
My '76 restoration (long post)
 07-23-2013, 11:46 AM
#341
Drifting


Thread Starter
Member Since: Aug 2010
Location: Kanuckistan
Posts: 1,617
Received 127 Likes
on
68 Posts
2022 C3 of the Year Finalist - Modified

I mentioned earlier that I was still having problem with my Borgeson steering box. Well turned out I hooked it up the wrong way, doh.
Redid the hose, fired it up yesterday, and it's all good.
I also had problem with the reverse speed, it was the shifter that wasn't allowing enough travel, once adjusted, all the speed are
engaging nicely.
If I was living in the country side, with no cops around, I could take the car for a little spin, since it now runs, stops and turns as expected.
As I live is a rather crowded area, I'll have to wait until I put the taillight, the licence plate and the front flasher back on to do so.
 07-23-2013, 12:02 PM
#342

So the only remaining mechanical stuff to fix is the parking brake? Then all the electricity to install back in, the inside and the paint?
07-23-2013, 01:00 PM
#343
Drifting
Thread Starter
Member Since: Aug 2010
Location: Kanuckistan
Posts: 1,617
Received 127 Likes
on
68 Posts
2022 C3 of the Year Finalist - Modified
LOL, yeah. I was so sure it was correct, I bet Borgeson tech assistant had a good laugh at my mistake.
It took me more than a file, I had to take the shifter apart and grind the stopping tab that control the lateral movement of the shifter.
By the way I had a good laugh yesterday. I manage to get the reverse to work, and as soon as it's engage, I hear a high pitched bipping noise.
I was like WTF???
After a short investigation is was the backup sensor I installed ages (and forgot about).
Parking brake should be easy, it's just a bolt to tighten.
Electricity is almost done.
I guess I have no more option, I'll have to resume the bodywork. With the heat it's the last thing I wanted to do, but hey, I signed for that.
09-06-2013, 11:25 AM
#347
Racer

Member Since: Jul 2006
Location: Woodstock Georgia
Posts: 388
Likes: 0
Received 47 Likes
on
30 Posts

Denpo,
This thread has been quite an inspiration to me. It's sparked my interest in my `75 which has been sitting in the garage untouched for the last 3 years. Now I'm getting things done and will have it back on the road in a few weeks.
BTW - I met my wife and her 3 kids in the Yukon Territory (Whitehorse). The kids are from Alberta. I have a house full that says words like aboot and eh .... LOL.
Good luck completing your project!!
09-06-2013, 06:00 PM
#348
Drifting
Thread Starter
Member Since: Aug 2010
Location: Kanuckistan
Posts: 1,617
Received 127 Likes
on
68 Posts
2022 C3 of the Year Finalist - Modified
Denpo,
This thread has been quite an inspiration to me. It's sparked my interest in my `75 which has been sitting in the garage untouched for the last 3 years. Now I'm getting things done and will have it back on the road in a few weeks.
BTW - I met my wife and her 3 kids in the Yukon Territory (Whitehorse). The kids are from Alberta. I have a house full that says words like aboot and eh .... LOL.
Good luck completing your project!!
This thread has been quite an inspiration to me. It's sparked my interest in my `75 which has been sitting in the garage untouched for the last 3 years. Now I'm getting things done and will have it back on the road in a few weeks.
BTW - I met my wife and her 3 kids in the Yukon Territory (Whitehorse). The kids are from Alberta. I have a house full that says words like aboot and eh .... LOL.
Good luck completing your project!!

It really feels good to know my thread inspired people.
See,I got myself inspired (and helped) by MaineVette's restoration. He's taking a lot of care in what he does and goes through the pain of documenting everything like a pro journalist would, so obviously he takes more time.
So I was telling myself that I might have mine on the road before his.... sounds similar.

Sorry Ben, I'm afraid you'll have to wait one more year. I'm now aiming at this Spring, and that's the most realistic estimation I ever made on this project.
Autumn is coming, temperature is plummeting and I'm about to leave my hibernating phase (reverse bear I am).
Anyway, Winter is harsh enough so you wanna make the most of summer weekends outside.
TO EVERYONE:
Sorry guys, I've been delaying new post for a while, and stretching the concept of 'soon' pretty thin.
Truth is I'm experiencing many setback:
RPM gauge still don't work, interior part painting is giving headaches and the whole restoration level of the interior is not satisfactory to me anymore.
So I've put the whole interior apart again, bought a bunch of missing small part and going over each piece more thoroughly.
Not much to show so far, no main course, but I'll see if I can get you some snacks over the weekend.
Thanks for your patience.
09-11-2013, 10:29 PM
#349
Drifting
Thread Starter
Member Since: Aug 2010
Location: Kanuckistan
Posts: 1,617
Received 127 Likes
on
68 Posts
2022 C3 of the Year Finalist - Modified
Ok, time for an actual update.
A couple of weeks ago I decided to take all the interior out again, just to be sure nothing was half done.
So I took out my dash pad, which was a cheap dashpad I recovered with vynil.
Could have worked for a quick fix, but I'm getting picky.
I found a dash pad with a crack in the speaker grill and a one missing clip for 50$.
I scavenged the clip for the wrap pad, and proceed to reduce the crash as much as I could.
Here's the result:
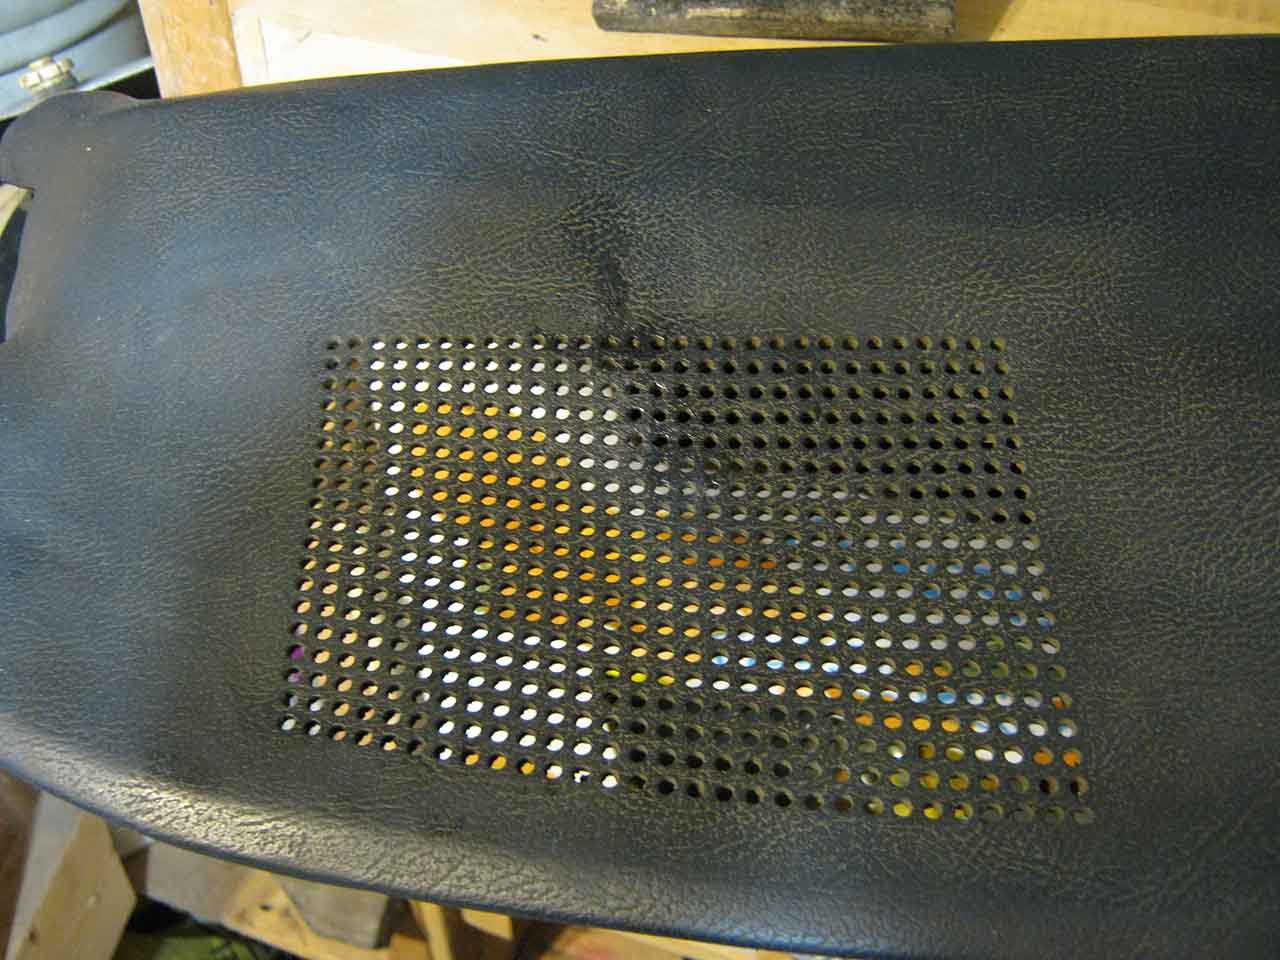
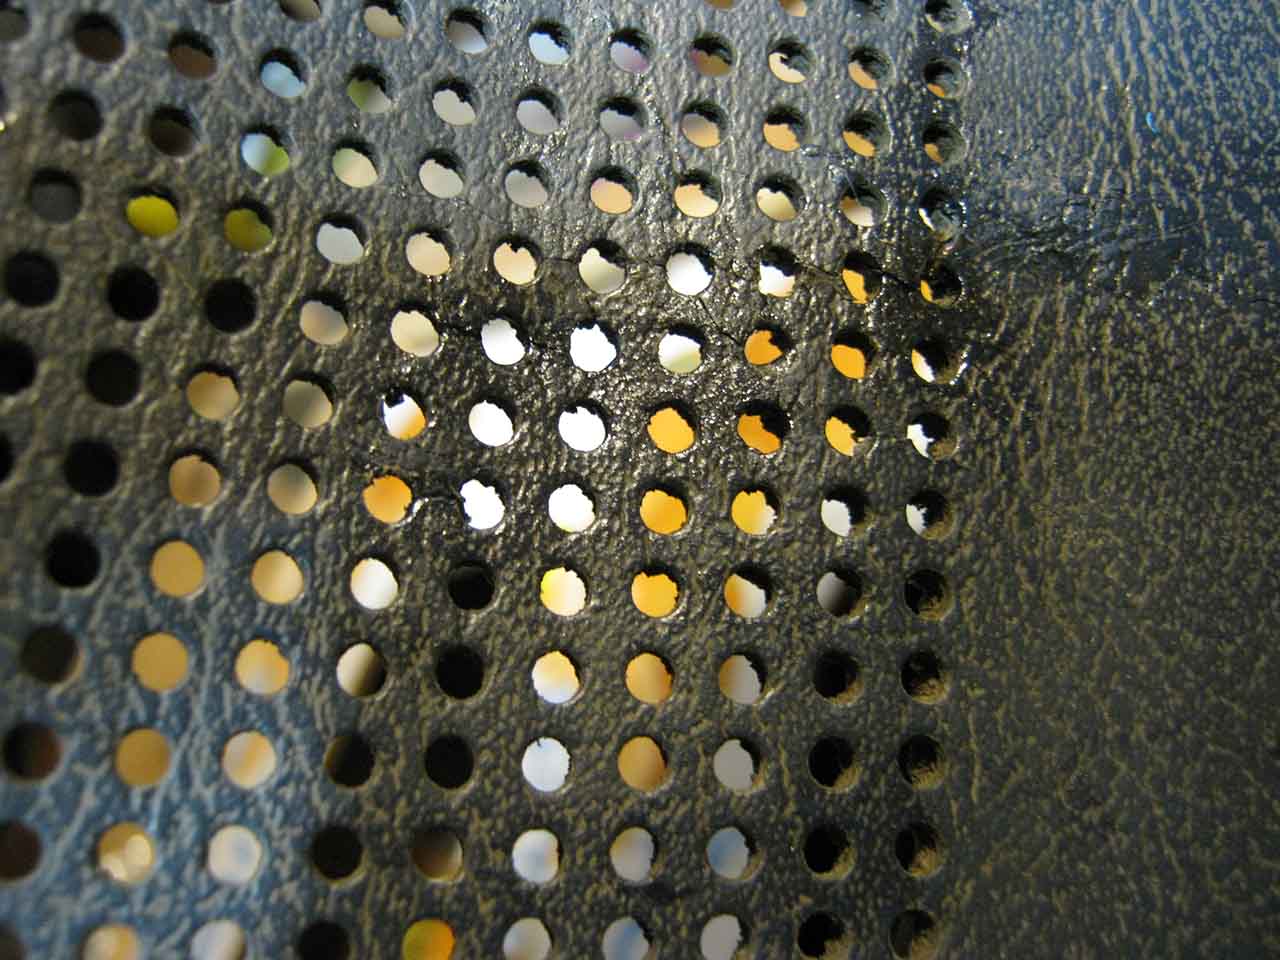
Not saying it's perfect, but considering the initial state (sorry no pics), I'm quiet pleased with the result.
It was just a question of epoxying the broken connections, one by one, and waiting for a complete cure before moving to the next.
But that opened a new can of worm :
now I had functional grilles I'd be stupid not putting speakers.
So tonight I went to the border to pick up my lastest Ebay hunt:
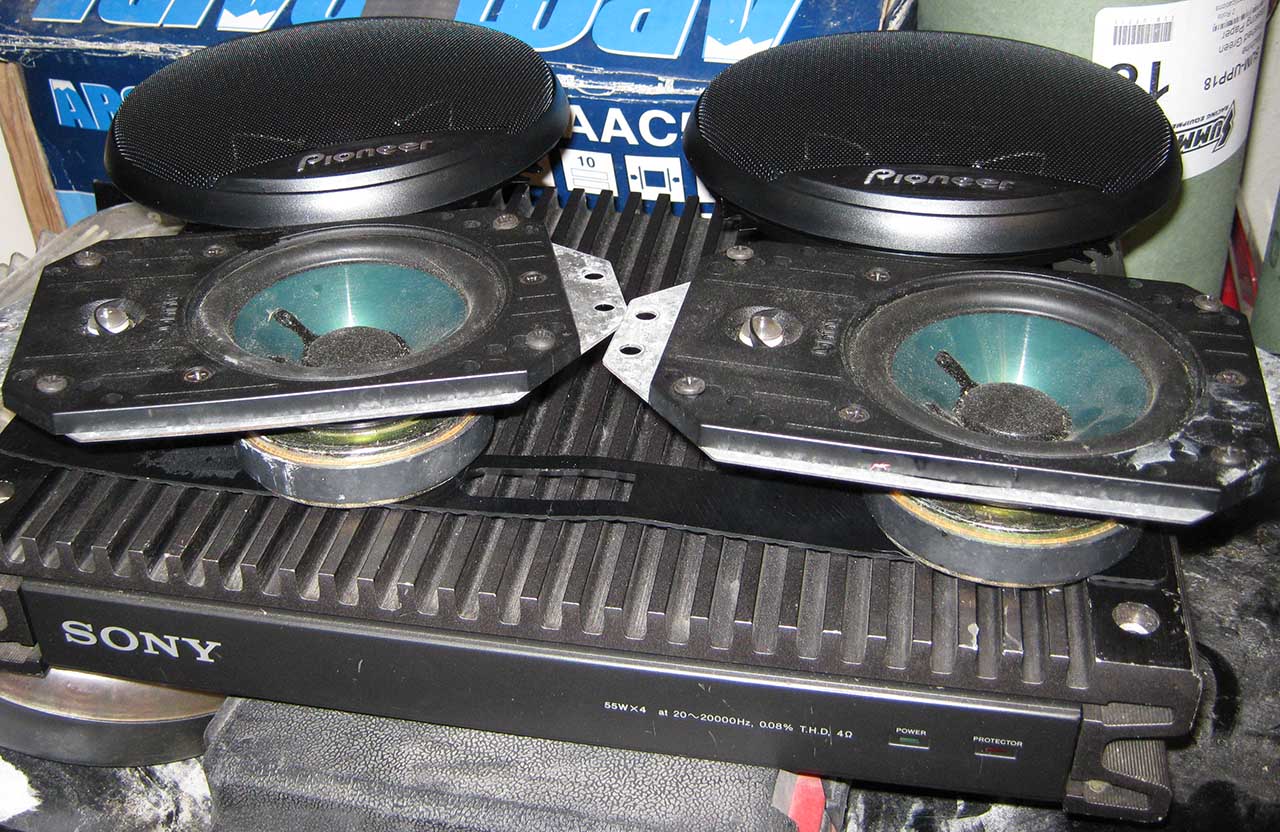
6"x4" Infinity Kappa for the dash, 6.5" Pionners for the kicker panel, and a Sony 4x55w ampli.
130$ for the whole shipped.
Thanks to Andr� (CF:leSkid) for giving me pointers on what to look for.
Now I have to make adapter plate, the Kappa mounting hole doesn't match.
Door panel are almost done.
I got them from CF:Rogman.
Painted them from blue to landau black.
Bought new lock back plate,
mine were way to pitted and scratched (told you I'm getting picky).
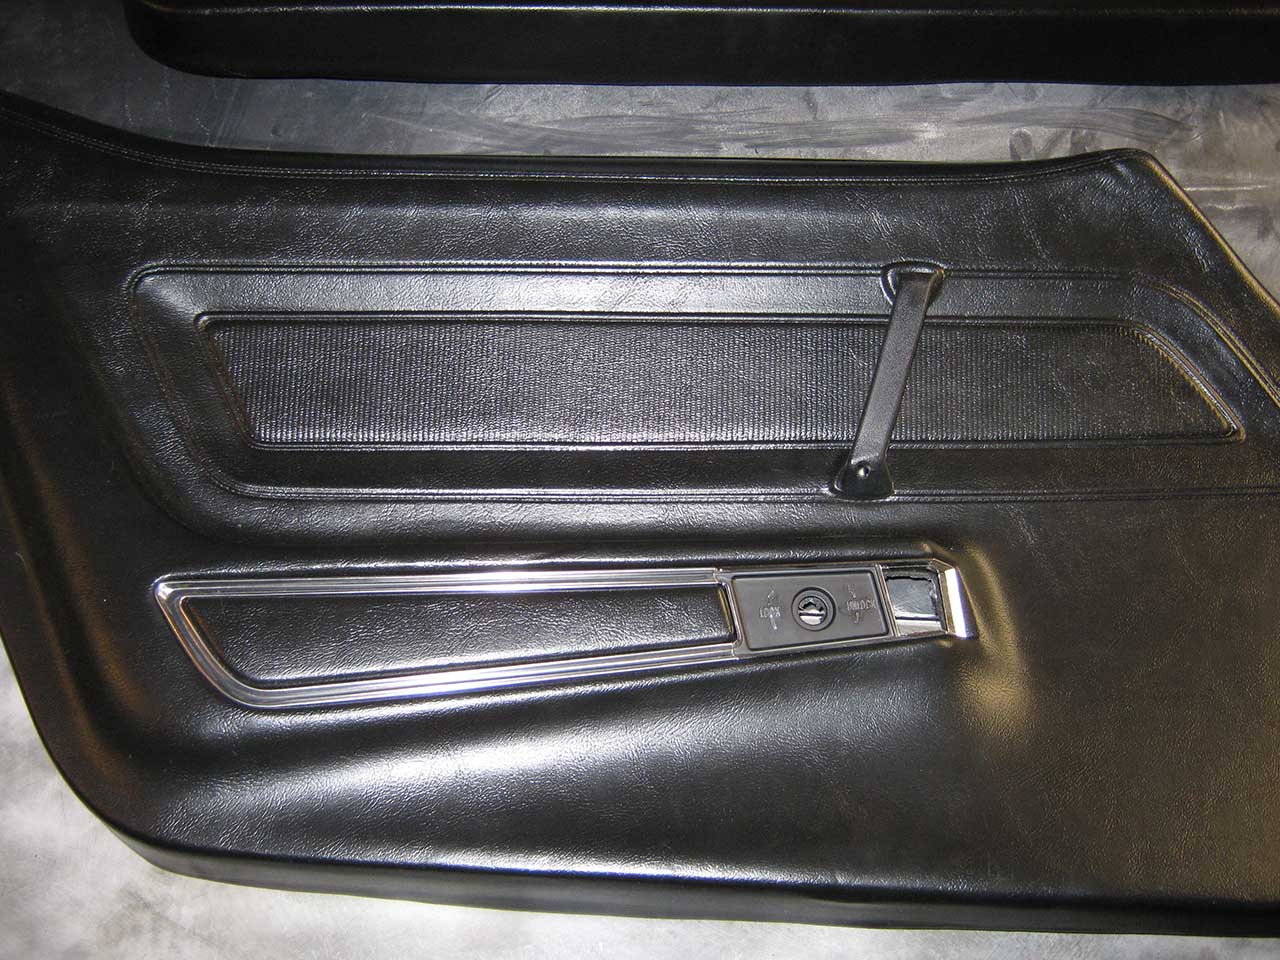
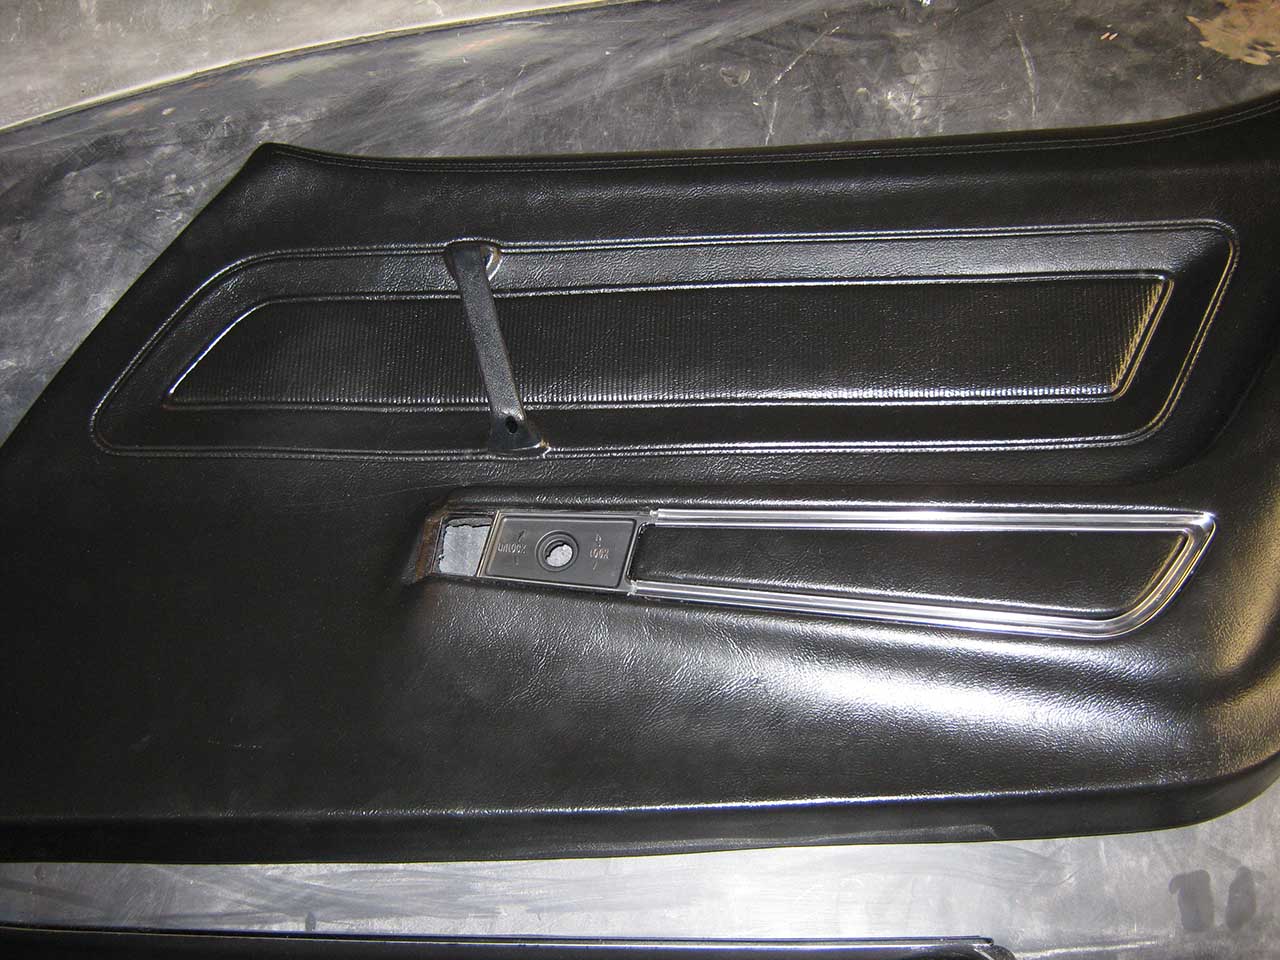
I say almost because I still have to accomodate the mirror remote on the driver side.
So far I ruled out the deluxe part of the pad.
This plate and bit of carpet on the bottom seem superfluous to me.
But I don't know if I won't have to put the heavy trim plate to support the remote.
Funny how each answer leads to 2 new questions these days, I feel like in a episode of 'Lost'.
Passenger dash pad done also, this one was originaly red, what a PITA to paint....
I also learned how to polish plastic.
A bit tricky at first, but with a no bite polish compound (the green one IIRC)
and care to avoid heat build up, it's doable.
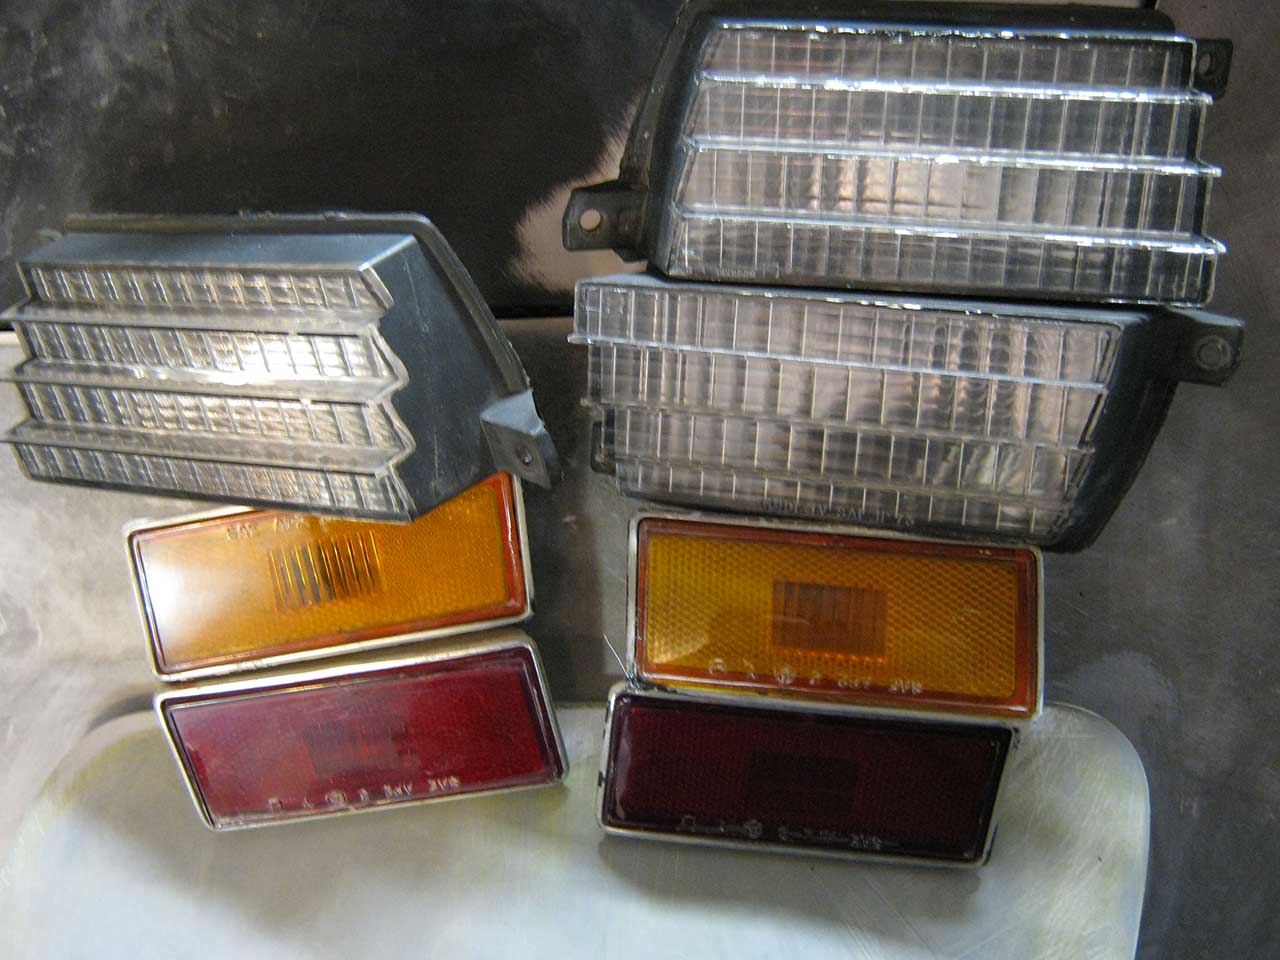
For the story I managed to save one red side marker.
I had a spare from my donor from clip, one had the lens broken, one had the casing broken.
I managed to make a good one out of that. It was extremely stressful, as the old plastic was very prone to break.
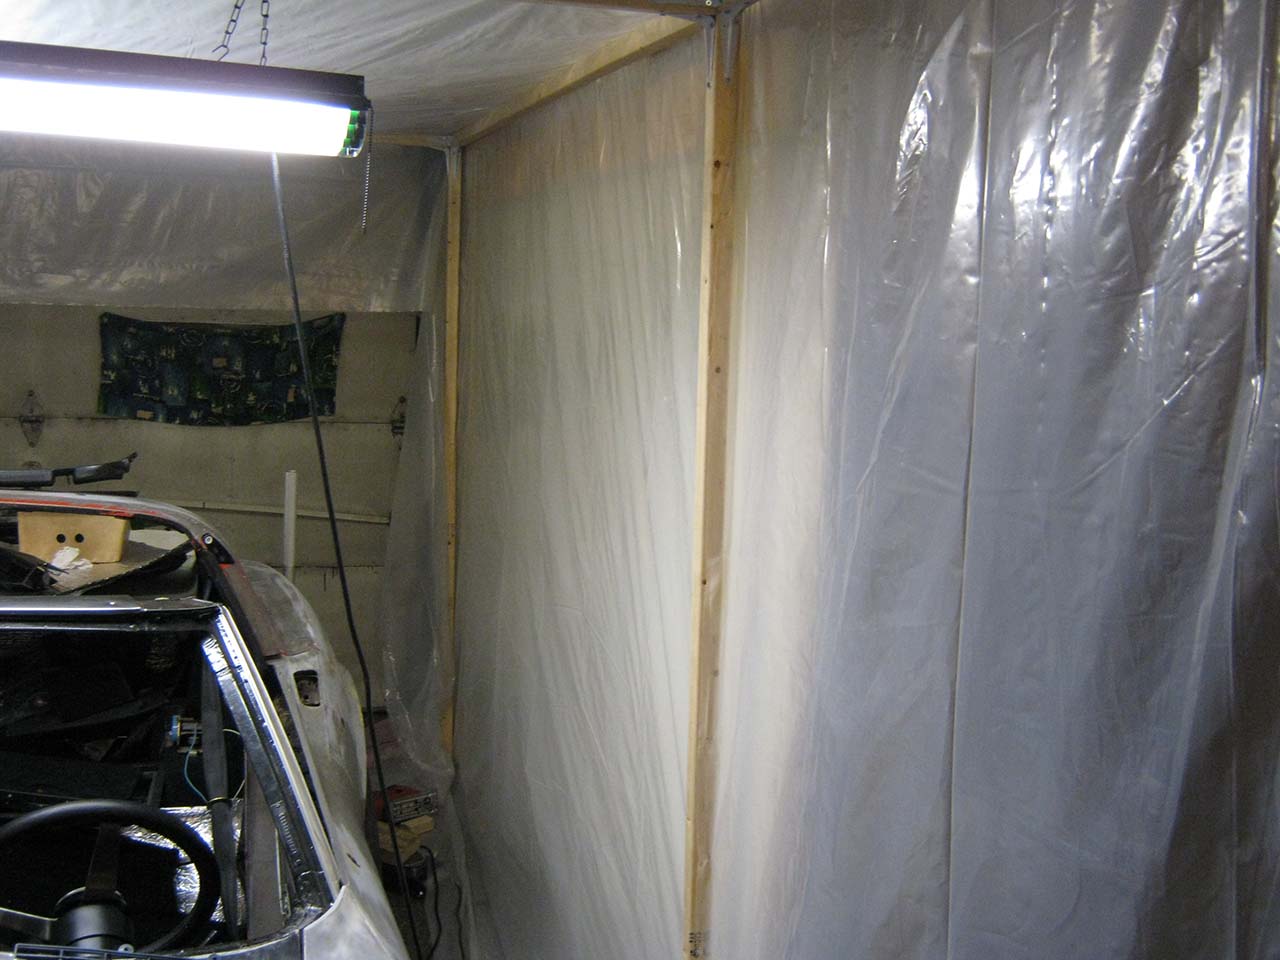
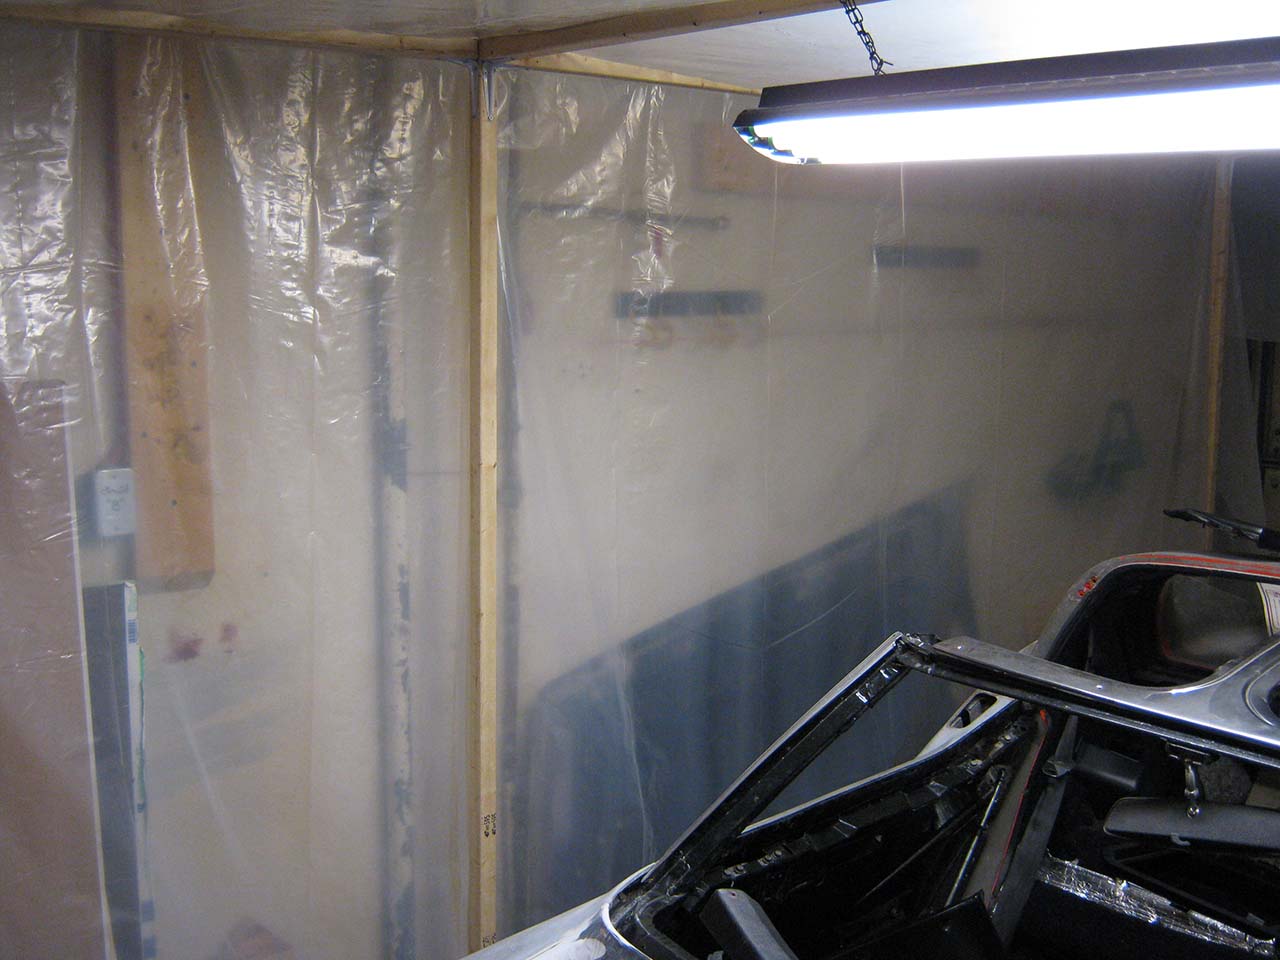
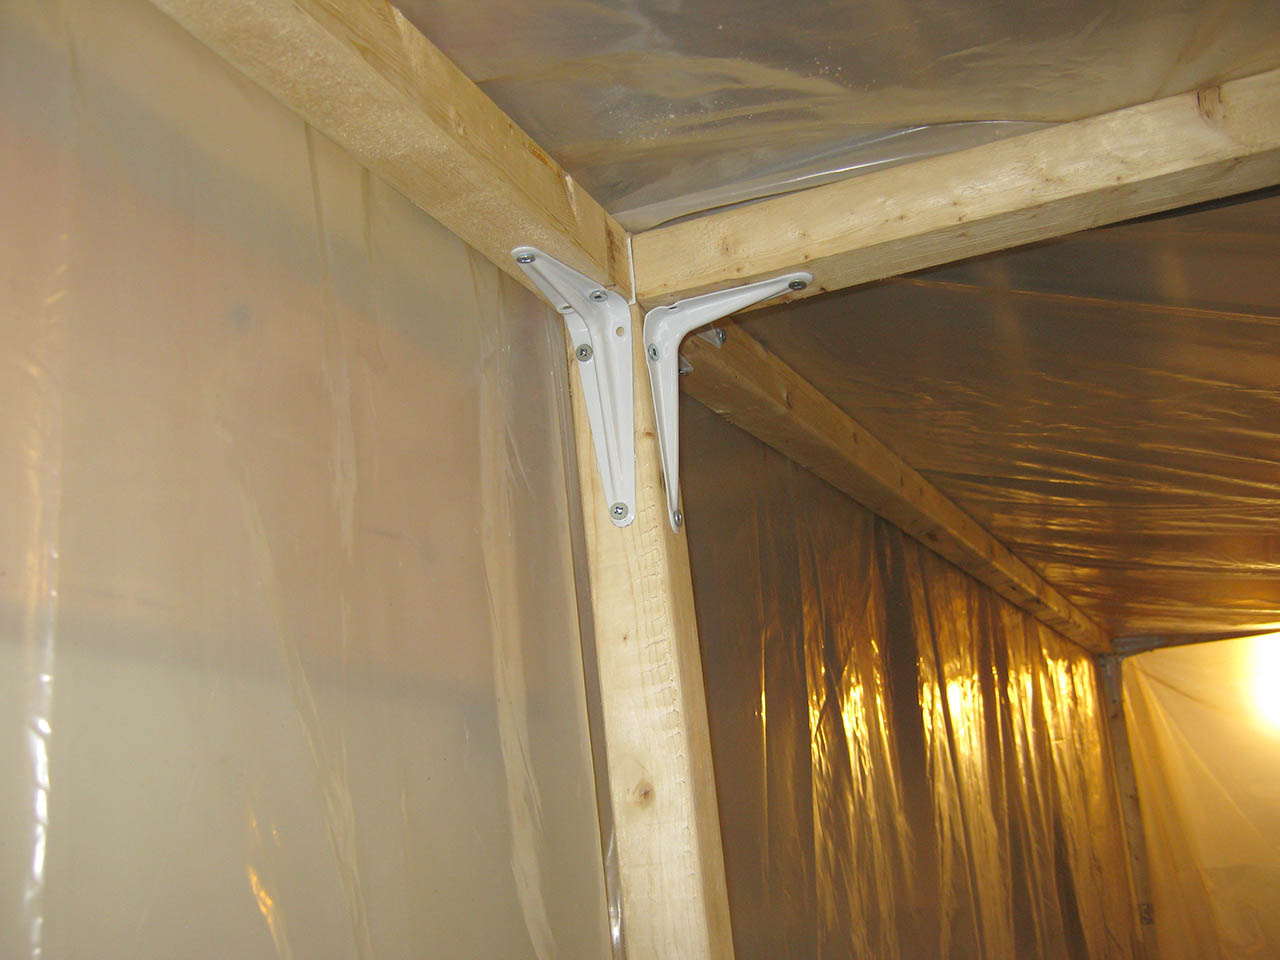
Finally, I rebuilt my dust tent.
I took inspiration for pic from TimAT who built a frame to support the plastic sheet out of plastic tubing.
I went for the cheapest way: wood and corner.
Can't remember price of wood, but corner were 53c.
I think plastic sheets did cost from than the frame.
And a added a tri tube neon lighting.
For now, I'm stuck with the repainting of the trim parts. Some part have dull spot, and I don't know why.
No matter the number of layer or the 'wetness' of the spray, it don't want to get any shine when drying.
I'm talking I'm talking, but still haven't kicked my *** to call SEM tech support. I got to admit english over the phone is my weak point, but I'll do it.
A couple of weeks ago I decided to take all the interior out again, just to be sure nothing was half done.
So I took out my dash pad, which was a cheap dashpad I recovered with vynil.
Could have worked for a quick fix, but I'm getting picky.
I found a dash pad with a crack in the speaker grill and a one missing clip for 50$.
I scavenged the clip for the wrap pad, and proceed to reduce the crash as much as I could.
Here's the result:
Not saying it's perfect, but considering the initial state (sorry no pics), I'm quiet pleased with the result.
It was just a question of epoxying the broken connections, one by one, and waiting for a complete cure before moving to the next.
But that opened a new can of worm :
now I had functional grilles I'd be stupid not putting speakers.
So tonight I went to the border to pick up my lastest Ebay hunt:
6"x4" Infinity Kappa for the dash, 6.5" Pionners for the kicker panel, and a Sony 4x55w ampli.
130$ for the whole shipped.
Thanks to Andr� (CF:leSkid) for giving me pointers on what to look for.
Now I have to make adapter plate, the Kappa mounting hole doesn't match.
Door panel are almost done.
I got them from CF:Rogman.
Painted them from blue to landau black.
Bought new lock back plate,
mine were way to pitted and scratched (told you I'm getting picky).
I say almost because I still have to accomodate the mirror remote on the driver side.
So far I ruled out the deluxe part of the pad.
This plate and bit of carpet on the bottom seem superfluous to me.
But I don't know if I won't have to put the heavy trim plate to support the remote.
Funny how each answer leads to 2 new questions these days, I feel like in a episode of 'Lost'.
Passenger dash pad done also, this one was originaly red, what a PITA to paint....
I also learned how to polish plastic.
A bit tricky at first, but with a no bite polish compound (the green one IIRC)
and care to avoid heat build up, it's doable.
For the story I managed to save one red side marker.
I had a spare from my donor from clip, one had the lens broken, one had the casing broken.
I managed to make a good one out of that. It was extremely stressful, as the old plastic was very prone to break.
Finally, I rebuilt my dust tent.
I took inspiration for pic from TimAT who built a frame to support the plastic sheet out of plastic tubing.
I went for the cheapest way: wood and corner.
Can't remember price of wood, but corner were 53c.
I think plastic sheets did cost from than the frame.
And a added a tri tube neon lighting.
For now, I'm stuck with the repainting of the trim parts. Some part have dull spot, and I don't know why.
No matter the number of layer or the 'wetness' of the spray, it don't want to get any shine when drying.
I'm talking I'm talking, but still haven't kicked my *** to call SEM tech support. I got to admit english over the phone is my weak point, but I'll do it.
Last edited by Denpo; 08-18-2017 at 09:31 PM.
09-12-2013, 12:21 AM
#350
Racer
Member Since: Jul 2006
Location: Woodstock Georgia
Posts: 388
Likes: 0
Received 47 Likes
on
30 Posts
Looks like a good deal on that amp/speakers based on the specs that I see on the front of the unit. Just curious ... what are you doing for the head unit? Are you going to dremel the center console for a din or go with factory 2 **** style radio?
I'm about to dremel mine for a single din radio.
I'm about to dremel mine for a single din radio.
09-12-2013, 12:42 AM
#351
Instructor
Member Since: May 2003
Location: Cottonwood Heights UT
Posts: 119
Likes: 0
Received 0 Likes
on
0 Posts
09-12-2013, 08:36 AM
#352
Drifting
Thread Starter
Member Since: Aug 2010
Location: Kanuckistan
Posts: 1,617
Received 127 Likes
on
68 Posts
2022 C3 of the Year Finalist - Modified
Looks like a good deal on that amp/speakers based on the specs that I see on the front of the unit. Just curious ... what are you doing for the head unit? Are you going to dremel the center console for a din or go with factory 2 **** style radio?
I'm about to dremel mine for a single din radio.
I'm about to dremel mine for a single din radio.
So far I'm still heading for a batshit crazy custom center console.
I will chop as much as it take to make them fit. I haven't looked into it yet, I just know it's doable.
09-13-2013, 12:24 AM
#353
Drifting
Thread Starter
Member Since: Aug 2010
Location: Kanuckistan
Posts: 1,617
Received 127 Likes
on
68 Posts
2022 C3 of the Year Finalist - Modified
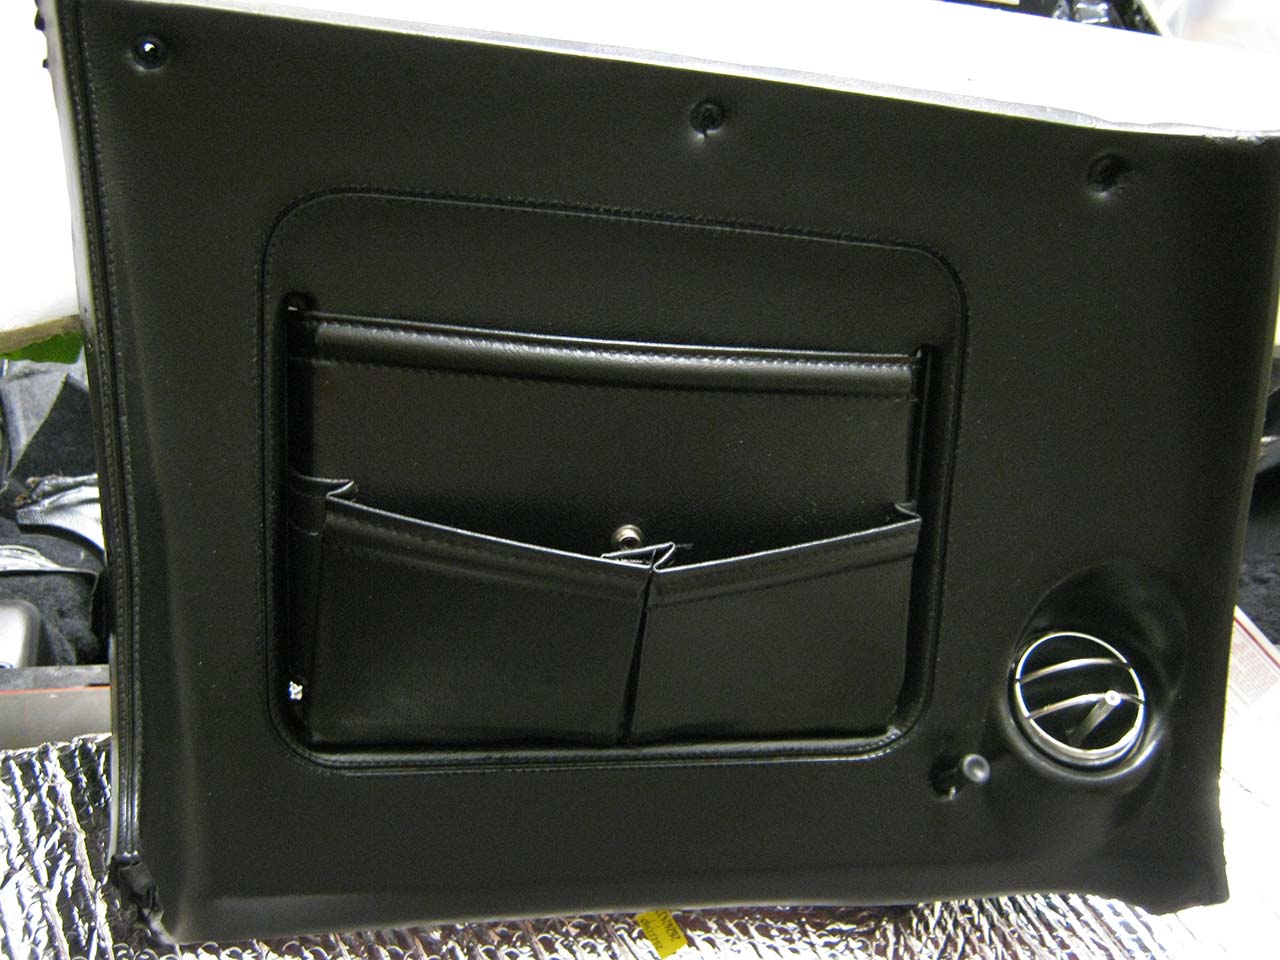
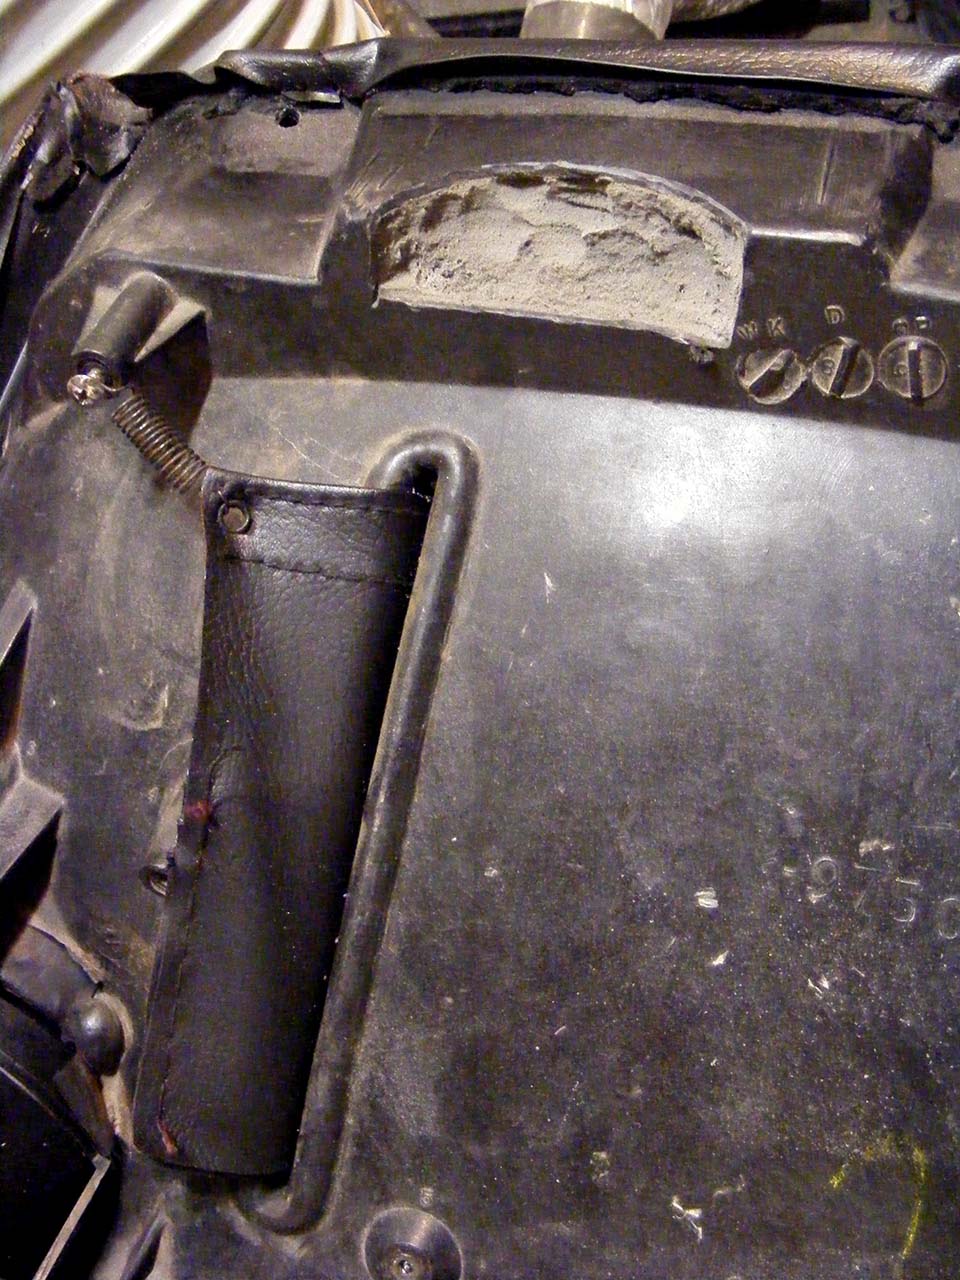
Along with the speaker came the last pieces to finish the rear storage door puzzle.
Washers are repaint (krylon semi flat.
I will probably powder coat them eventually for scratch resistance.
Locks have been polished.
I was missing the latch striker, not anymore.
I also bought the spring, not sure I really need them, and since the AIM is very vague on those, I had to guess the installation. This one is the only way that is making sense to me.
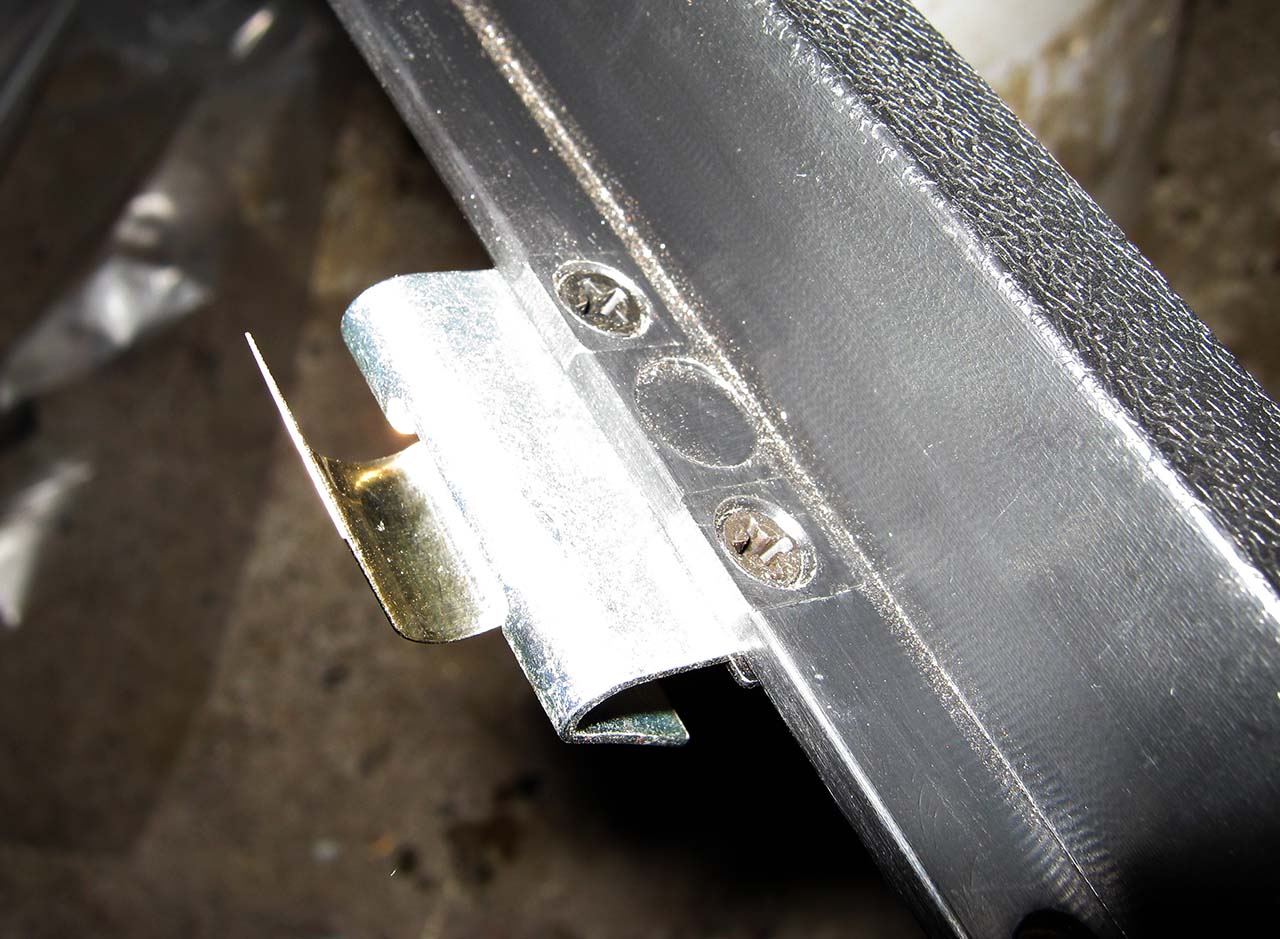
I cleaned and repainted the hinges, and decided to reinstall them the correct way, with solid rivets.
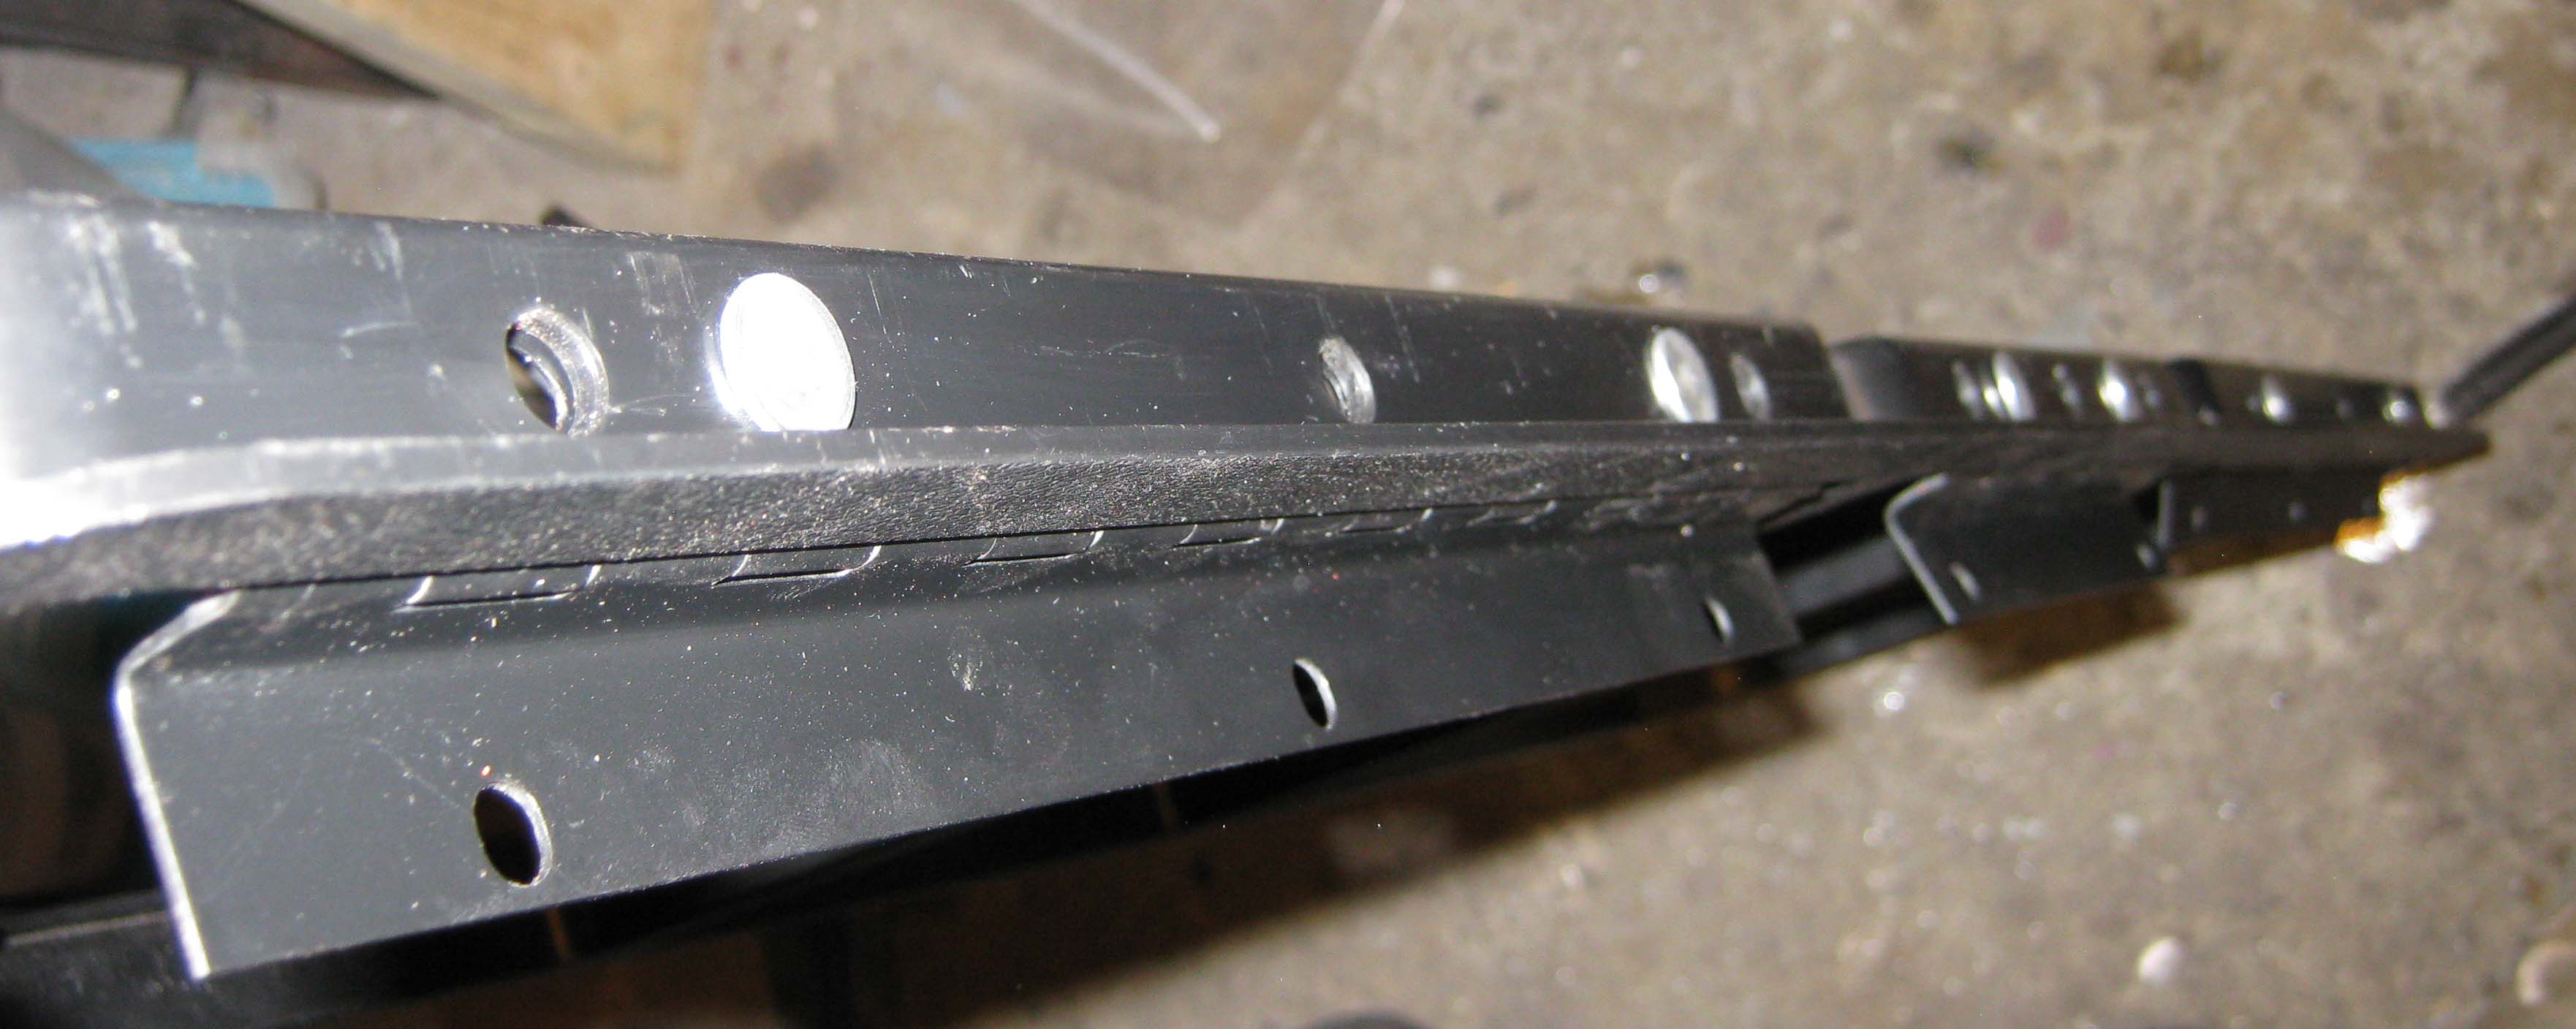
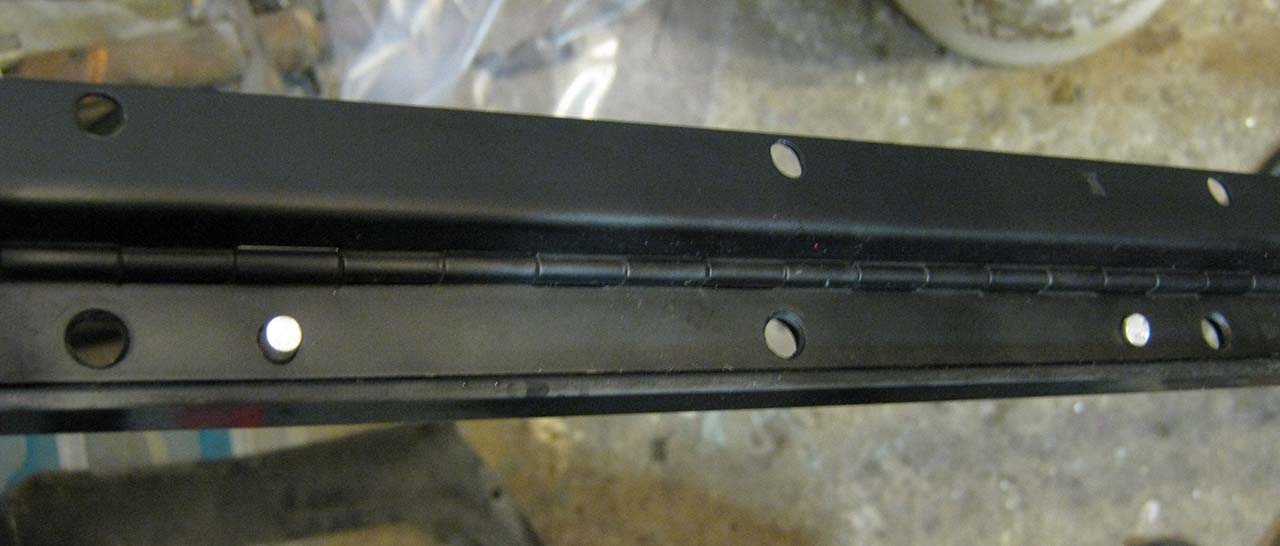
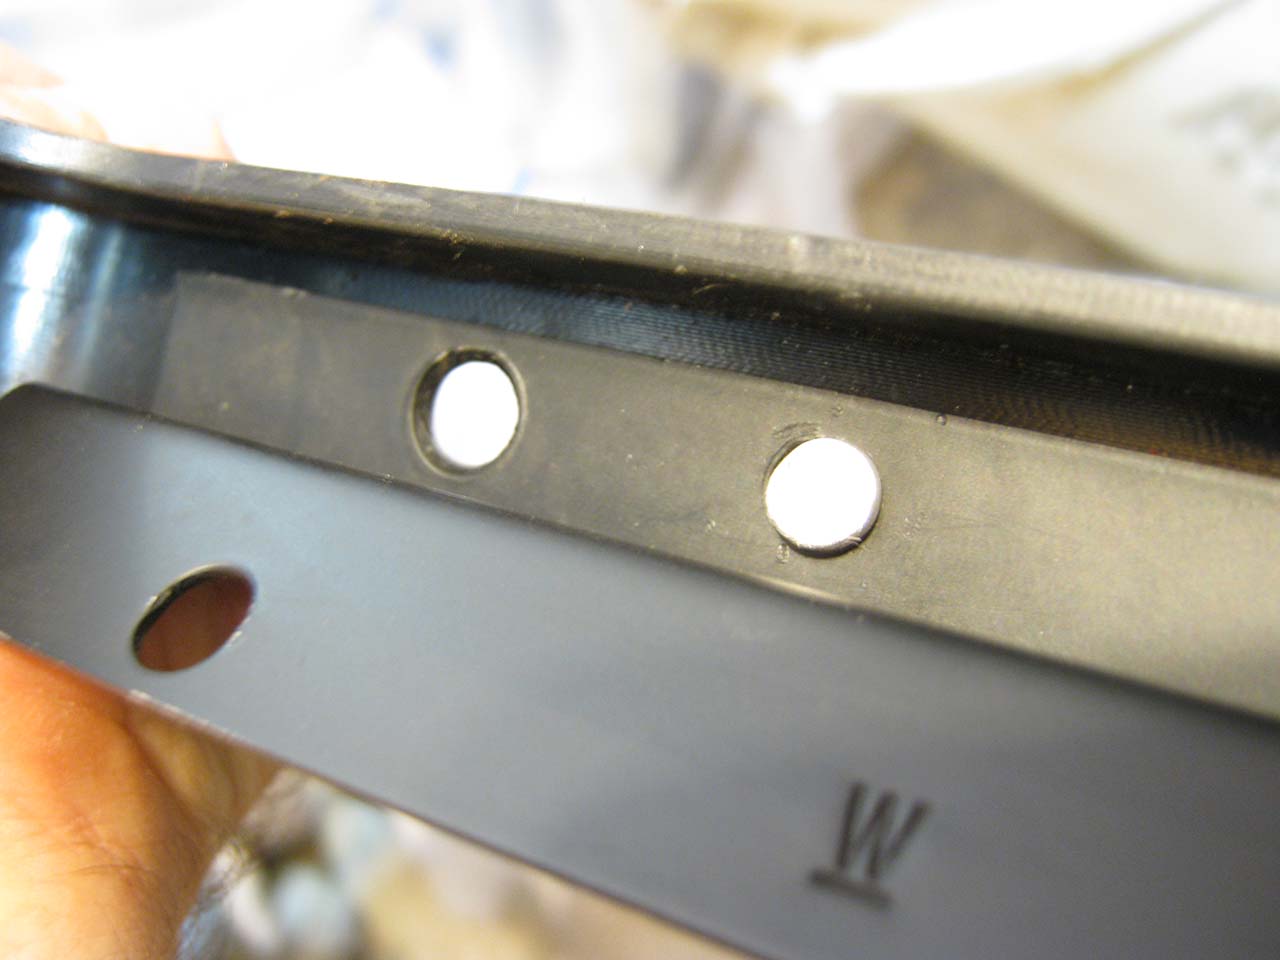
First time for me to install solid rivet.
As I don't have an air hammer, I used my 5t press.
Did the job.
The trunk have been stripped again, the carpet is being cleaned.
The carpet was a new set the PO did loosely install.
It had a distintive odor of burned oil and gasoline.
Guess was, at the time the AC box was cracked and smoke was getting suck into the cockpit.
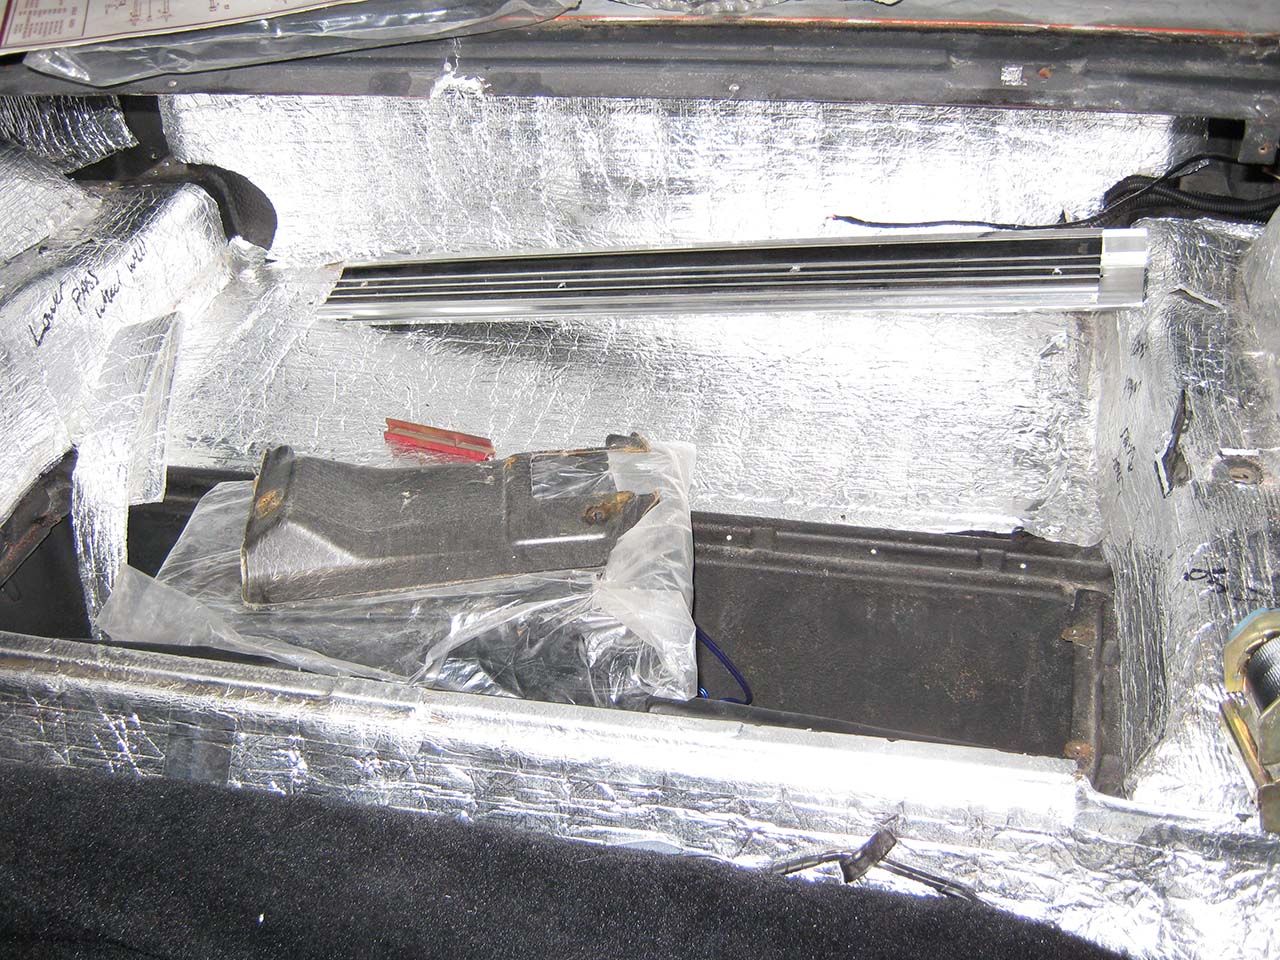
And yes, I'm storing lot of things everywhere, like the sill plate in the trunk...
Washers are repaint (krylon semi flat.
I will probably powder coat them eventually for scratch resistance.
Locks have been polished.
I was missing the latch striker, not anymore.
I also bought the spring, not sure I really need them, and since the AIM is very vague on those, I had to guess the installation. This one is the only way that is making sense to me.
I cleaned and repainted the hinges, and decided to reinstall them the correct way, with solid rivets.
First time for me to install solid rivet.
As I don't have an air hammer, I used my 5t press.
Did the job.
The trunk have been stripped again, the carpet is being cleaned.
The carpet was a new set the PO did loosely install.
It had a distintive odor of burned oil and gasoline.
Guess was, at the time the AC box was cracked and smoke was getting suck into the cockpit.
And yes, I'm storing lot of things everywhere, like the sill plate in the trunk...
Last edited by Denpo; 08-18-2017 at 09:34 PM.
09-15-2013, 08:33 PM
#354
Drifting
Thread Starter
Member Since: Aug 2010
Location: Kanuckistan
Posts: 1,617
Received 127 Likes
on
68 Posts
2022 C3 of the Year Finalist - Modified
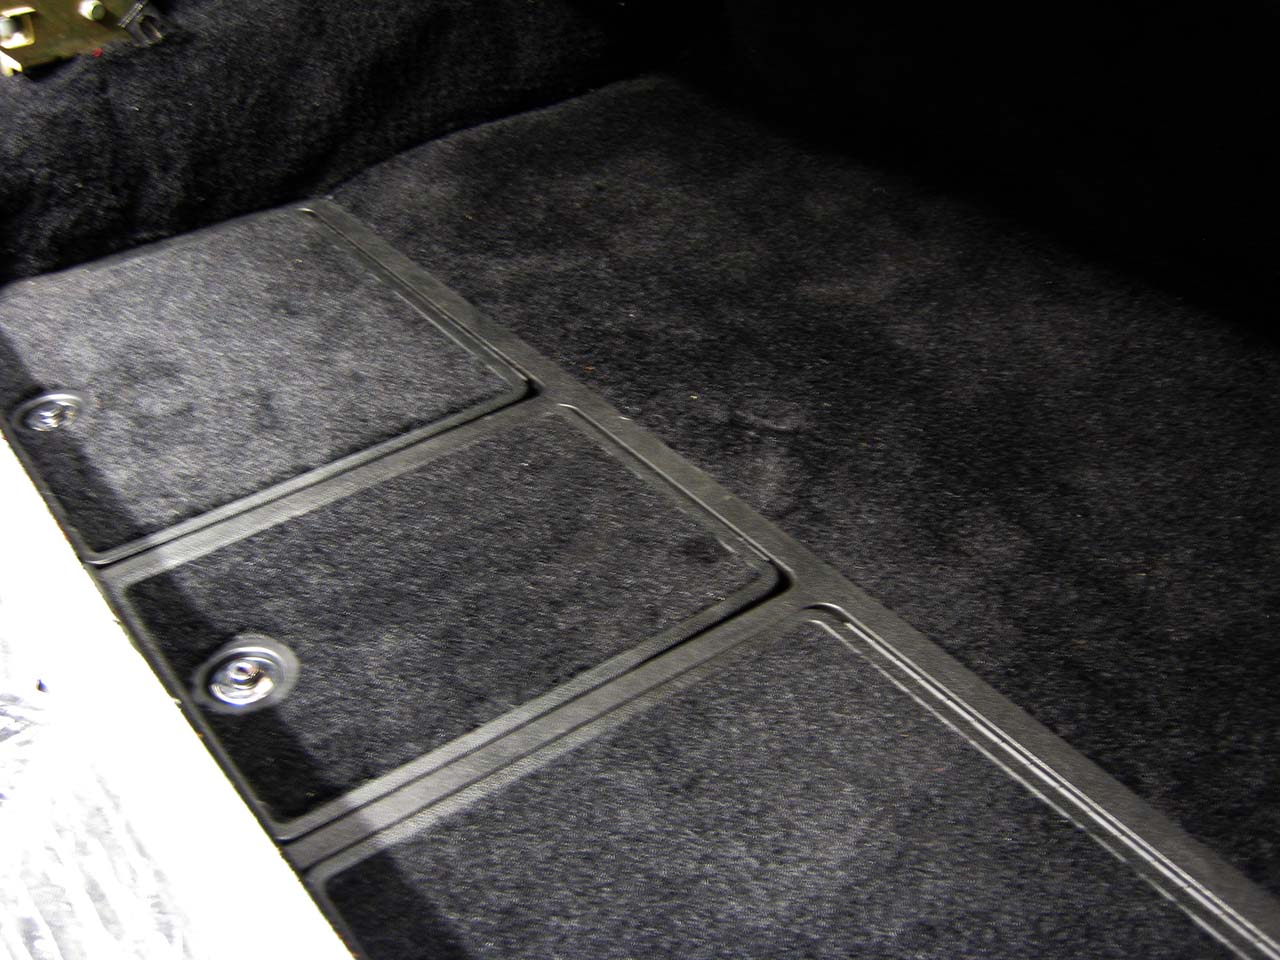
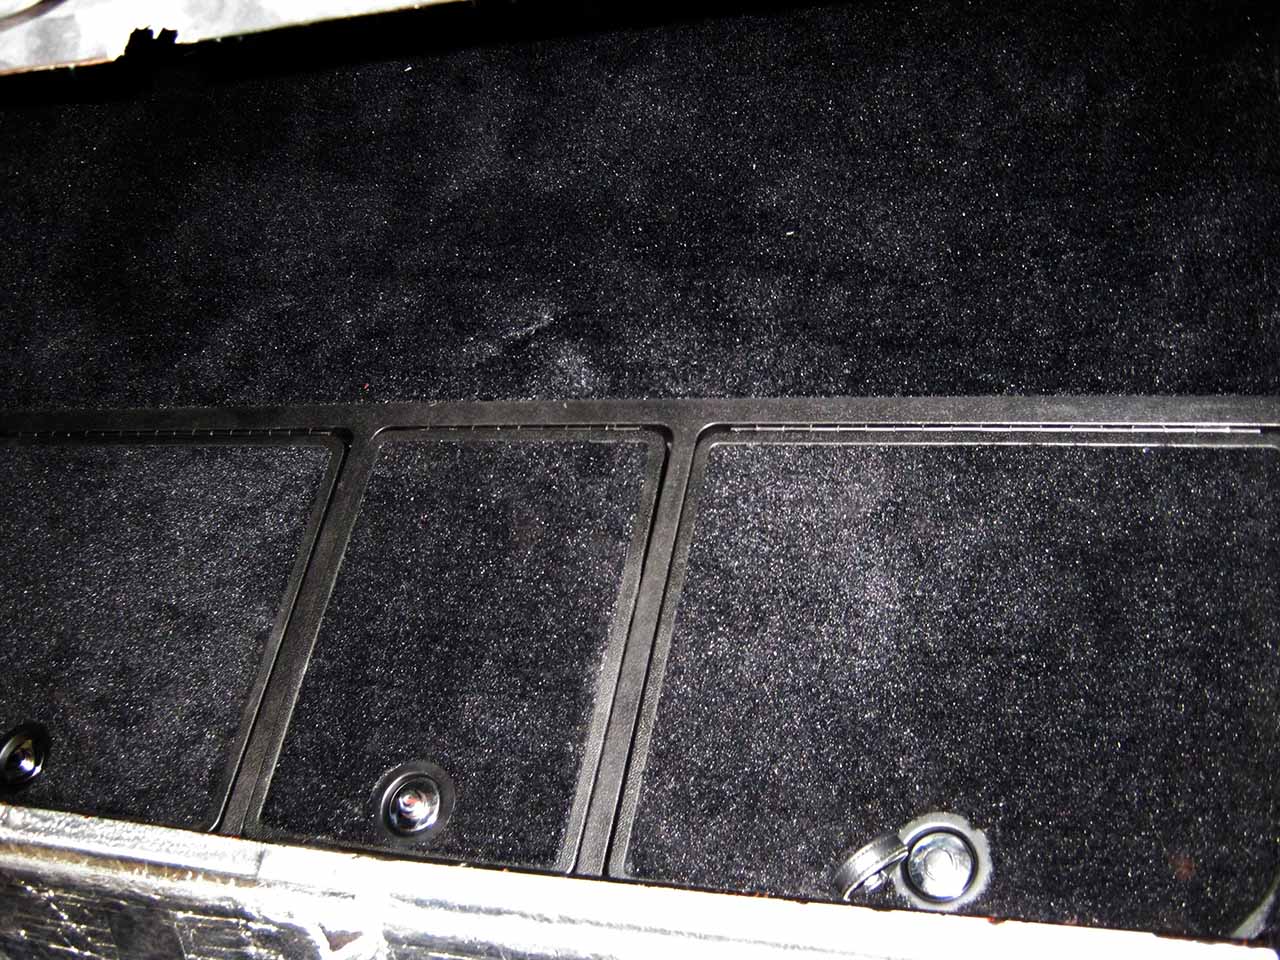
Small victory the week end as I can declare the trunk area finished.
Carpet is clean and odorless, everything have been lined up right.
Not easy to take pic of something all black...
Another good new is the test of the Ebay sound system:
Everything's working fine.
I can now proceed to install the amplified in the back and lay down the audio cables.
I think I gonna put it verticaly against the back of the trunk.
I will probably to epoxy some aluminum tab I can bolt the amplifier to, I'd prefer that to drill new holes.
Does anyone know if this kind of amplifier is a threat to the carpet, heat speaking?
Should I put some of the foil I insulate the car with between it and the carpet?
Never had a dedicated amplifier, so I don't know how hot they can get...
Last edited by Denpo; 08-18-2017 at 09:35 PM.
09-18-2013, 12:14 AM
#355
Drifting
Thread Starter
Member Since: Aug 2010
Location: Kanuckistan
Posts: 1,617
Received 127 Likes
on
68 Posts
2022 C3 of the Year Finalist - Modified
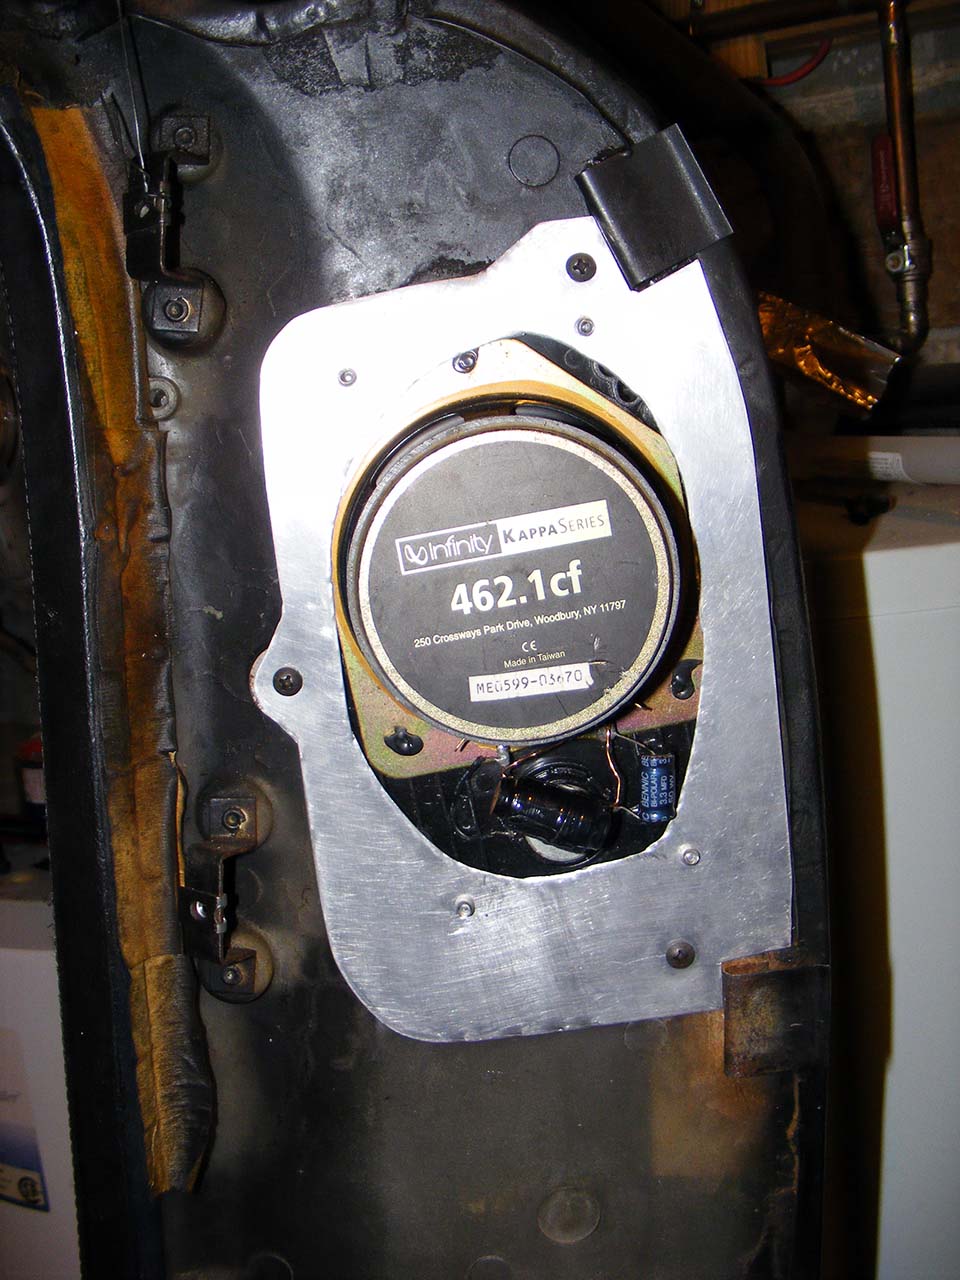
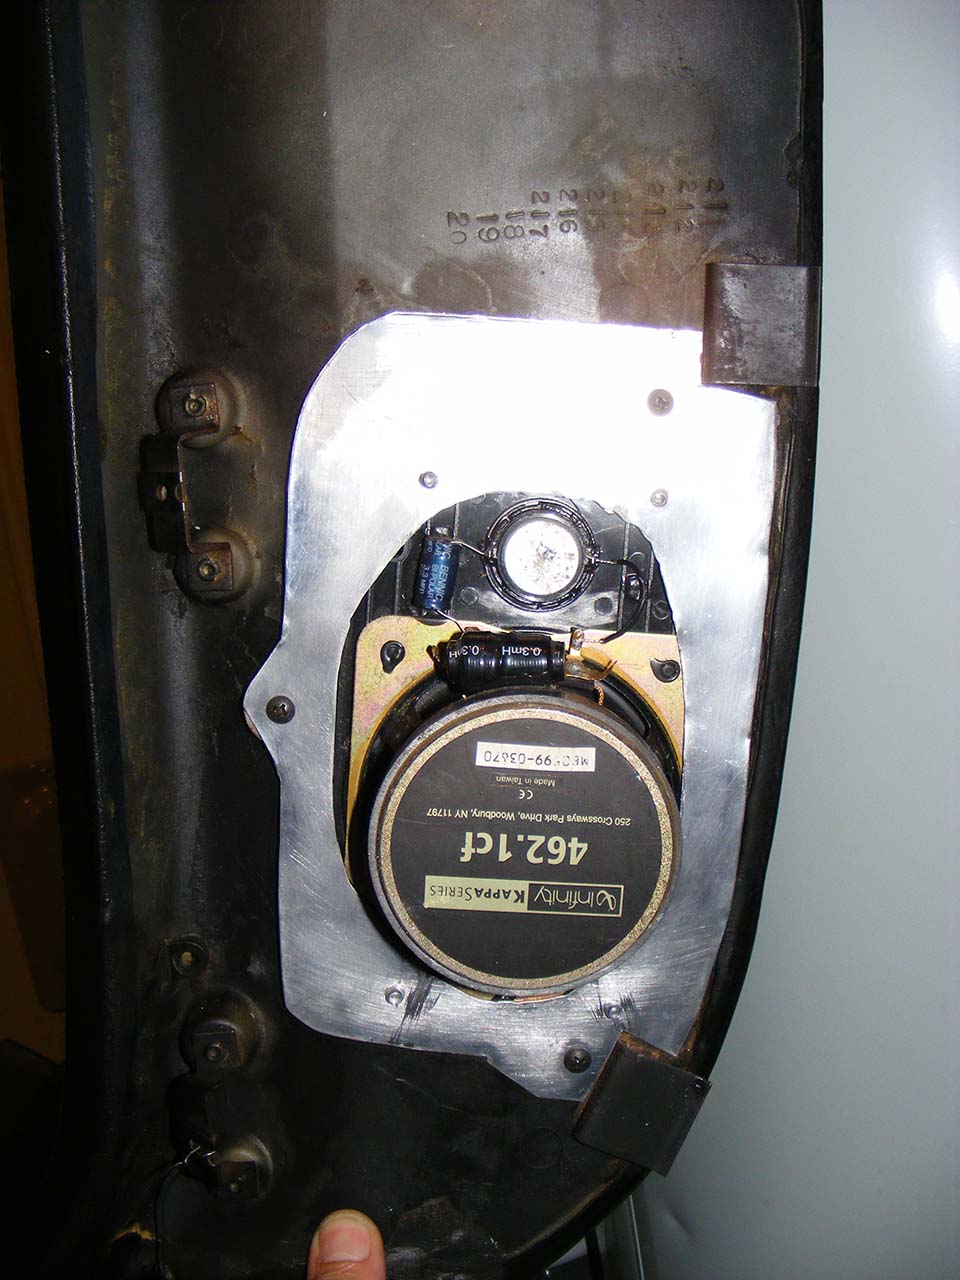
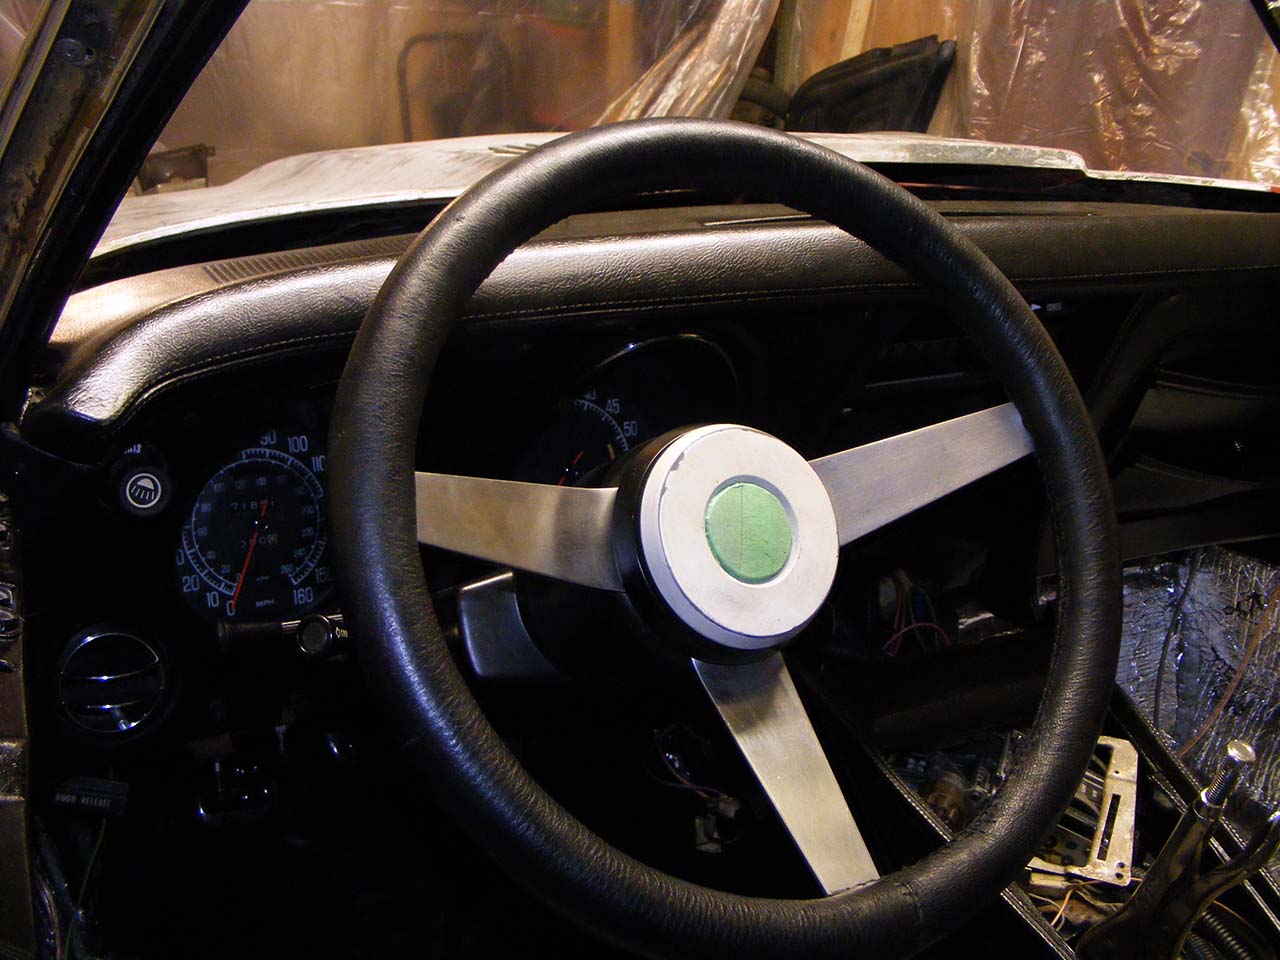
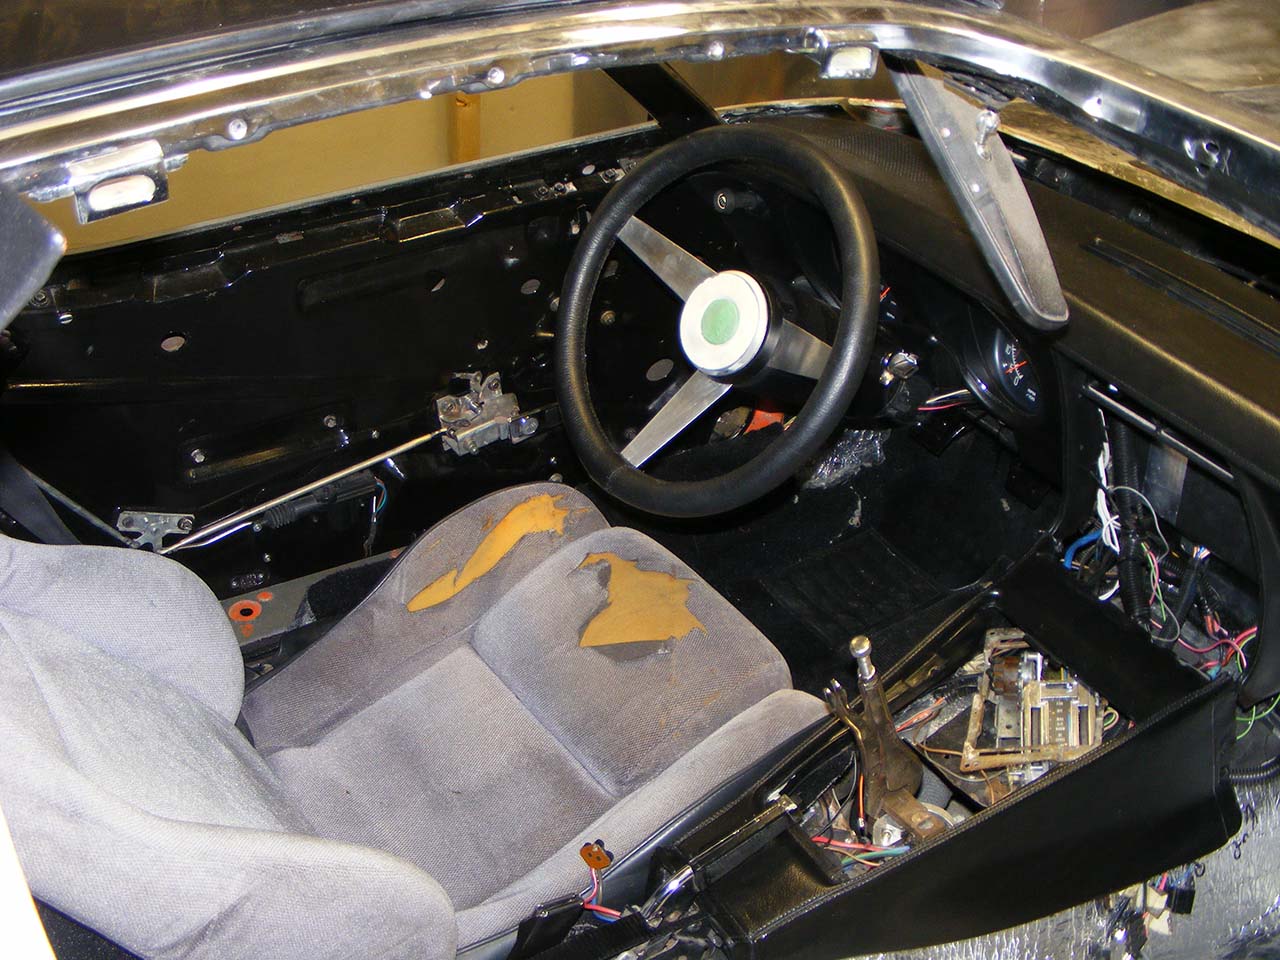
Dashpad speakers installed.
Adaptor plate made from thin aluminum (1/32?), pop rivet to attach speaker to plate.
Since it's asymetrical I've put the big speaker on the outside of the dashpad, the further away from the gauges.
Adaptor plate made from thin aluminum (1/32?), pop rivet to attach speaker to plate.
Since it's asymetrical I've put the big speaker on the outside of the dashpad, the further away from the gauges.
Last edited by Denpo; 08-18-2017 at 09:36 PM.
10-09-2013, 11:43 PM
#356
Drifting
Thread Starter
Member Since: Aug 2010
Location: Kanuckistan
Posts: 1,617
Received 127 Likes
on
68 Posts
2022 C3 of the Year Finalist - Modified
I started to install once again the interior, this time should be the final one.
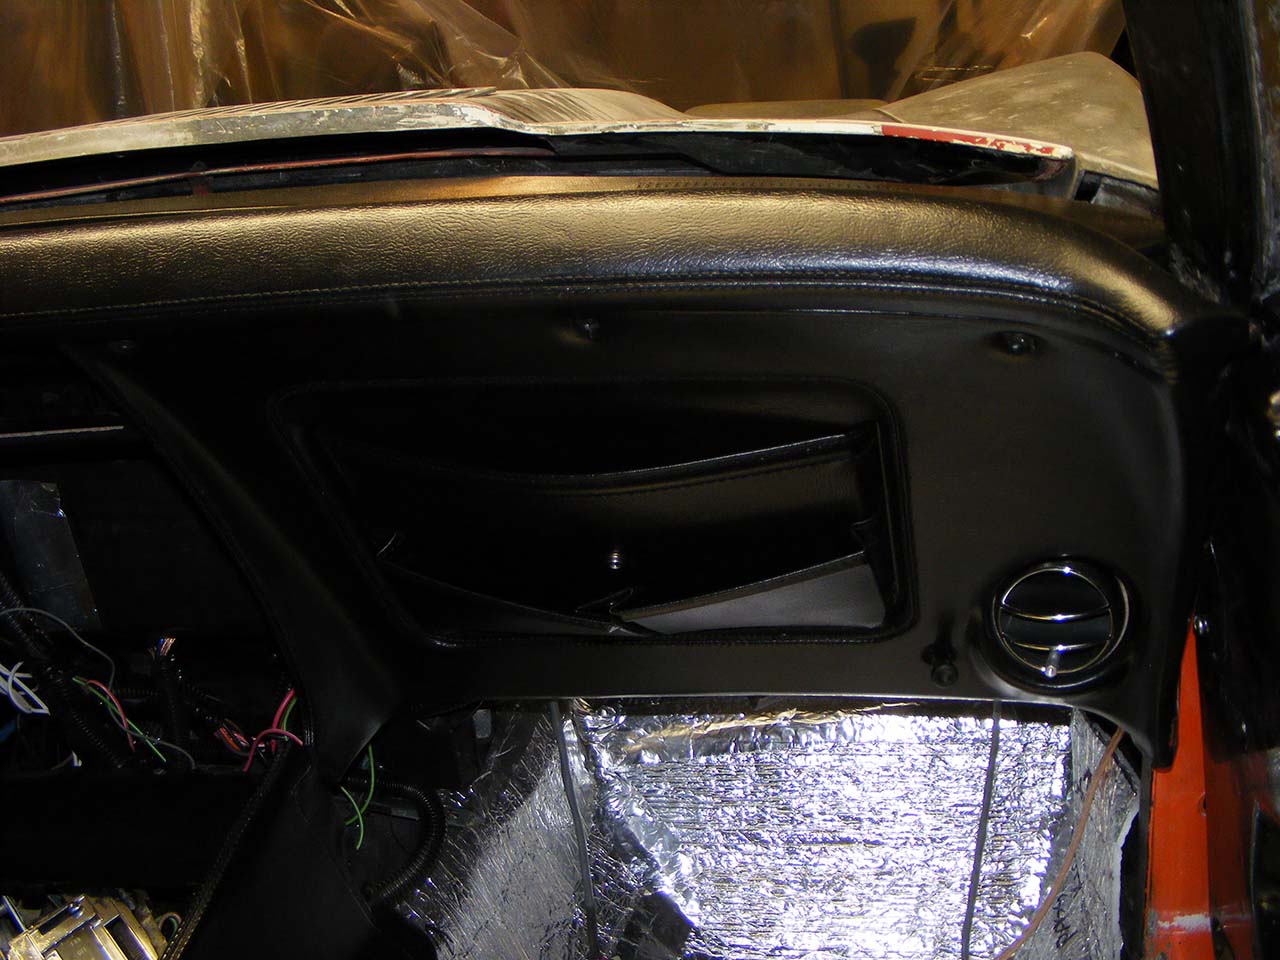
While the dashpad speakers cleared the driver gauges by far, unexpectedly the passenger side dash required a cut out.
With the carpet thoroughly washed and reinstalled, I was facing the next big step reluctantly : putting the seats back.
I've never been fan of the stock seats and was hoping to find someday a set of Fiero's.
Alas, Corvette owners much have spread the word, because they're getting damn rare.
So I resign myself to reuse the the stock one.
That was until yesterday. Did a last chance kijiji search.... guess what, bingo!
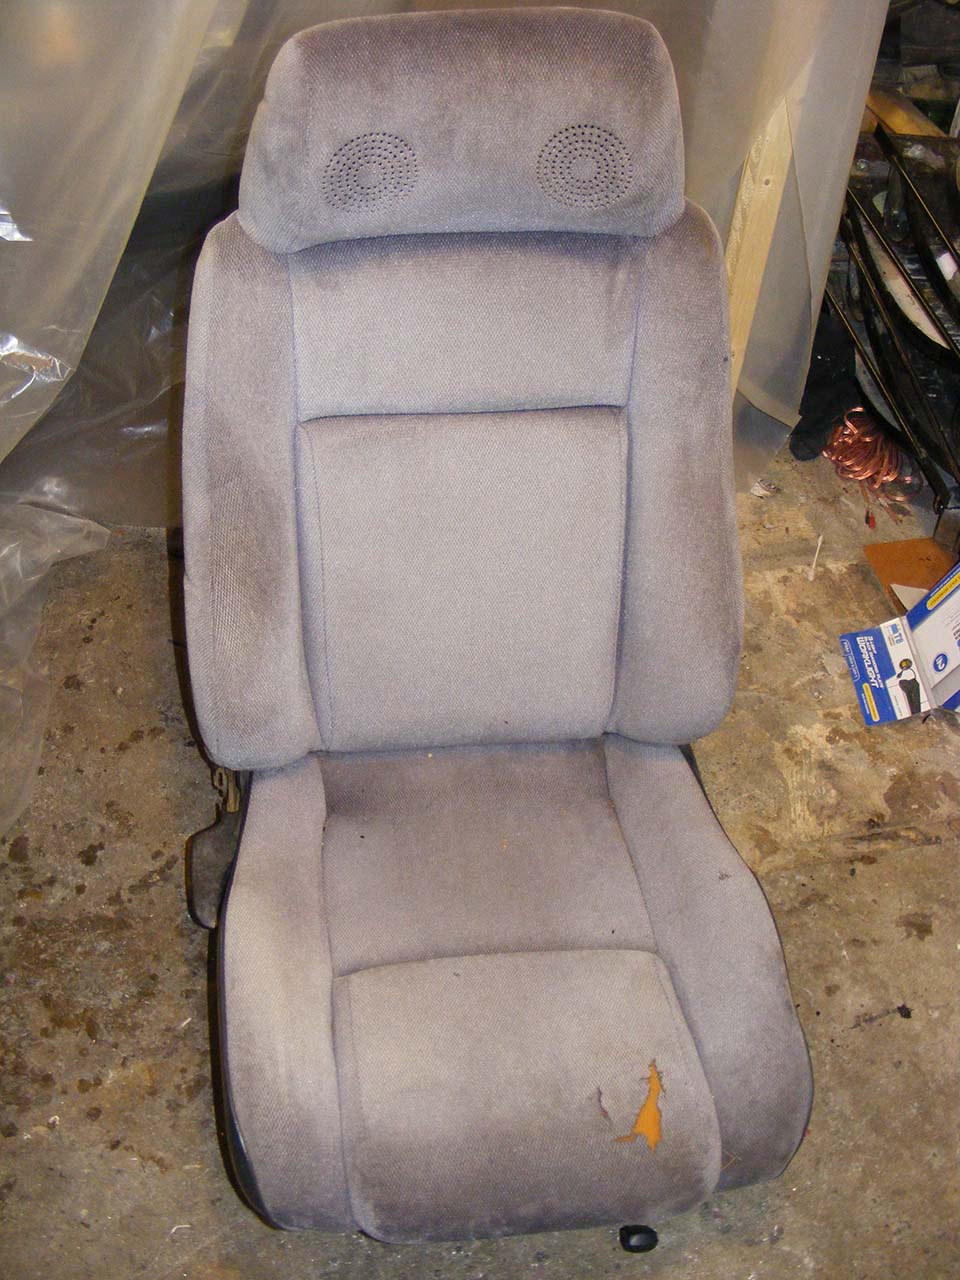
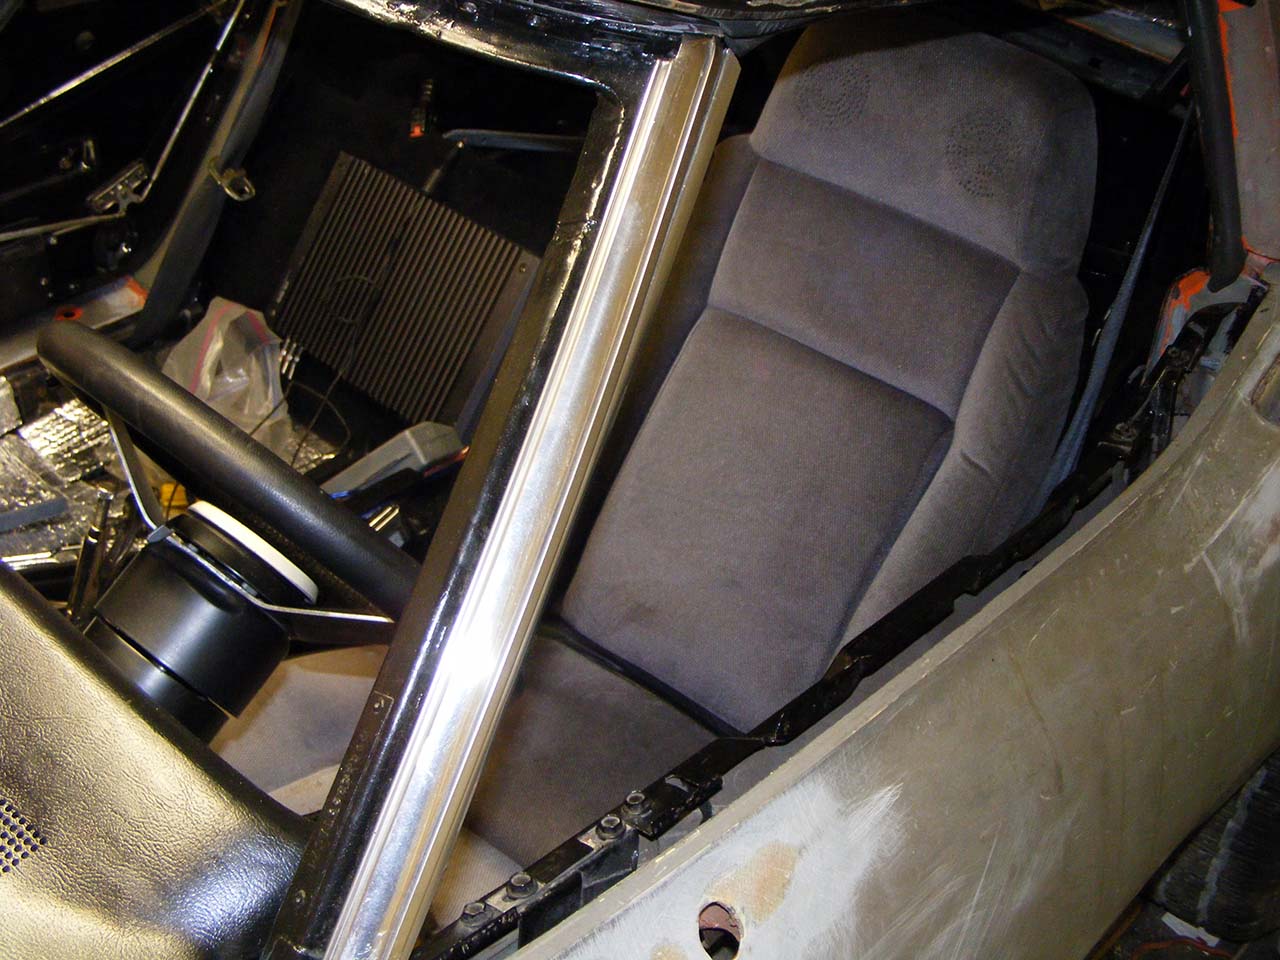
80$ for the pair. The fabric is trashed, but the foam is still pretty good for my use. I need all the clearance I can get (I'm 6'6") and if the driver seat is more flatten, it's all good for me.
Didn't take me long to put them in situation.
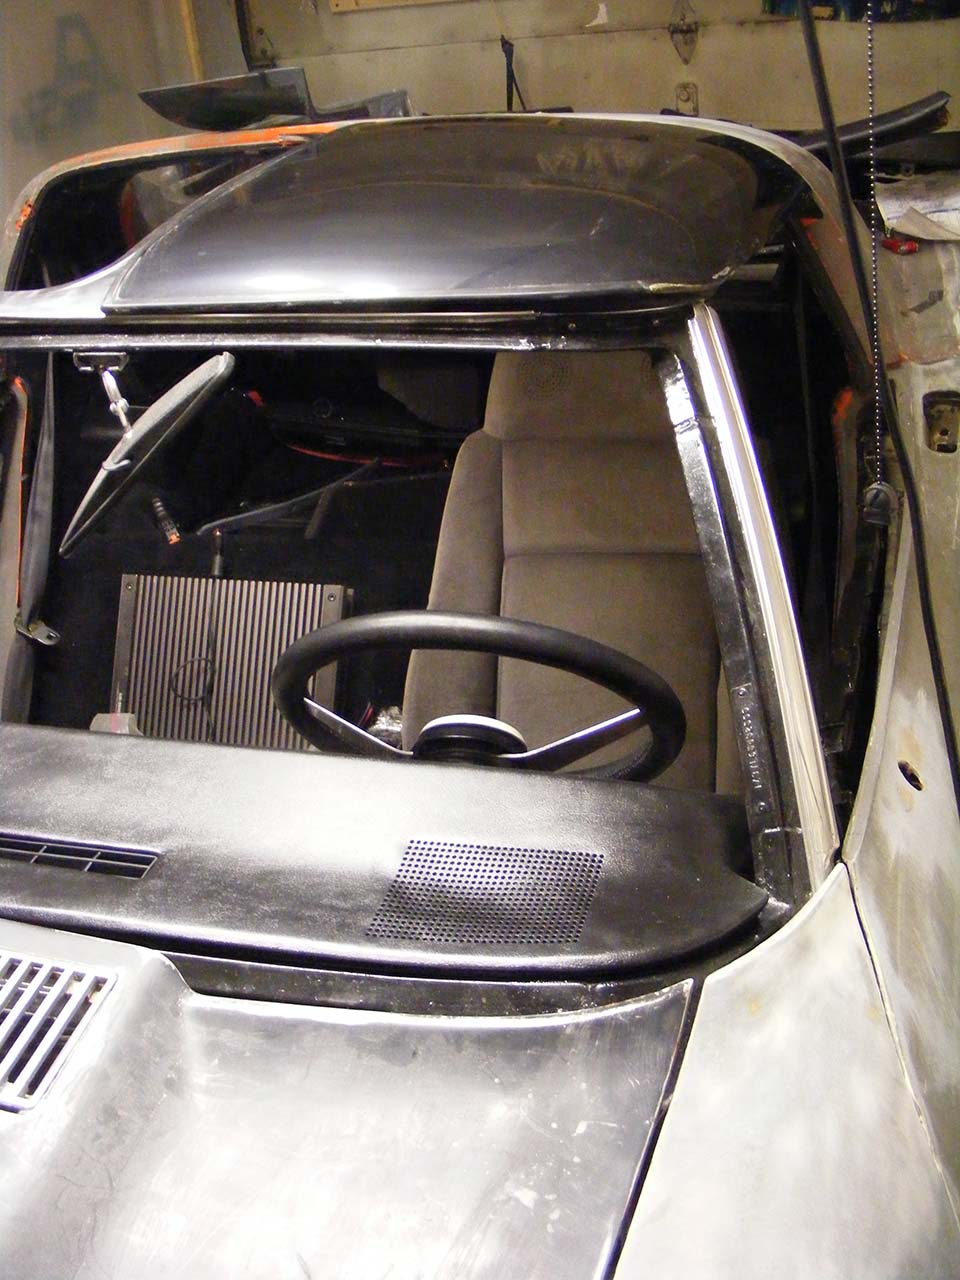
Now I can see how much clearance I'm getting with the trackless seat and the plexiglass T-top. Seat all the way back, I can say my head feels much roomy than my left knee .
.
I will probably have to do something to the two levers in the way (should have listen to you Mr Vette).
You can see I put the audio amplifier behind the passenger seat.
I'm now tuning the shifter position and will have the handle and the ball machined this weekend.
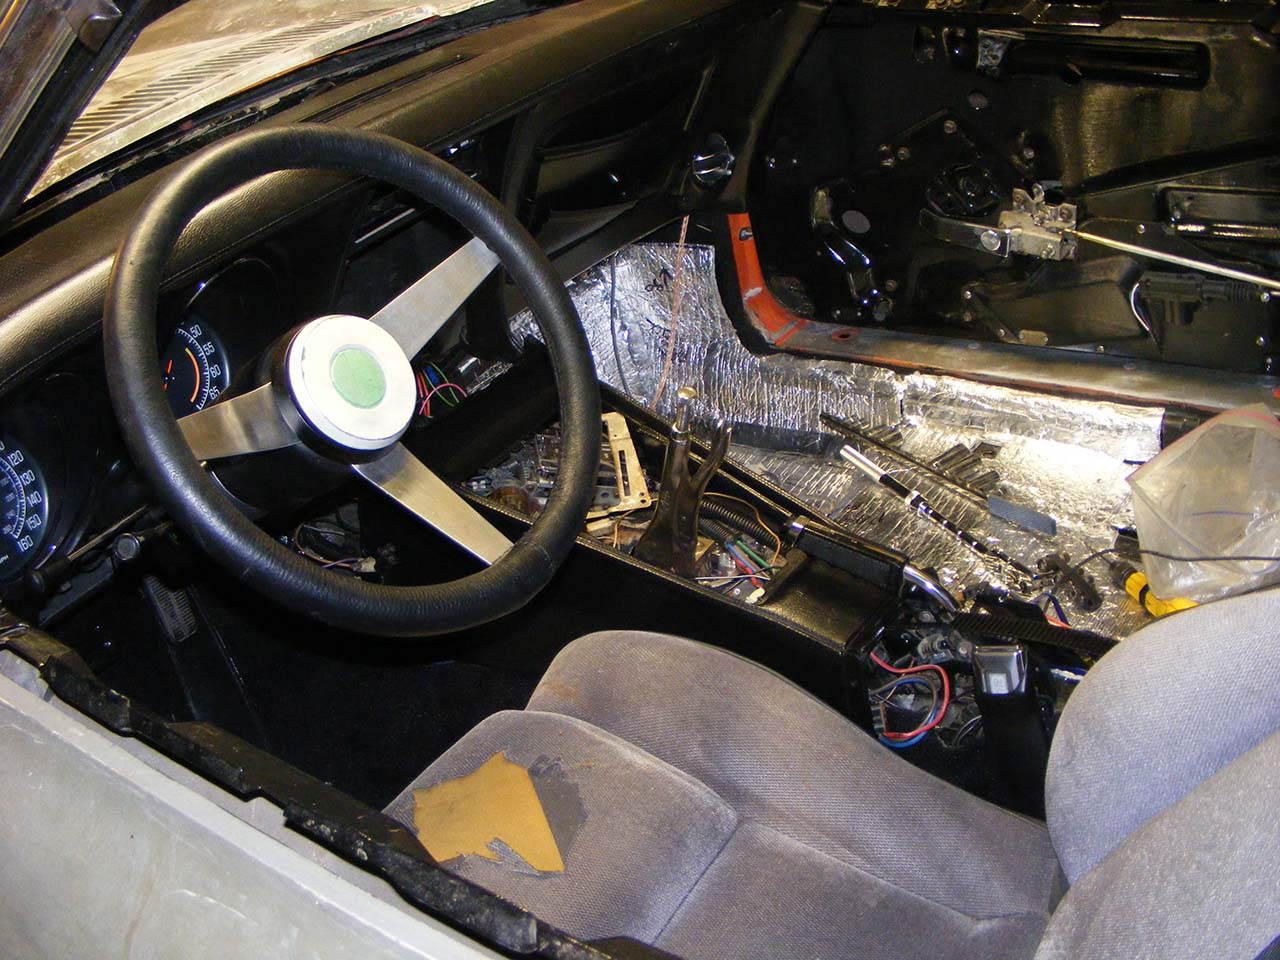
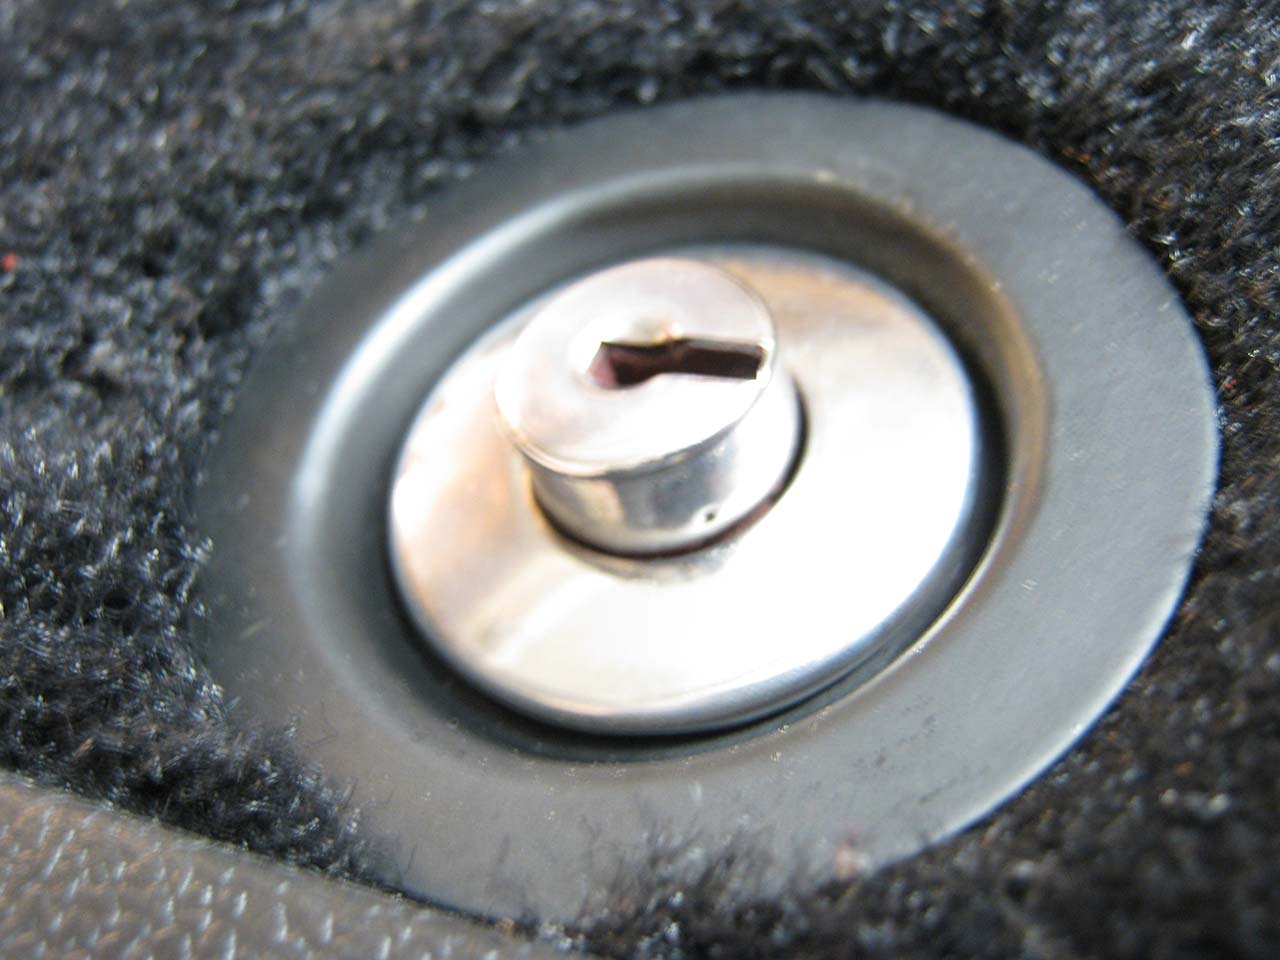
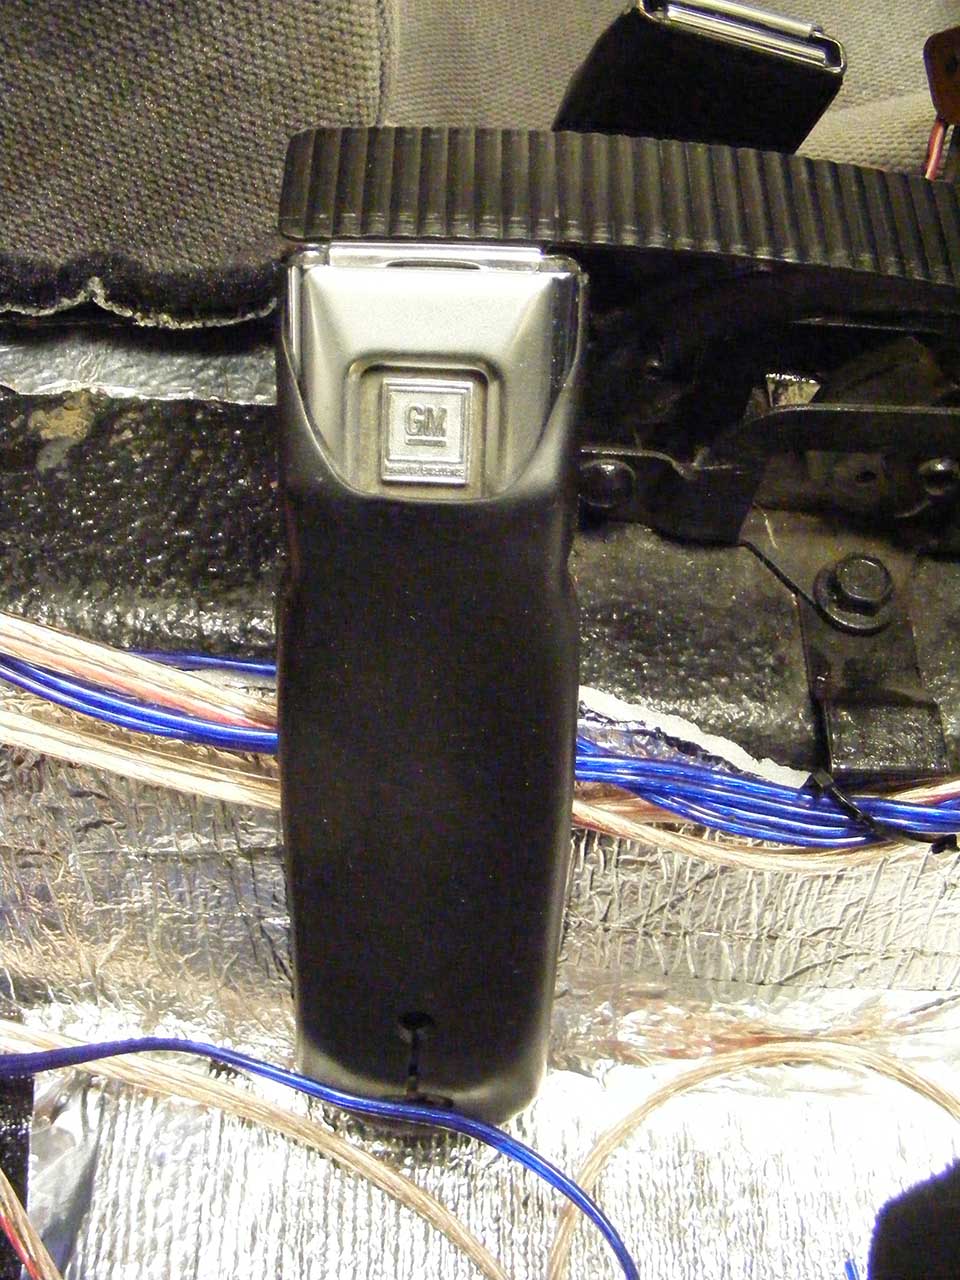
To make this area 'done' I need to restore every bit, like the seat belt latch.
Evaporust proved invaluable for cleaning the rust inside the mechanism. Housings were red, like 60% of the interior (30% blue, 10% black).
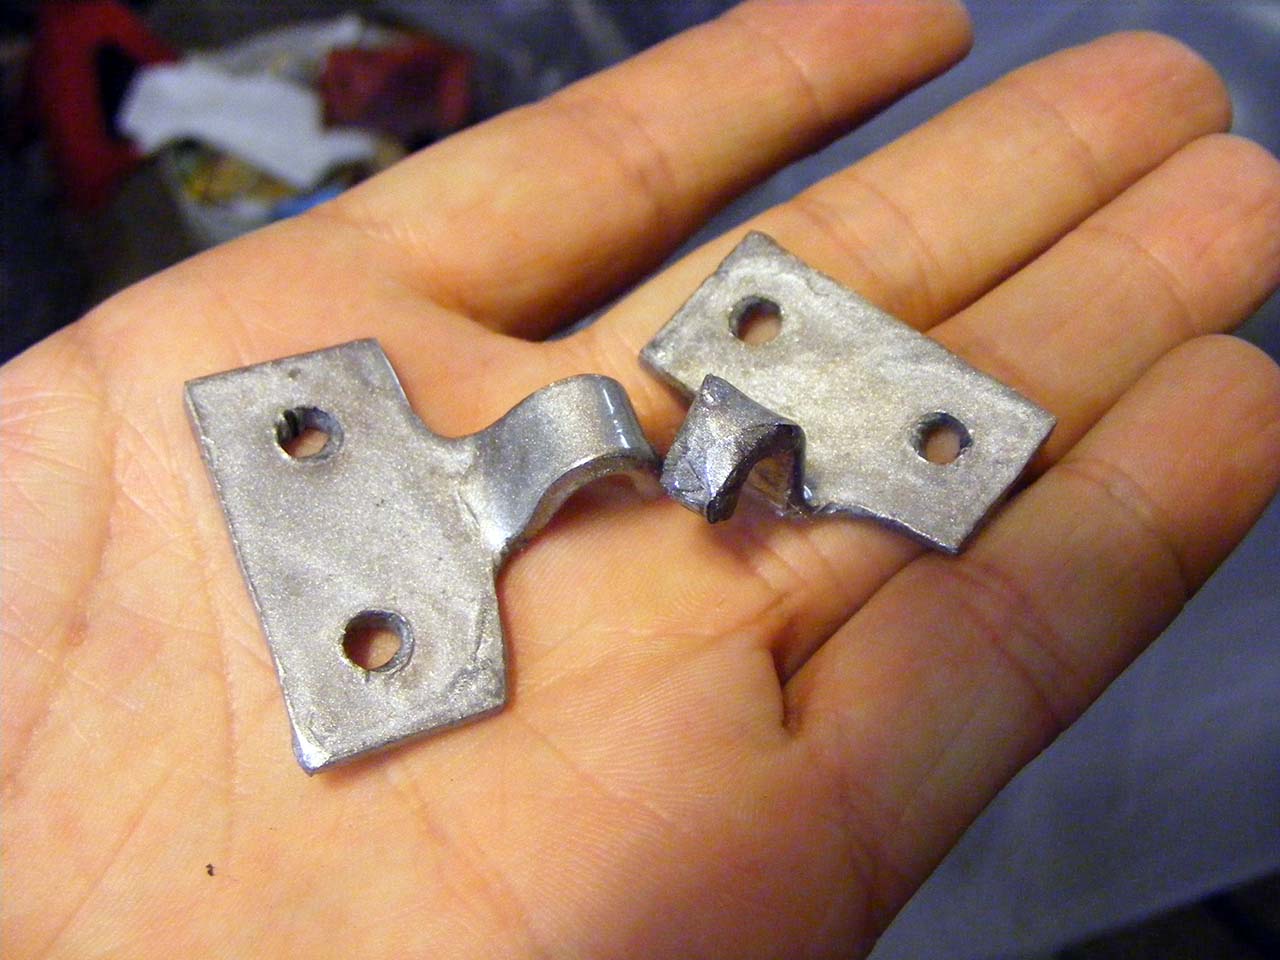
Also remade the hooks for the jack retainer. I know it's kinda trash, but hey, it's B-part.
I will soon stop on the interior, I'll deal with the central gauge cluster later. I will seal the crap out of it, and move back to the bodywork, I feel the itch coming back.
Even if it may sound goofy to some, doing the interior now was a good experience, changed my focus from the strenuous to the meticulous.
While the dashpad speakers cleared the driver gauges by far, unexpectedly the passenger side dash required a cut out.
With the carpet thoroughly washed and reinstalled, I was facing the next big step reluctantly : putting the seats back.
I've never been fan of the stock seats and was hoping to find someday a set of Fiero's.
Alas, Corvette owners much have spread the word, because they're getting damn rare.
So I resign myself to reuse the the stock one.
That was until yesterday. Did a last chance kijiji search.... guess what, bingo!
80$ for the pair. The fabric is trashed, but the foam is still pretty good for my use. I need all the clearance I can get (I'm 6'6") and if the driver seat is more flatten, it's all good for me.
Didn't take me long to put them in situation.
Now I can see how much clearance I'm getting with the trackless seat and the plexiglass T-top. Seat all the way back, I can say my head feels much roomy than my left knee
.I will probably have to do something to the two levers in the way (should have listen to you Mr Vette).
You can see I put the audio amplifier behind the passenger seat.
I'm now tuning the shifter position and will have the handle and the ball machined this weekend.
To make this area 'done' I need to restore every bit, like the seat belt latch.
Evaporust proved invaluable for cleaning the rust inside the mechanism. Housings were red, like 60% of the interior (30% blue, 10% black).
Also remade the hooks for the jack retainer. I know it's kinda trash, but hey, it's B-part.
I will soon stop on the interior, I'll deal with the central gauge cluster later. I will seal the crap out of it, and move back to the bodywork, I feel the itch coming back.
Even if it may sound goofy to some, doing the interior now was a good experience, changed my focus from the strenuous to the meticulous.
Last edited by Denpo; 08-18-2017 at 09:40 PM.
10-10-2013, 09:28 AM
#357
Melting Slicks


Hey Denpo, looking good  do you have pictures of your fiero seat mounts? I just picked up a pair of seats for my Vette and am trying to figure out the best/easiest way to mount the seats. Thanks and keep up the good work!
do you have pictures of your fiero seat mounts? I just picked up a pair of seats for my Vette and am trying to figure out the best/easiest way to mount the seats. Thanks and keep up the good work!
10-10-2013, 09:40 AM
#358
Drifting
Thread Starter
Member Since: Aug 2010
Location: Kanuckistan
Posts: 1,617
Received 127 Likes
on
68 Posts
2022 C3 of the Year Finalist - Modified
IIRC the website corvetteC3.ca has info on it.
I will post as soon as I got something on it.
Thanks for watching.
10-10-2013, 09:52 AM
#359
Administrator


Member Since: Mar 2001
Location: In a parallel universe. Currently own 2014 Stingray Coupe.
Posts: 343,004
Received 19,303 Likes
on
13,975 Posts
C7 of the Year - Modified Finalist 2021
MO Events Coordinator
St. Jude Co-Organizer
St. Jude Donor '03-'04-'05-'06-'07-'08-'09-'10-'11-'12-'13-'14-'15-'16-'17-'18-'19-
'20-'21-'22-'23-'24
NCM Sinkhole Donor
CI 5, 8 & 11 Veteran


Been quite the journey from your purchase till now. Car is really coming together and best of luck getting it finished up and back on the road.
10-10-2013, 10:07 AM
#360
Melting Slicks
Thanks Denpo, I did go to that site but it seems there has to be an easier way to accomplish it and I'm not certain you need to used the Corvette seat rails, seems like extra work.