
My '76 restoration (long post)


 12-08-2012, 11:57 PM
#262
Drifting


Thread Starter
Member Since: Aug 2010
Location: Kanuckistan
Posts: 1,617
Received 127 Likes
on
68 Posts
2022 C3 of the Year Finalist - Modified

Hi everyone, I had a very busy week but finally I could log some hours on the project today.
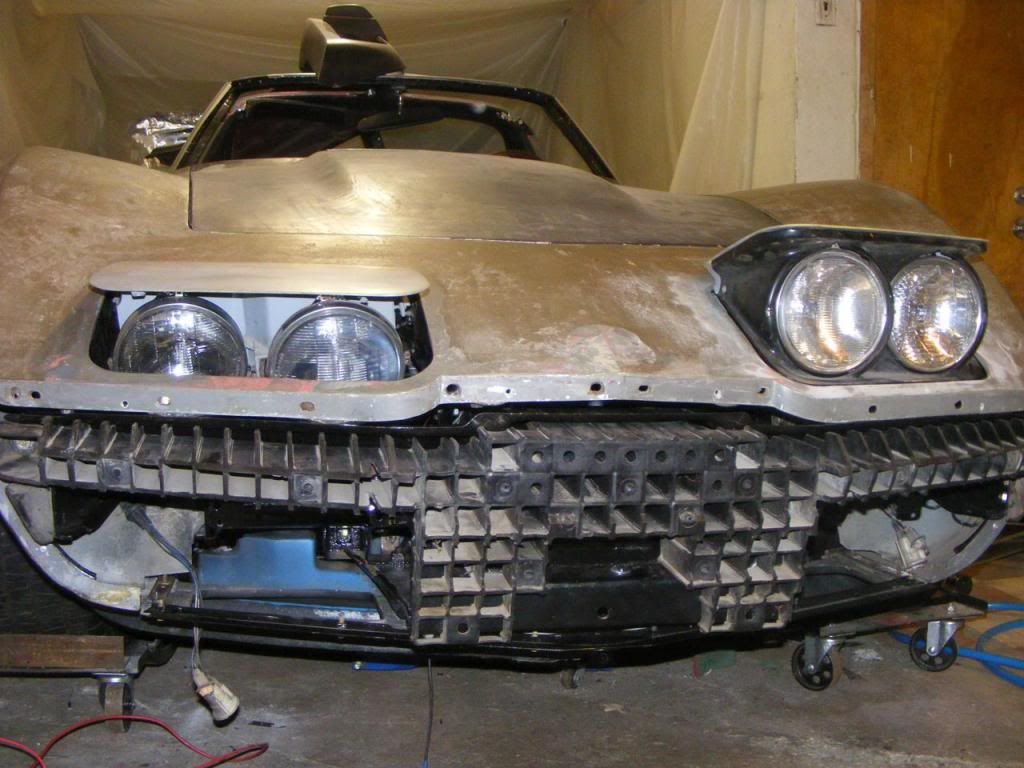
I installed the headlight. God those things are PITA to install and adjust.
Driver:
Passenger:
Still not pleased by the alignment, but this is a two persons job, and my helping hand du jour could stay any long.
Not a problem, this was not my actual goal, I wanted to try a headlight mod :
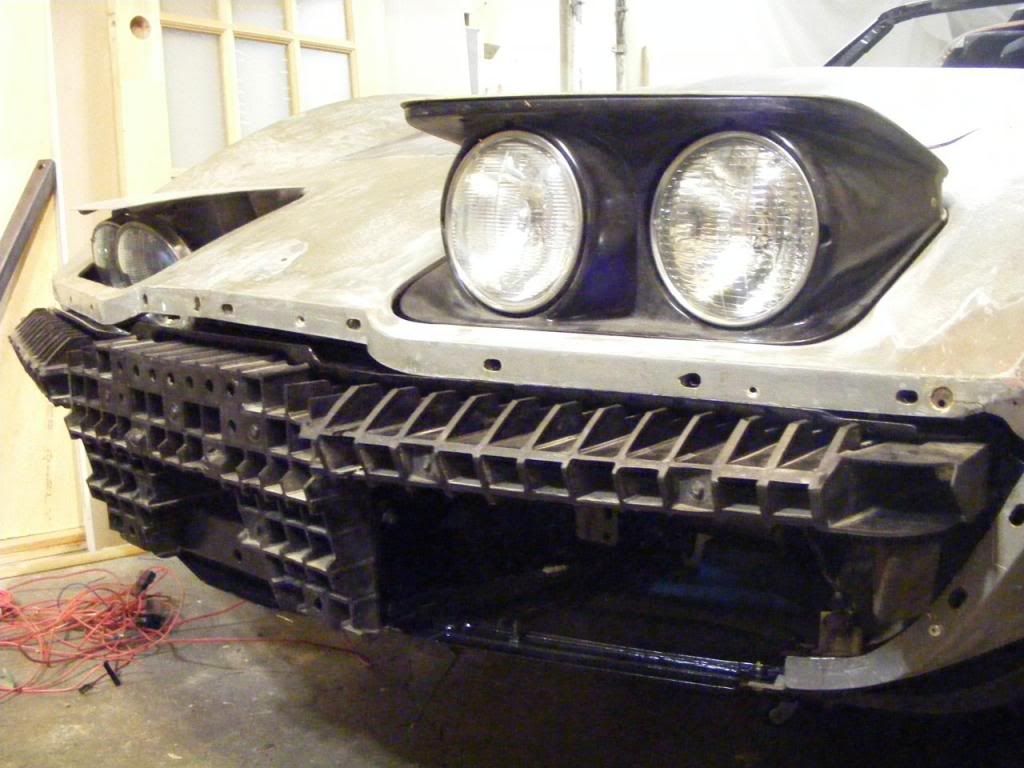
I implemented the design proposed by BBShark(VM).
It don't open enough, and the open state is not really stable anymore, you can close the door with little pressure on the headlight flap. Still a good start, to be continued.
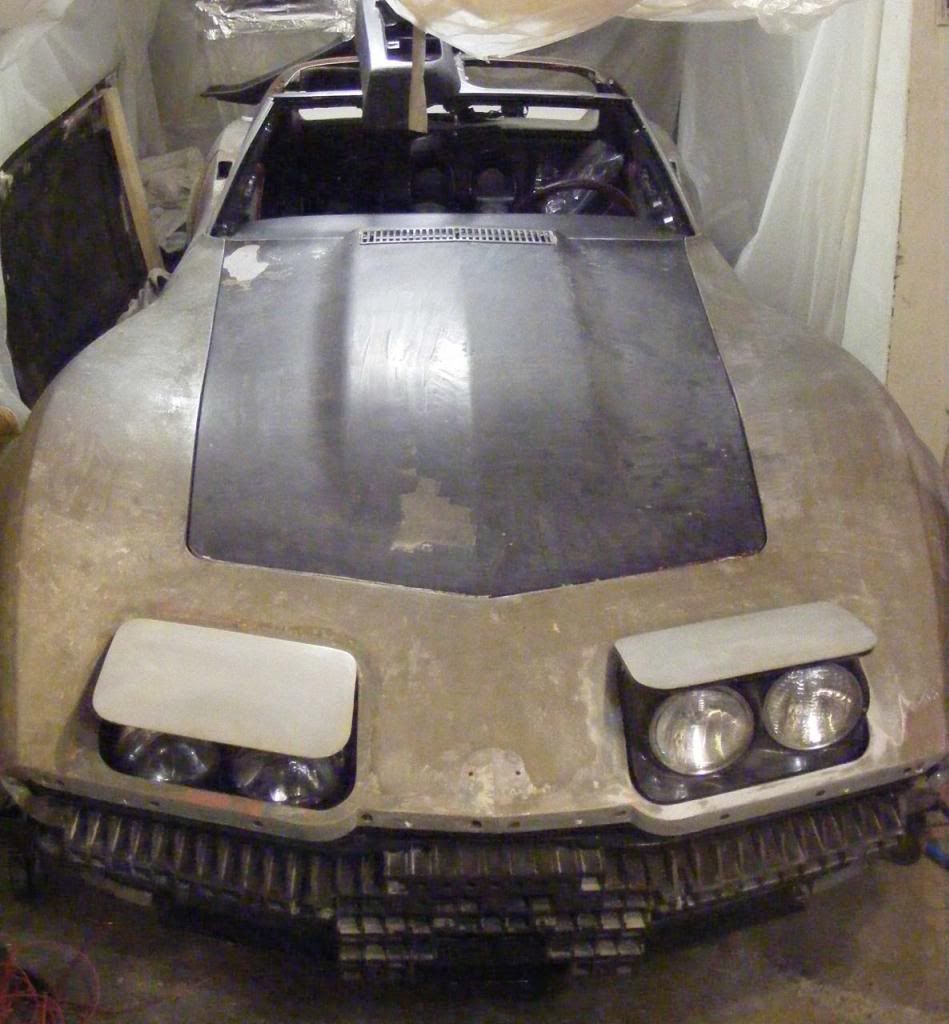
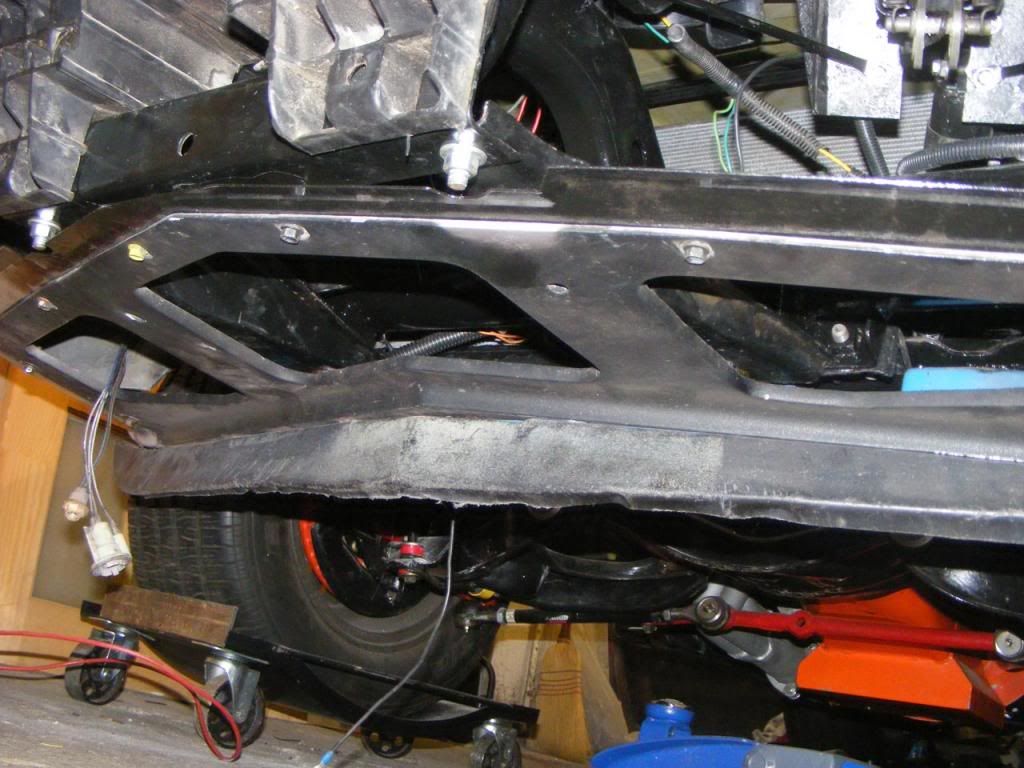
Also as you can see I'm done with the bumper assembly. Here again a PITA, lots of parts to interconnect, bolts everywhere.

While I was a it I reinstalled the horns.
I'm still looking to get a set of spoiler, but in the meanwhile the stock spoiler is better on the car that on a shelve. Anyhow, it's more about checking if I have all the brackets and the bolts than doing a final assembly.
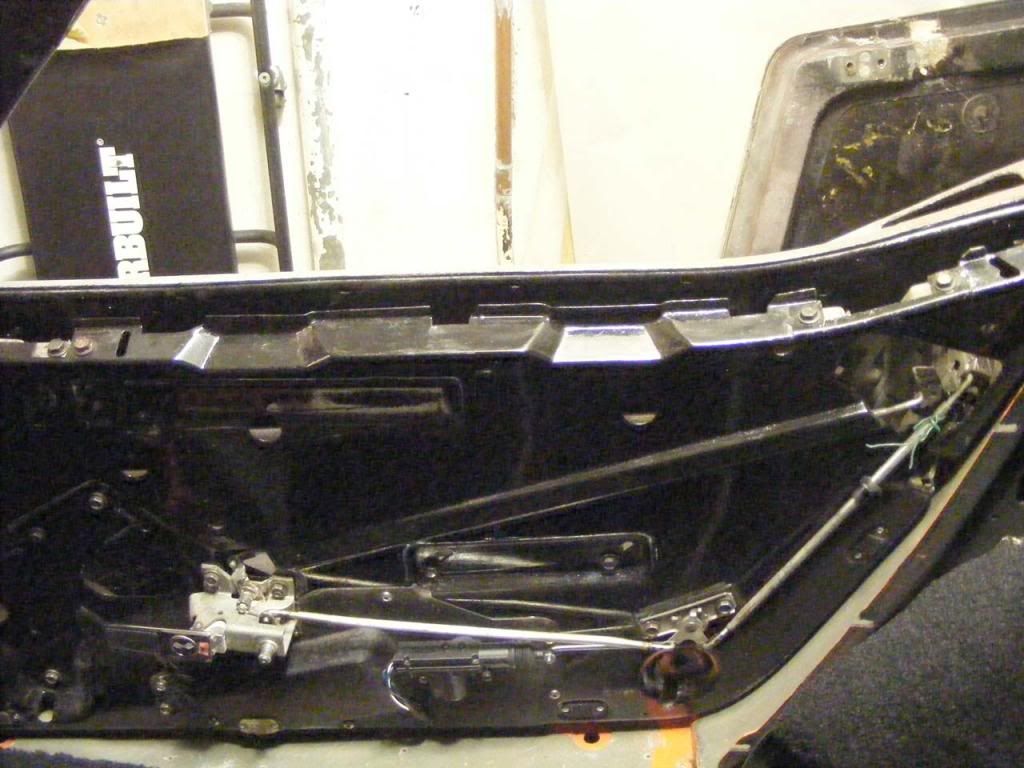
Thank to Roco71(CF) I could finish my passenger door.
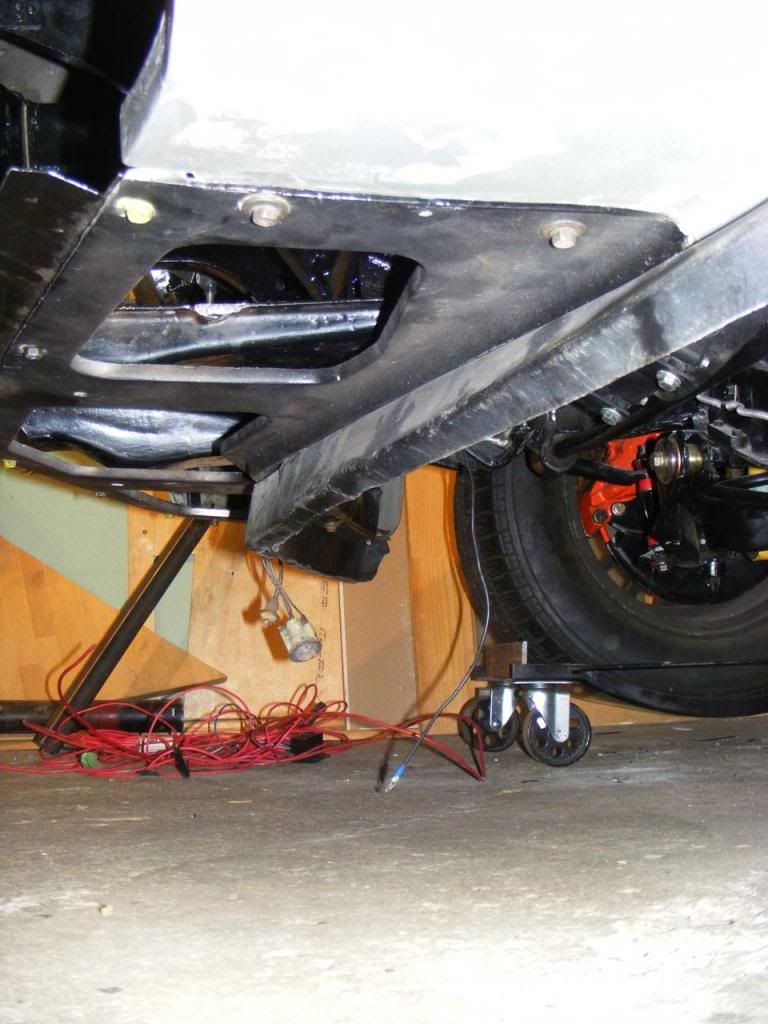
And as I said before, the radiator is back in place, with coolant.
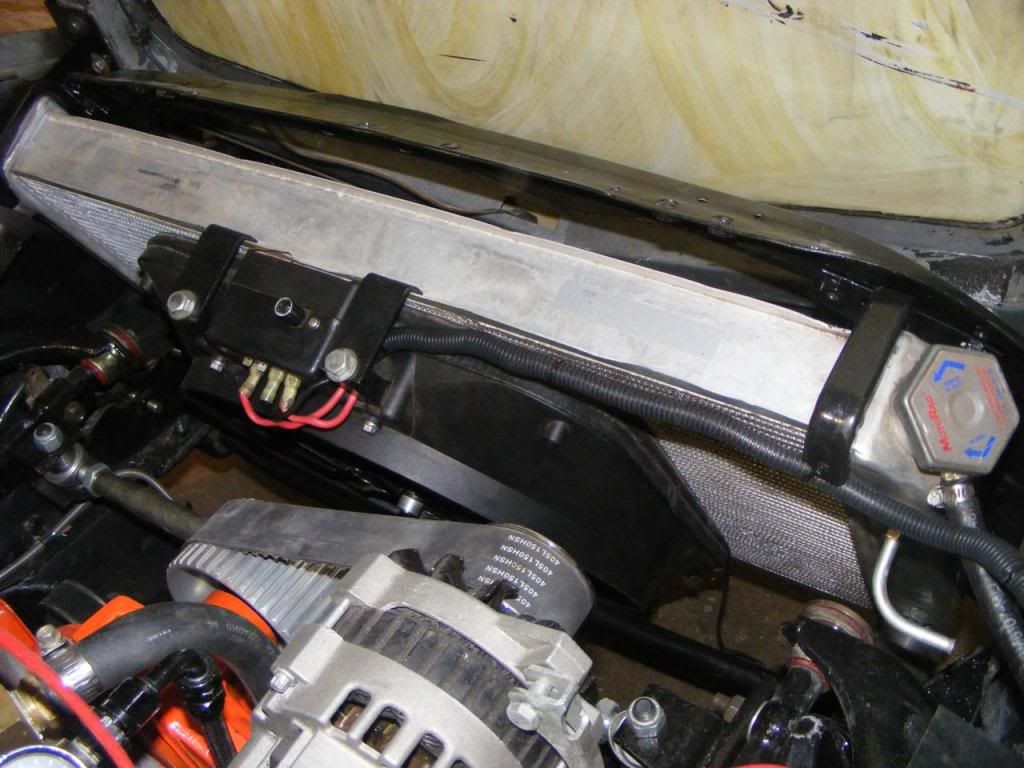
The more I see my radiator, the more I think it's ridiculously tiny. Next time I hit the scrapyard I'll look for some twin fan setup.
I installed the headlight. God those things are PITA to install and adjust.
Driver:
Passenger:
Still not pleased by the alignment, but this is a two persons job, and my helping hand du jour could stay any long.
Not a problem, this was not my actual goal, I wanted to try a headlight mod :
I implemented the design proposed by BBShark(VM).
It don't open enough, and the open state is not really stable anymore, you can close the door with little pressure on the headlight flap. Still a good start, to be continued.
Also as you can see I'm done with the bumper assembly. Here again a PITA, lots of parts to interconnect, bolts everywhere.
While I was a it I reinstalled the horns.
I'm still looking to get a set of spoiler, but in the meanwhile the stock spoiler is better on the car that on a shelve. Anyhow, it's more about checking if I have all the brackets and the bolts than doing a final assembly.
Thank to Roco71(CF) I could finish my passenger door.
And as I said before, the radiator is back in place, with coolant.
The more I see my radiator, the more I think it's ridiculously tiny. Next time I hit the scrapyard I'll look for some twin fan setup.

 12-09-2012, 03:34 PM
#265
Drifting
Thread Starter
Member Since: Aug 2010
Location: Kanuckistan
Posts: 1,617
Received 127 Likes
on
68 Posts
2022 C3 of the Year Finalist - Modified
Thanks guys.
I've been carried away for a while and it feels so good to see significant progress happening.
You know what I mean Rogman right? I hope you go can go back to hell (on earth) as soon as you can to finish yours.
Speaking on space, as soon as my shelves are empty of corvette part, I'm gonna take them down to make one rather spacious bodywork booth.
01-08-2013, 07:02 PM
#266
Drifting
Thread Starter
Member Since: Aug 2010
Location: Kanuckistan
Posts: 1,617
Received 127 Likes
on
68 Posts
2022 C3 of the Year Finalist - Modified
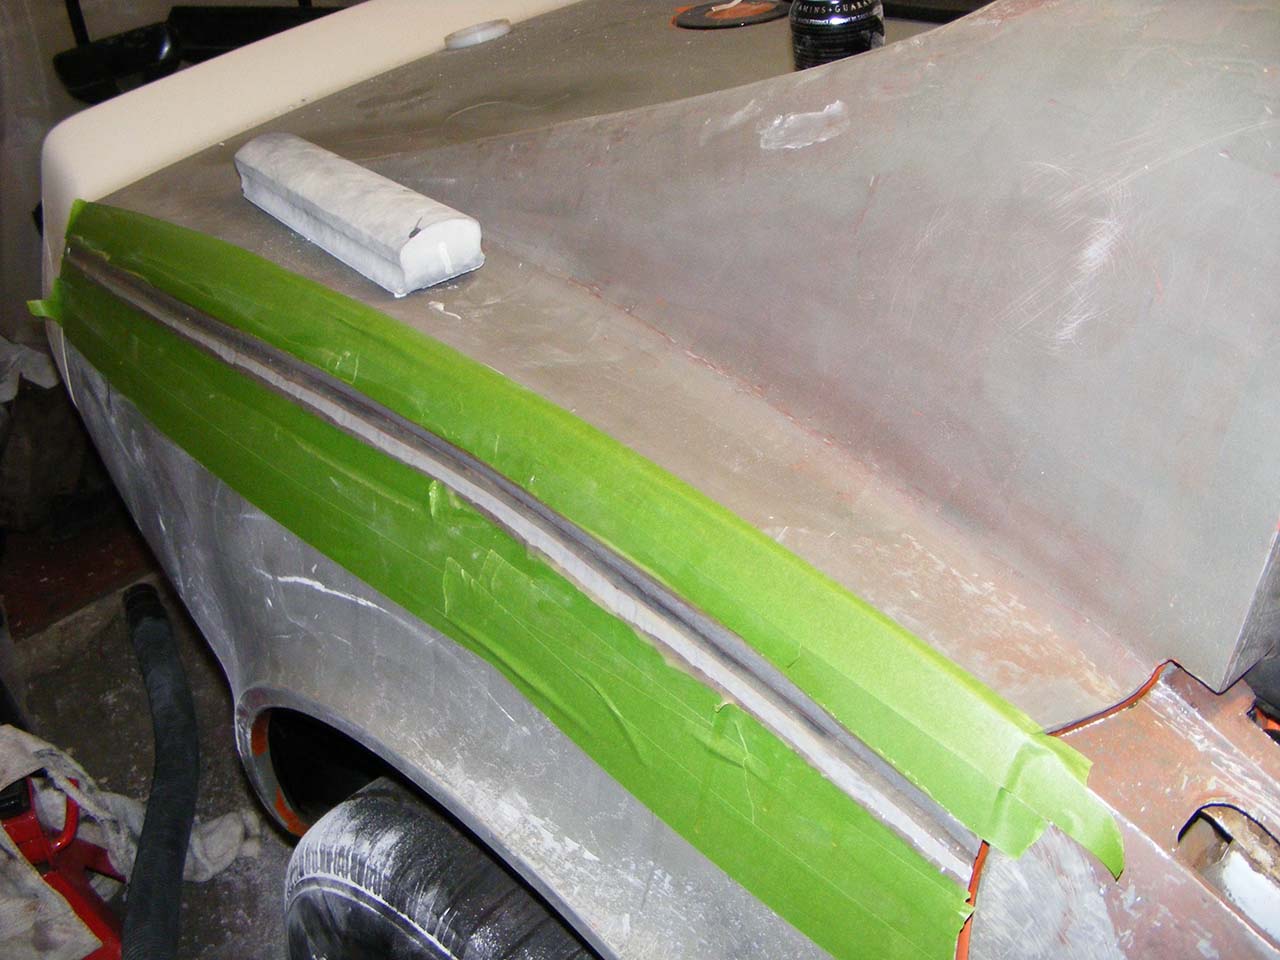
To the list of things done, I can add my door upper curve fitting.
After ungluing the fiberglass, banging the suporting metal frame and gluing it again, I now have pretty decently matching body curves

Then I started the body seams.
First I chiseled out the original glue down to the underlying bonding strip
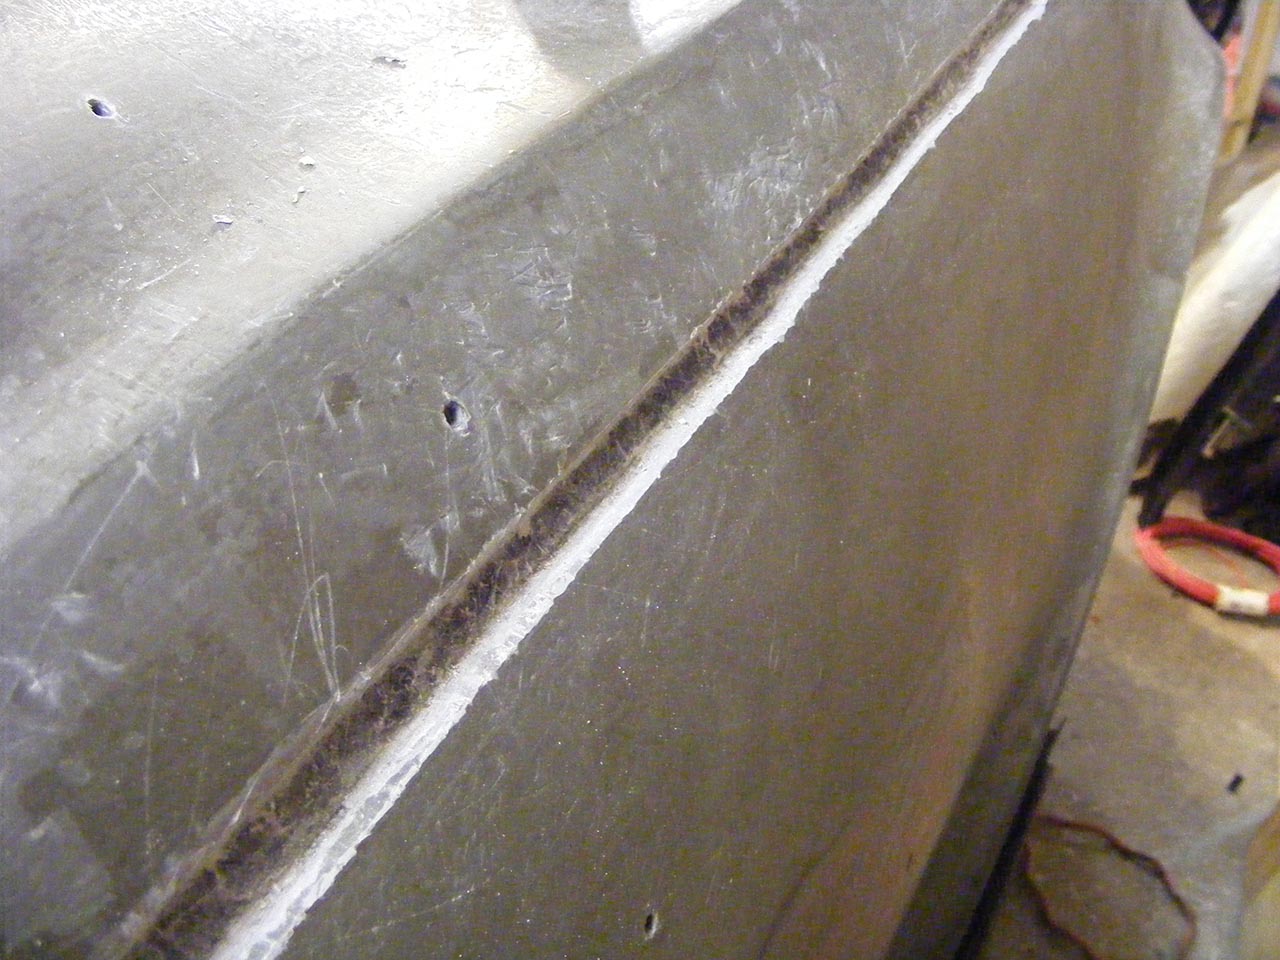
Here you can see I cut the bonding strip at the back of the front clip. At the time I found it was easier for adjusting the front clip with the doors.
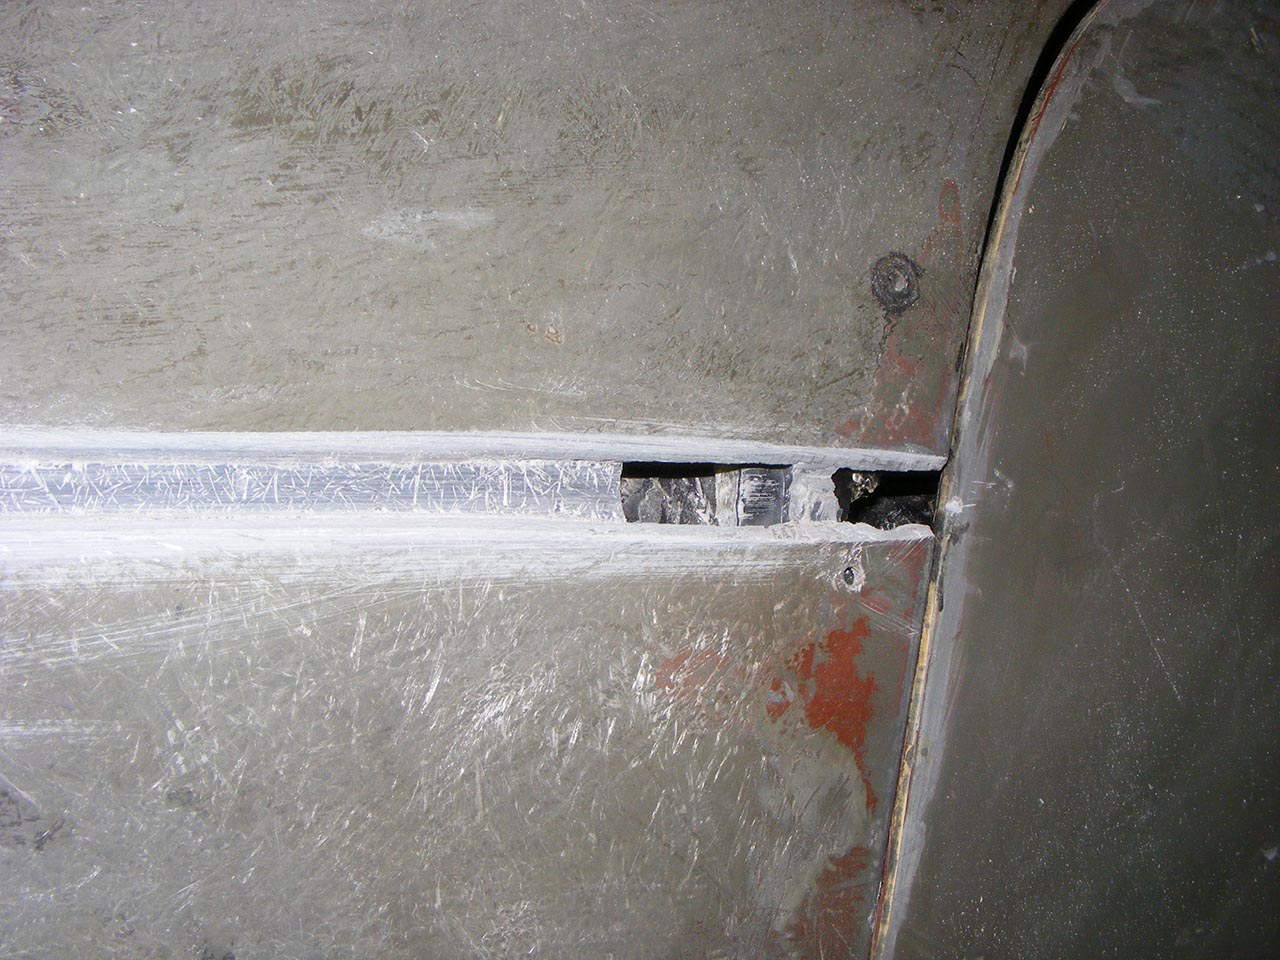
Then I ground a slope along both side of the fiberglass.
With a mix of epoxy and fiberglass powder I then filled the gap formed by the glue. So I got a continuous V shaped groove.
Sorry no pic of that, will take one when I do the next seams.
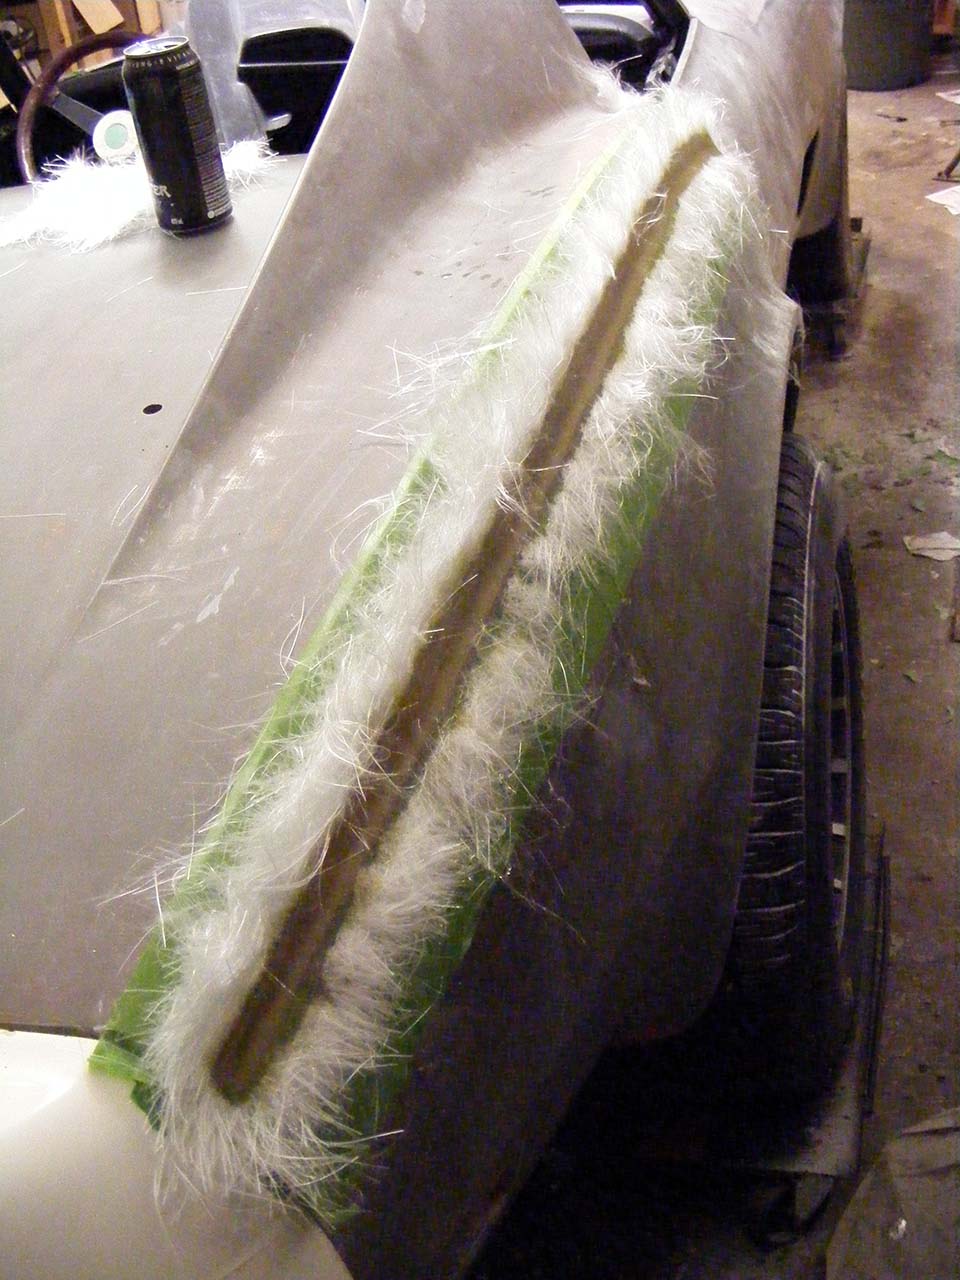
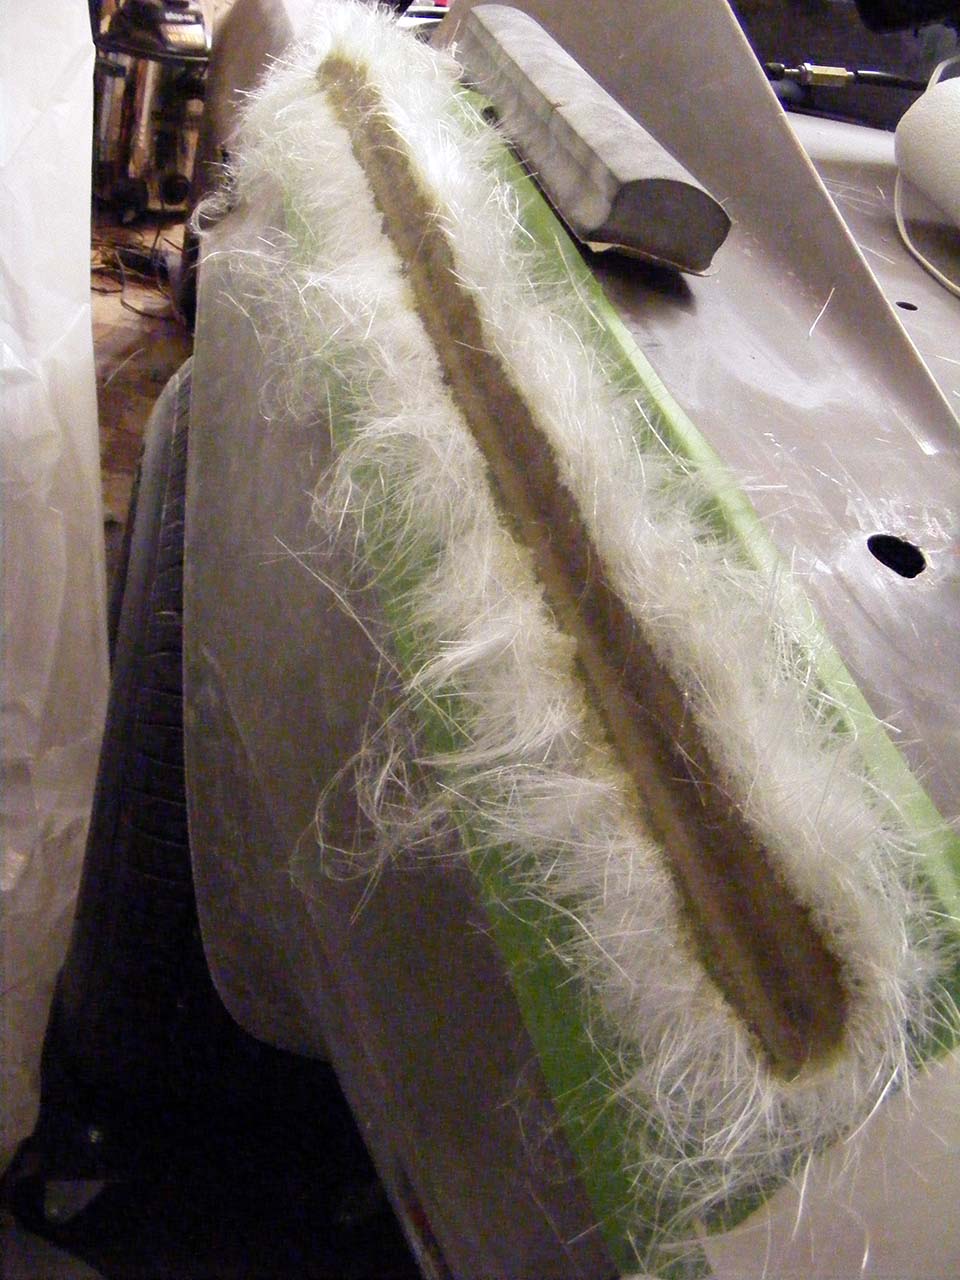
Then glassing.
If I'd say I got it right the first time I'd be lying big time.
Took me 4 attempts go get it right. Each time I had to remove everything and start from scratch.
My biggest mistake, and it's a newbie one, was not to break the fiber before laying it.
Basically I was trying to make piece of fiberglass rigid as cardboard to stick to in a concave shape. Did not fly.
It was ok doing this way when the surface are flat and/or can be kept under compression while curing, like all the repairs had to do so far.
I had to get back to fellow restorers thread to understand that.
So with every patch of fiberglass mat gently pulled in every direction until it get soft as cloth, I could finally math by fiberglass to follow the shape.
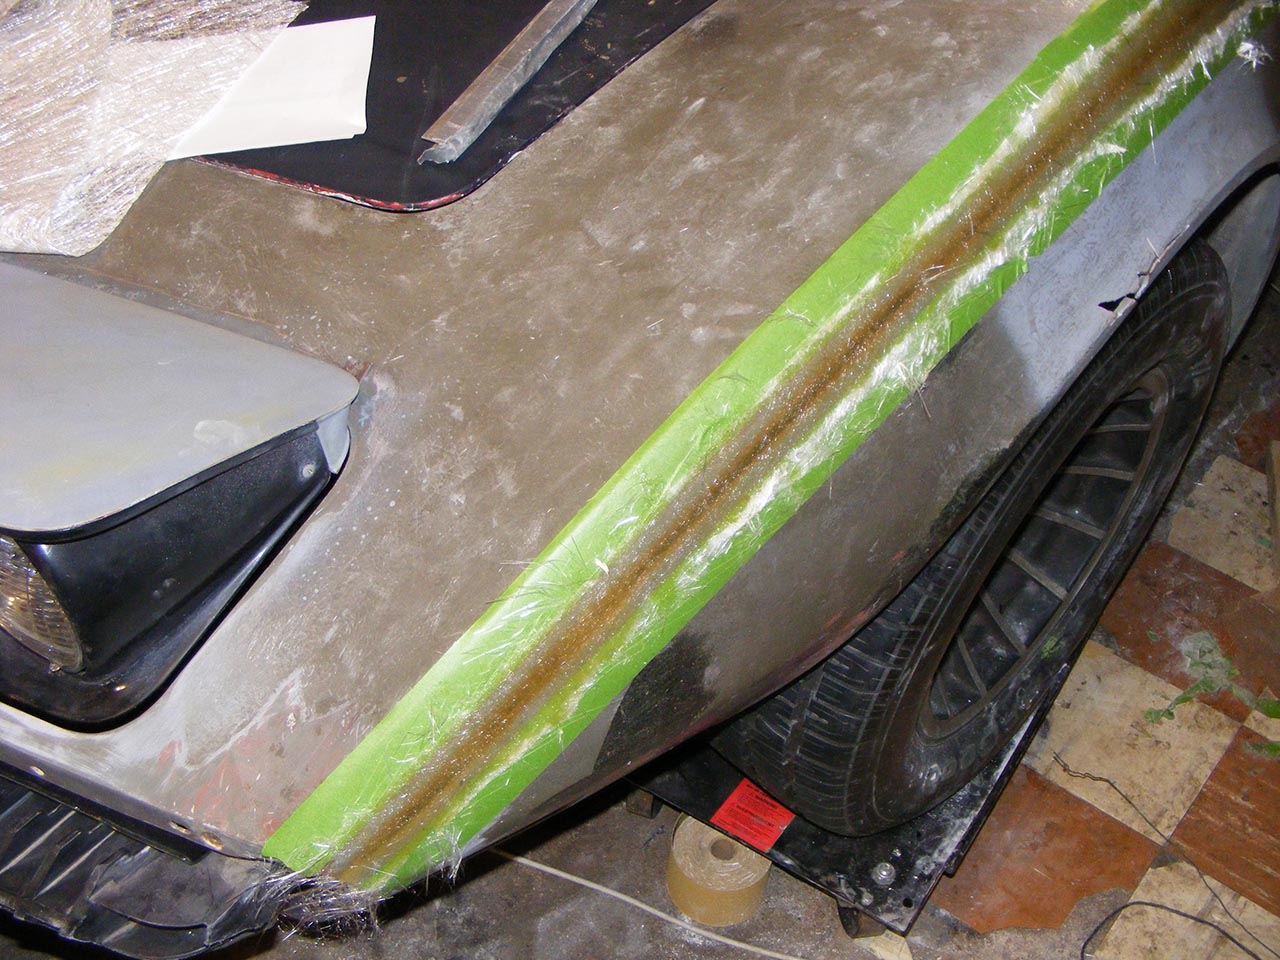

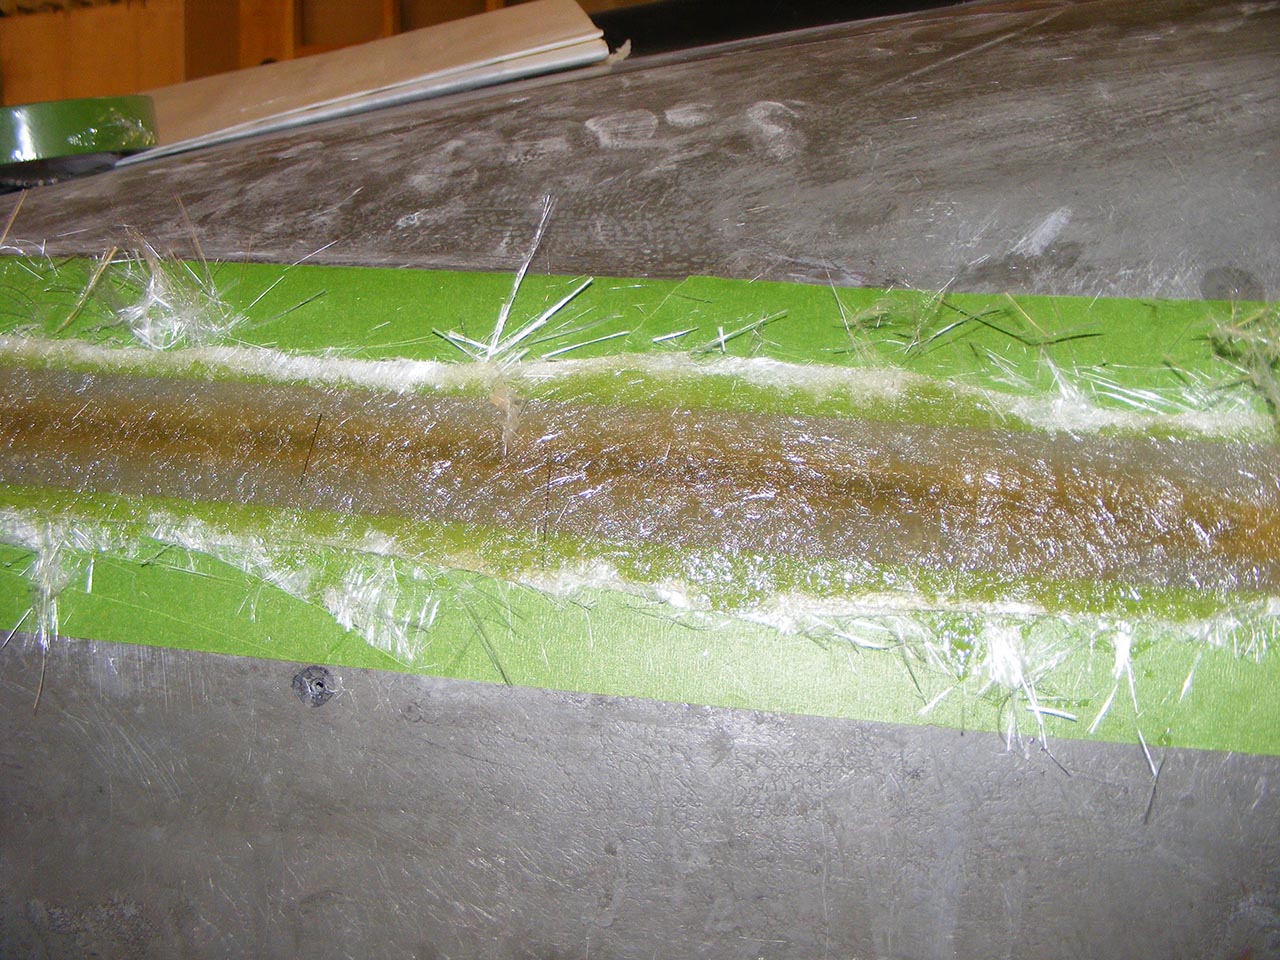
Bubble is the other big deal breaker, and I found it's important to keep checking the setup while it cures, chasing bubble with a spotlight and a razor blade, making sure every inch of mat is fully soaked in resin.
The painter tape trick, I learned from Jeremy's thread, is a must. Without them I'm sure I couldn't get back to the original shape.
Took me 5 layers to match the body panel thickness. I don't know how thick is my mat, I took the regular-medium-usual local fiberglass supplier sells.
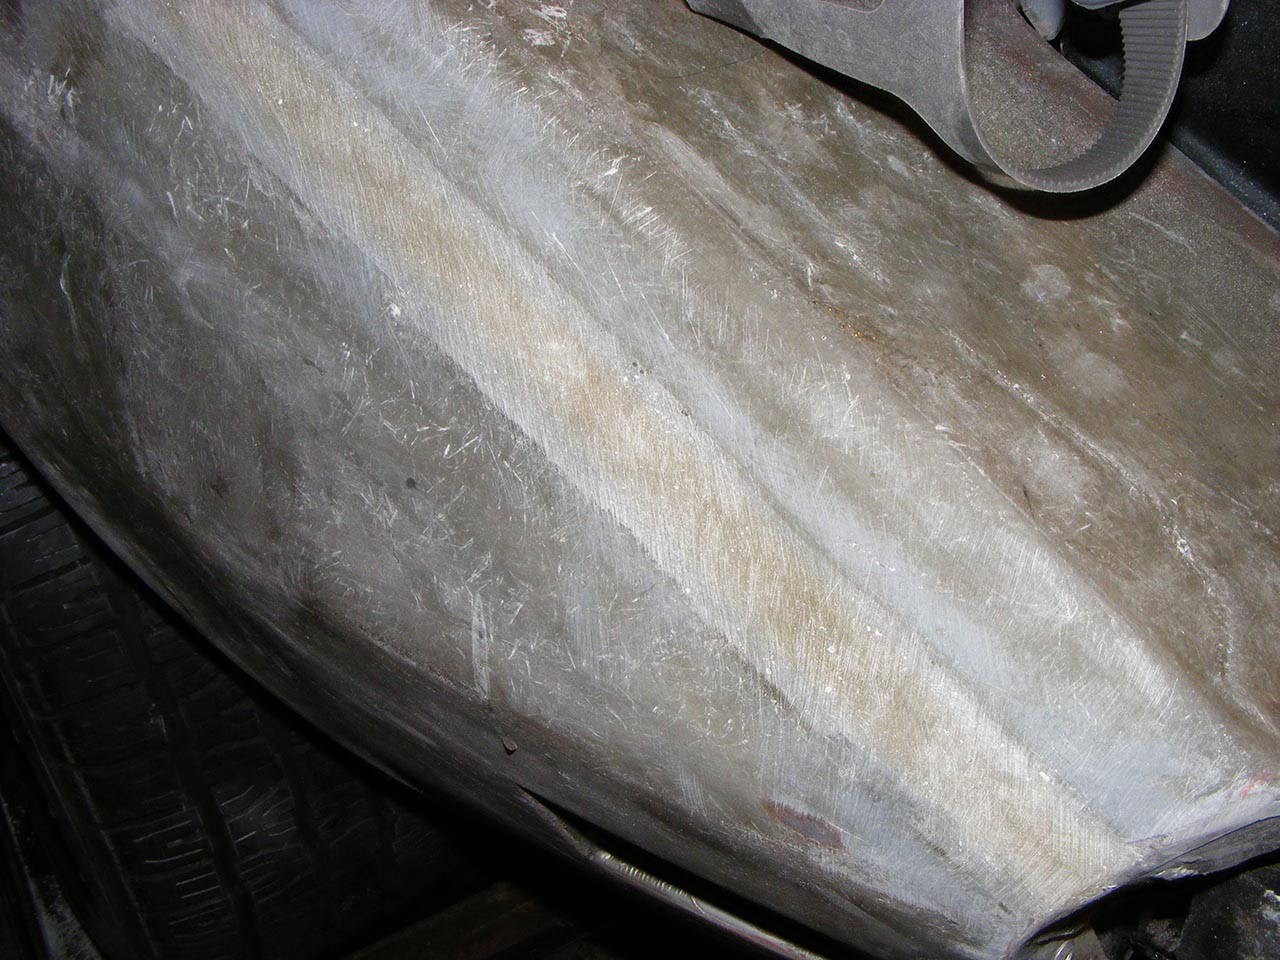
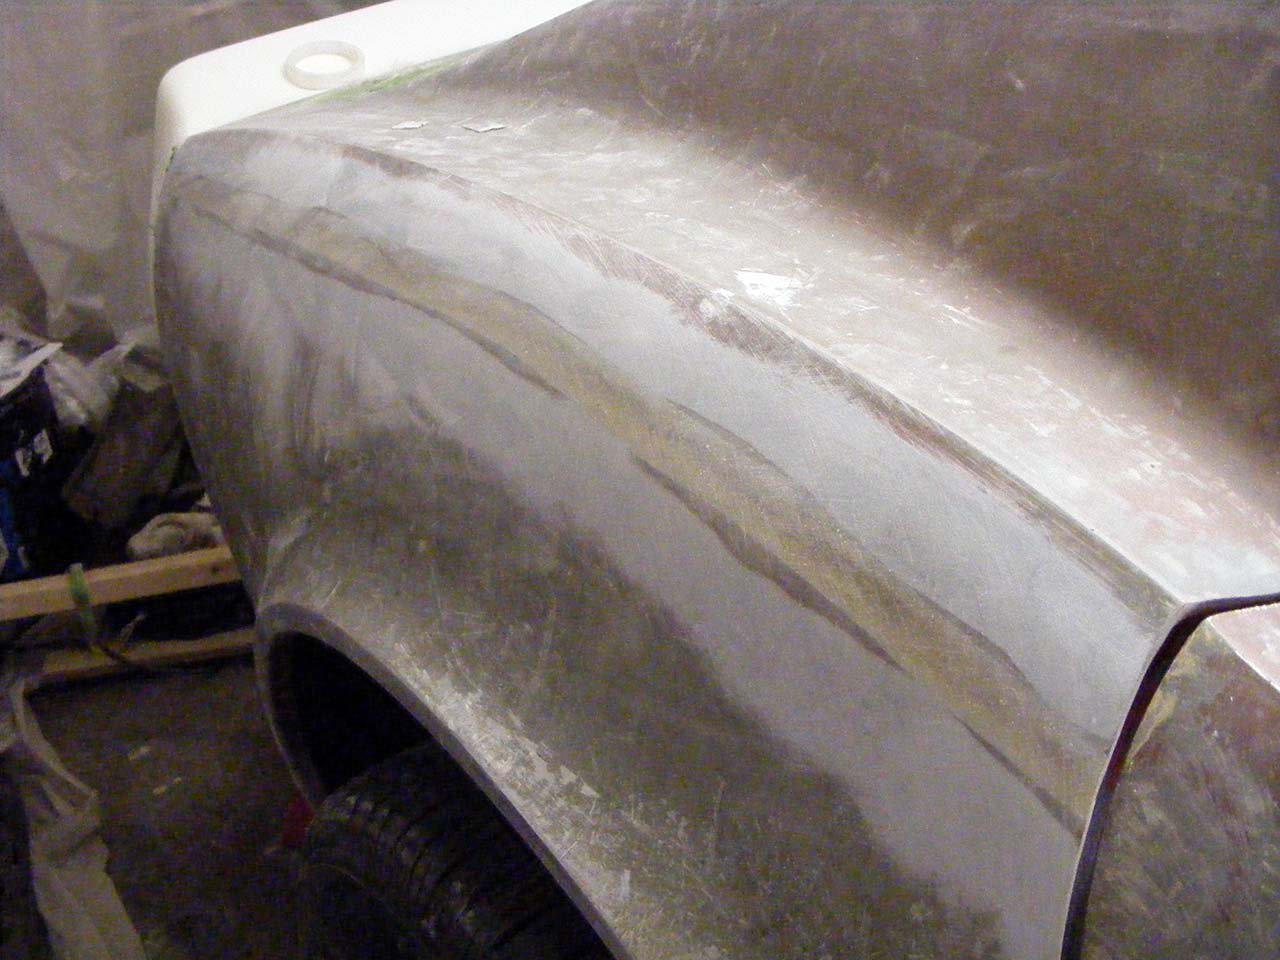
Here the sanded result :
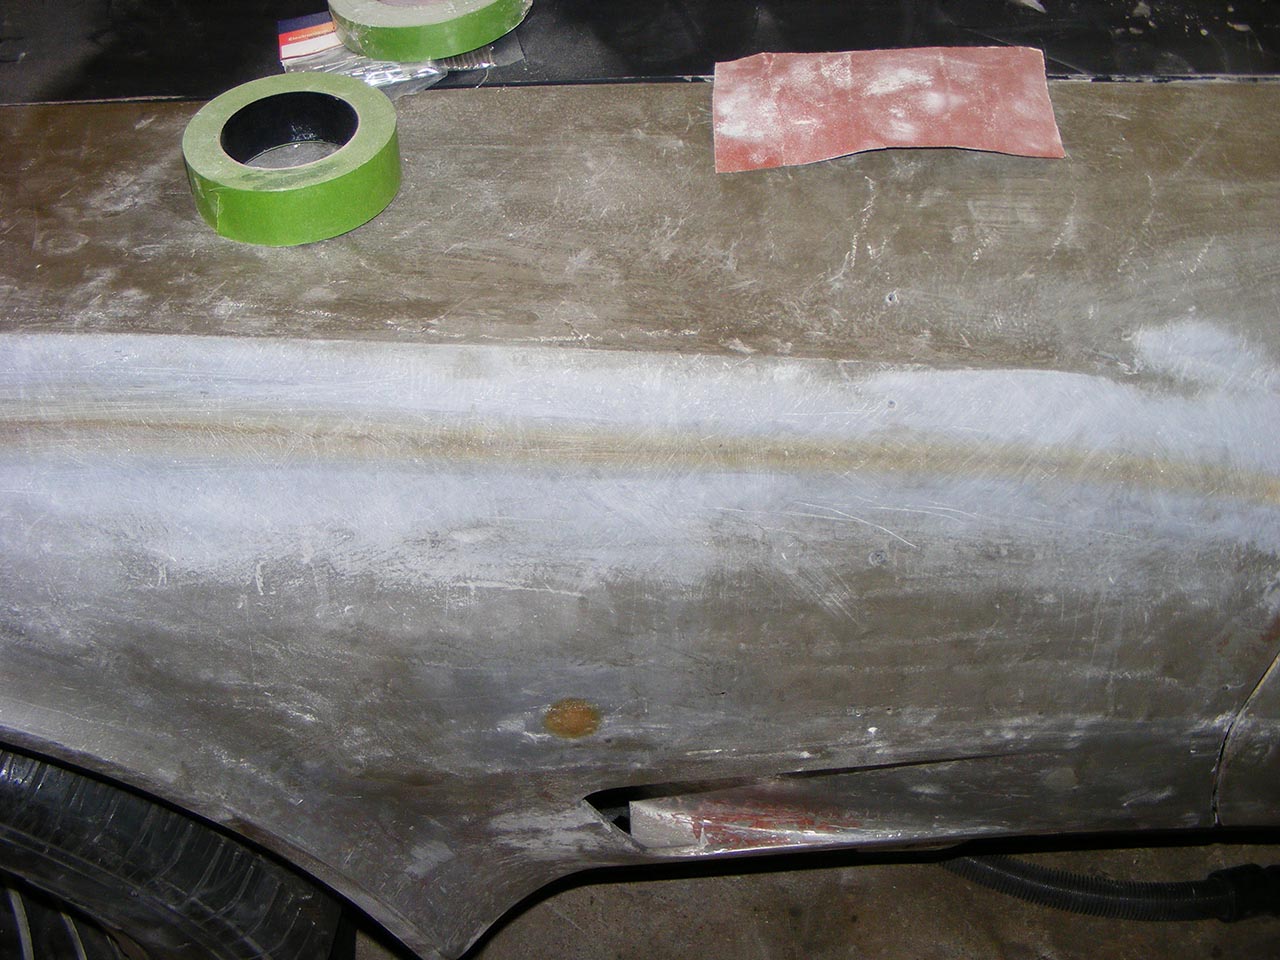
I'm gonna probably sound cocky here, but I'm damn proud of the result.
A handfull of surface bubble (I couldn't monitor the last layer as I wanted), it feels solid, and the seems are barely noticeable.
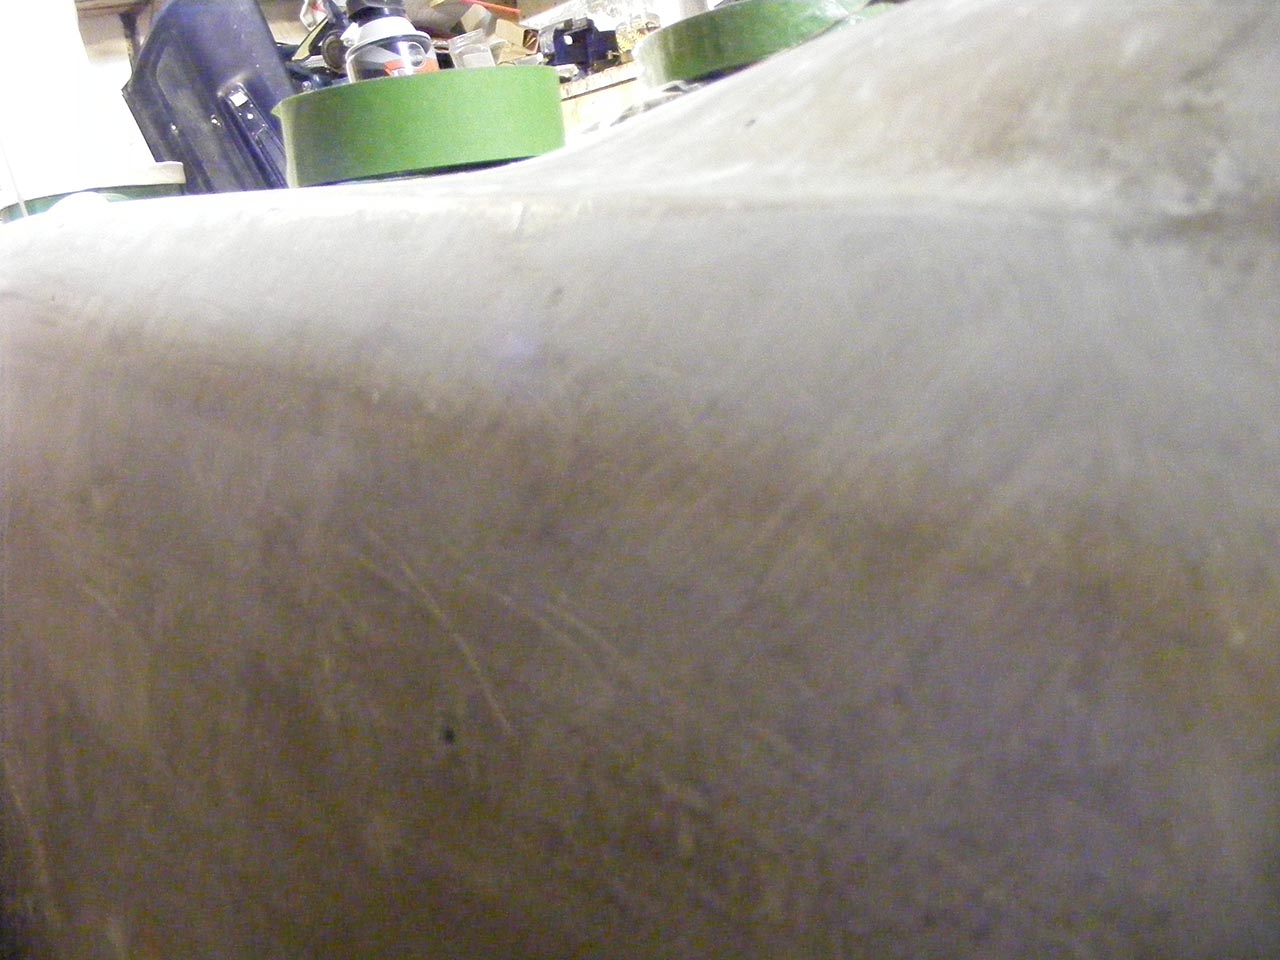
Last pic is a crack in my donor front clip I discovered some time ago. Cracked fiberglass backed by a generous layer of bondo.
I ground into every cracks and removed all the bad fiberglass
After ungluing the fiberglass, banging the suporting metal frame and gluing it again, I now have pretty decently matching body curves
Then I started the body seams.
First I chiseled out the original glue down to the underlying bonding strip
Here you can see I cut the bonding strip at the back of the front clip. At the time I found it was easier for adjusting the front clip with the doors.
Then I ground a slope along both side of the fiberglass.
With a mix of epoxy and fiberglass powder I then filled the gap formed by the glue. So I got a continuous V shaped groove.
Sorry no pic of that, will take one when I do the next seams.
Then glassing.
If I'd say I got it right the first time I'd be lying big time.
Took me 4 attempts go get it right. Each time I had to remove everything and start from scratch.
My biggest mistake, and it's a newbie one, was not to break the fiber before laying it.
Basically I was trying to make piece of fiberglass rigid as cardboard to stick to in a concave shape. Did not fly.
It was ok doing this way when the surface are flat and/or can be kept under compression while curing, like all the repairs had to do so far.
I had to get back to fellow restorers thread to understand that.
So with every patch of fiberglass mat gently pulled in every direction until it get soft as cloth, I could finally math by fiberglass to follow the shape.
Bubble is the other big deal breaker, and I found it's important to keep checking the setup while it cures, chasing bubble with a spotlight and a razor blade, making sure every inch of mat is fully soaked in resin.
The painter tape trick, I learned from Jeremy's thread, is a must. Without them I'm sure I couldn't get back to the original shape.
Took me 5 layers to match the body panel thickness. I don't know how thick is my mat, I took the regular-medium-usual local fiberglass supplier sells.
Here the sanded result :
I'm gonna probably sound cocky here, but I'm damn proud of the result.
A handfull of surface bubble (I couldn't monitor the last layer as I wanted), it feels solid, and the seems are barely noticeable.
Last pic is a crack in my donor front clip I discovered some time ago. Cracked fiberglass backed by a generous layer of bondo.
I ground into every cracks and removed all the bad fiberglass
Last edited by Denpo; 08-17-2017 at 11:06 PM.
01-08-2013, 07:19 PM
#267
Drifting
You should be proud, that seam looks great... And as you found out, you'll continue to refine and get better on each seam you do... By the time I got to my last seam, I was able to finish it in about a fourth of the time and with better results...
Looking good!!!!

Rogman
01-08-2013, 08:46 PM
#269
Drifting
Thread Starter
Member Since: Aug 2010
Location: Kanuckistan
Posts: 1,617
Received 127 Likes
on
68 Posts
2022 C3 of the Year Finalist - Modified
Denpo--
You should be proud, that seam looks great... And as you found out, you'll continue to refine and get better on each seam you do... By the time I got to my last seam, I was able to finish it in about a fourth of the time and with better results...
Looking good!!!!
Rogman
You should be proud, that seam looks great... And as you found out, you'll continue to refine and get better on each seam you do... By the time I got to my last seam, I was able to finish it in about a fourth of the time and with better results...
Looking good!!!!
Rogman
If I count the mistakes out, I'd say I've put 10h in this, spread along the 3 lastest weeks. I didn't have Xmass vacations or much free time recently.
Turn out I'm gonna have a lot of free time in the coming weeks, and will probably be glassin' full time in the coming days.
01-08-2013, 11:05 PM
#270
Drifting
Thread Starter
Member Since: Aug 2010
Location: Kanuckistan
Posts: 1,617
Received 127 Likes
on
68 Posts
2022 C3 of the Year Finalist - Modified
Here diagram that show what I did on the seams.
Initial state : fiberglass and the pink factory glue

Remove the seams

Grind the border

Form the groove with epoxy+fiberglass powder

Glassing, several layers
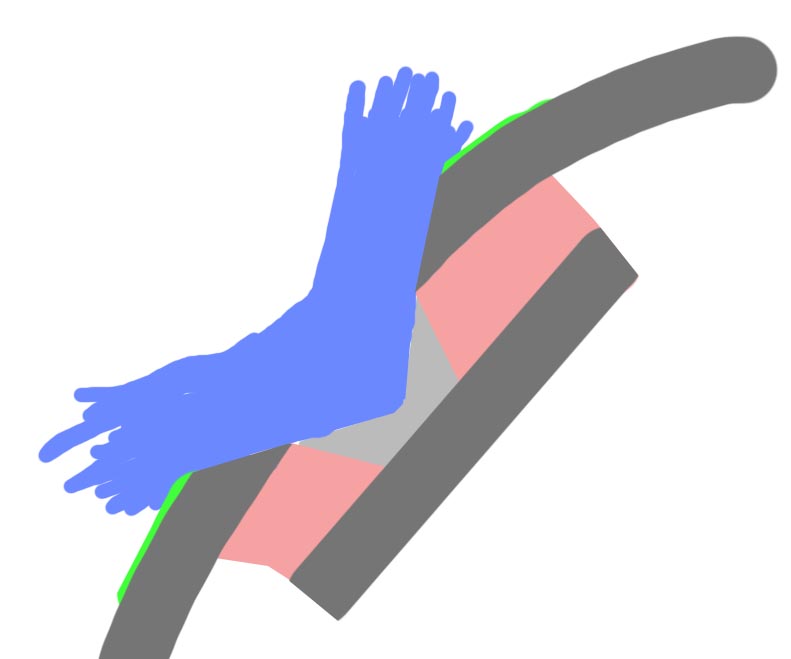
Then sanding

Initial state : fiberglass and the pink factory glue
Remove the seams
Grind the border
Form the groove with epoxy+fiberglass powder
Glassing, several layers
Then sanding
Last edited by Denpo; 08-17-2017 at 11:09 PM.
01-13-2013, 07:01 AM
#271
Drifting
Thread Starter
Member Since: Aug 2010
Location: Kanuckistan
Posts: 1,617
Received 127 Likes
on
68 Posts
2022 C3 of the Year Finalist - Modified
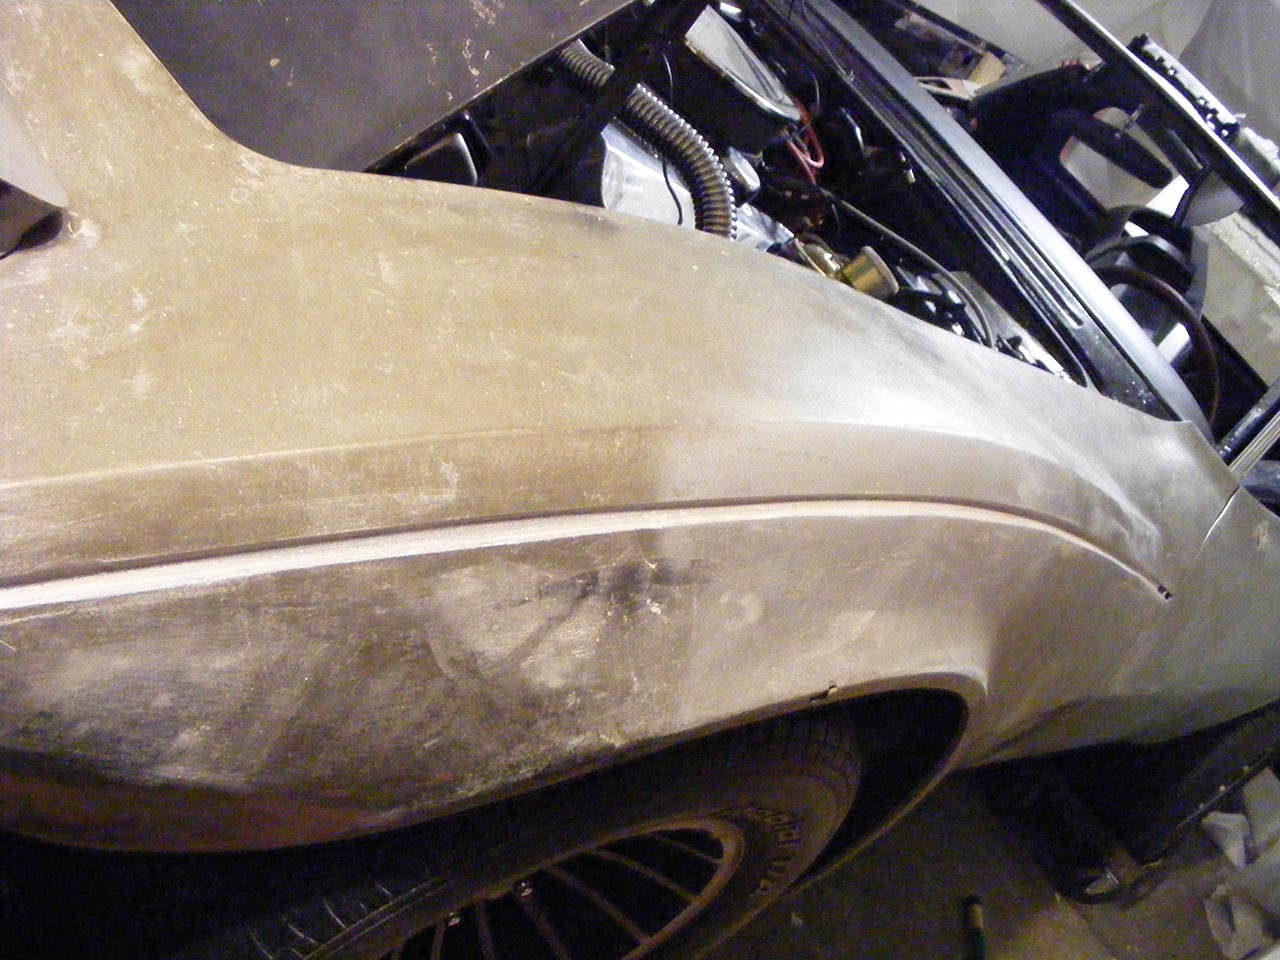
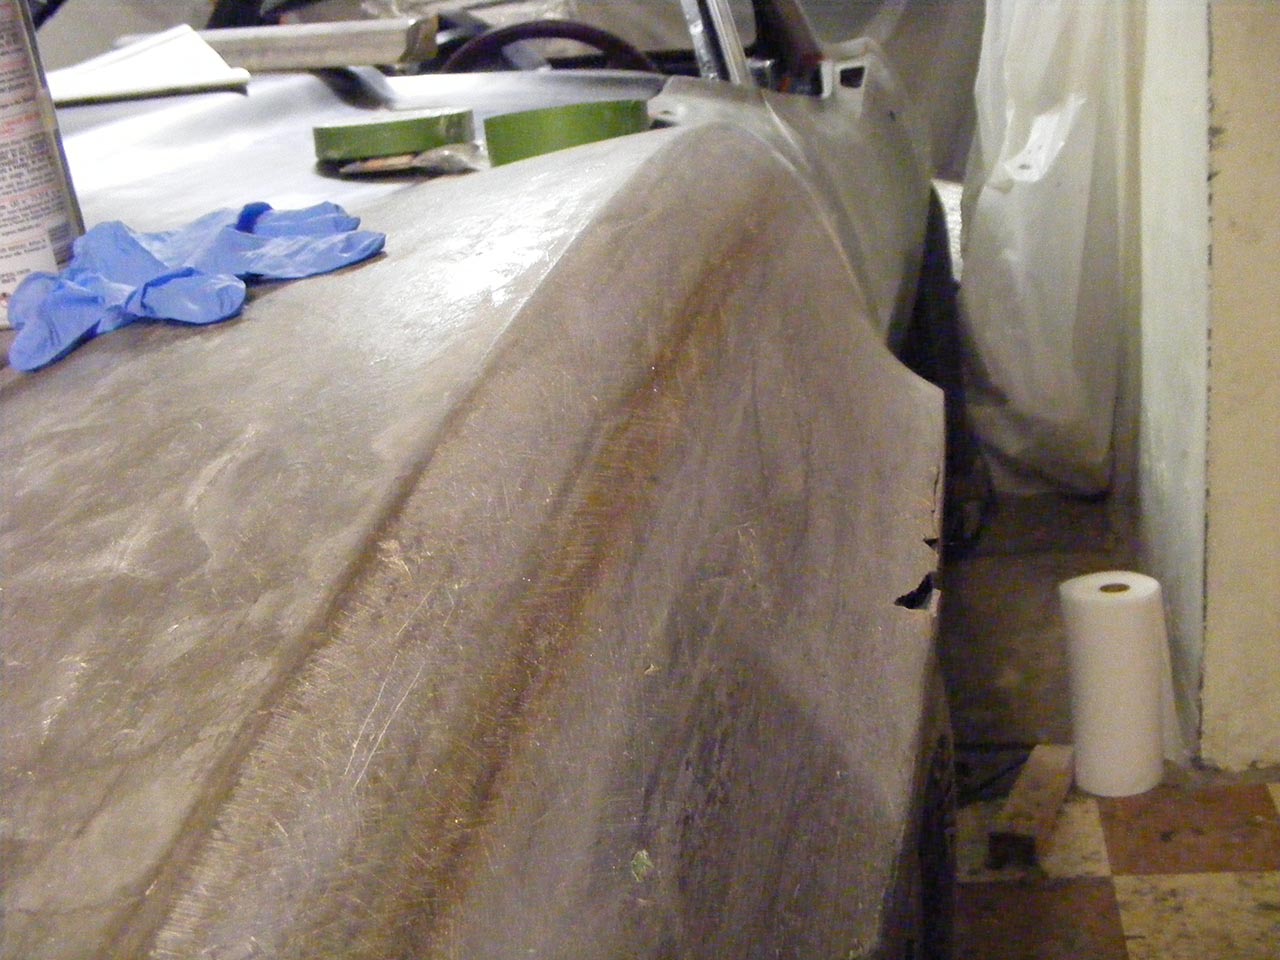
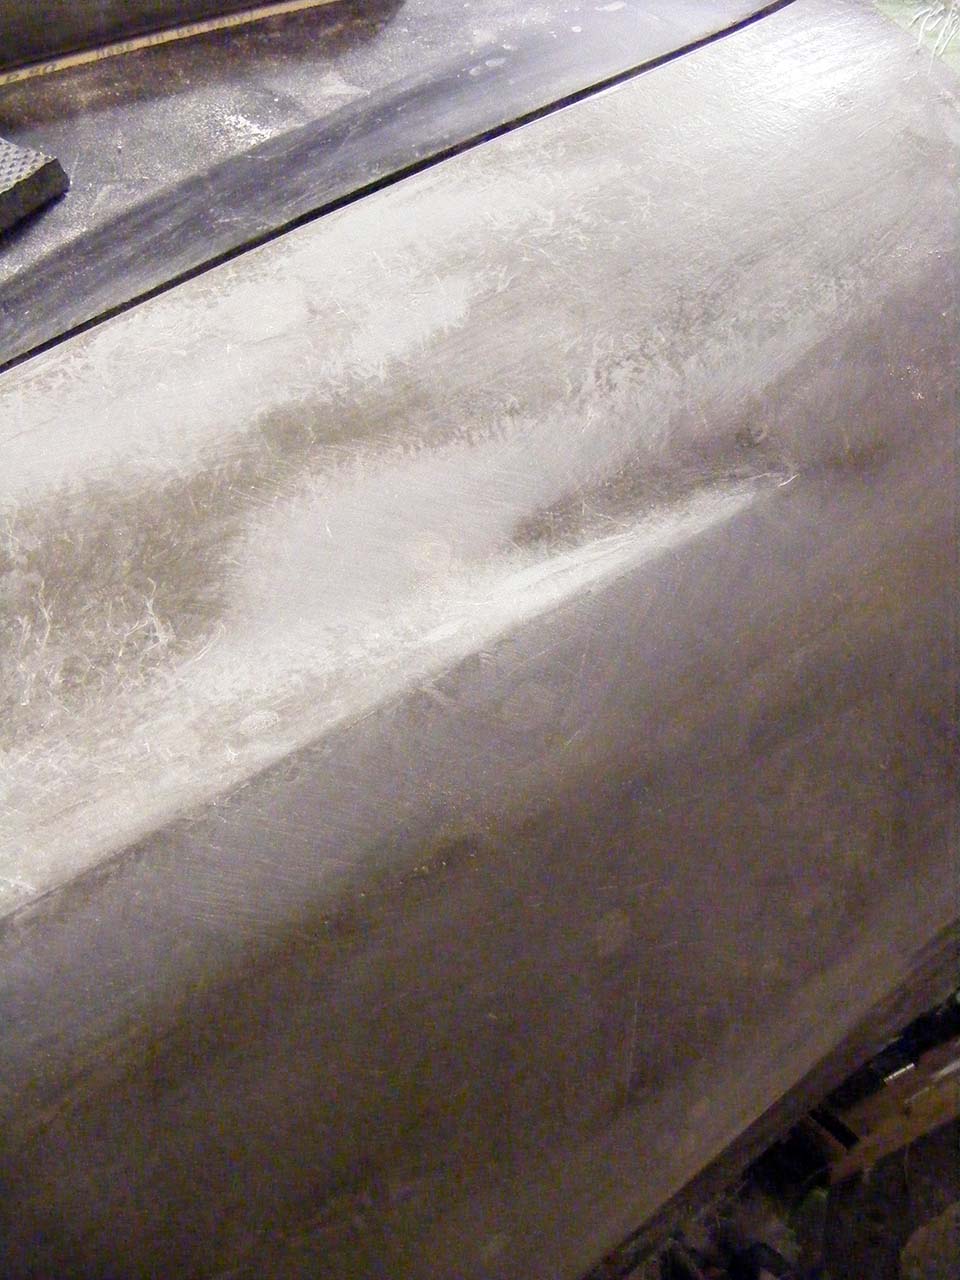
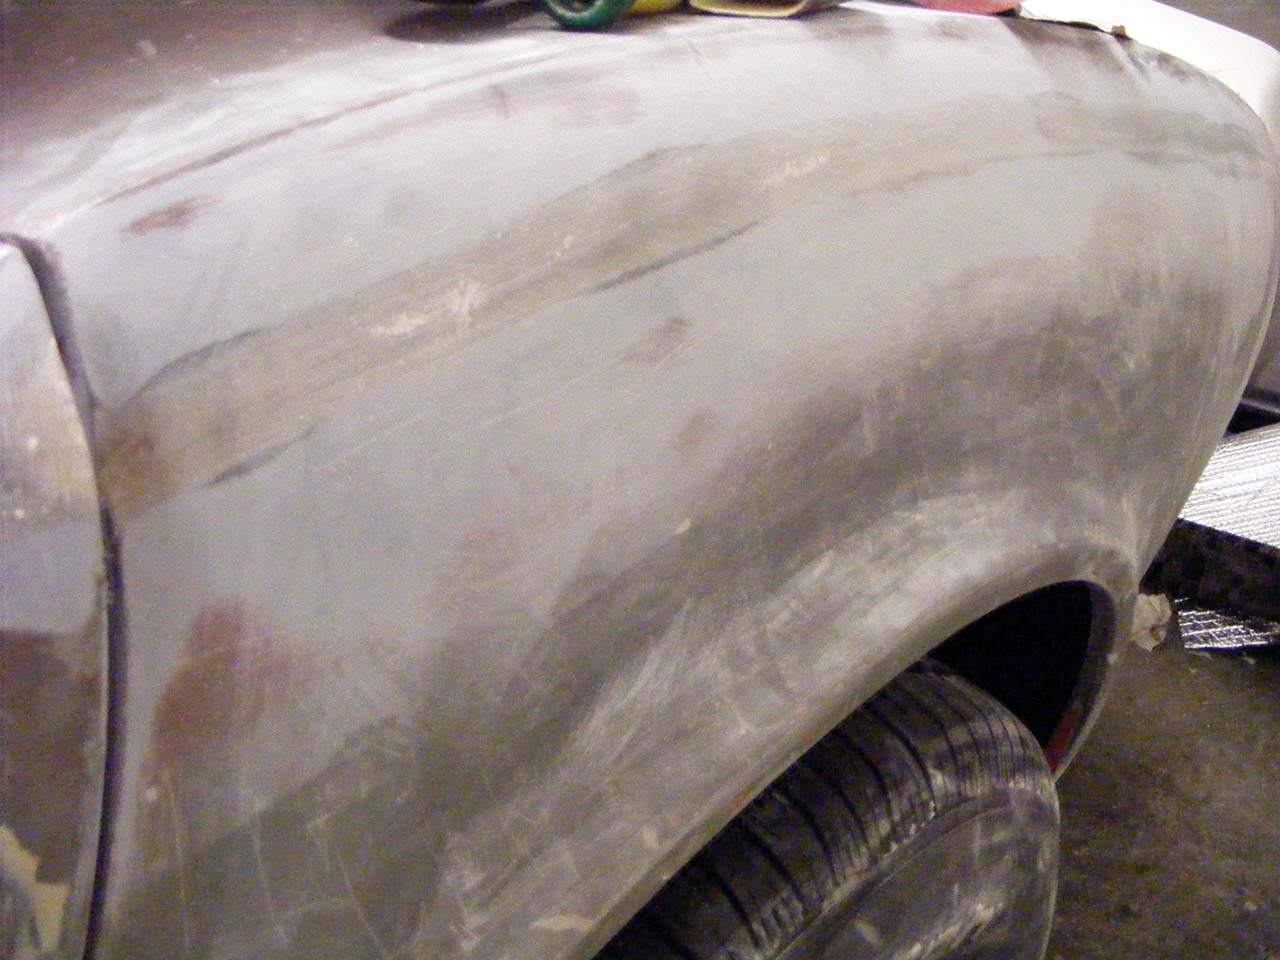
Front fender seam, passenger side, done :
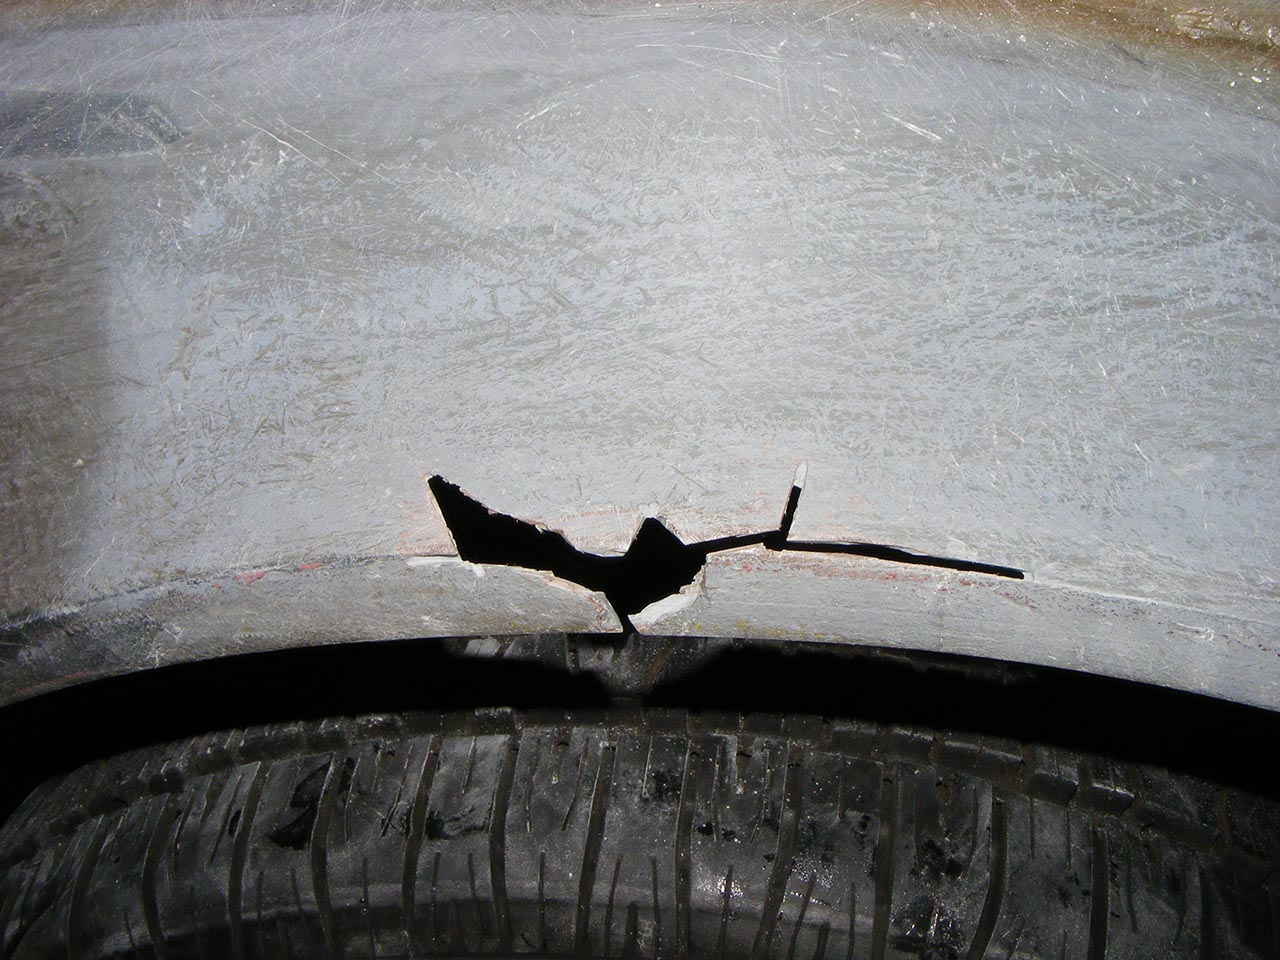
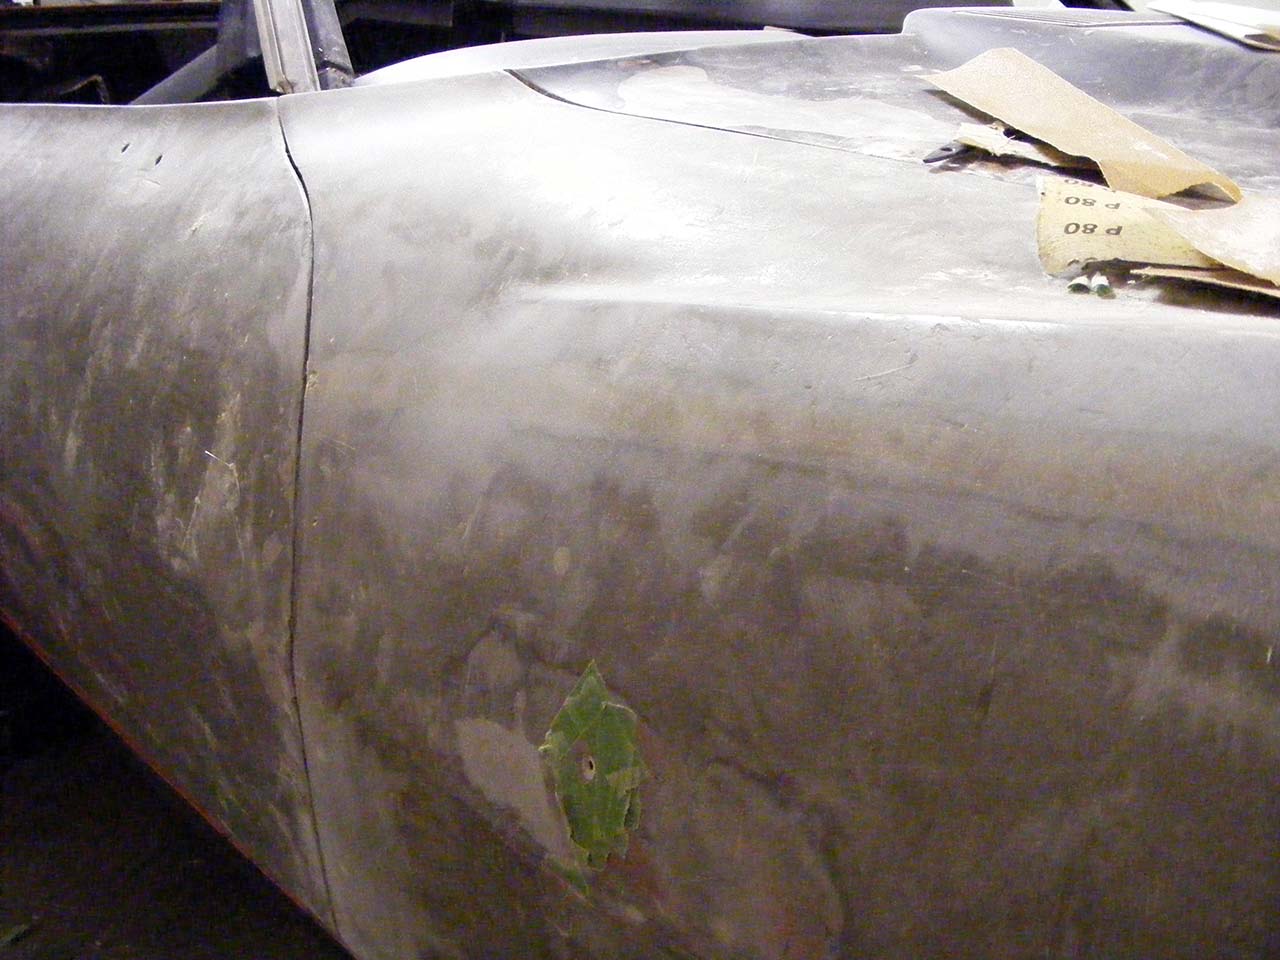
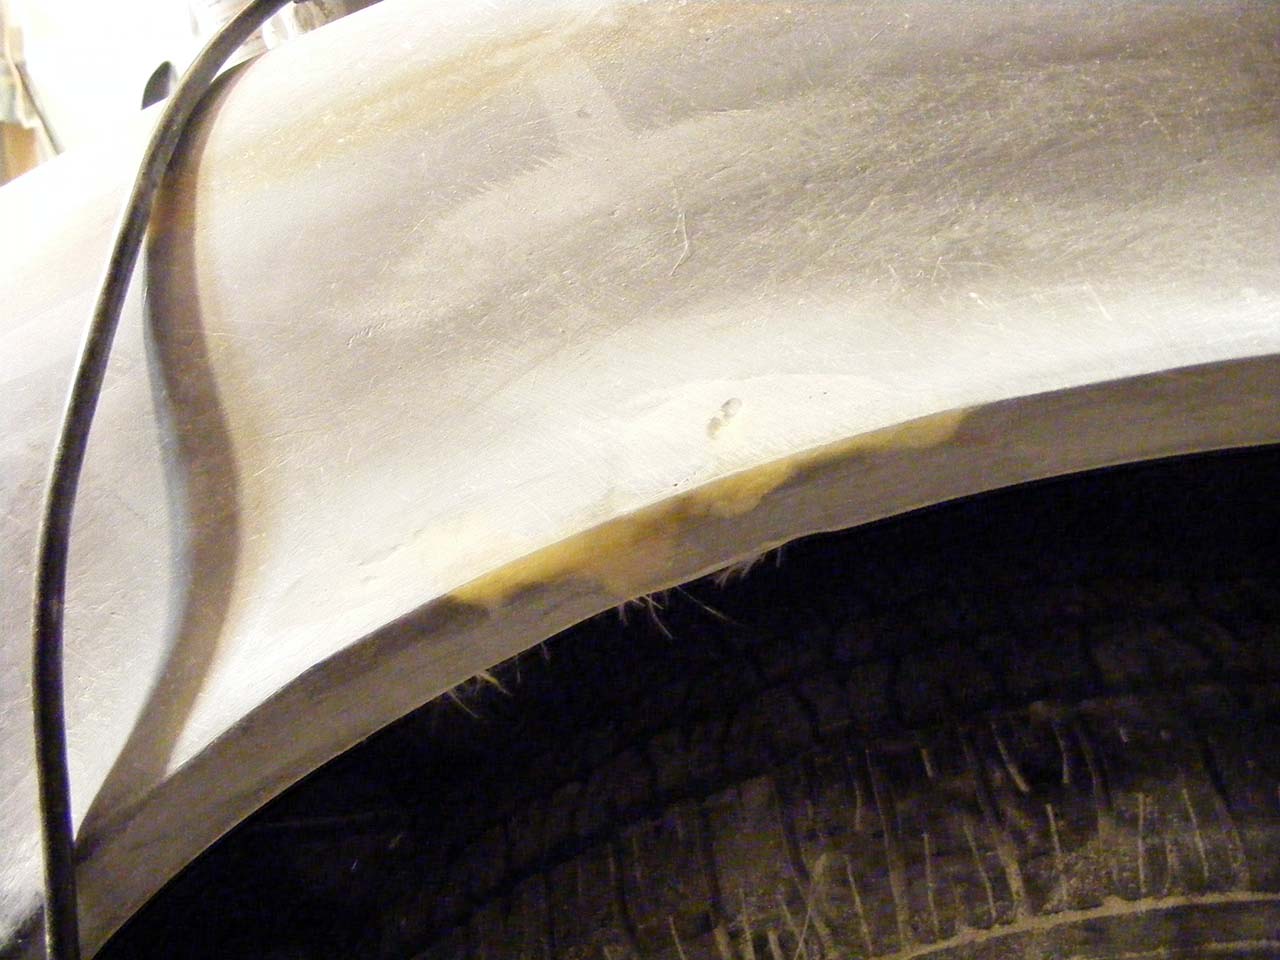
I started actual repairs, like this big scratch:
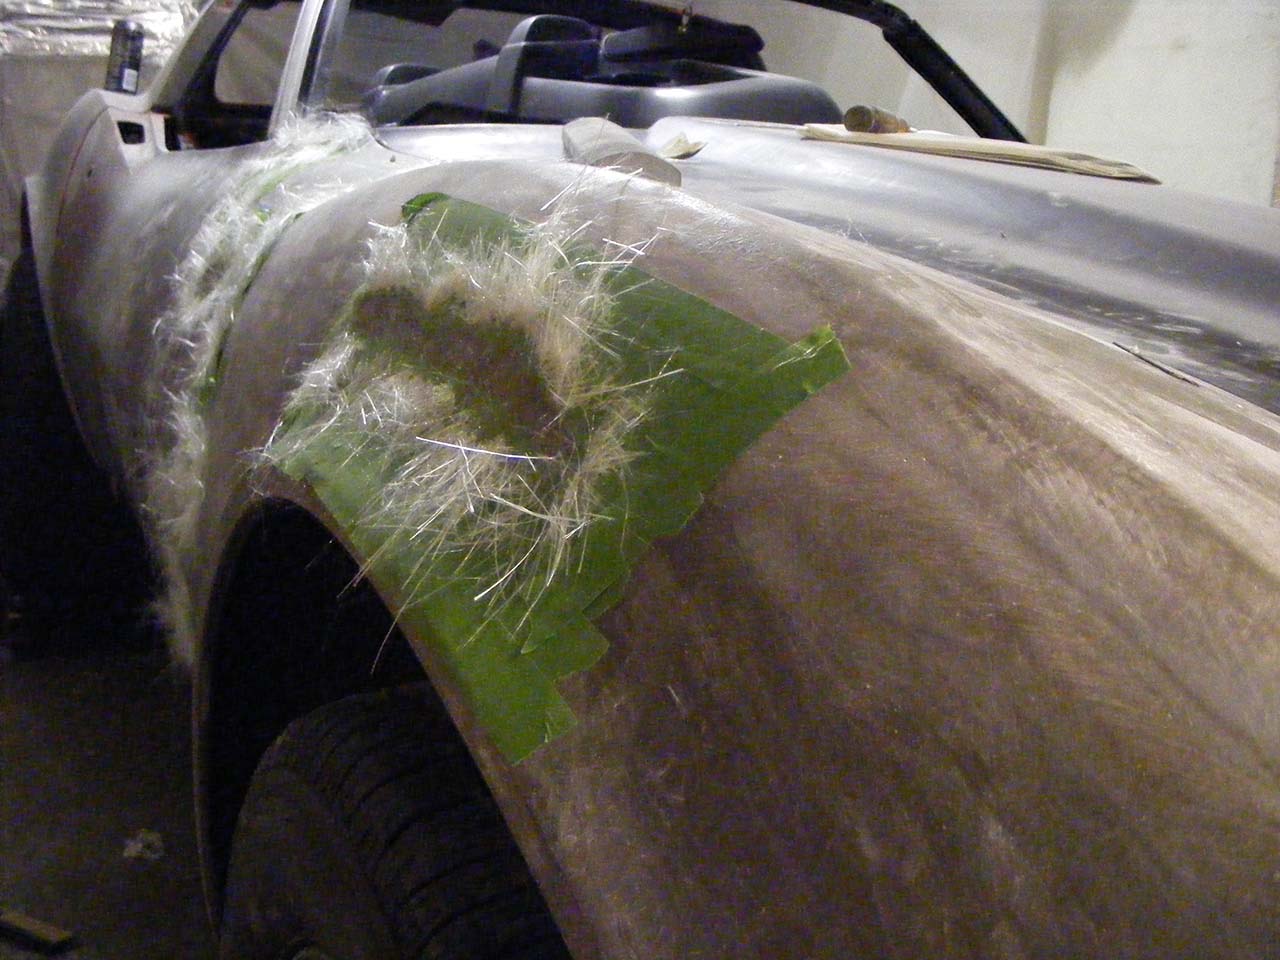
This parts was filled with bondo, ground it out, replace with fiberglass :
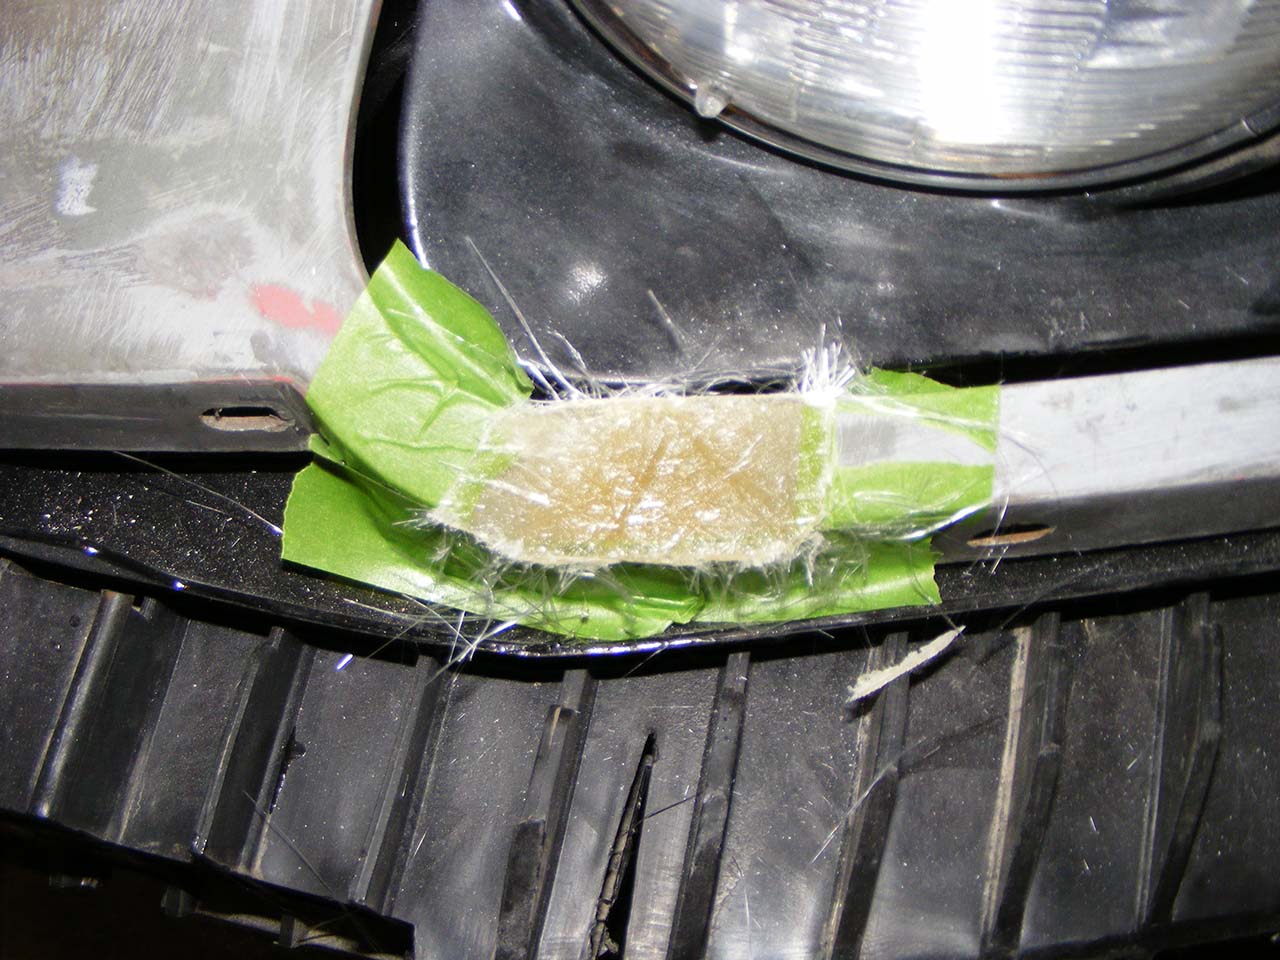
This one was cracked
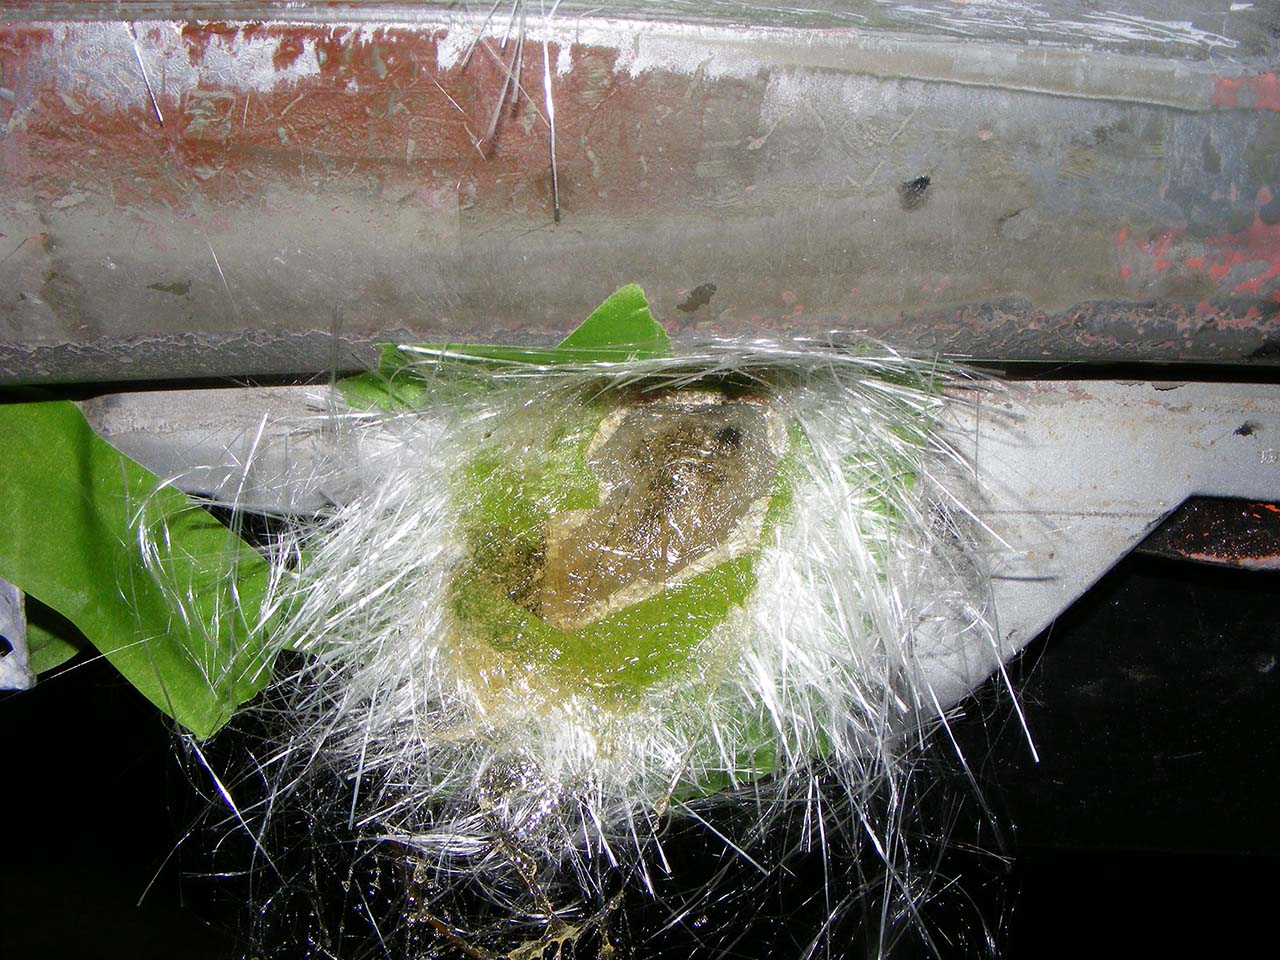
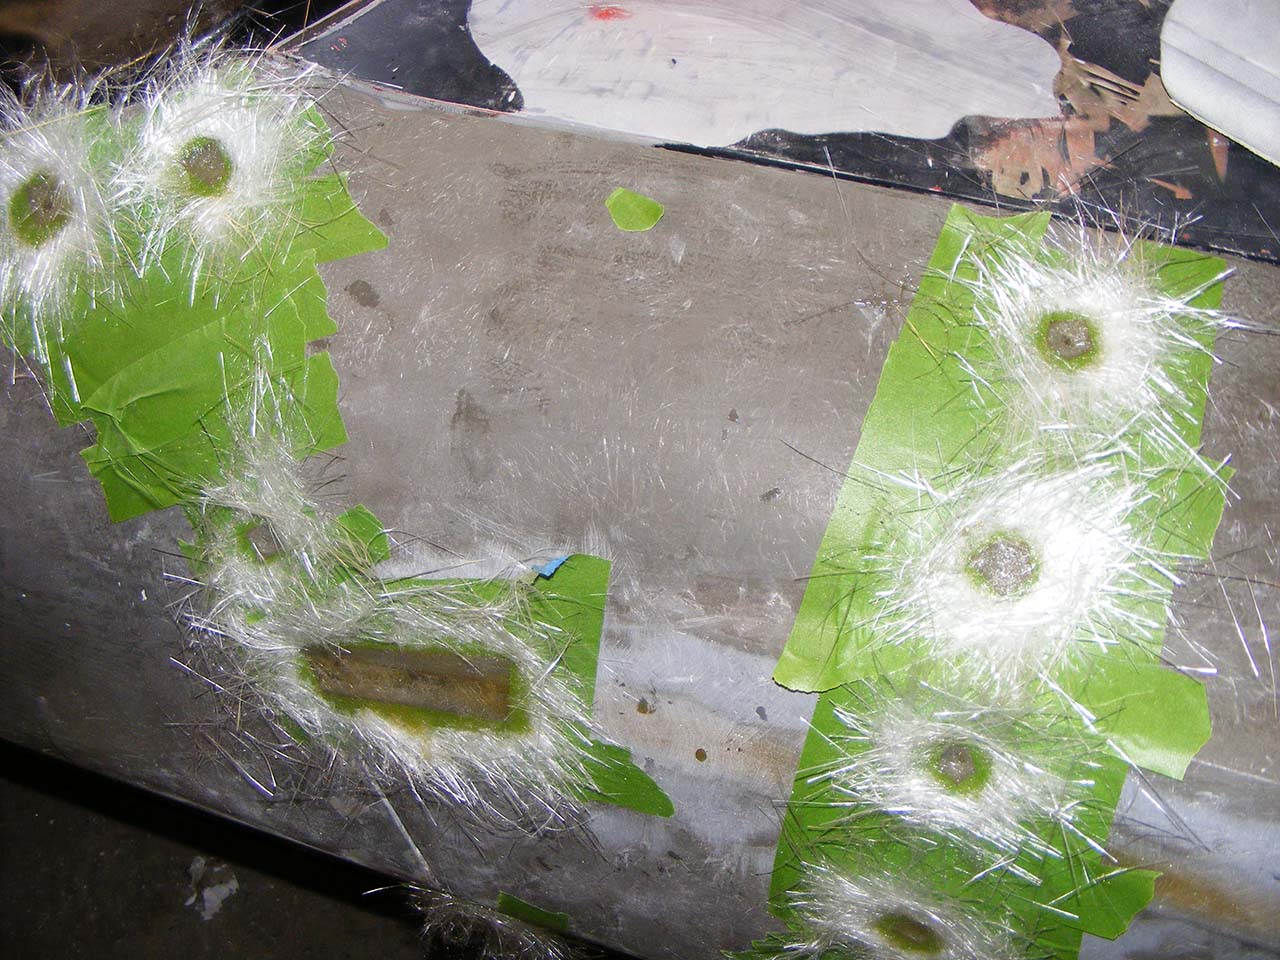
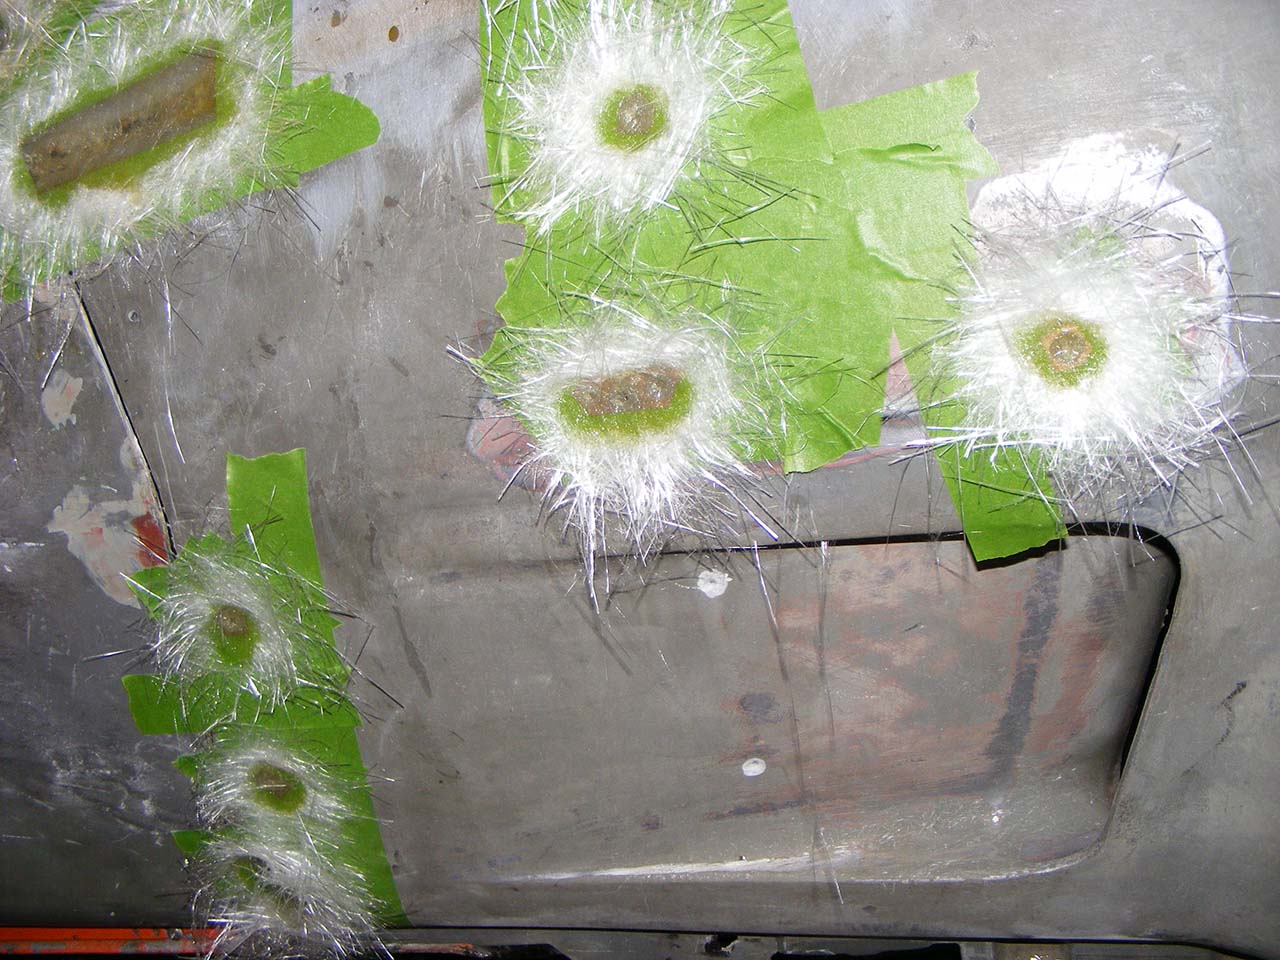
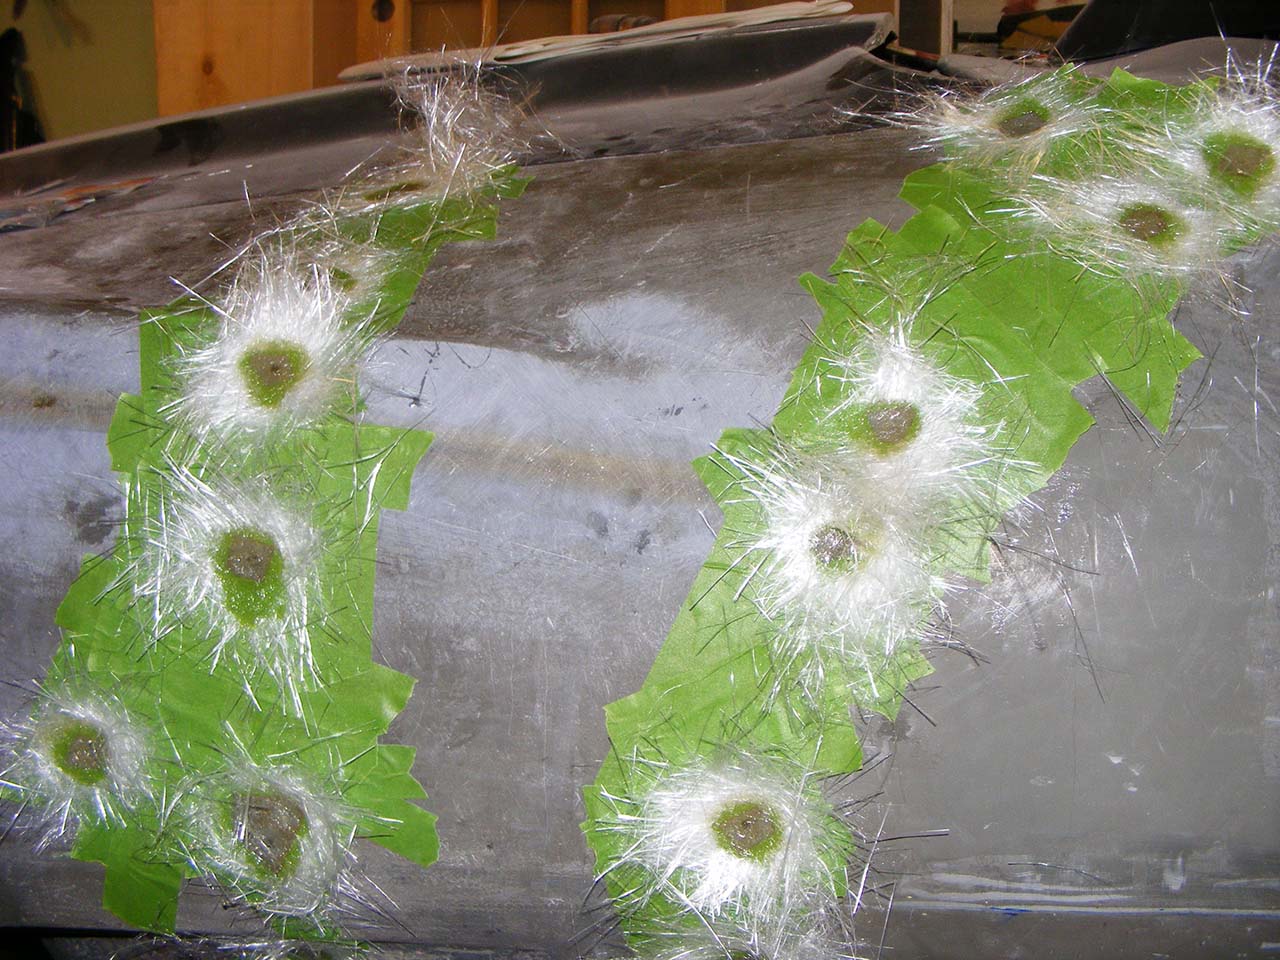
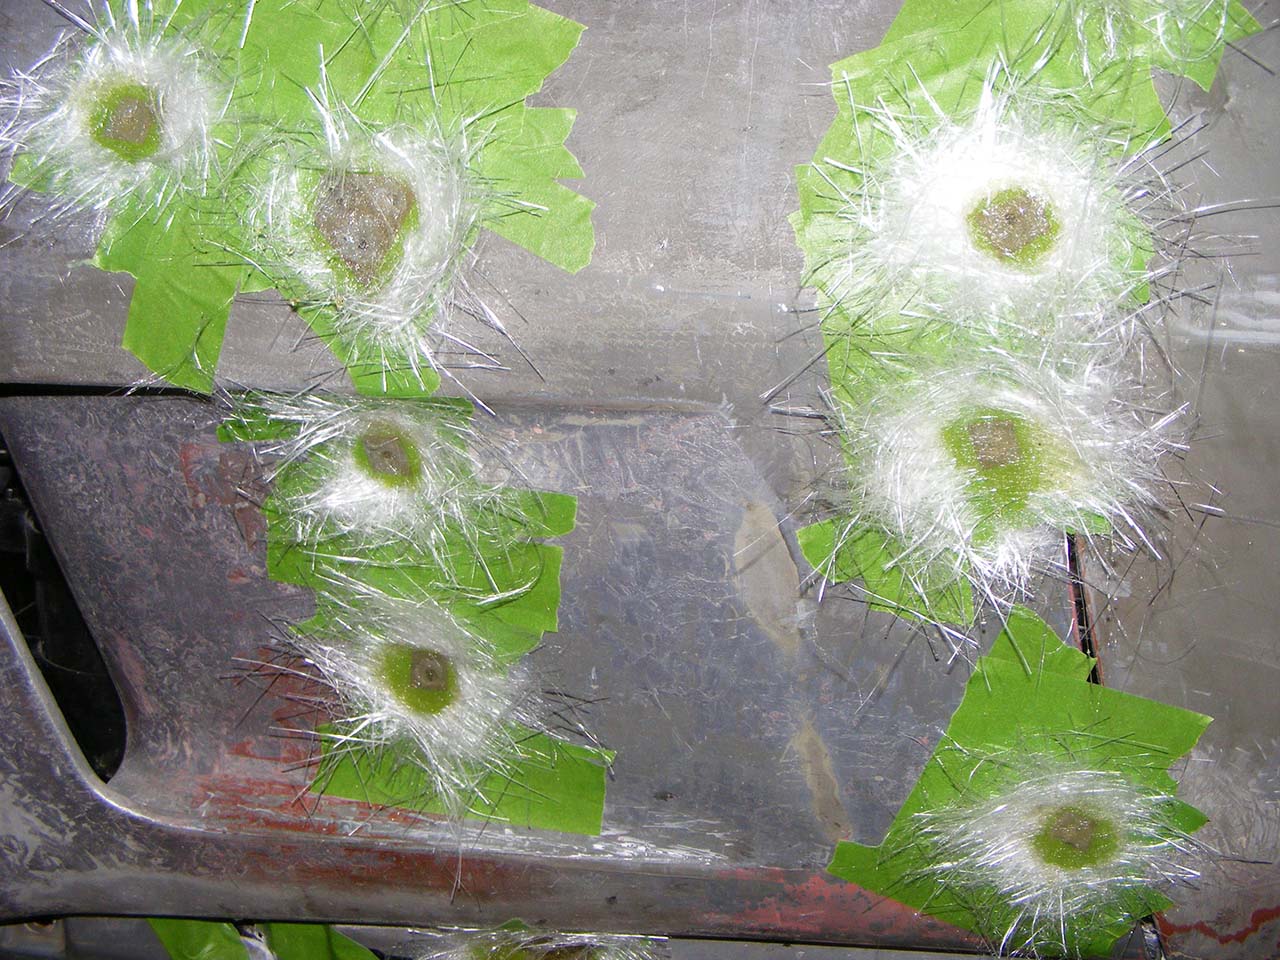
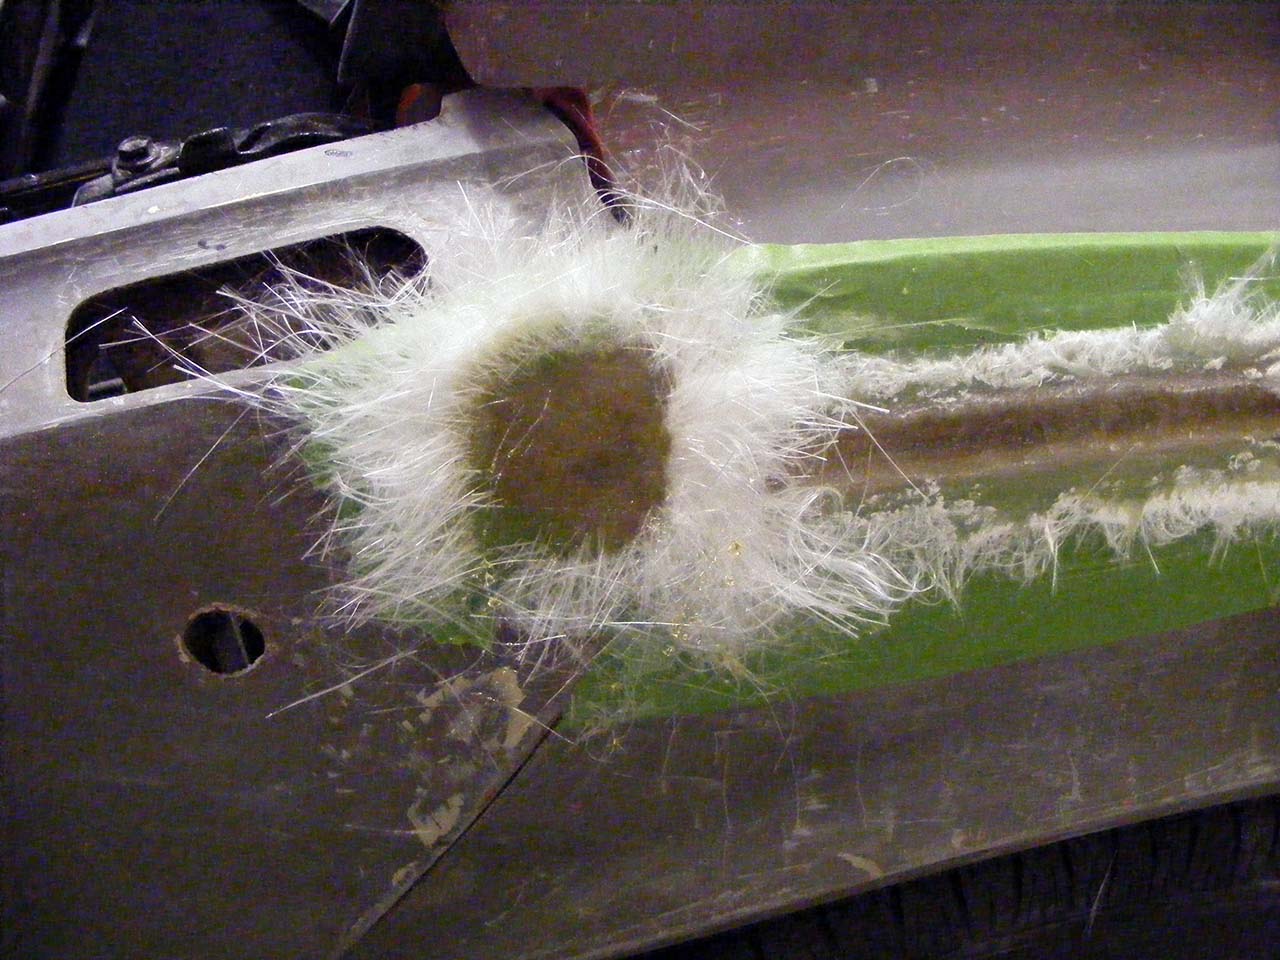
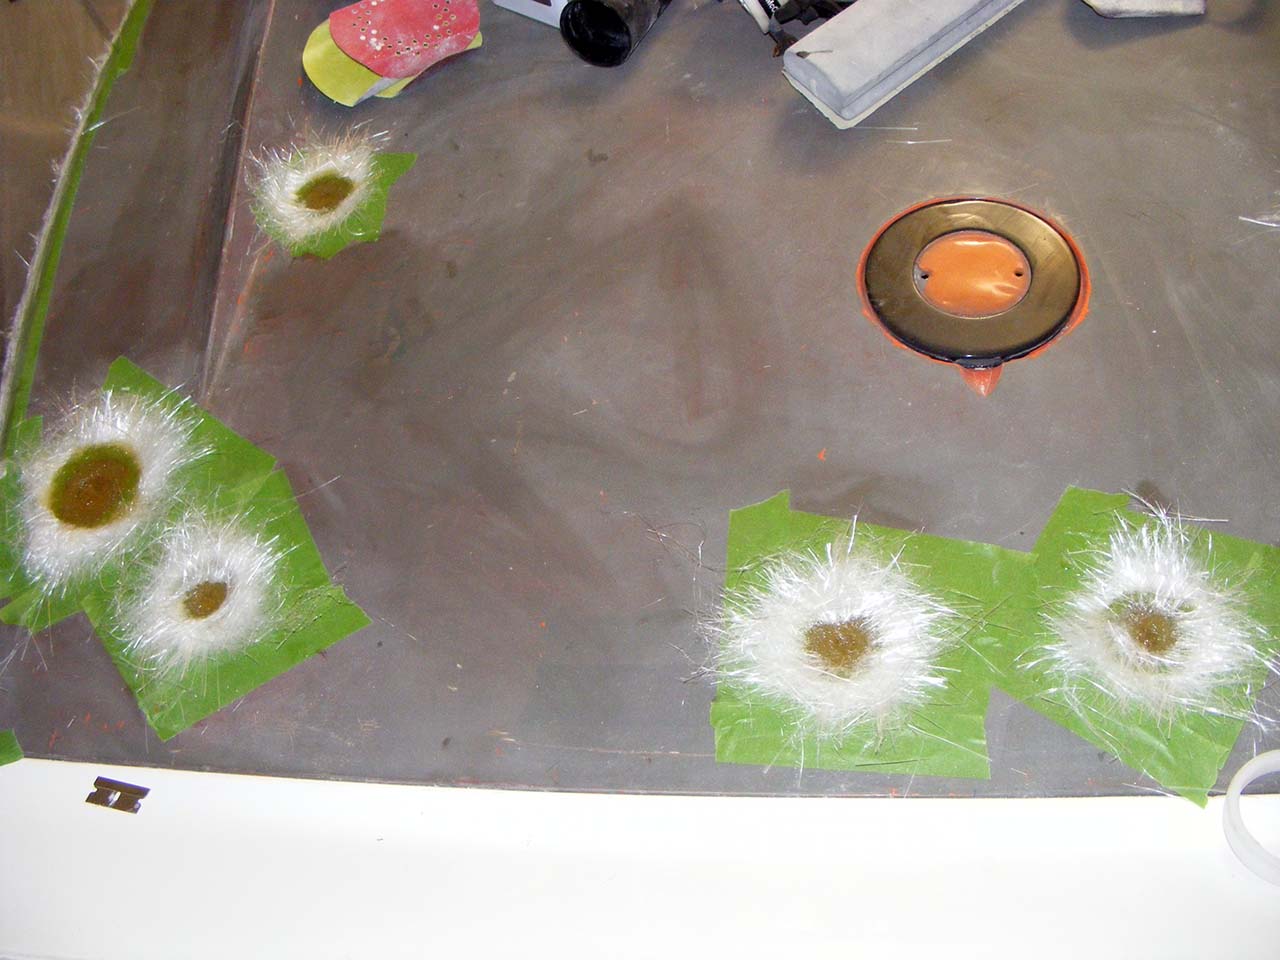
Now it's hole filling time !
Rear fender is ready for glassing
I'm moving really fast, and Sovan will come help me this week's evenings.
I expect the bulk of the bodywork to be done this week.
I started actual repairs, like this big scratch:
This parts was filled with bondo, ground it out, replace with fiberglass :
This one was cracked
Now it's hole filling time !
Rear fender is ready for glassing
I'm moving really fast, and Sovan will come help me this week's evenings.
I expect the bulk of the bodywork to be done this week.
Last edited by Denpo; 08-17-2017 at 11:13 PM.
 01-14-2013, 01:58 AM
#274
Drifting
Thread Starter
Member Since: Aug 2010
Location: Kanuckistan
Posts: 1,617
Received 127 Likes
on
68 Posts
2022 C3 of the Year Finalist - Modified
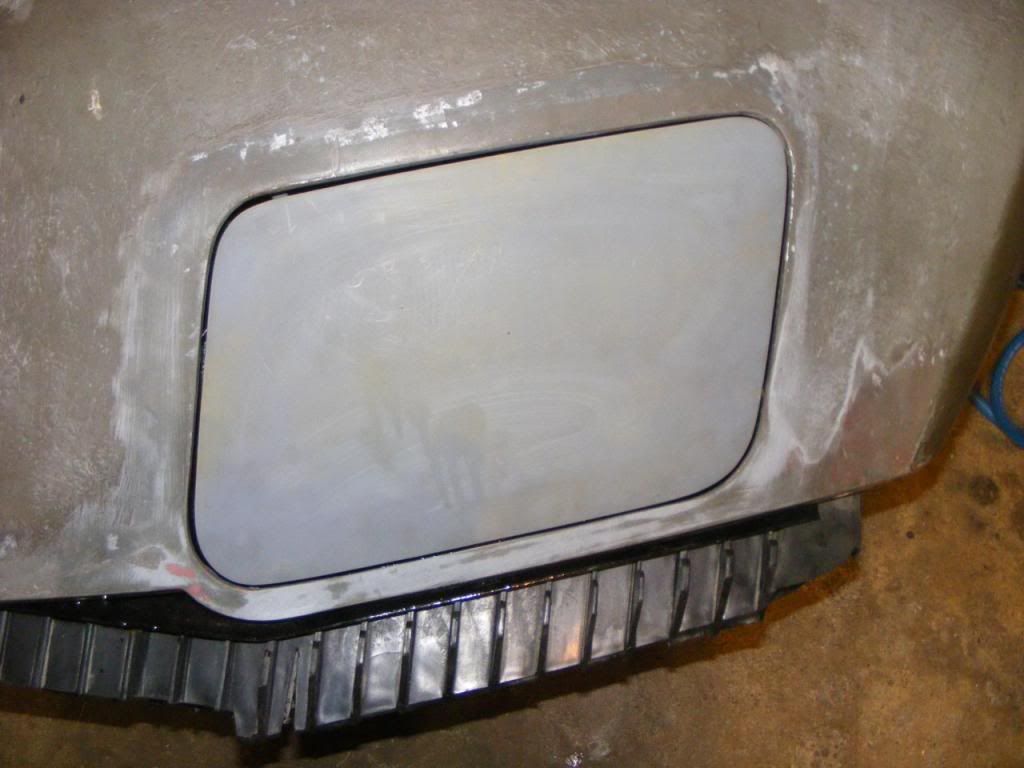
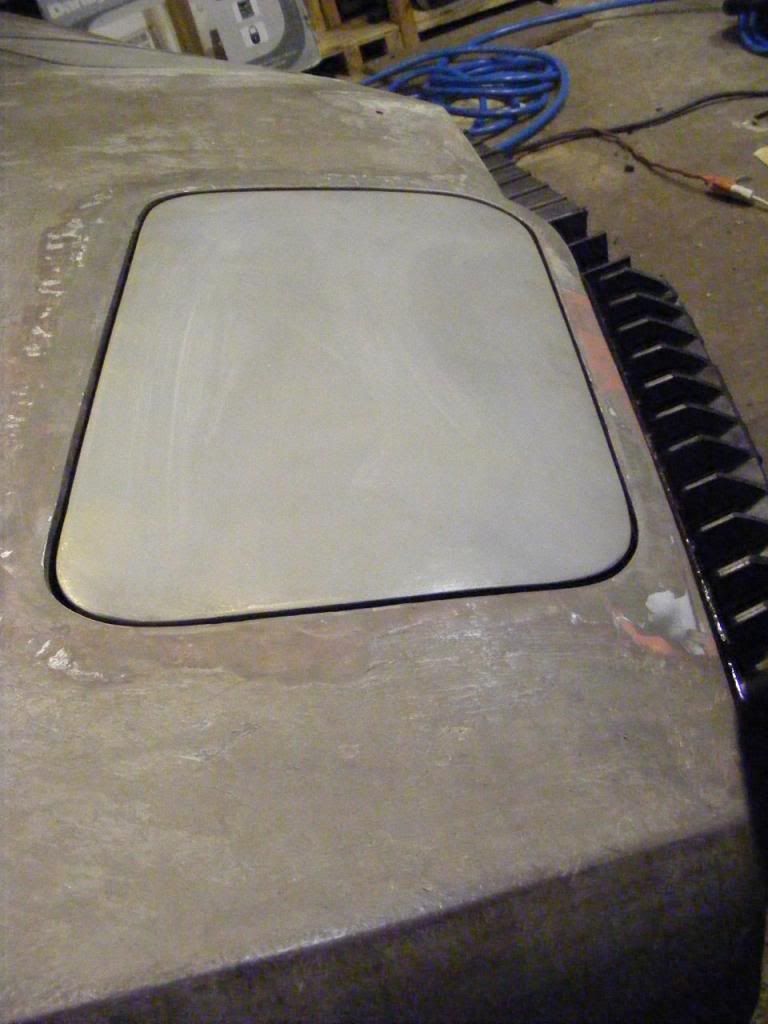
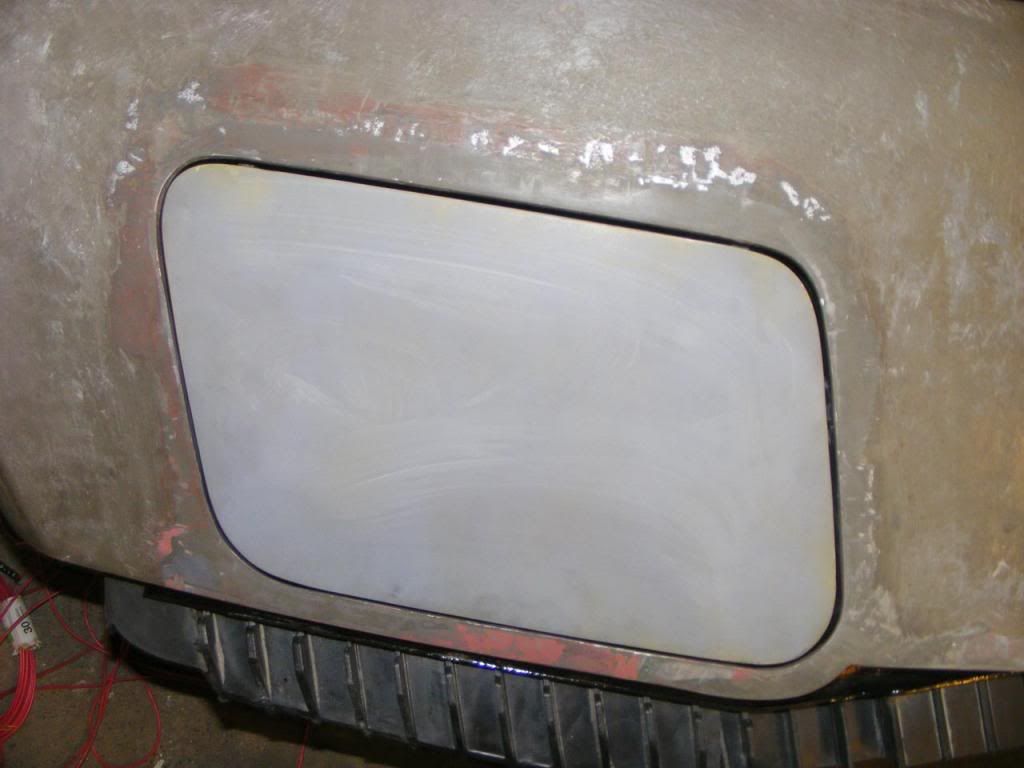
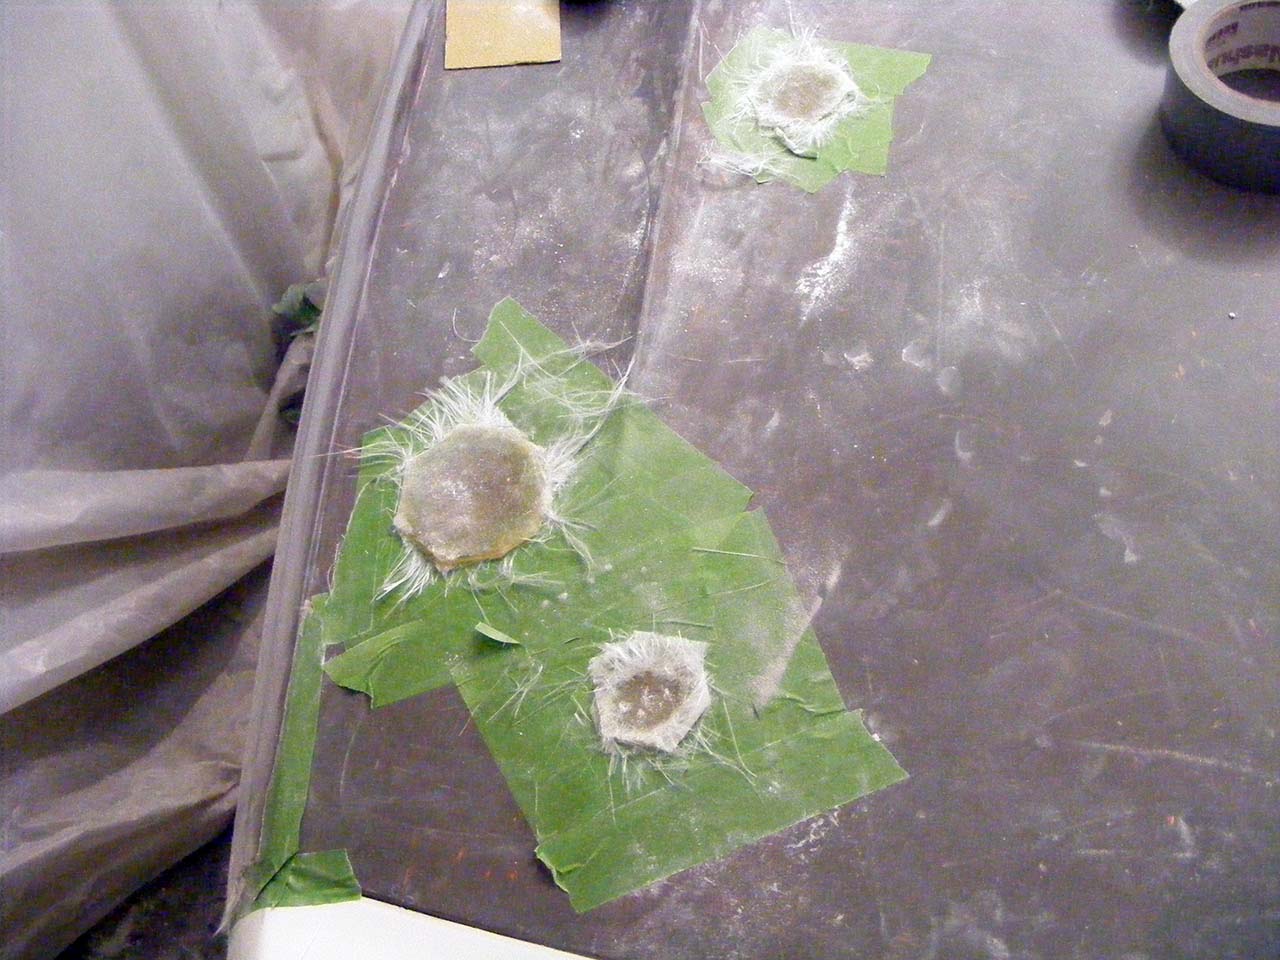
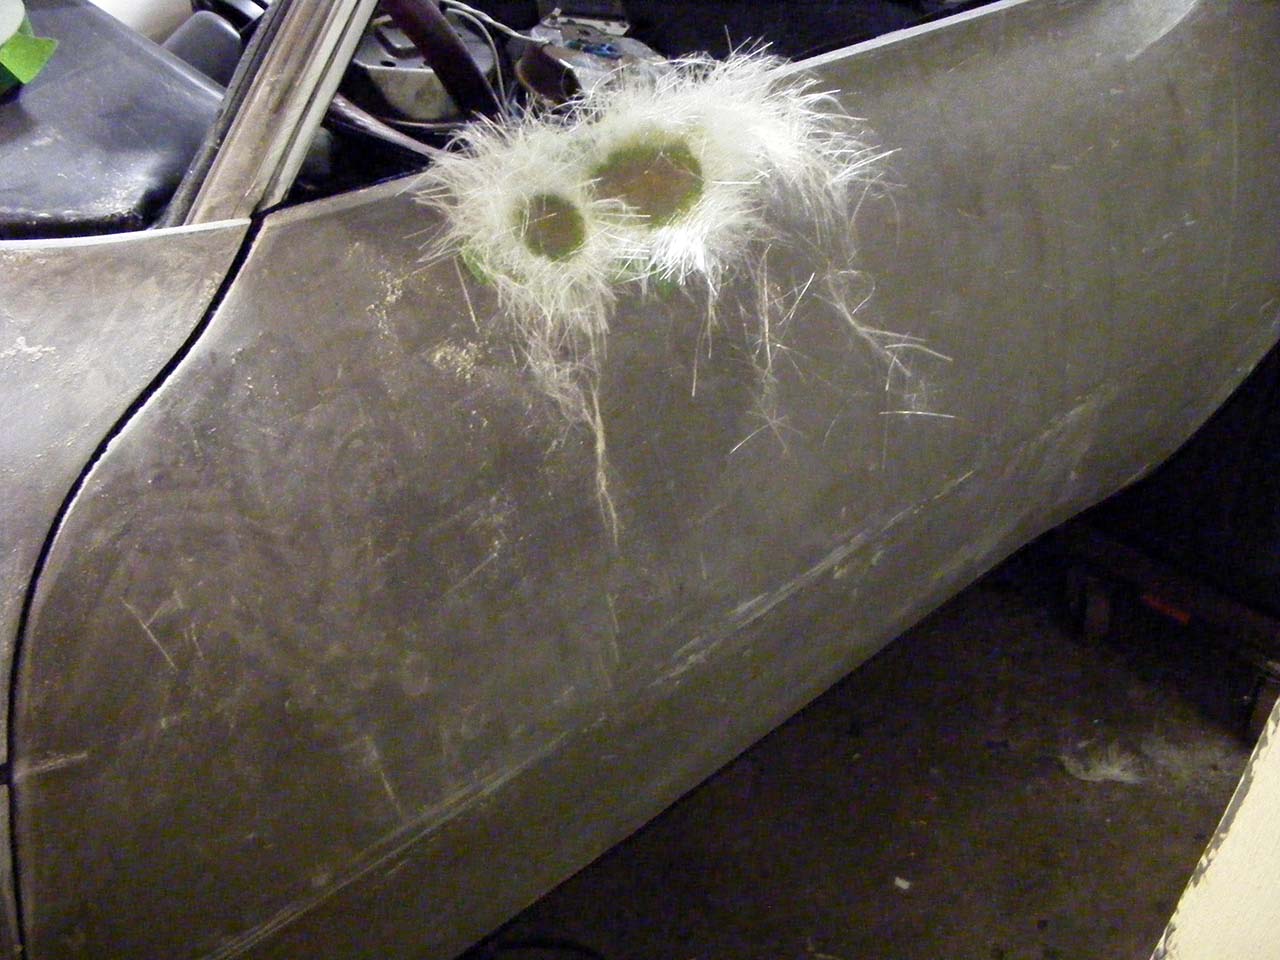
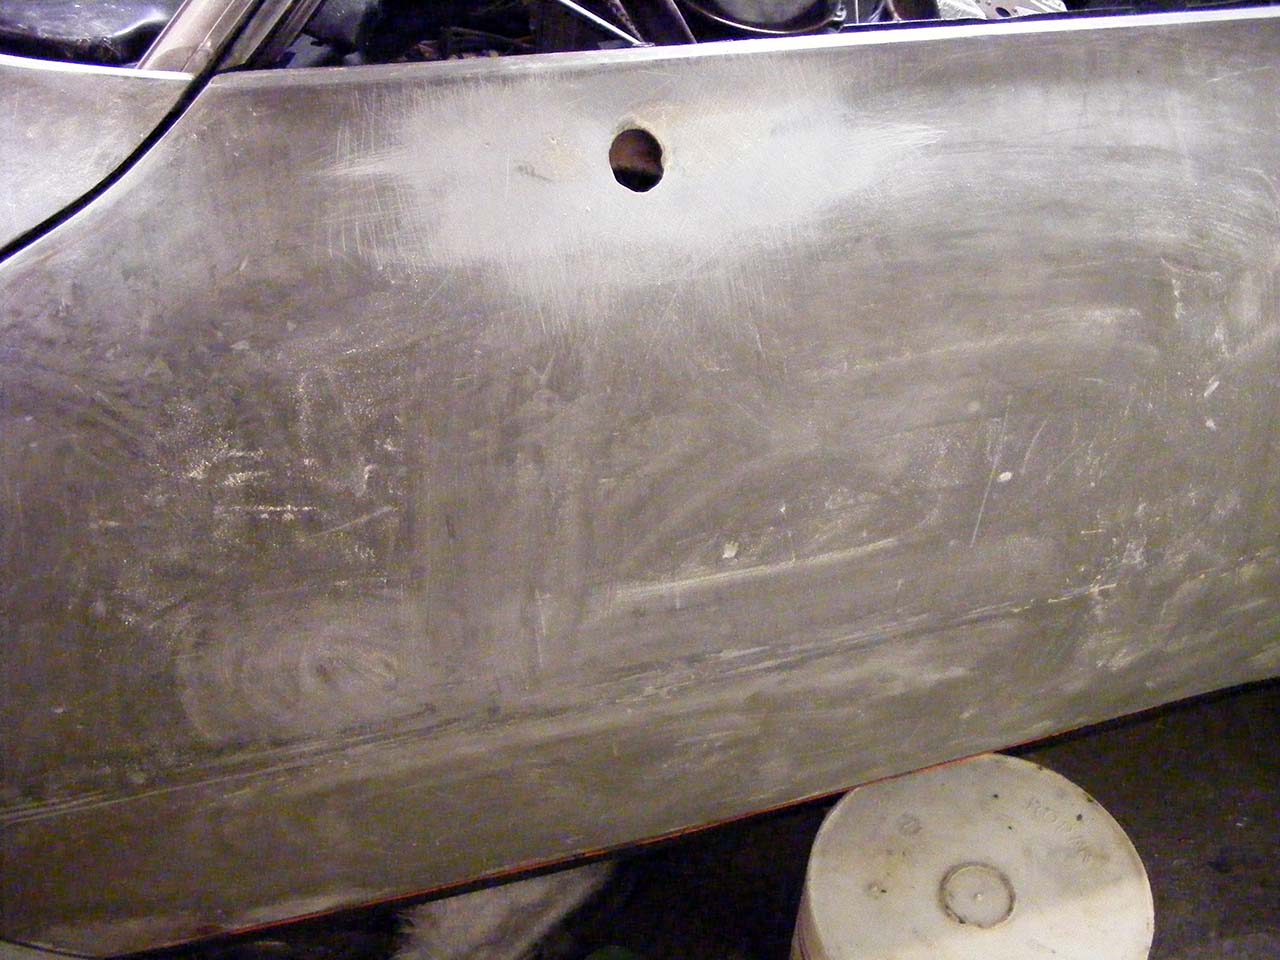
(Almost all) fender holes glassed
The fender crack repair is on its way, still need some work to get the wheel arch right.
The rear fenders will get sanded tomorrow
Next in line to be glassed off : T-top carrier, antenna and mirrors holes.
The fender crack repair is on its way, still need some work to get the wheel arch right.
The rear fenders will get sanded tomorrow
Next in line to be glassed off : T-top carrier, antenna and mirrors holes.
Last edited by Denpo; 08-17-2017 at 11:15 PM.
01-14-2013, 02:02 AM
#275
Drifting
Member Since: Jun 2011
Location: iowa city iowa
Posts: 1,540
Received 253 Likes
on
139 Posts
2020 Corvette of the Year Finalist (appearance mods)
C3 of Year Winner (appearance mods) 2019
Lookin' good. I have a full week of glassin' on mine ahead of me too. I am getting used to itchin' at night.
Keep up the good work.
Keep up the good work.
01-14-2013, 02:16 AM
#276
Drifting
Thread Starter
Member Since: Aug 2010
Location: Kanuckistan
Posts: 1,617
Received 127 Likes
on
68 Posts
2022 C3 of the Year Finalist - Modified

One of my finger feels weird when I try to close it and I have a painfull blister in a palm, but that won't stop me.
Thanks and have fun with your glassing week too.
 01-14-2013, 09:32 AM
#277
Racer

1. Rub down with baby powder before glassing.
2. If you do happen to get a splinter, remove it with duct tape.
Made work much easier...
01-14-2013, 05:03 PM
#278
Drifting
Thread Starter
Member Since: Aug 2010
Location: Kanuckistan
Posts: 1,617
Received 127 Likes
on
68 Posts
2022 C3 of the Year Finalist - Modified
I wear have a full face 3M mask, an old hoodie and disposable gloves, so I don't get that much in contact with the nasty.
01-16-2013, 03:16 AM
#279
Drifting
Thread Starter
Member Since: Aug 2010
Location: Kanuckistan
Posts: 1,617
Received 127 Likes
on
68 Posts
2022 C3 of the Year Finalist - Modified
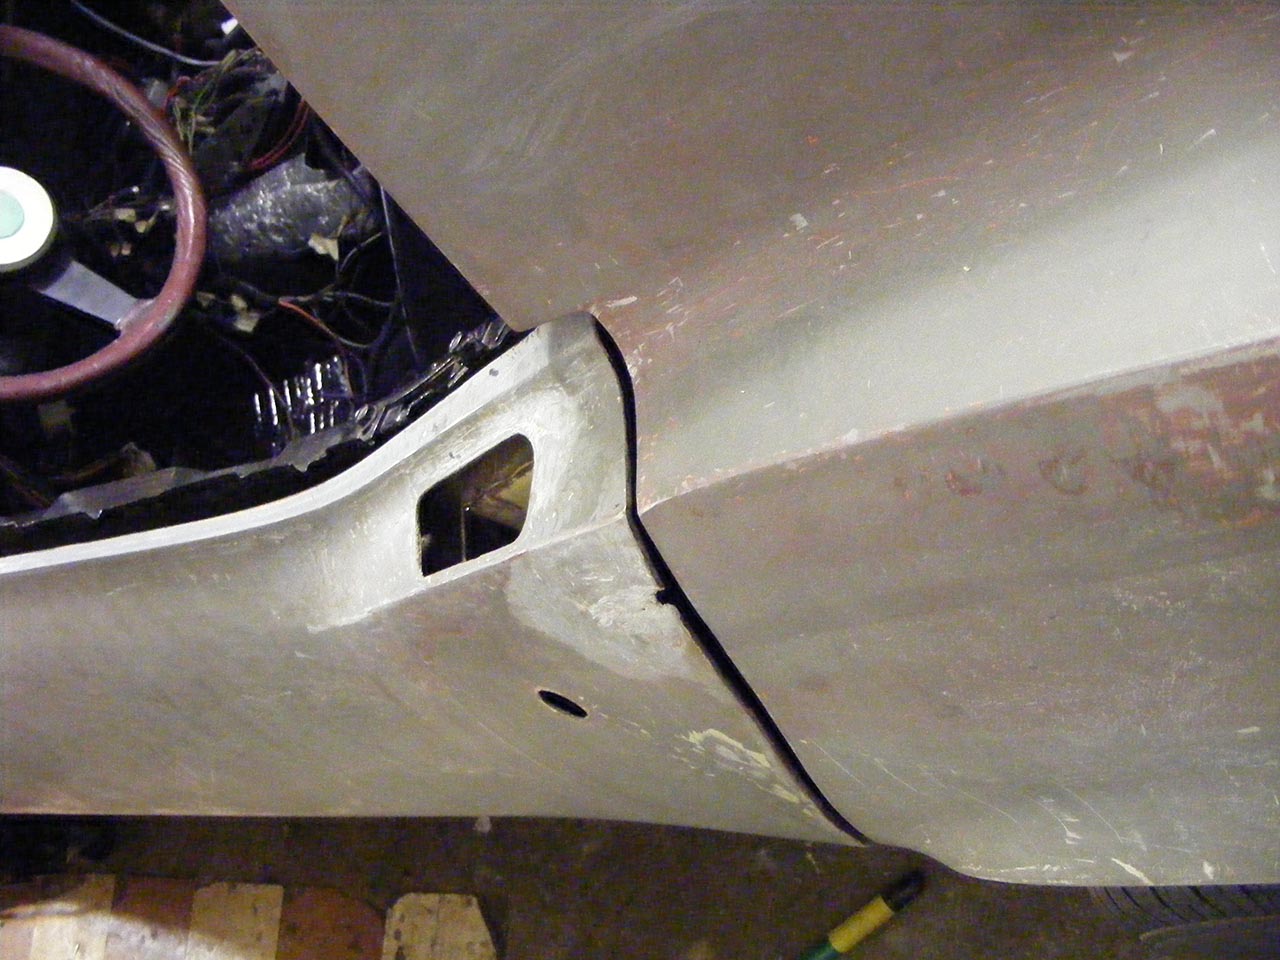
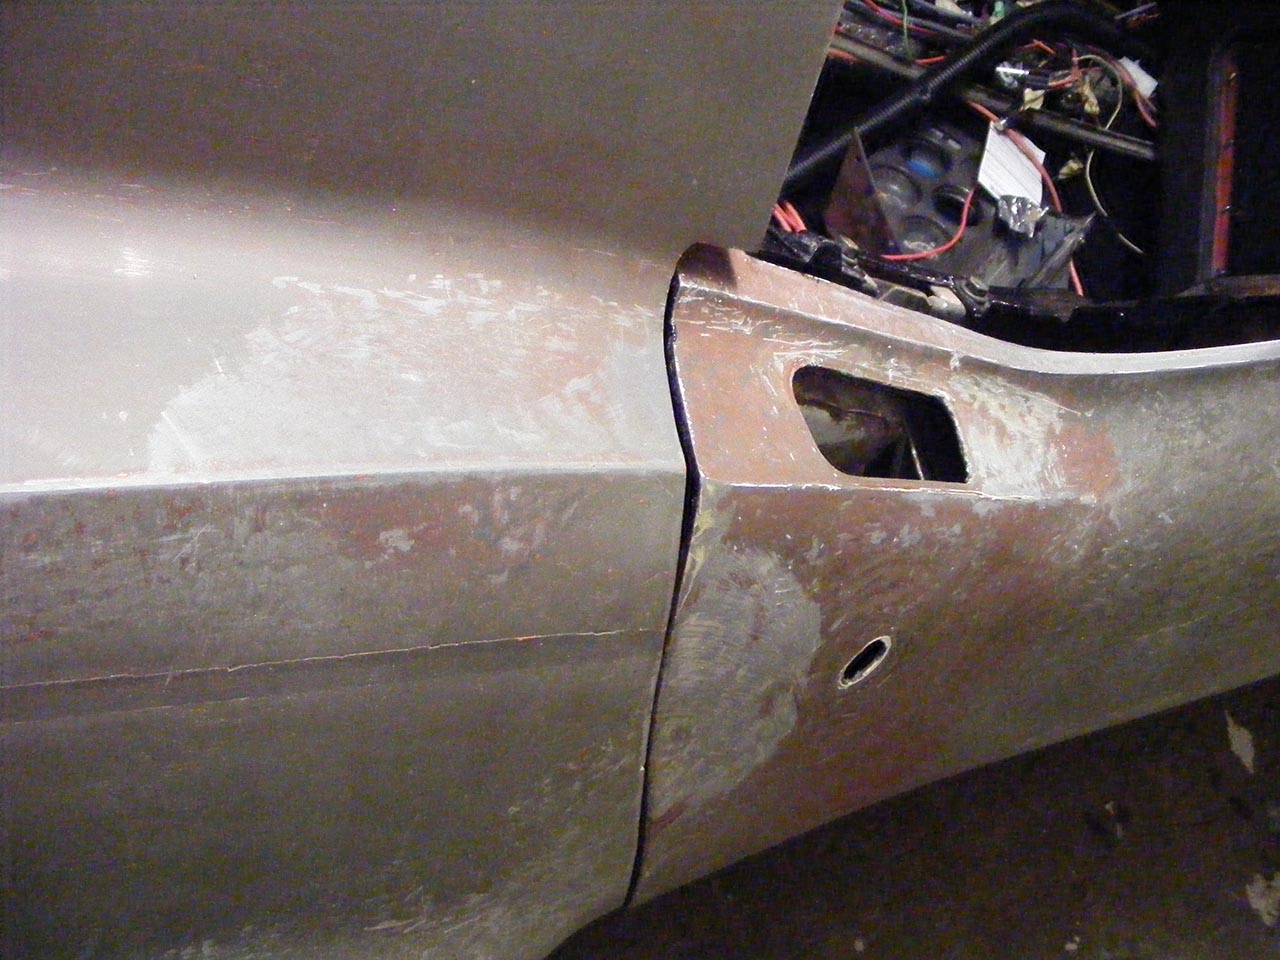
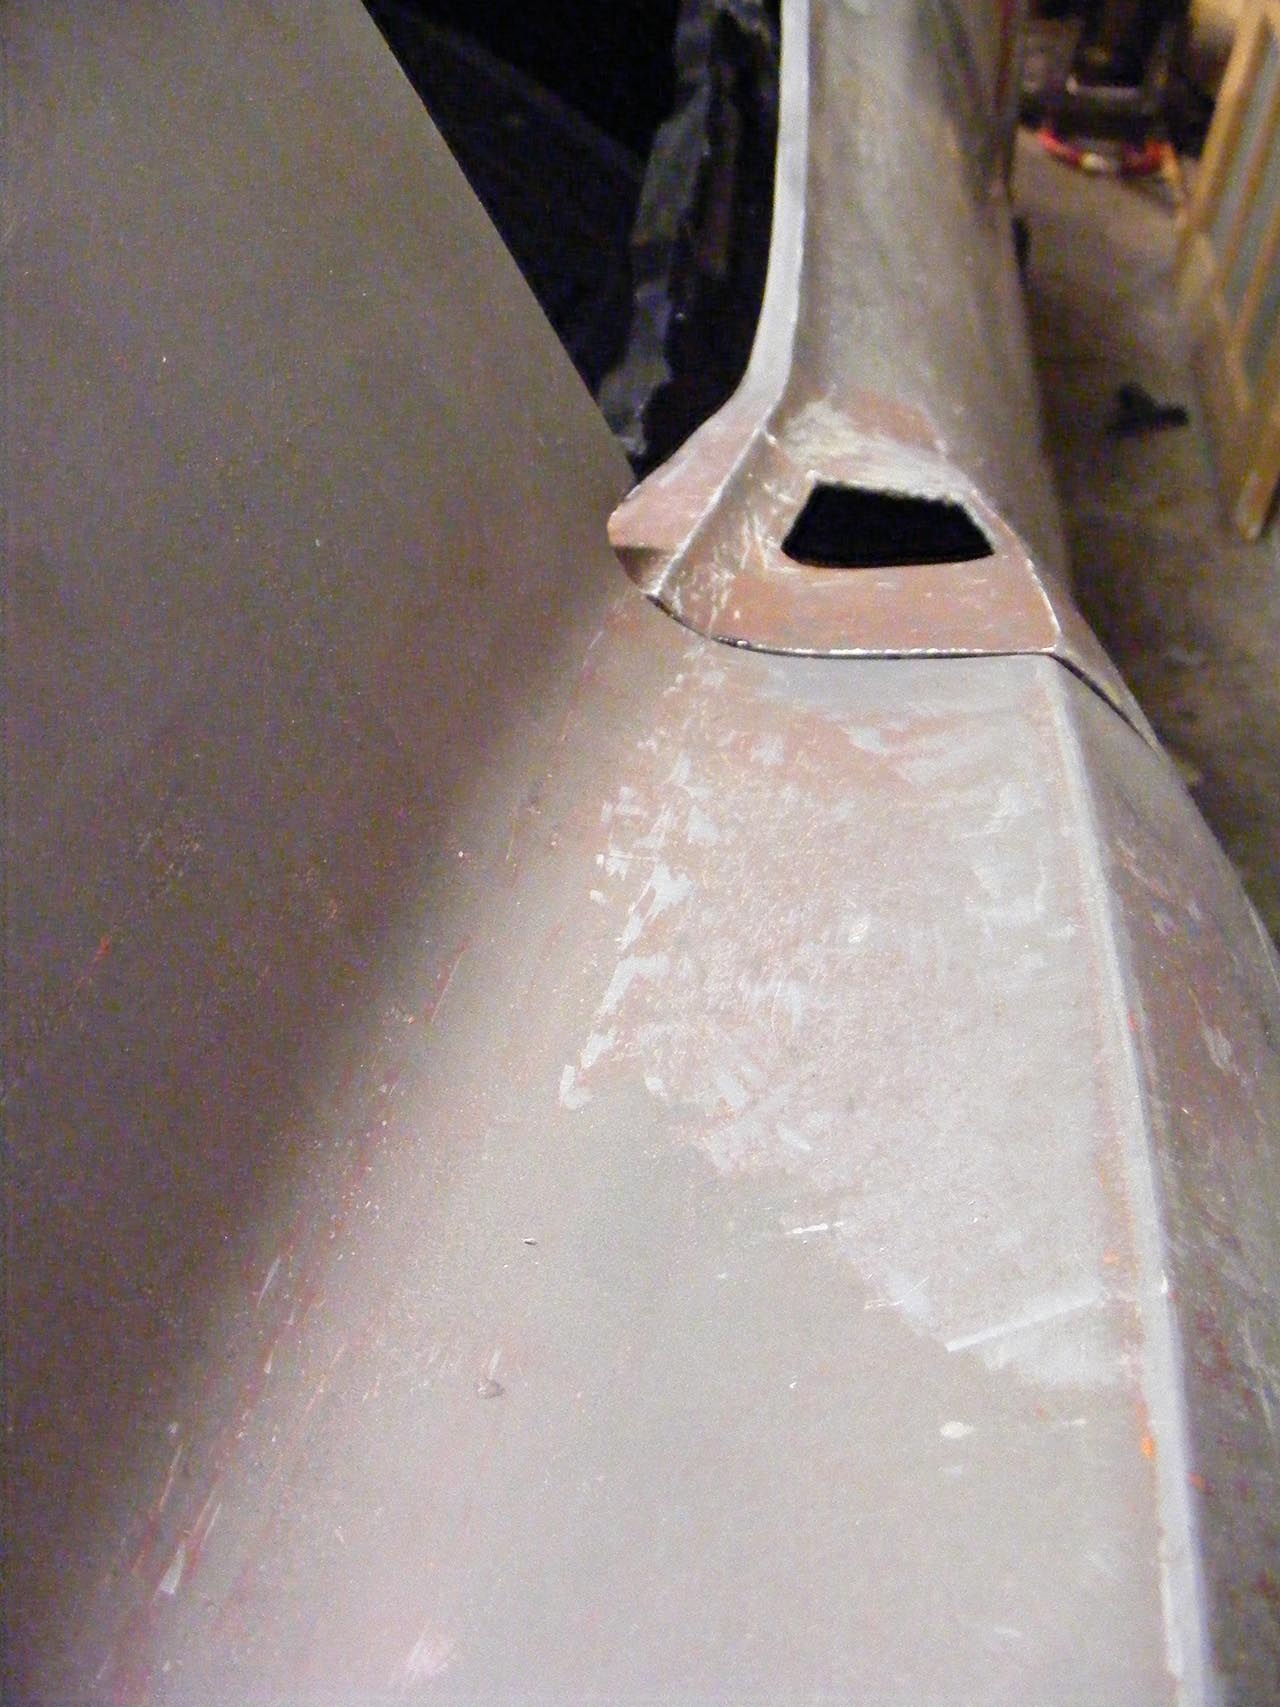
Repair of the corner of the door :
Rear seams done :
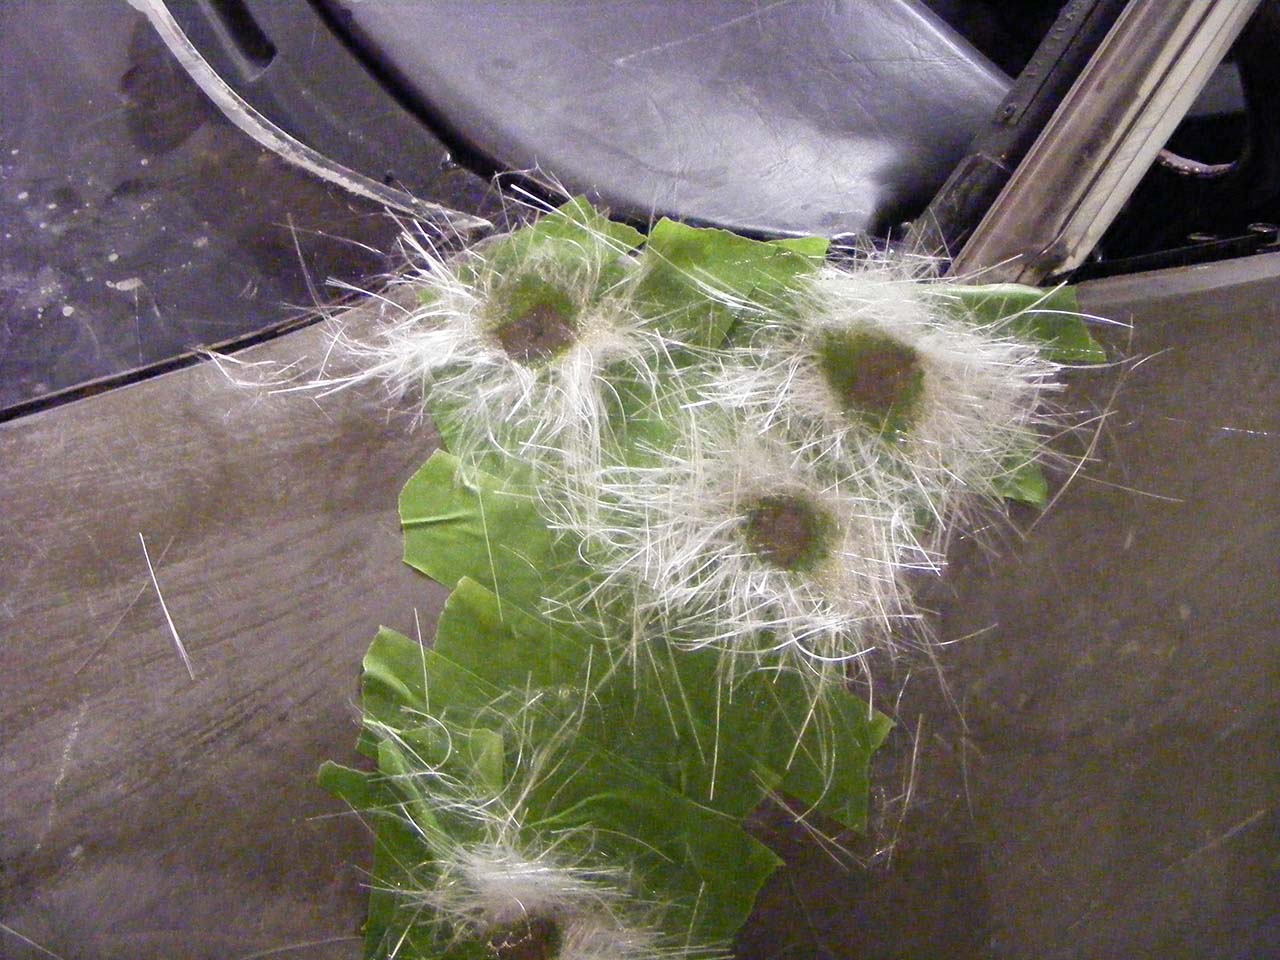
Taking care of rear deck holes :
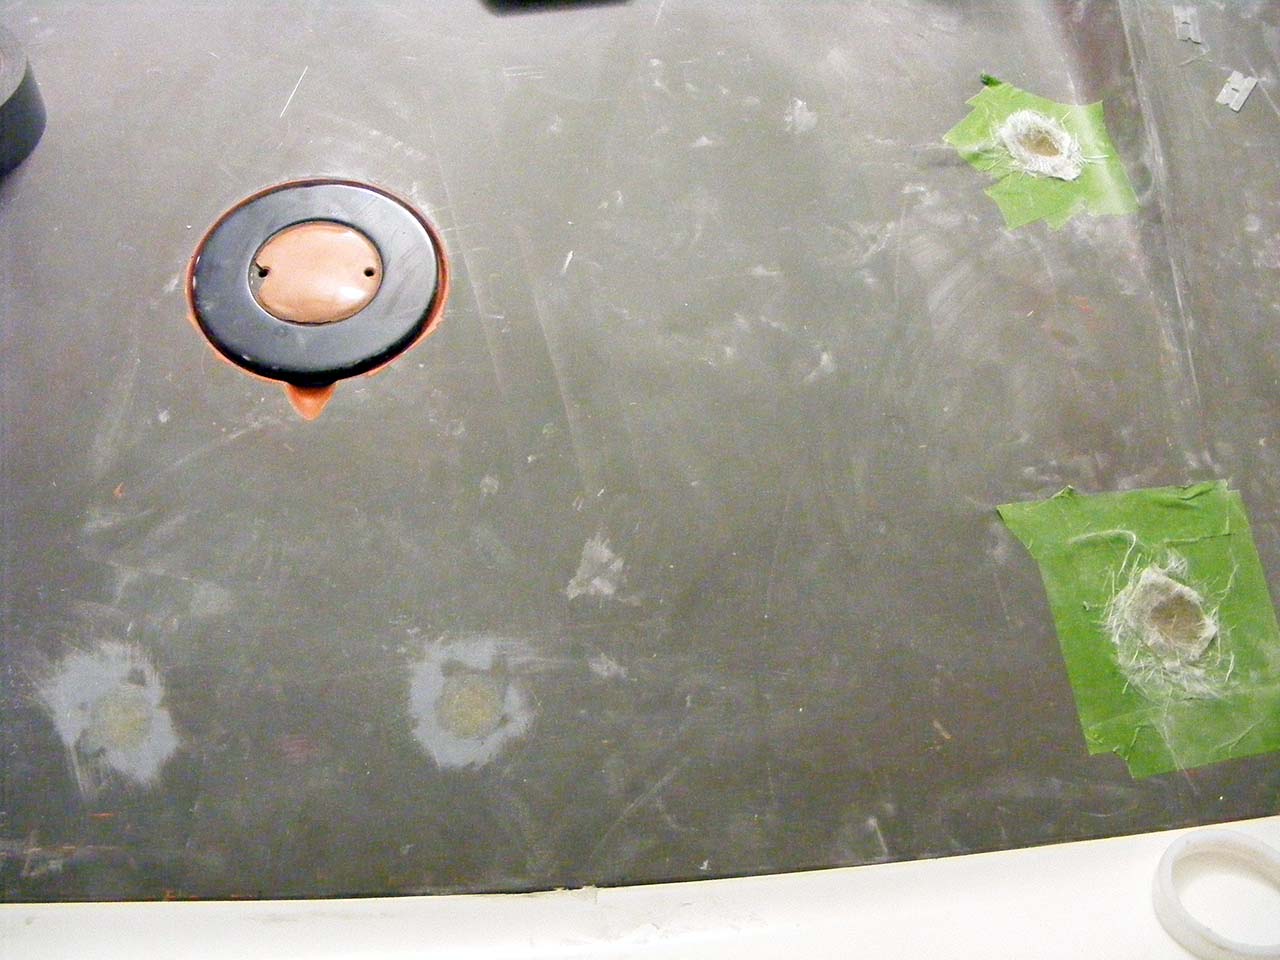
Redoing the mirror area:
Now some experimentation :
I'm gonna try to recut a sharper fender line, that's gonna be tedious.
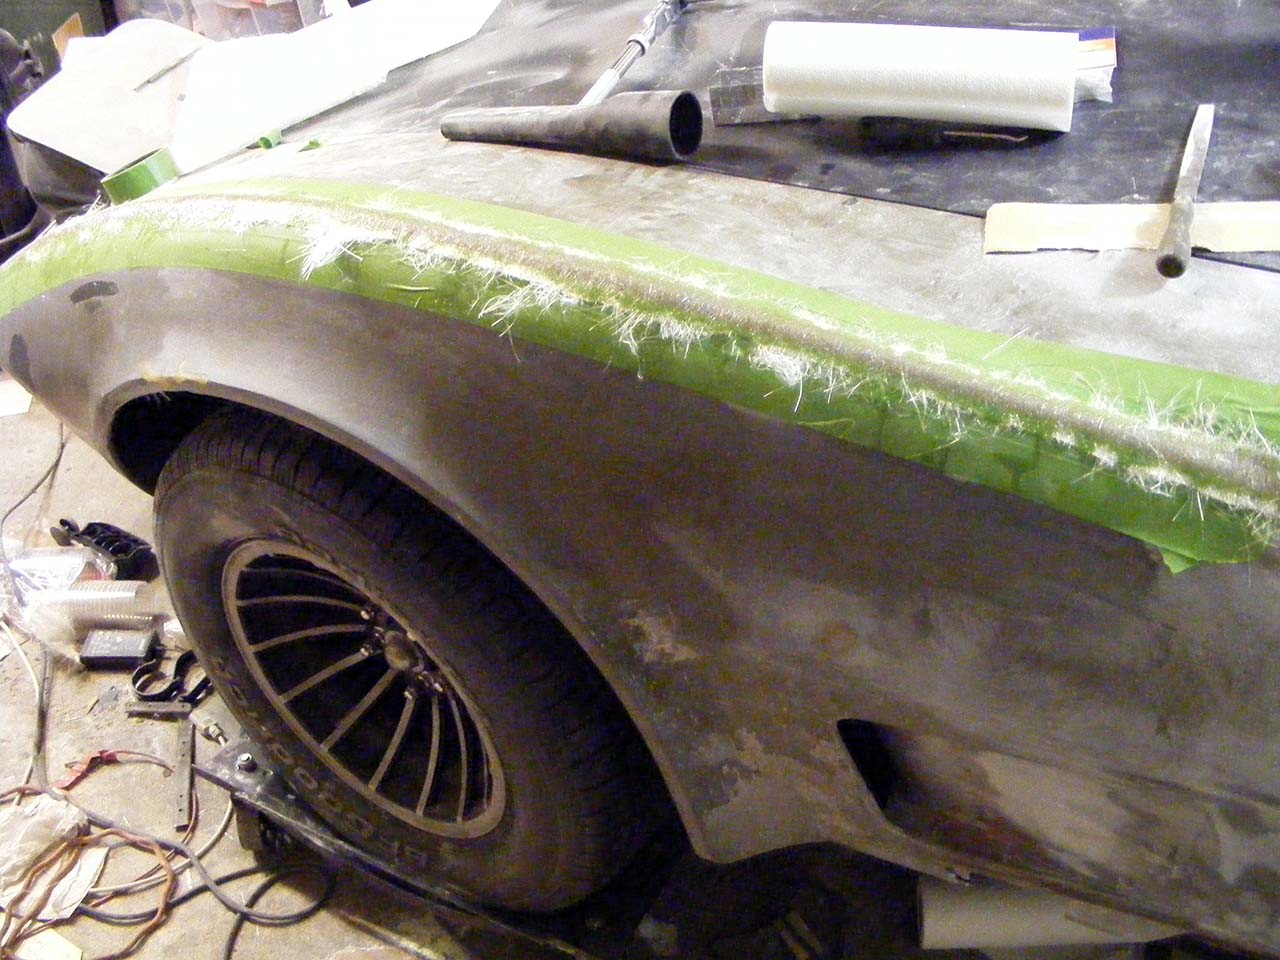
Rear seams done :
Taking care of rear deck holes :
Redoing the mirror area:
Now some experimentation :
I'm gonna try to recut a sharper fender line, that's gonna be tedious.
Last edited by Denpo; 08-17-2017 at 11:20 PM.