
My '76 restoration (long post)
 07-23-2012, 06:01 PM
#241
Drifting


Thread Starter
Member Since: Aug 2010
Location: Kanuckistan
Posts: 1,617
Received 127 Likes
on
68 Posts
2022 C3 of the Year Finalist - Modified

Passenger side done :
Front clip is back on, good contact surface

Now got to find someone to help me put the doors back on, then we'll enter the front clip installation last straight.
Front clip is back on, good contact surface
Now got to find someone to help me put the doors back on, then we'll enter the front clip installation last straight.
Last edited by Denpo; 08-17-2017 at 09:11 PM.
 07-23-2012, 06:03 PM
#242
Drifting
Thread Starter
Member Since: Aug 2010
Location: Kanuckistan
Posts: 1,617
Received 127 Likes
on
68 Posts
2022 C3 of the Year Finalist - Modified
Anyhow, I dropped the front clip and cut what was on the way, case close.
Still I appreciate the effort

 08-29-2012, 06:00 PM
#245
Drifting
Thread Starter
Member Since: Aug 2010
Location: Kanuckistan
Posts: 1,617
Received 127 Likes
on
68 Posts
2022 C3 of the Year Finalist - Modified
Moving foward very slowly these time, even in Montreal it's too damn hot for me to work confortably in the garage. As a reverse bear, with weather getting cooler everyday, I think I'm got stop hibernating (summernating?) very soon.
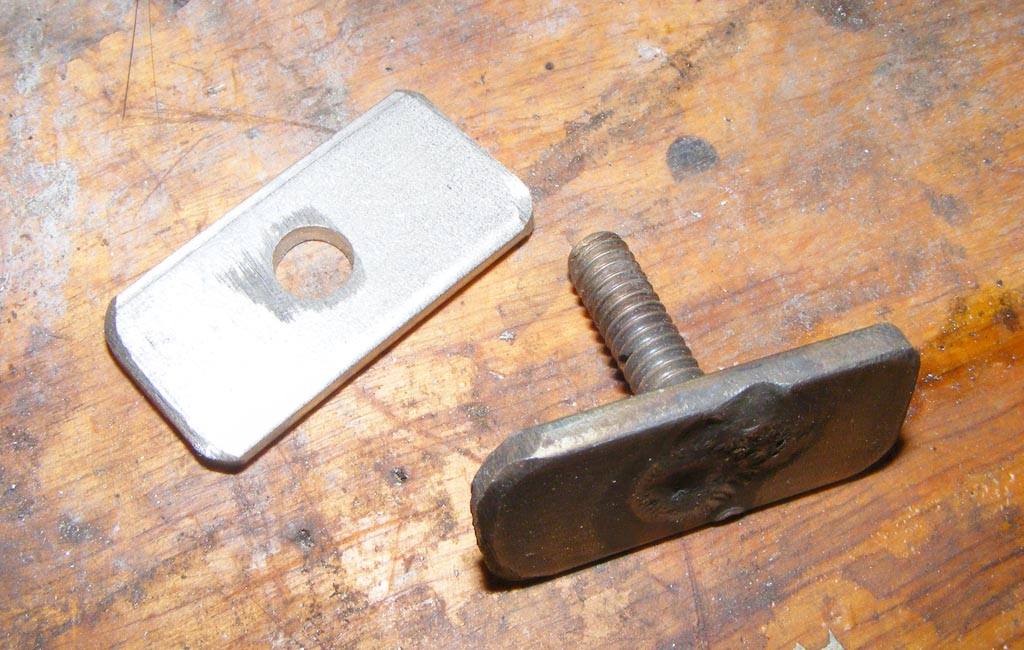
I made a set of rear bumper brackets, all SS.
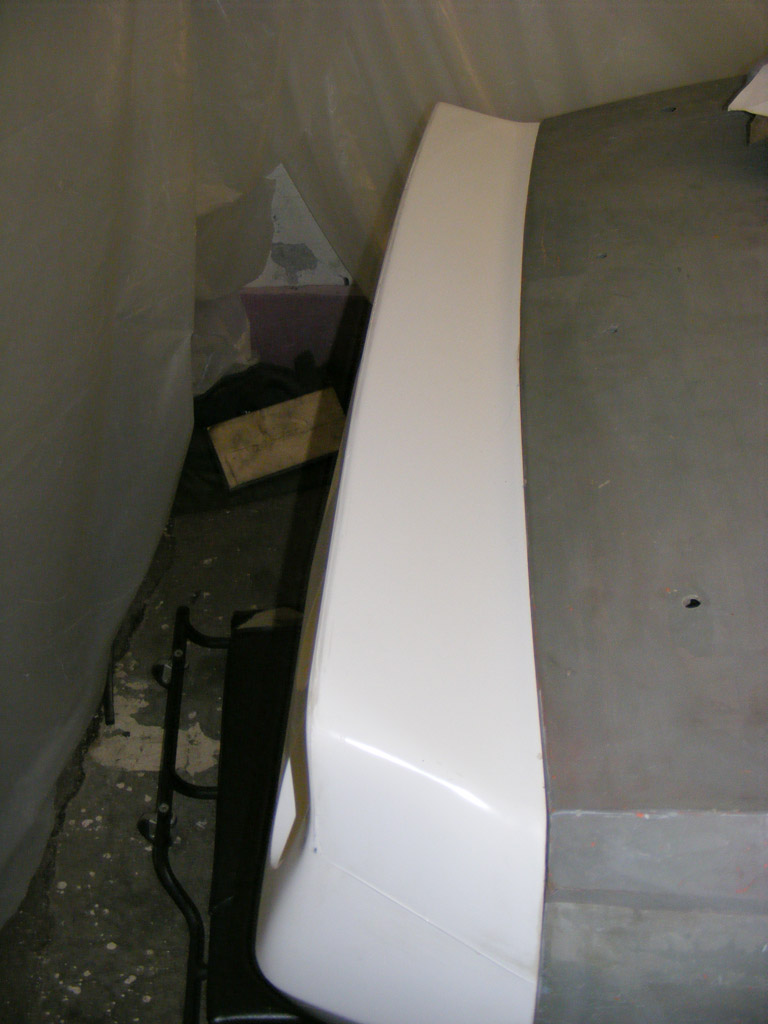
And started test fitting the bumper.
Turned out very well, glassing work should be minimal.
Finally a trick I've found for getting correct resin mix when dealing with small quantity :
I mix by the squirts. I'm sure the trick is as old as glassing itseft.
It's never too late to reinvent the wheel.
I made a set of rear bumper brackets, all SS.
And started test fitting the bumper.
Turned out very well, glassing work should be minimal.
Finally a trick I've found for getting correct resin mix when dealing with small quantity :
I mix by the squirts. I'm sure the trick is as old as glassing itseft.
It's never too late to reinvent the wheel.
Last edited by Denpo; 08-17-2017 at 09:14 PM.
11-23-2012, 05:02 AM
#246
Drifting
Thread Starter
Member Since: Aug 2010
Location: Kanuckistan
Posts: 1,617
Received 127 Likes
on
68 Posts
2022 C3 of the Year Finalist - Modified
Ahoy everyone.
It's been a long time since last post. Project is still going on, just a little less free time. My new job is quiet demanding.
So, I can say that now I'm ready for gluing the front clip, finally.
Before that I had a couple of things to do, thing that would be much harder to do once the front clip back on:
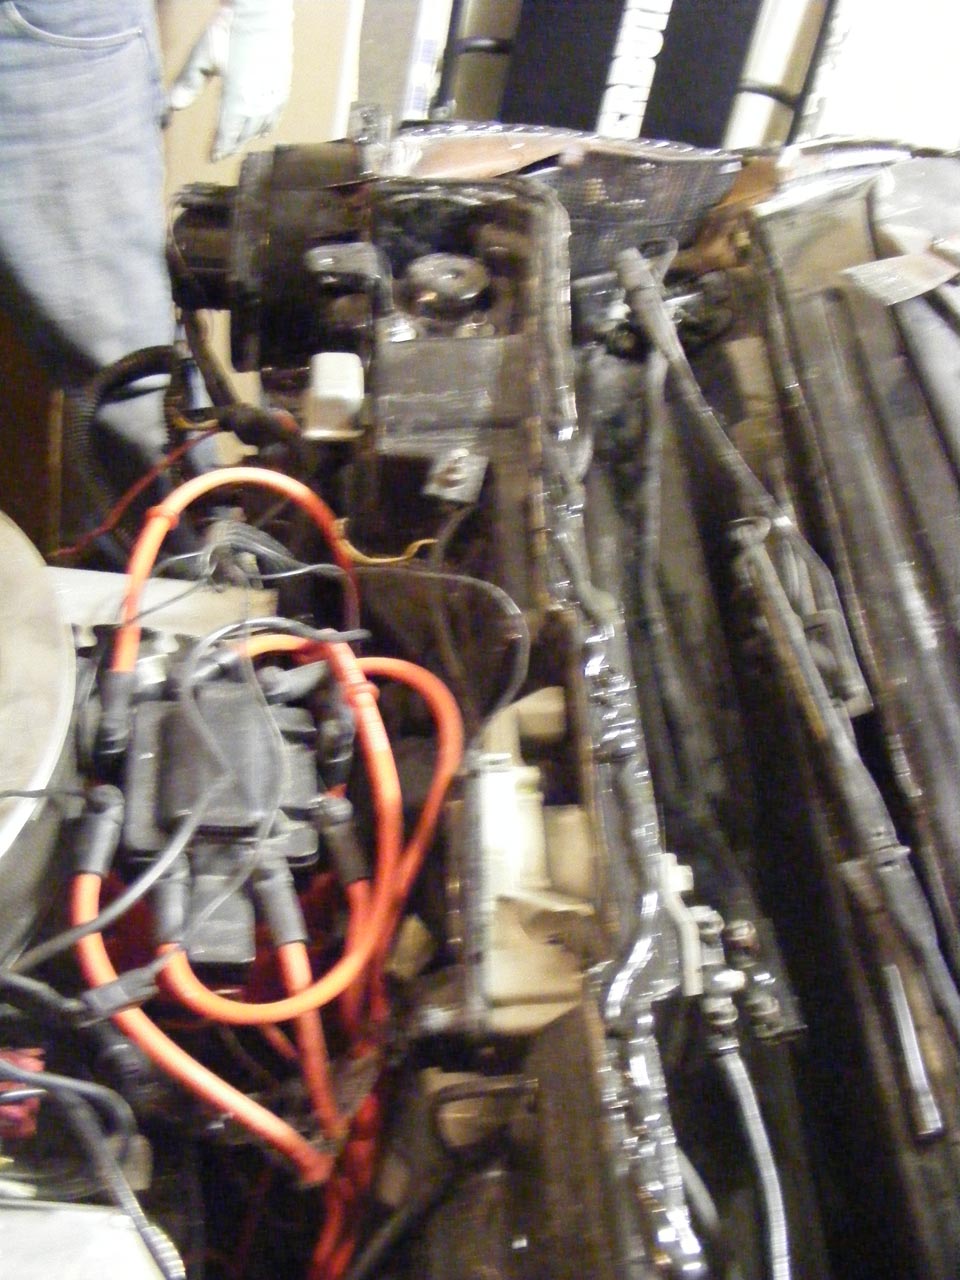
-I sorted out all my engine bay harness, rearranged my 12v main line since the alternor is passenger side now.
-Soldered a relay on the ignition line, for the security system to come.
-Installed the heater resistor, yup I forgot that one when I built my ac delete box.
-Wrapped the header that is the closest to the aformentioned ac.
-Installed the steering wheel.
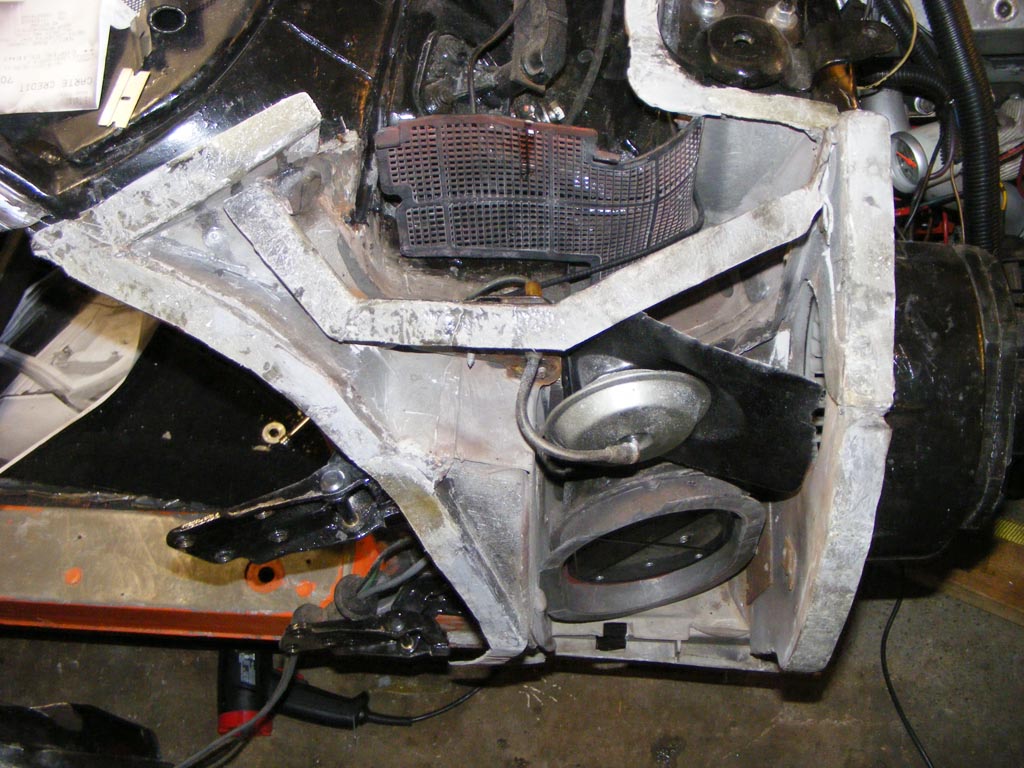
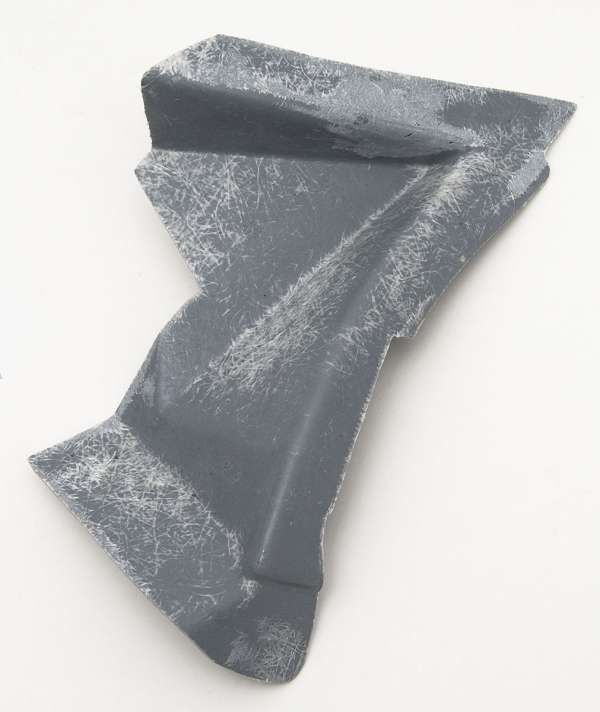
-I had a bunch of crack in the front clip bracket support to fix.
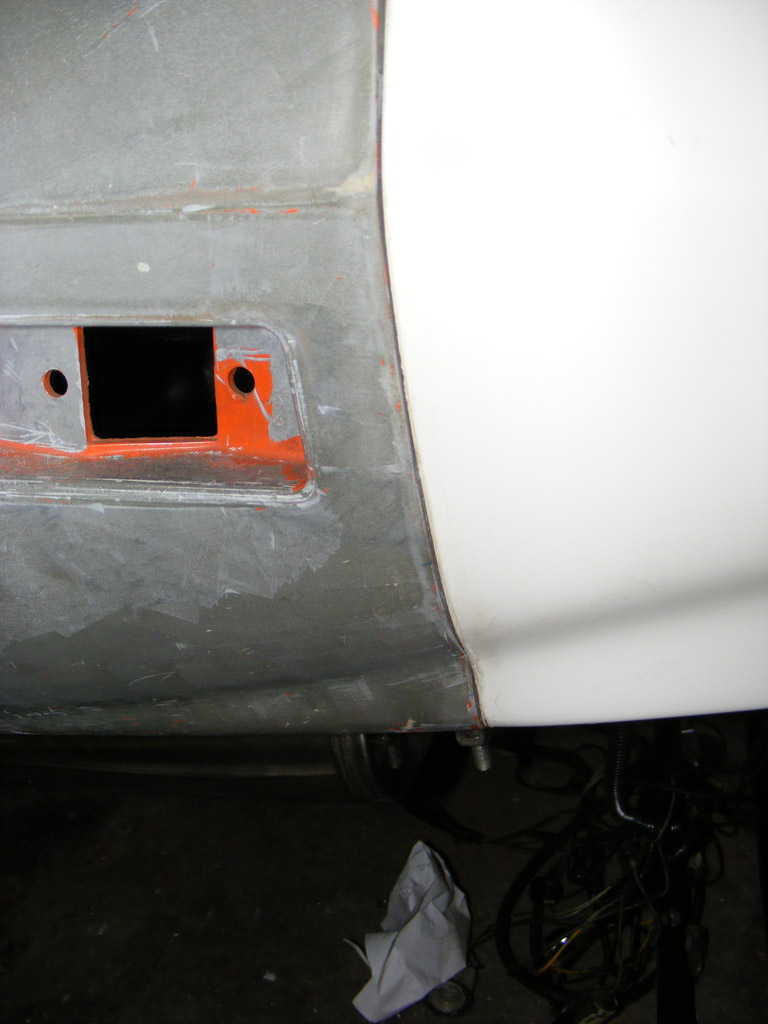
-While I was at it I started glassing my fender alarm keyhole.
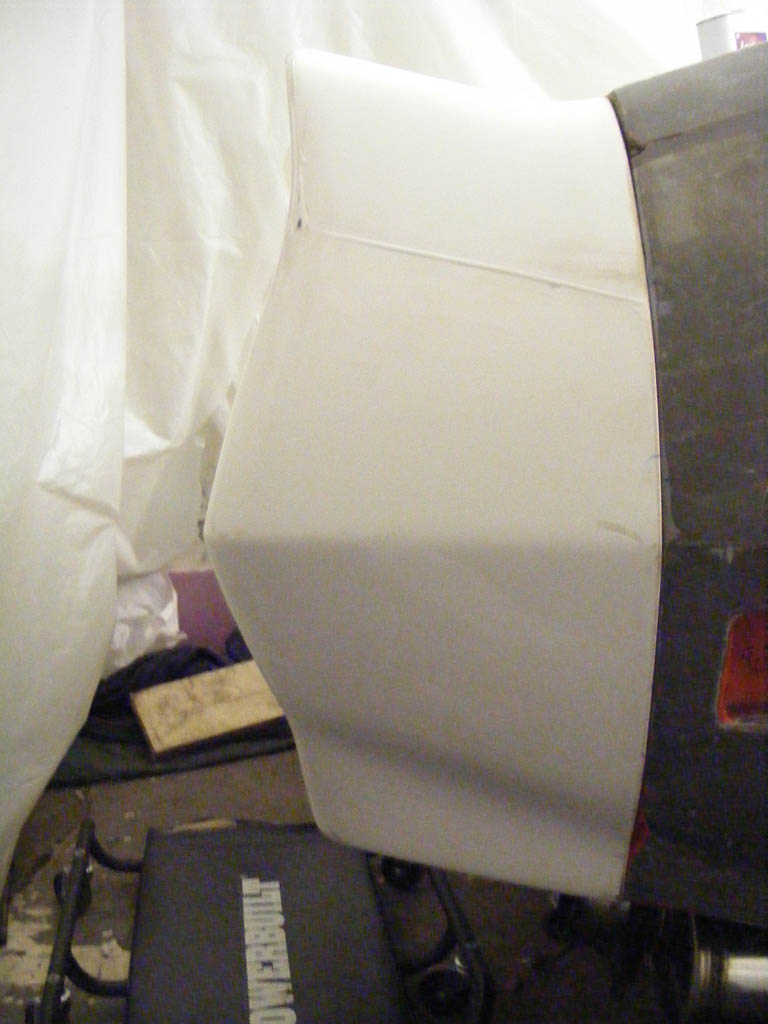
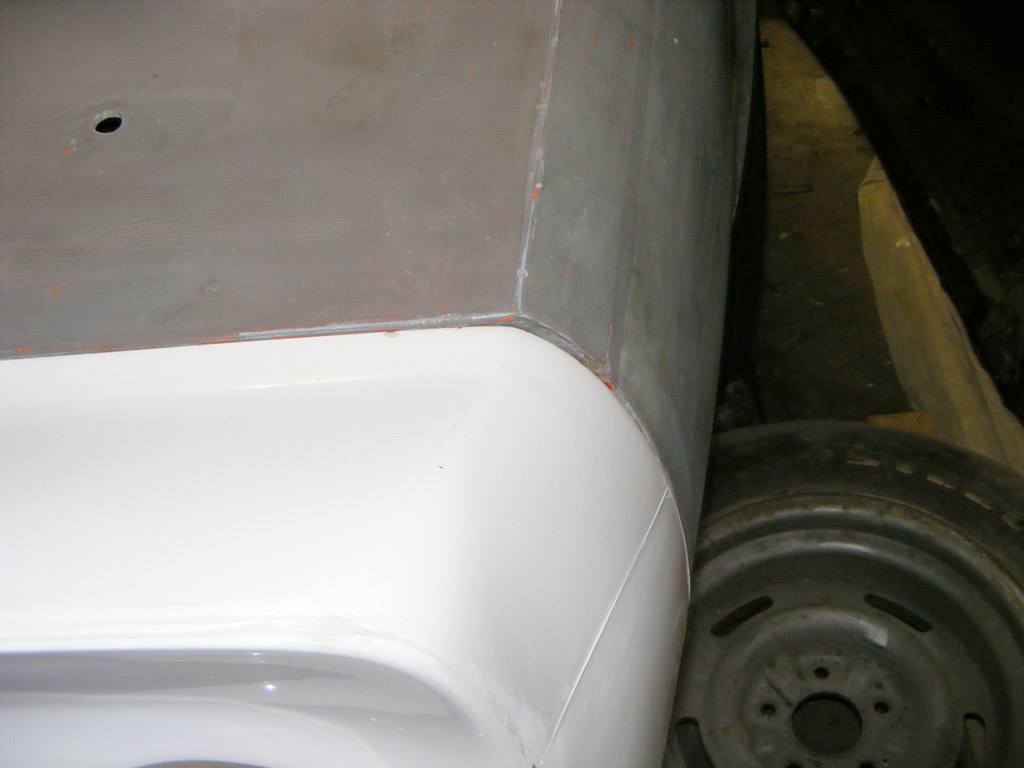
Now the front clip is properly installed, with alignment holes drilled.
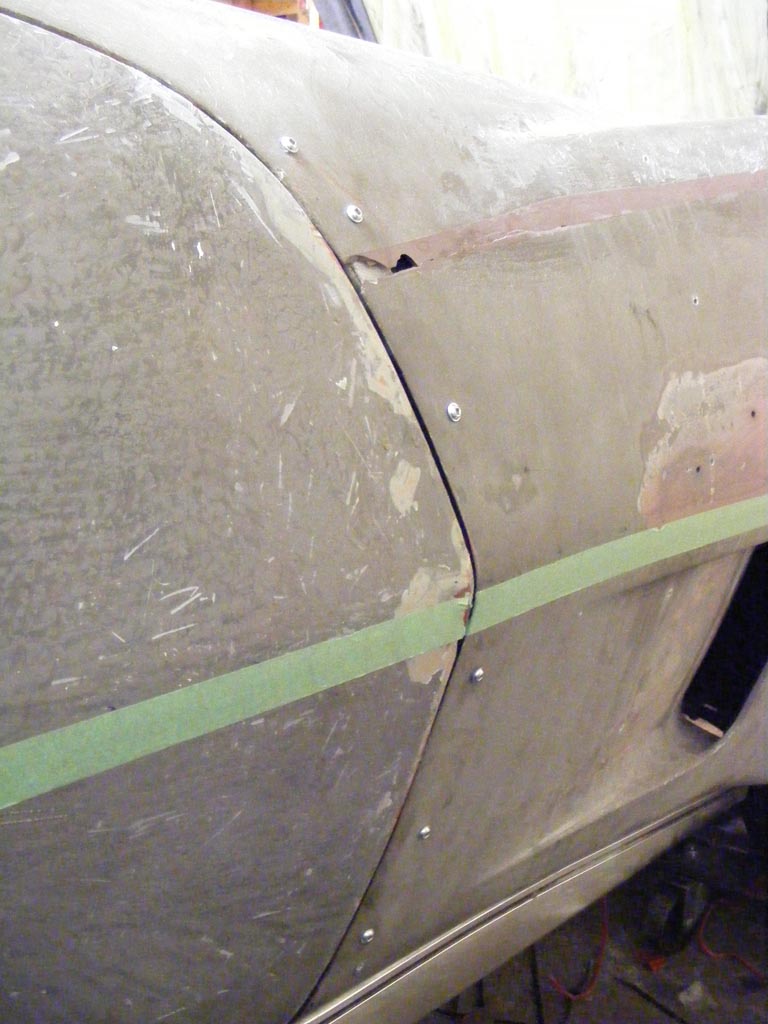

I got to admit this haven't been easy. Turned out the front clip was hanging 1" higher on the passenger side (measured a the wheel arches).
After measuring everything several time I came to the conclusion that the front clip outer and inner fender had been glued that way on the donor car.
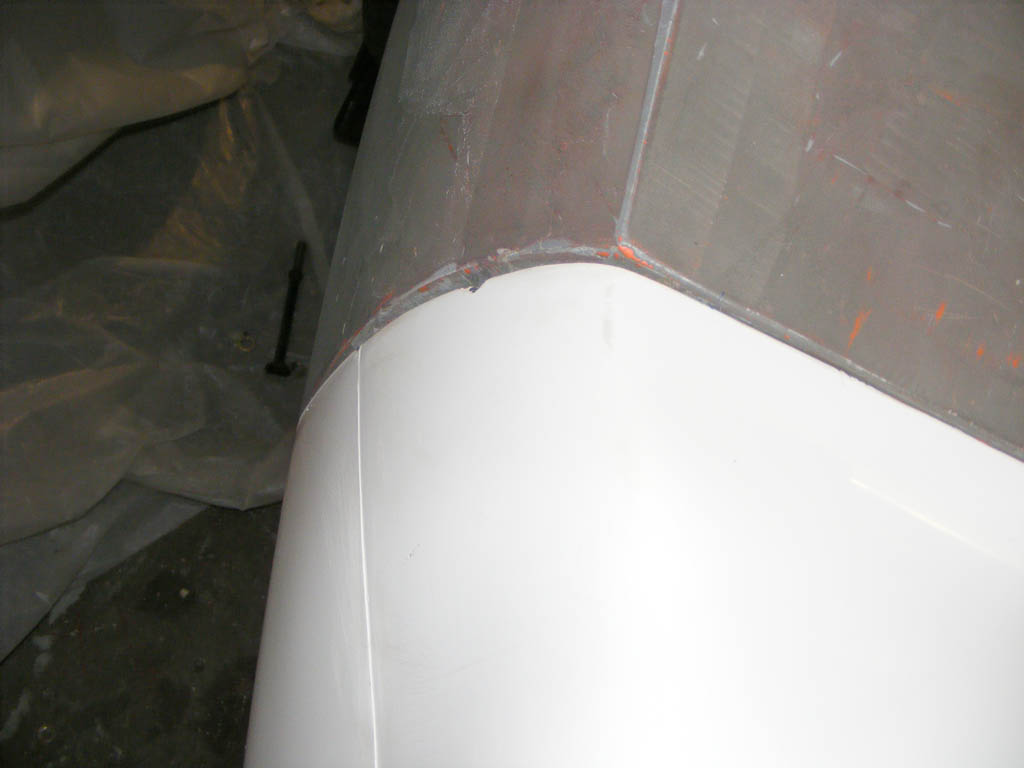
A little cutting on the inner fender and the piece that join the radiator support to the bumper, and everything lined up, beauty file, front bracket, bumper assy, everything. Now I'm sure.
Taping the beauty line was very helpfull, as well as installing the rocket panels.
I my quest to make everything was right, I even reinstalled the whole hood lock mechanism.
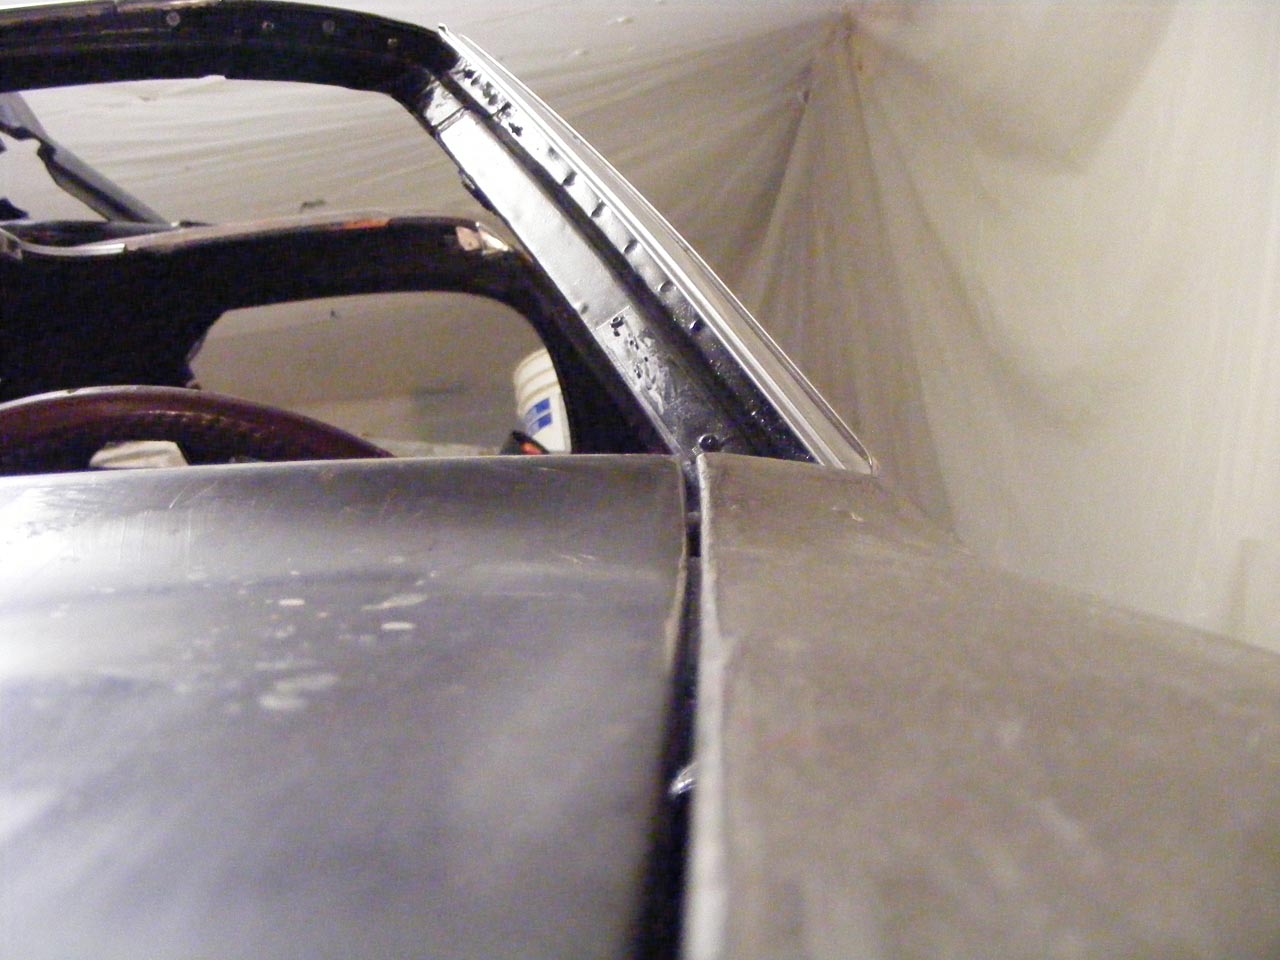
The curves are lining up nicely, a good surprise for part coming for different donor cars. It was good to hear the sound of the hood popping open, sound from a distant memory when my corvette was in one piece.
So, here's a tip for you. Take it for what it's worth.
Let say you're aligning the hood locking pin, and of course you to it wrong at first. The hood get stuck for good.
If by chance your headlights and your radiator are not already installed, you can remove the hood by unbolting the base of the hood hinge, it's tight but doable. Then pry the hood open by the front, just enough to you can slip you arm in and unbolt the pin support.
You already know how I know don't you?
Maybe next weeked, If I can grab enough helping hands, I do the big jump. A question of days now.
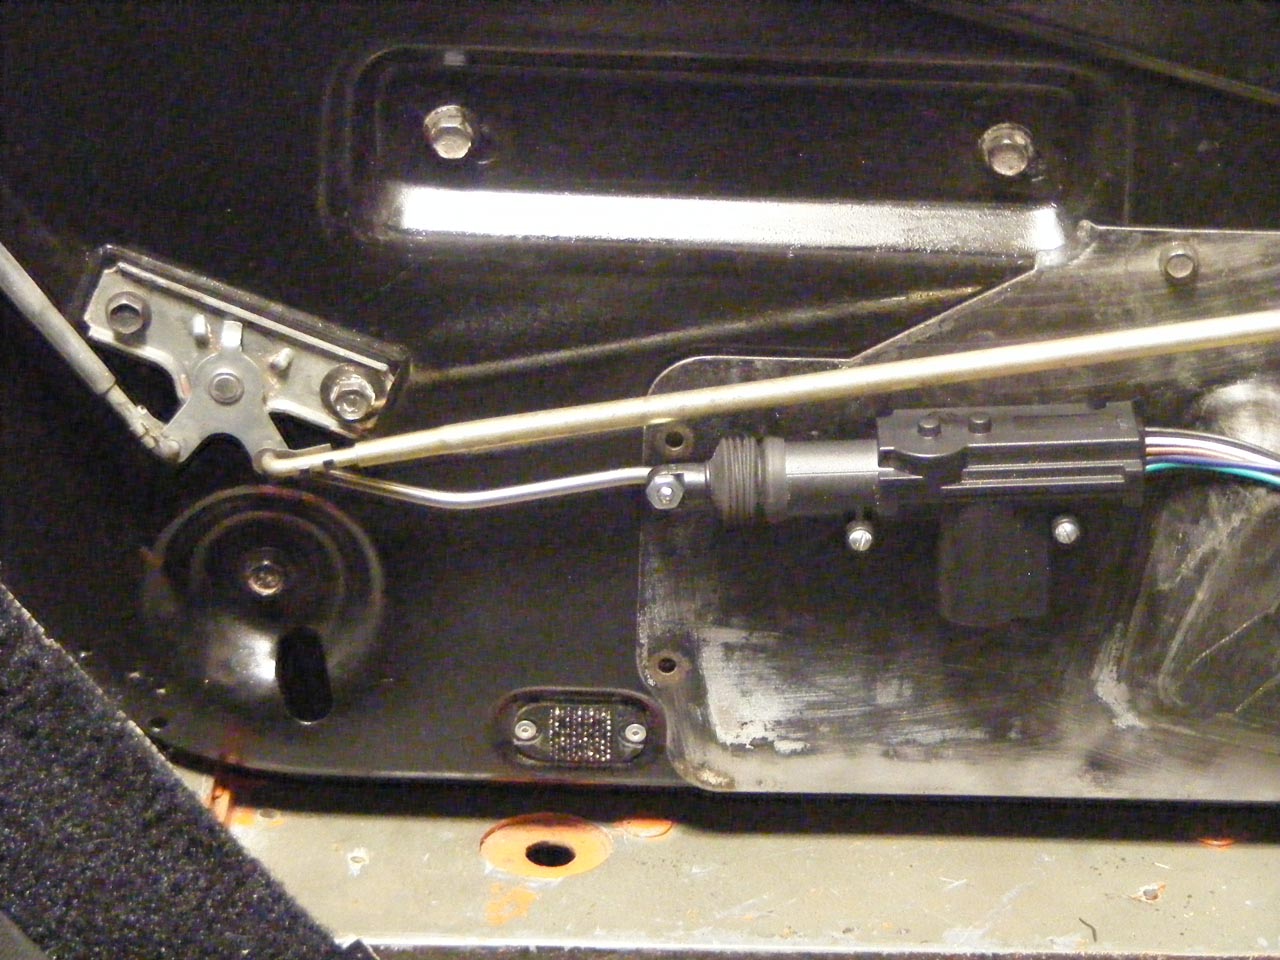
I also started to install my remote door lock system
I forged a piece out of some stainless 3/16 rod.
No need to modify anything.
While kinda slow in the garage, I kept on working on related projects.
First one it the led taillight project.
I went a long road since the first homemade prototype. After searching for part I realized most of the material was already there, ready to be repurposed.
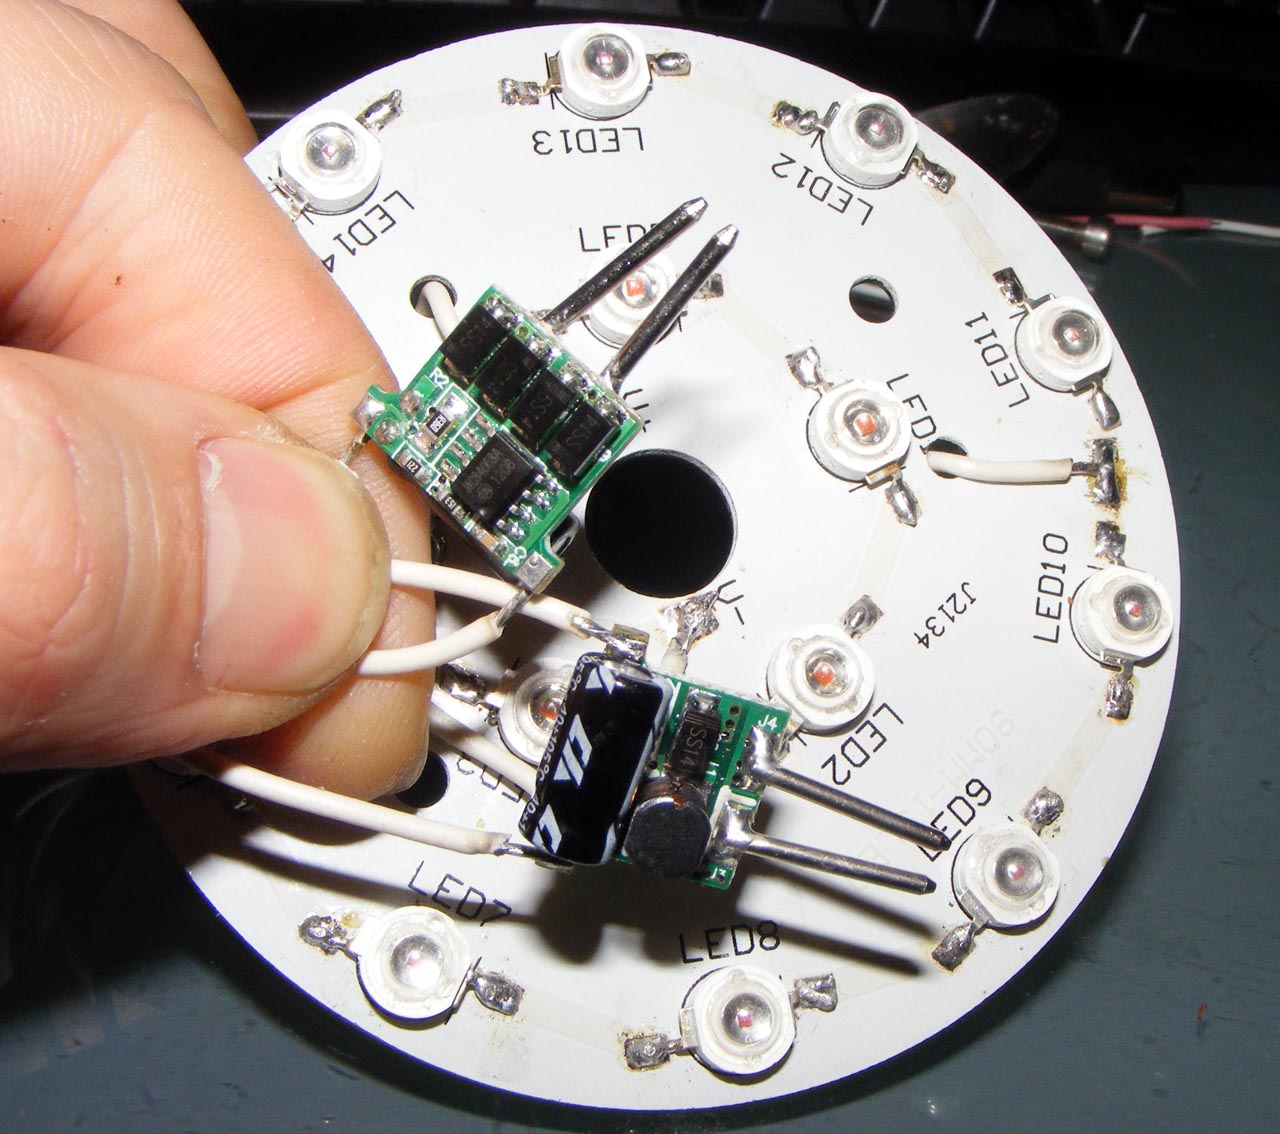
So I found those boards :
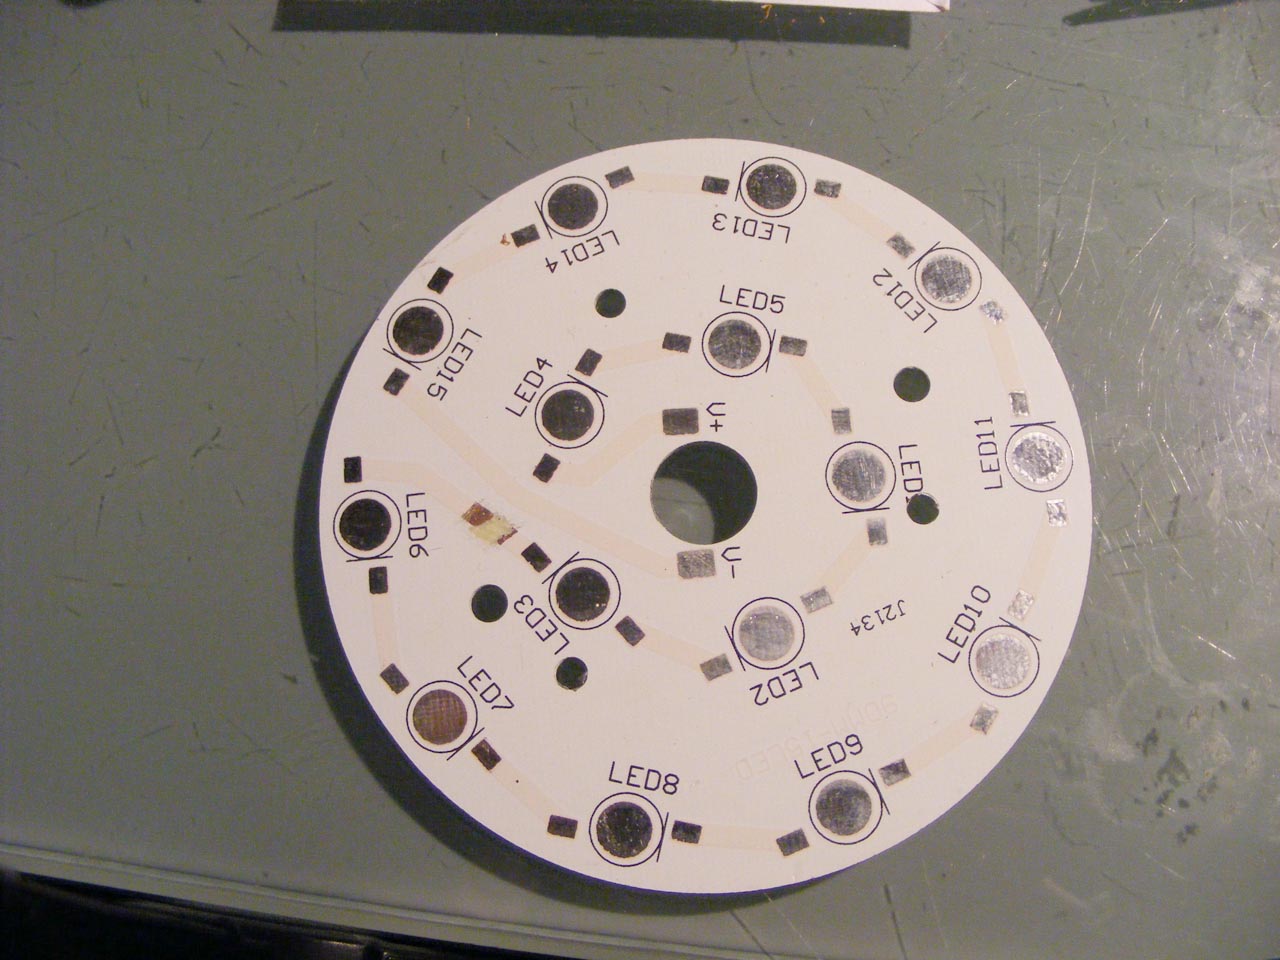
A bunch of dollar each, aluminum plate (for heat dissipation), and connexion for "1w" high power led. You can see I started to scratch the copper connexion.
The circuit is initially 15 led wired in serial.
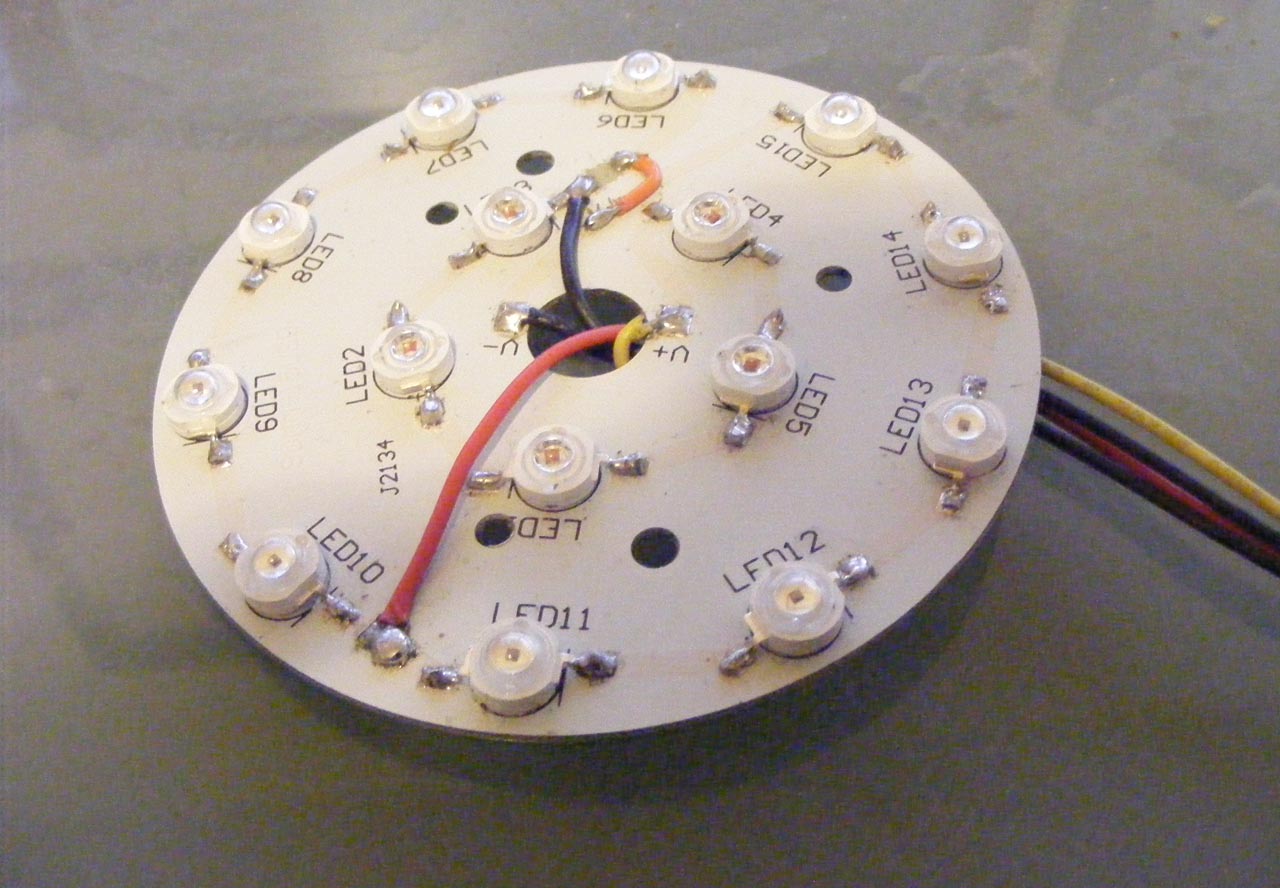
I hacked it into three lines of 5 led in serial, one in the center for the turn light and the backup light. 2 on the outside for the break/running light combo.
I soldered led of the actual color (red, orange and white) since I'm gonna try to replicate the classic bubble cover in some sort of clear resin.
Went you do those don't forget to put a dab of thermal paste a the back of each leds.
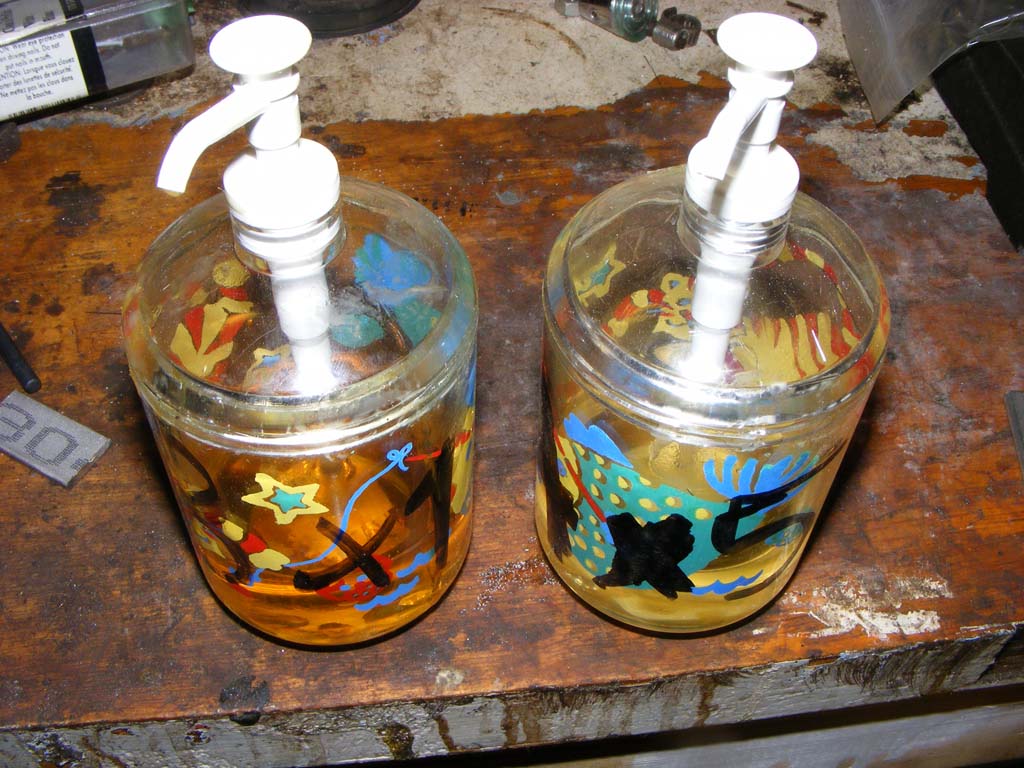
Here is the buckets I just received (and after cleaning/modification)
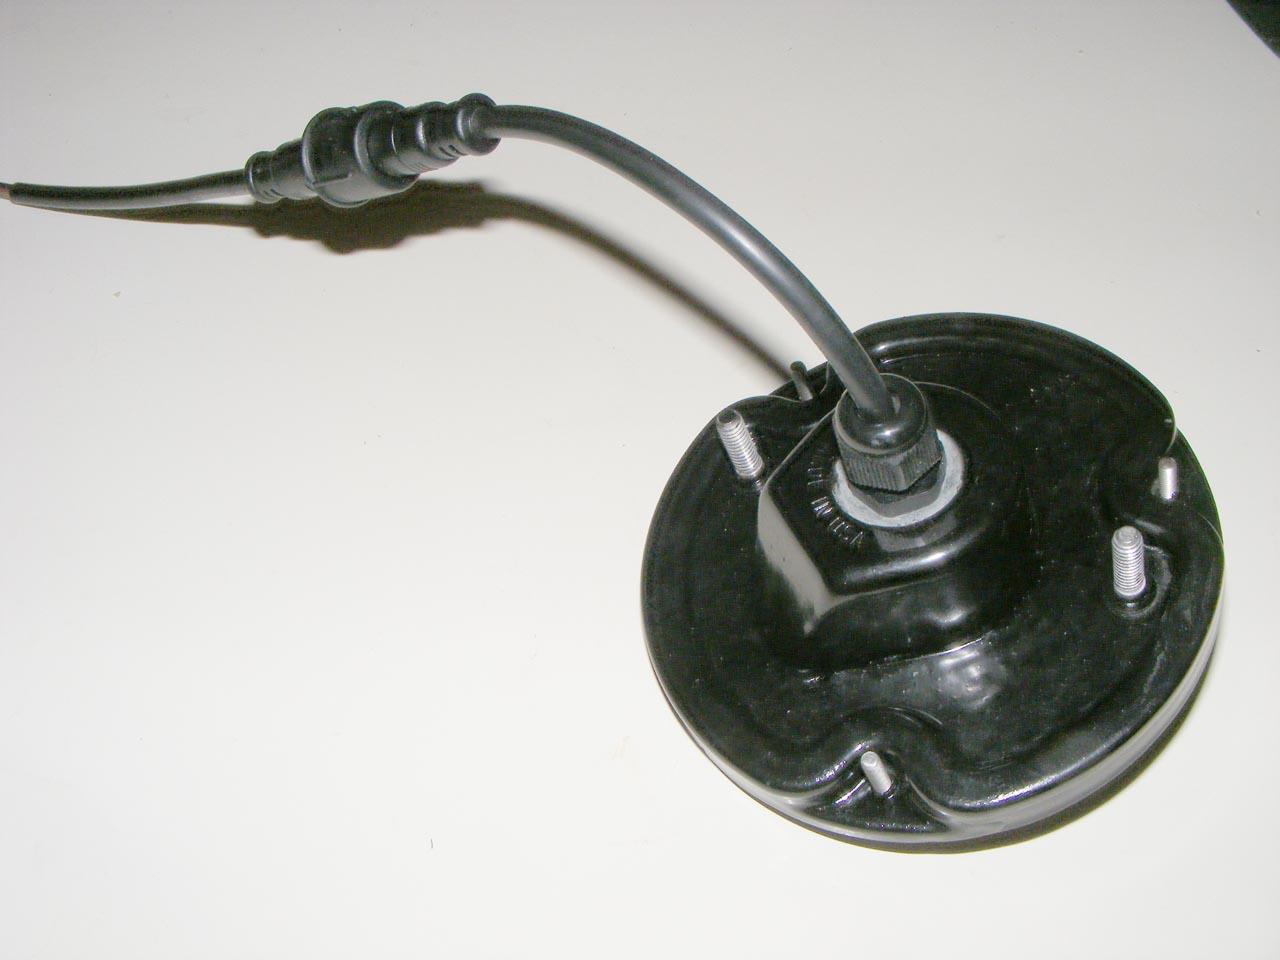
It's still missing a seal where you can the bare metal on the picture, but it's gonna be all water proof eventually. The cable are outdoor led cable, cheap robust and very well sealed.
The heart (and the brain) of the taillight system will be contained in a external box. I'm still exploring possibilities with the box design, but it won't be very long.
The second side project is a very special one. A handfull of people know about it so far.
Like everyone doing his own restocustomod, you want the car to be yours.
So I decided I wanted my C3 to inspired by fighter jets, more specially the B2 bomber. Inspired is a big name, but I got a couple of mod ideas I hope turn reality.
Then I decided to give it a name, and it would be "DARK PATROL". May sound corny to some, I just love it. Choosed it 2 years ago, and haven't changed my mind since then.
Then, I decide to make a logo for my car. Took me a long time, more than 6 months. I made numerous prototype, none were convincing. Then, one night, I had an Epiphany, and it came very quickly to the current and terminal state :

It has everything, it has the plane, the power, the military touch.
the logo is reversible, so I can put it on the nose with the plane pointing forward, it still read DP.
I made a 3D rendition of it, adding some slopes and bevel, so if I make a chromed version if would catch light nicely.
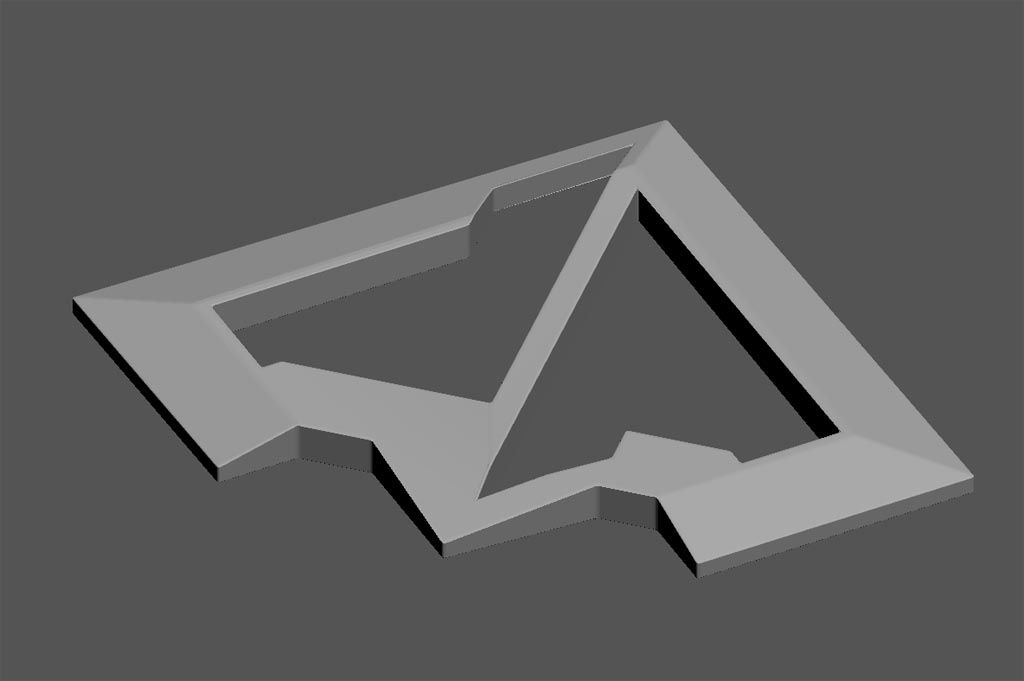
And it happens I have a more-nerdy-than-me friend who built his own 3D printer, and offered to make me a print of my 3D object.
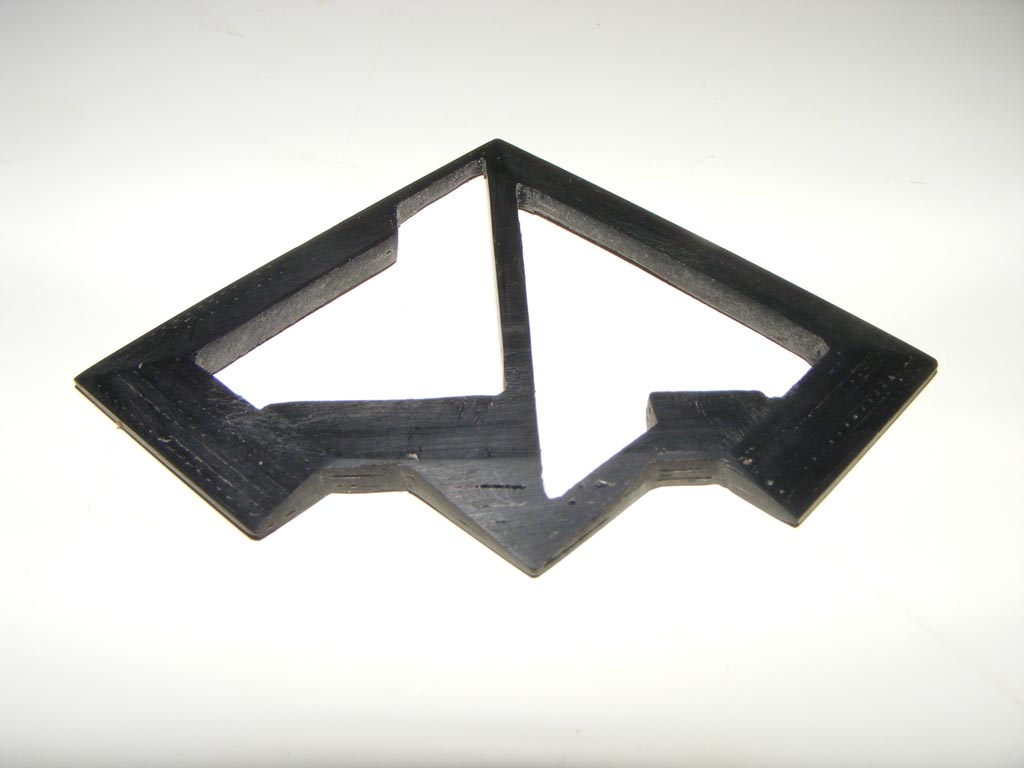
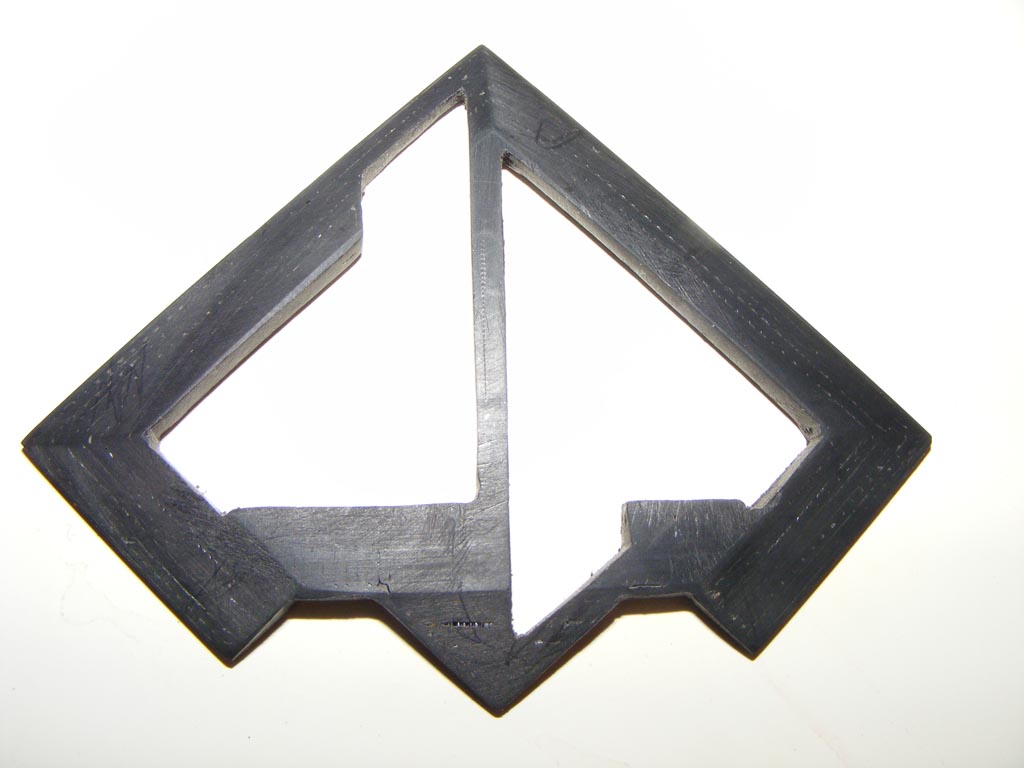
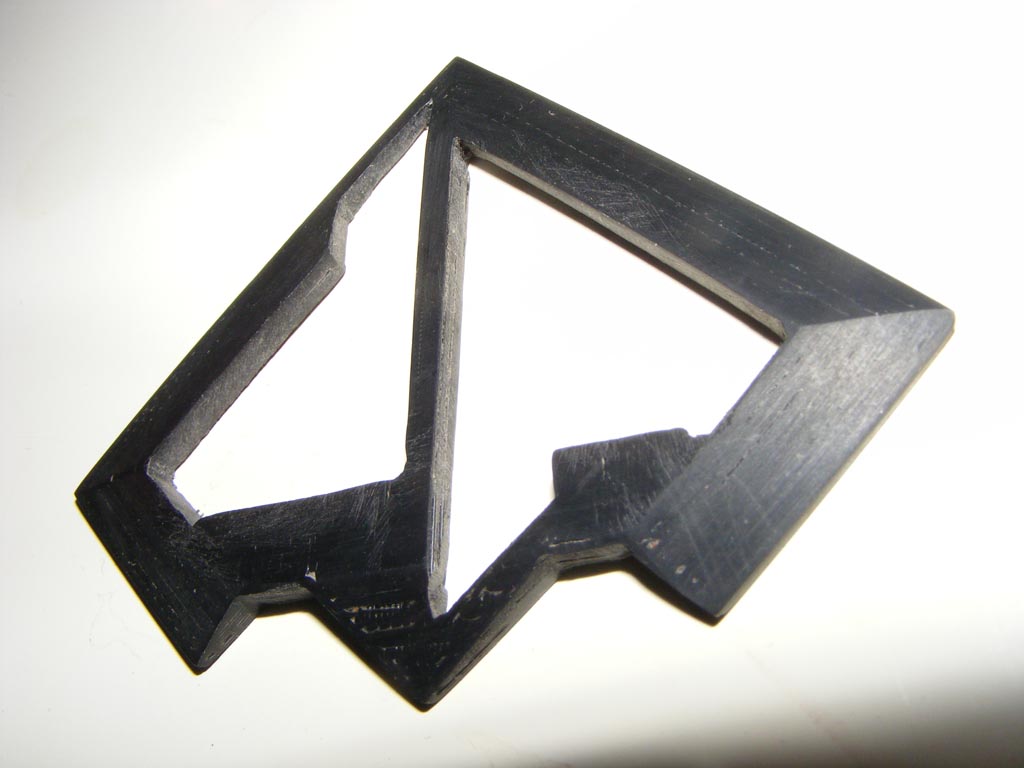
It's a rough prototype. It didn't came this way out of the printer, took a lot of sanding to get here and it's still far from perfect.
Since my object is really angular I think I'm gonna give CNC a try... if I can get reasonable pricing.
I just wanted to feel the object. It could make a good steering wheel emblem, it's about 2.5" wide.
That's all for today.
Happy thanksgiving.
It's been a long time since last post. Project is still going on, just a little less free time. My new job is quiet demanding.
So, I can say that now I'm ready for gluing the front clip, finally.
Before that I had a couple of things to do, thing that would be much harder to do once the front clip back on:
-I sorted out all my engine bay harness, rearranged my 12v main line since the alternor is passenger side now.
-Soldered a relay on the ignition line, for the security system to come.
-Installed the heater resistor, yup I forgot that one when I built my ac delete box.
-Wrapped the header that is the closest to the aformentioned ac.
-Installed the steering wheel.
-I had a bunch of crack in the front clip bracket support to fix.
-While I was at it I started glassing my fender alarm keyhole.
Now the front clip is properly installed, with alignment holes drilled.
I got to admit this haven't been easy. Turned out the front clip was hanging 1" higher on the passenger side (measured a the wheel arches).
After measuring everything several time I came to the conclusion that the front clip outer and inner fender had been glued that way on the donor car.
A little cutting on the inner fender and the piece that join the radiator support to the bumper, and everything lined up, beauty file, front bracket, bumper assy, everything. Now I'm sure.
Taping the beauty line was very helpfull, as well as installing the rocket panels.
I my quest to make everything was right, I even reinstalled the whole hood lock mechanism.
The curves are lining up nicely, a good surprise for part coming for different donor cars. It was good to hear the sound of the hood popping open, sound from a distant memory when my corvette was in one piece.
So, here's a tip for you. Take it for what it's worth.
Let say you're aligning the hood locking pin, and of course you to it wrong at first. The hood get stuck for good.
If by chance your headlights and your radiator are not already installed, you can remove the hood by unbolting the base of the hood hinge, it's tight but doable. Then pry the hood open by the front, just enough to you can slip you arm in and unbolt the pin support.
You already know how I know don't you?
Maybe next weeked, If I can grab enough helping hands, I do the big jump. A question of days now.
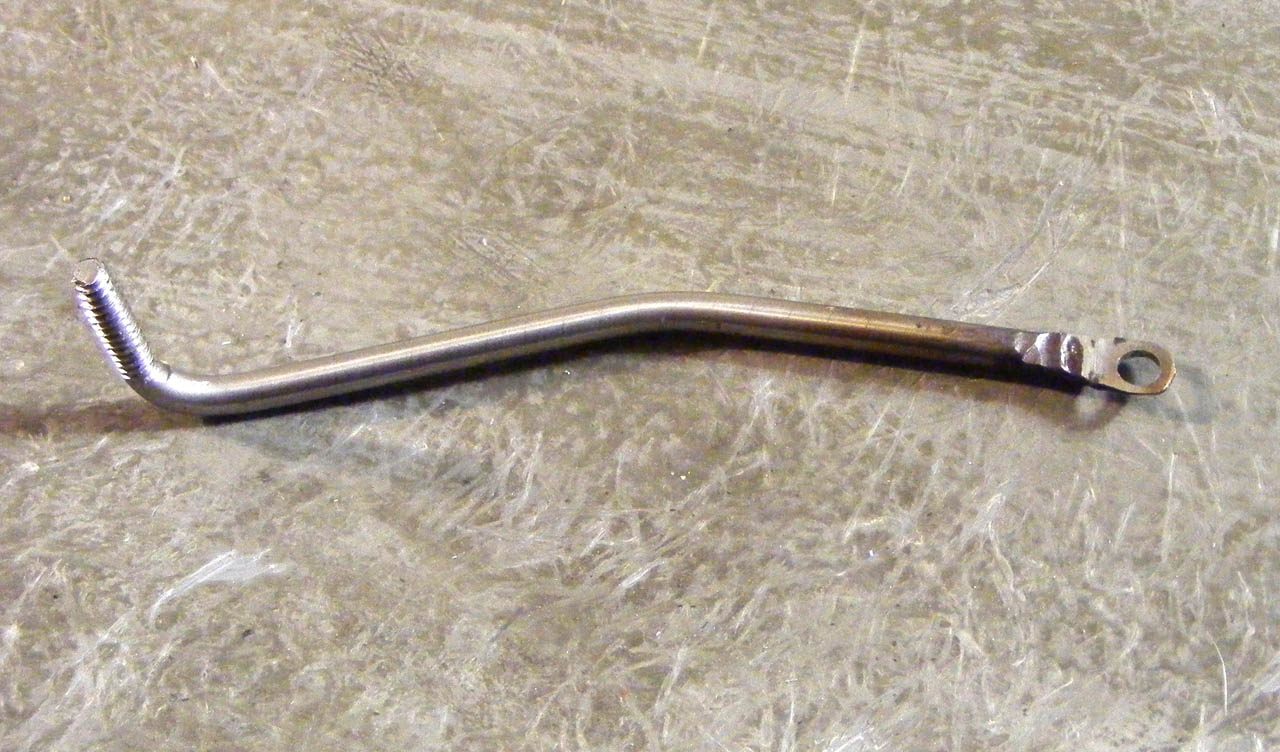
I also started to install my remote door lock system
I forged a piece out of some stainless 3/16 rod.
No need to modify anything.
While kinda slow in the garage, I kept on working on related projects.
First one it the led taillight project.
I went a long road since the first homemade prototype. After searching for part I realized most of the material was already there, ready to be repurposed.
So I found those boards :
A bunch of dollar each, aluminum plate (for heat dissipation), and connexion for "1w" high power led. You can see I started to scratch the copper connexion.
The circuit is initially 15 led wired in serial.
I hacked it into three lines of 5 led in serial, one in the center for the turn light and the backup light. 2 on the outside for the break/running light combo.
I soldered led of the actual color (red, orange and white) since I'm gonna try to replicate the classic bubble cover in some sort of clear resin.
Went you do those don't forget to put a dab of thermal paste a the back of each leds.
Here is the buckets I just received (and after cleaning/modification)
It's still missing a seal where you can the bare metal on the picture, but it's gonna be all water proof eventually. The cable are outdoor led cable, cheap robust and very well sealed.
The heart (and the brain) of the taillight system will be contained in a external box. I'm still exploring possibilities with the box design, but it won't be very long.
The second side project is a very special one. A handfull of people know about it so far.
Like everyone doing his own restocustomod, you want the car to be yours.
So I decided I wanted my C3 to inspired by fighter jets, more specially the B2 bomber. Inspired is a big name, but I got a couple of mod ideas I hope turn reality.
Then I decided to give it a name, and it would be "DARK PATROL". May sound corny to some, I just love it. Choosed it 2 years ago, and haven't changed my mind since then.
Then, I decide to make a logo for my car. Took me a long time, more than 6 months. I made numerous prototype, none were convincing. Then, one night, I had an Epiphany, and it came very quickly to the current and terminal state :
It has everything, it has the plane, the power, the military touch.
the logo is reversible, so I can put it on the nose with the plane pointing forward, it still read DP.
I made a 3D rendition of it, adding some slopes and bevel, so if I make a chromed version if would catch light nicely.
And it happens I have a more-nerdy-than-me friend who built his own 3D printer, and offered to make me a print of my 3D object.
It's a rough prototype. It didn't came this way out of the printer, took a lot of sanding to get here and it's still far from perfect.
Since my object is really angular I think I'm gonna give CNC a try... if I can get reasonable pricing.
I just wanted to feel the object. It could make a good steering wheel emblem, it's about 2.5" wide.
That's all for today.
Happy thanksgiving.
Last edited by Denpo; 08-18-2017 at 09:18 PM.
11-23-2012, 11:46 AM
#247
Drifting

Denpo--
Looks fantastic, great workmanship as always!!! Front end body gaps look very tight and straight... Love the logo prototype... How big is that or how big do you envision the final product???
Rogman
Looks fantastic, great workmanship as always!!! Front end body gaps look very tight and straight... Love the logo prototype... How big is that or how big do you envision the final product???
Rogman
11-23-2012, 03:37 PM
#248
Drifting
Thread Starter
Member Since: Aug 2010
Location: Kanuckistan
Posts: 1,617
Received 127 Likes
on
68 Posts
2022 C3 of the Year Finalist - Modified
Will depends of the use. I'm planning a emblem for the nose, the gas door the steering wheel and maybe the central console.
Each version will match of the emblem that was there before.
The print (current 2.5" wide) would fit the steering wheel button bill.
11-23-2012, 03:53 PM
#249
Drifting
Rogman
11-23-2012, 08:44 PM
#250


 11-26-2012, 11:32 PM
#253
Drifting
Thread Starter
Member Since: Aug 2010
Location: Kanuckistan
Posts: 1,617
Received 127 Likes
on
68 Posts
2022 C3 of the Year Finalist - Modified
I swear I tried to resist, that was too much of a good deal
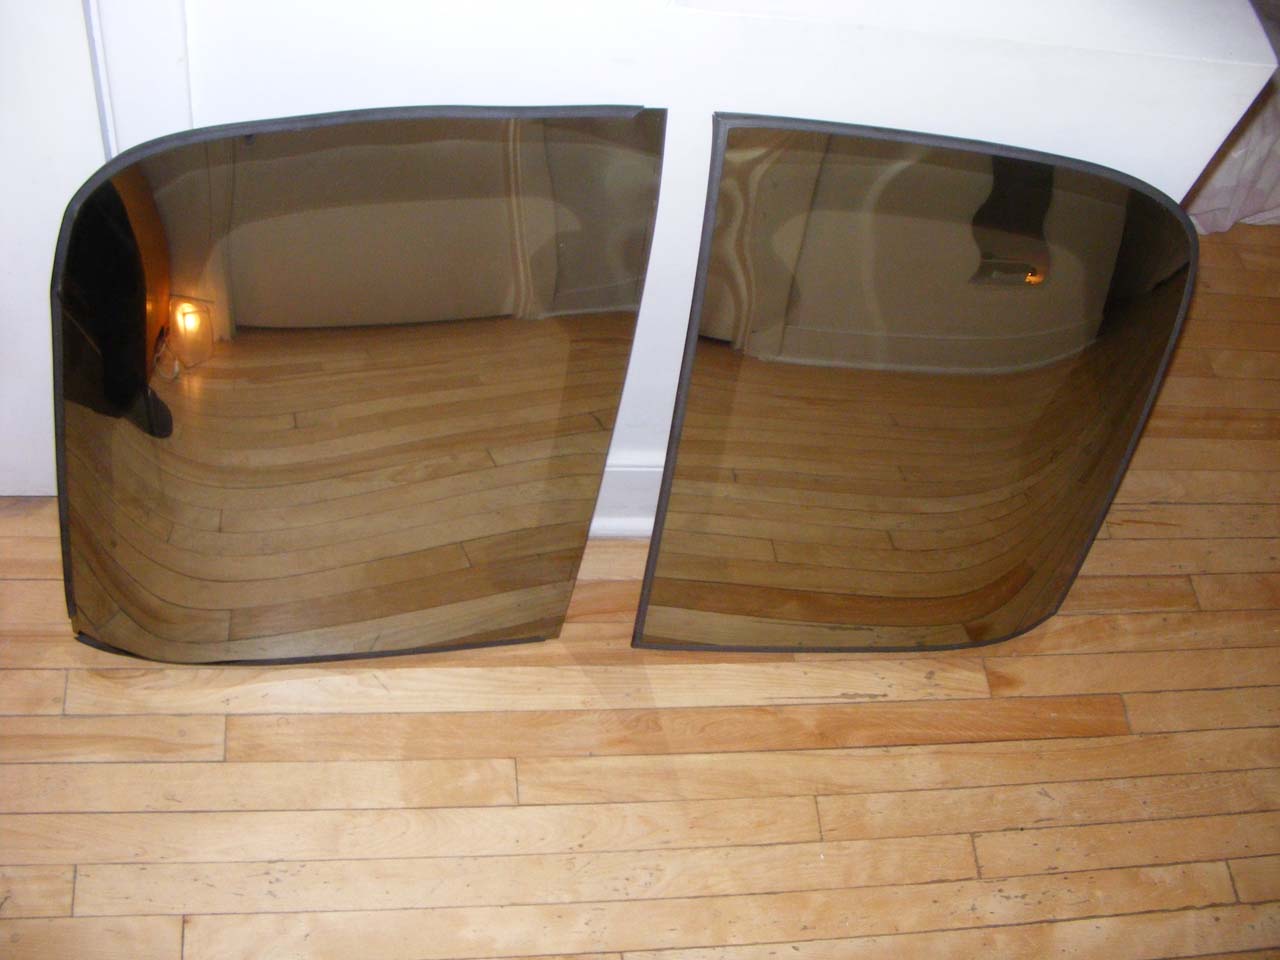
400$ found on local classified.
The plastic edge cover is shot, the weatherstrip are a bit on the tired side, but the glass is 97% A-ok.
I guess I have to sew another set of T-Top bag.
400$ found on local classified.
The plastic edge cover is shot, the weatherstrip are a bit on the tired side, but the glass is 97% A-ok.
I guess I have to sew another set of T-Top bag.
Last edited by Denpo; 08-18-2017 at 09:22 PM.
11-27-2012, 12:26 AM
#254
TheCorvetteBen

Why sew T-top bags when you can buy a set from me! If your interested I have a decent pair of T-top bags I will sell you. As always, let me get you some pics first
12-01-2012, 06:54 PM
#255
Drifting
Thread Starter
Member Since: Aug 2010
Location: Kanuckistan
Posts: 1,617
Received 127 Likes
on
68 Posts
2022 C3 of the Year Finalist - Modified
Ok, it just happened.
Almost a year of questioning, worrying and preparations and now it's done.
My joy is beyond words, it's been 2 hours, and I still have a large banana across my face and it's not coming down.

I had my trusty friend Jeff, who was there for my initial body lift and engine swap, and Michel, my Corvette buddy.
Both were incredible, focus and precision, I couldn't dream better team.
I called more people, but turned out the 3 of us was all we needed. So thanks to Sly, Chris and Paul too, I know you guys did all you could to come.
We first practiced the dropping process, 4 or 5 times, until we were sure we could to a smooth drop, without any surface rubbing. I was controling the lift and made sure everything was aligned at the front, while Jeff and Michel were spreading apart the sides and drive the back to its final position. Sorry no pic, we were all way too busy.
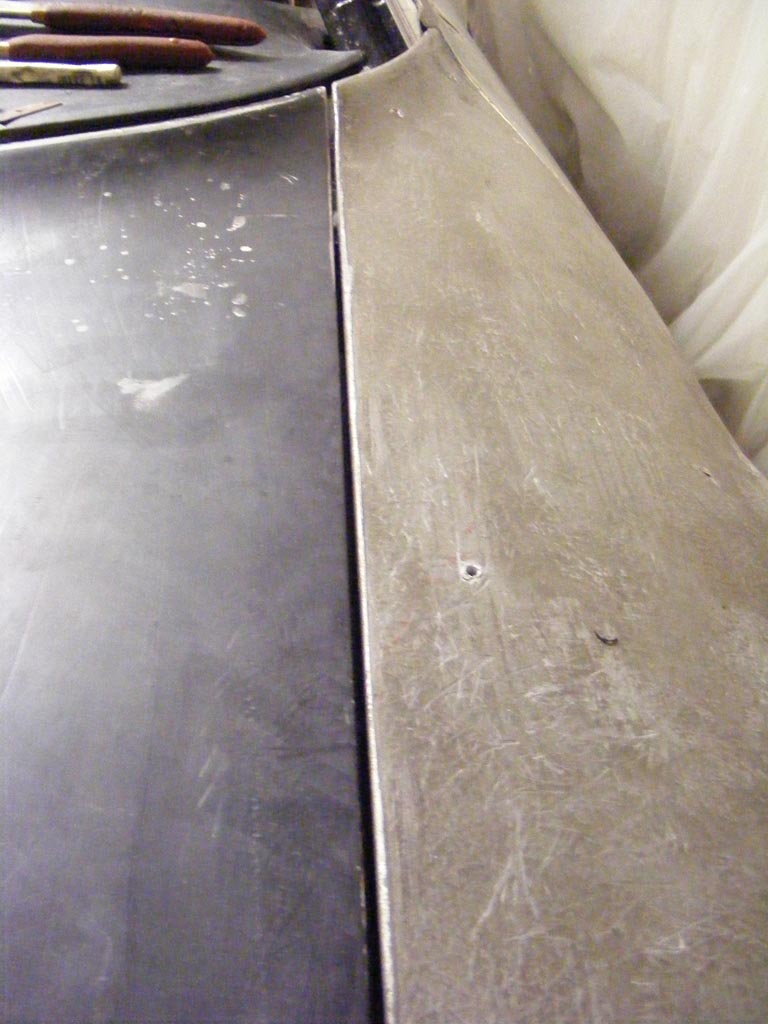
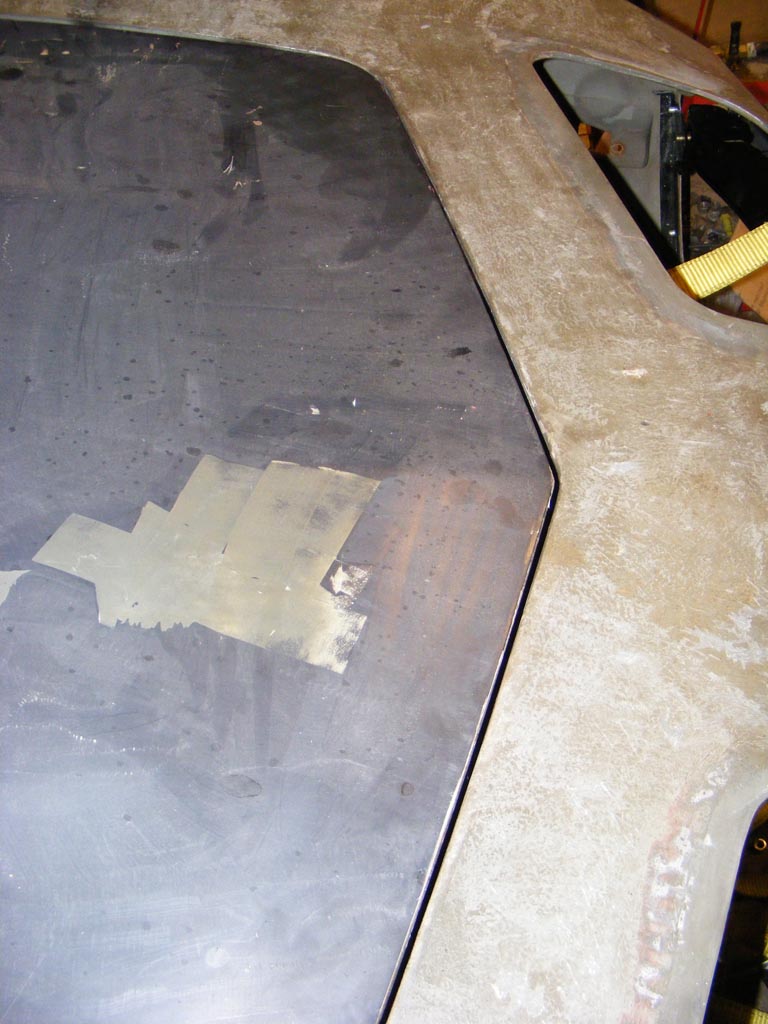
Then we prepped one last time the matting surfaces, 80 grit and Acetone rub.

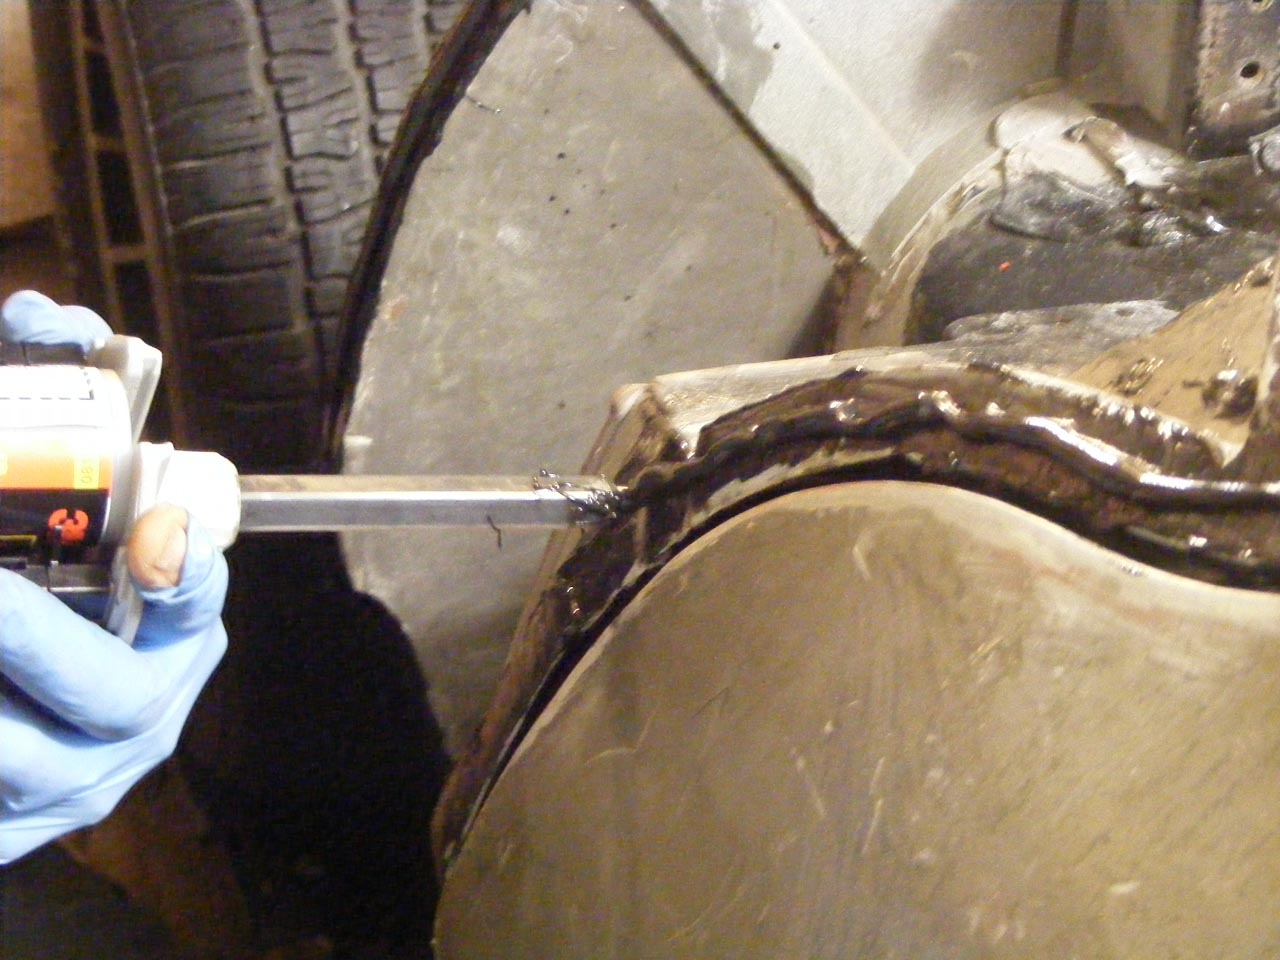
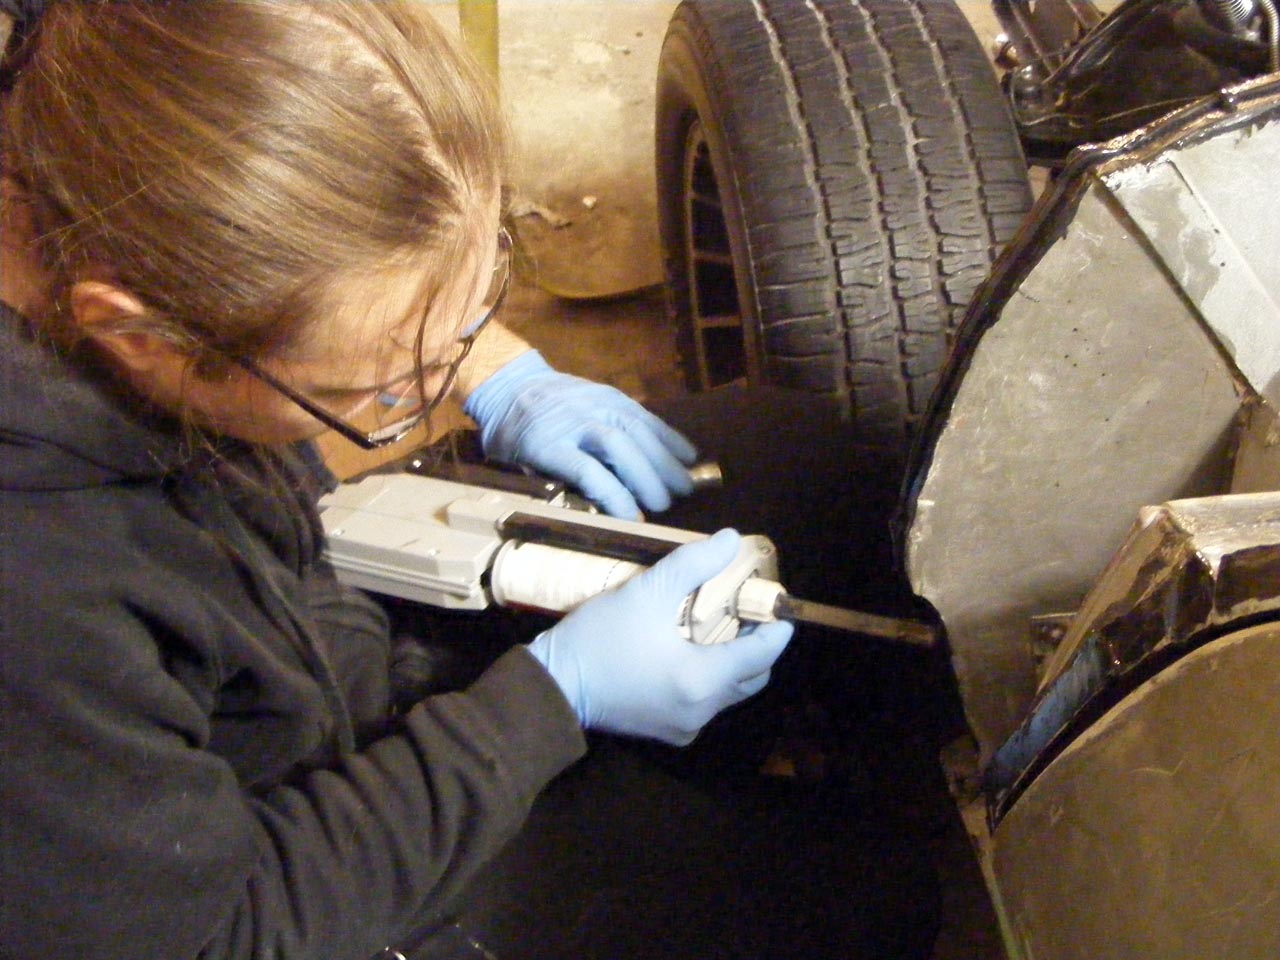
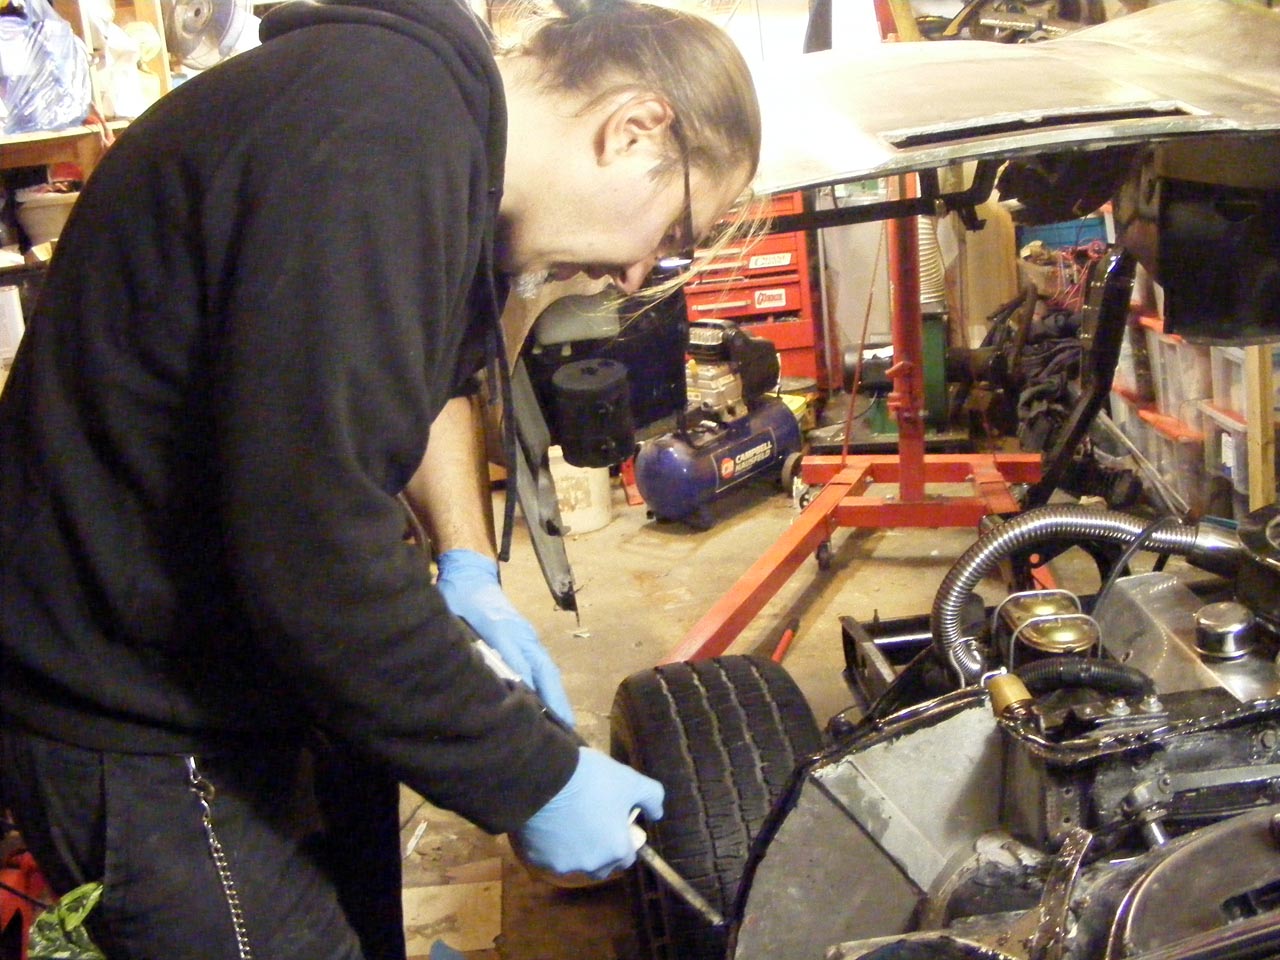
Then applied a first coating of glue on all the surfaces, pressed again the surface to ensure good contact.
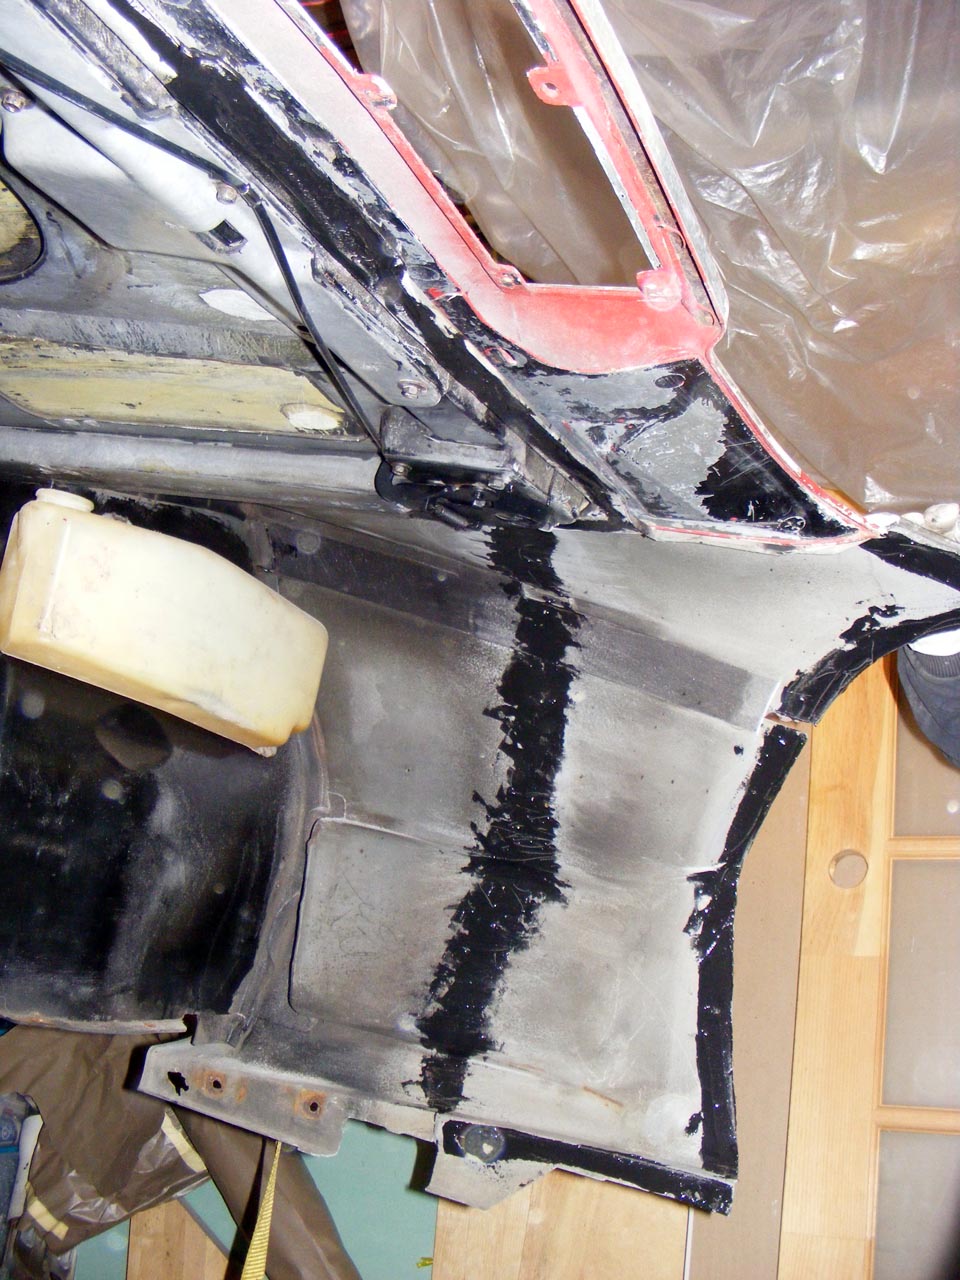
Then a good bead on the car side of the contact surface
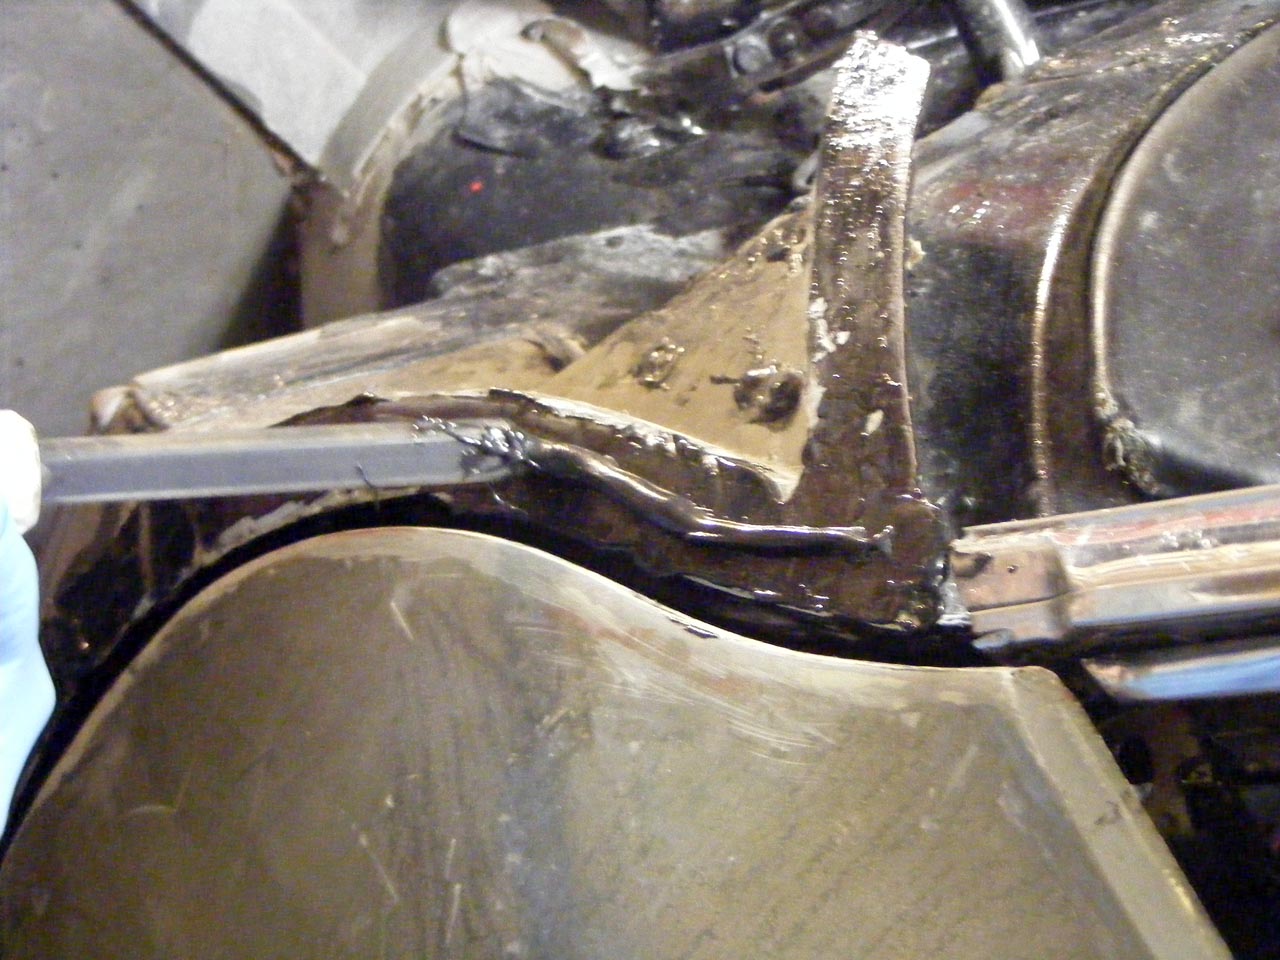
It shows I'm not alone this time: pic of me!!
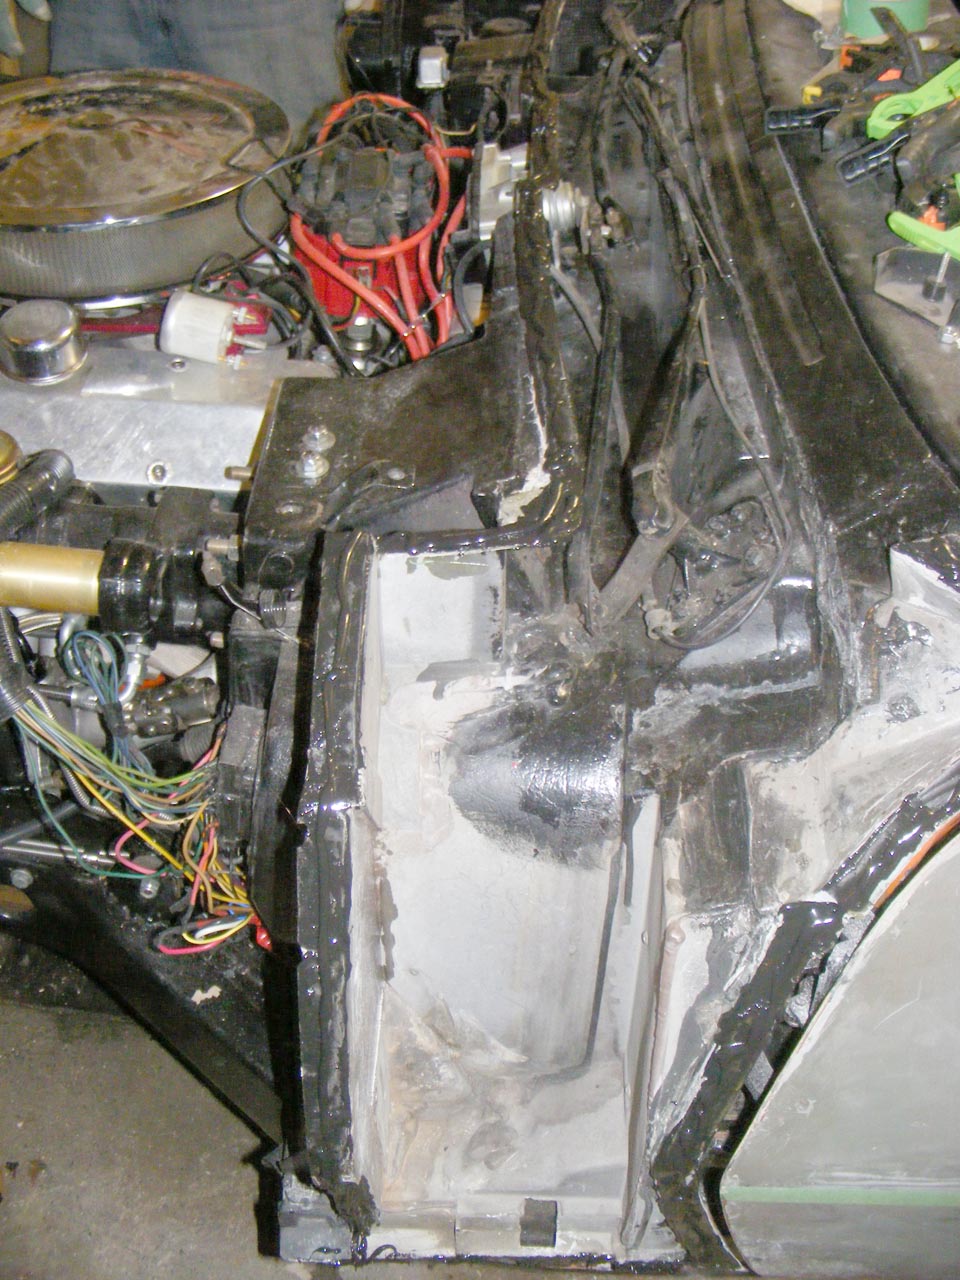
Then we did the actual drop, aligned stuff, put the screw and some tension, et voila :

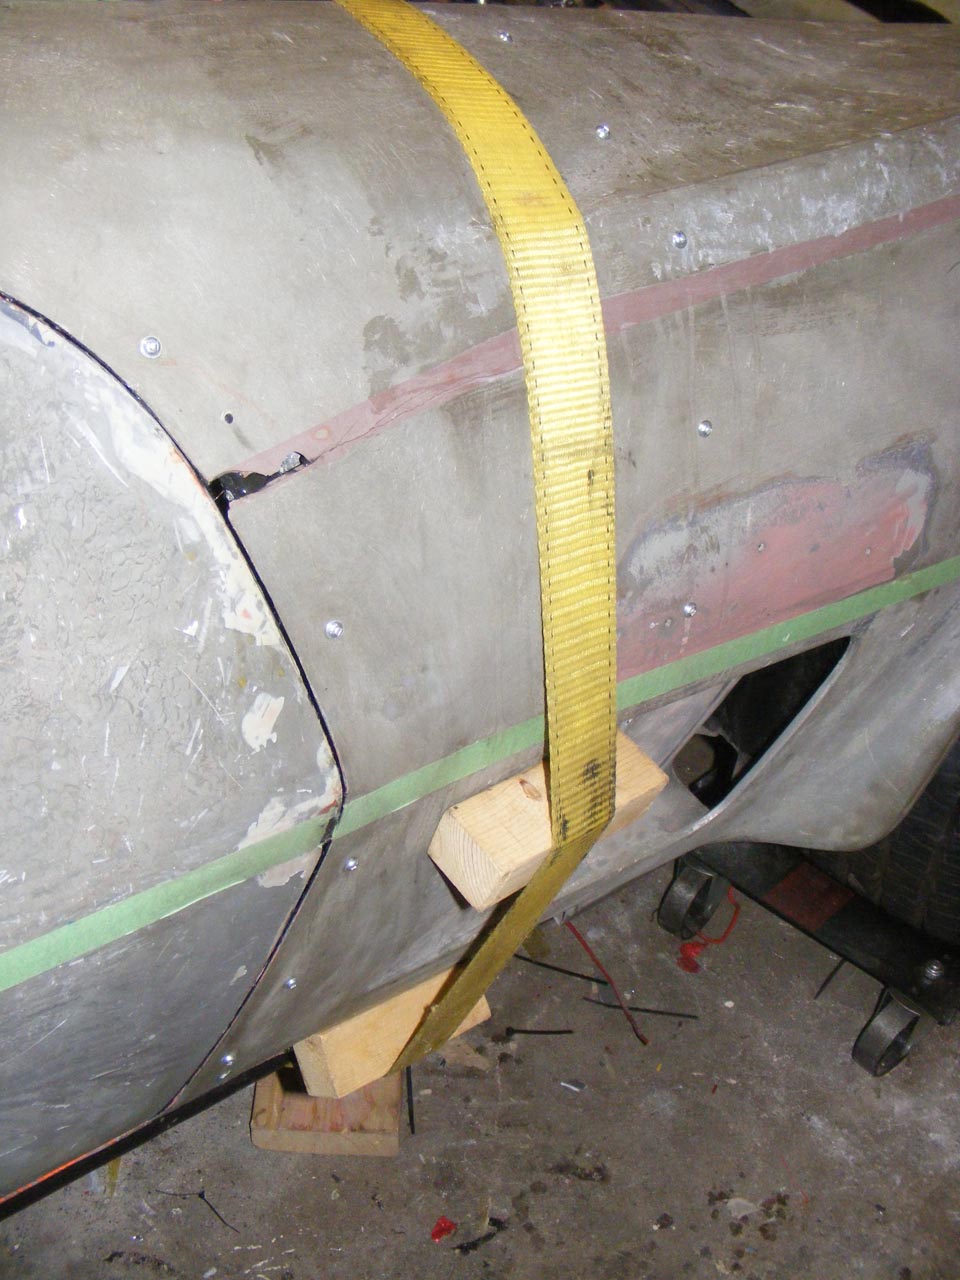
The Front is bolted to the bumper support, all is lining up nicely, we're done.
No turning back.
Now I can prepare the engine for its revival.
The plan so far was from then to entirely rebuilt the car, bypass most of the bodywork and get a rolling machine to alignment shop, to make sure everything is straight before major glassing.
Now I'm not of that sure anymore.
First the temperature outside is now diving below freezing point, snow can come tomorrow, trapping me in the garage for the months to come.
Secondly I'm concern about fiberglass contamination. For now it's not as bad as my crappy camera wanna show, but taking it outside to a shop, it's asking for trouble, no?
Whatever, today to a day of victory, a major bump is cleared, progress should come fast now, and yes, still have the banana
Almost a year of questioning, worrying and preparations and now it's done.
My joy is beyond words, it's been 2 hours, and I still have a large banana across my face and it's not coming down.
I had my trusty friend Jeff, who was there for my initial body lift and engine swap, and Michel, my Corvette buddy.
Both were incredible, focus and precision, I couldn't dream better team.
I called more people, but turned out the 3 of us was all we needed. So thanks to Sly, Chris and Paul too, I know you guys did all you could to come.
We first practiced the dropping process, 4 or 5 times, until we were sure we could to a smooth drop, without any surface rubbing. I was controling the lift and made sure everything was aligned at the front, while Jeff and Michel were spreading apart the sides and drive the back to its final position. Sorry no pic, we were all way too busy.
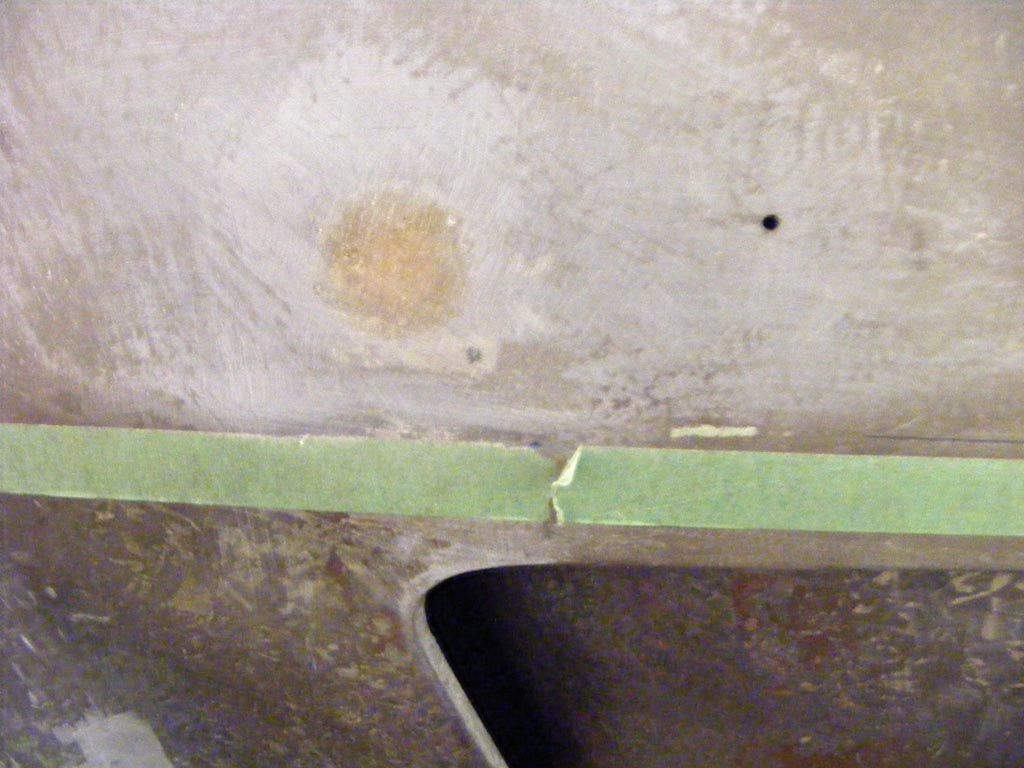
Then we prepped one last time the matting surfaces, 80 grit and Acetone rub.
Then applied a first coating of glue on all the surfaces, pressed again the surface to ensure good contact.
Then a good bead on the car side of the contact surface
It shows I'm not alone this time: pic of me!!
Then we did the actual drop, aligned stuff, put the screw and some tension, et voila :
The Front is bolted to the bumper support, all is lining up nicely, we're done.
No turning back.
Now I can prepare the engine for its revival.
The plan so far was from then to entirely rebuilt the car, bypass most of the bodywork and get a rolling machine to alignment shop, to make sure everything is straight before major glassing.
Now I'm not of that sure anymore.
First the temperature outside is now diving below freezing point, snow can come tomorrow, trapping me in the garage for the months to come.
Secondly I'm concern about fiberglass contamination. For now it's not as bad as my crappy camera wanna show, but taking it outside to a shop, it's asking for trouble, no?
Whatever, today to a day of victory, a major bump is cleared, progress should come fast now, and yes, still have the banana
Last edited by Denpo; 08-17-2017 at 10:32 PM. Reason: proofreading
12-01-2012, 06:57 PM
#256
Drifting
Thread Starter
Member Since: Aug 2010
Location: Kanuckistan
Posts: 1,617
Received 127 Likes
on
68 Posts
2022 C3 of the Year Finalist - Modified
I hope I can stumble on some affordable heavy duty walking-foot... and try to roll my own upholstery.
DIY to the core
 12-02-2012, 04:12 AM
#257
Drifting
Thread Starter
Member Since: Aug 2010
Location: Kanuckistan
Posts: 1,617
Received 127 Likes
on
68 Posts
2022 C3 of the Year Finalist - Modified
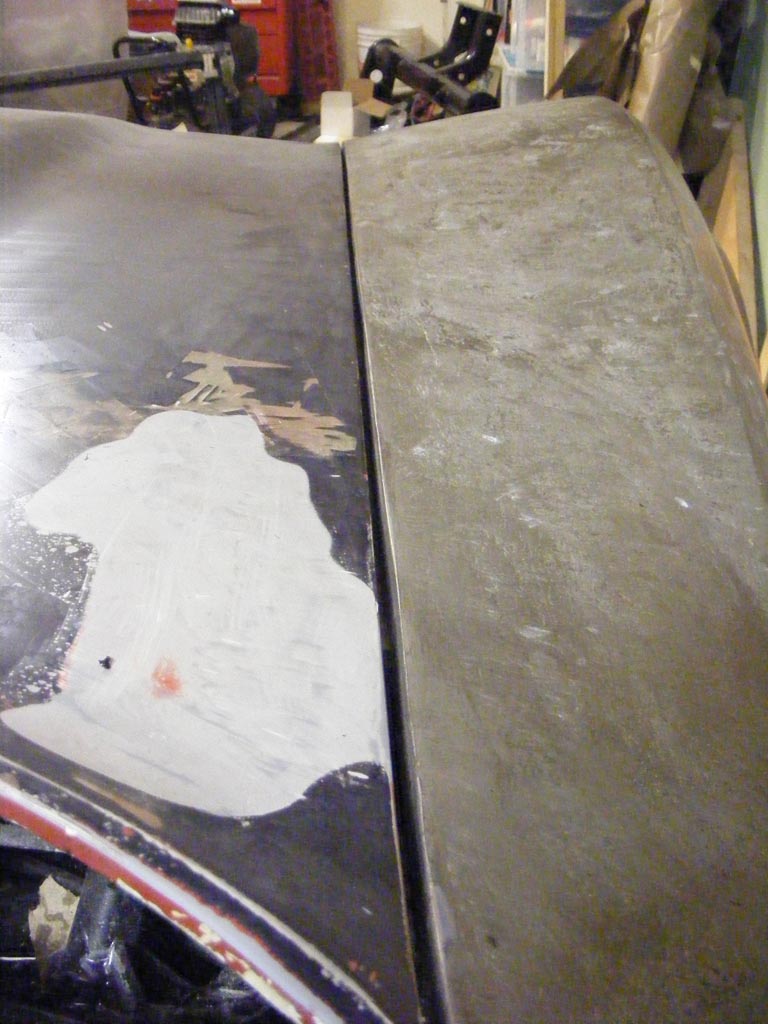
Now the 3M 3115 is rock hard, but I'll remove the screws in a couple of days.
What I could do so far :
-Vapor line reconnected to vapor canister
-Windshield washer pump connected (12v & water)
-Radiator back in, hose connected, coolant in.
-Fender lower splash shield bolted
-Fender A-Arm splash mat clipped in
-Front bumper side arm installed
-Hood realigned
-engine and headlight harness laid out and clipped in.
Now I can seriously start thinking about my body mods:
-Slopped rear window
-Hella headlight + modified popup mechanism
-Shaved front bumperette
-A Thin front aluminum bumper, embedded all along the upper lip of the bumper, integrating LED daylight and flasher.
12-02-2012, 10:51 AM
#258
TheCorvetteBen
Great job on your front clip install. Those body gaps are awesome. You did a good job holding it on there to dry as well.
Interesting you post a pic of yourself. Whenever I would sell parts to you I would always imagine you looked like the guy in your avatar. Maybe you will once your vette is up and running!
12-02-2012, 01:57 PM
#259
Drifting
Thread Starter
Member Since: Aug 2010
Location: Kanuckistan
Posts: 1,617
Received 127 Likes
on
68 Posts
2022 C3 of the Year Finalist - Modified
Hey Dennis not a problem. By the way, I sent you a PM that I have a 76 parts car. I have a list of parts and prices on the thread.
Great job on your front clip install. Those body gaps are awesome. You did a good job holding it on there to dry as well.
Interesting you post a pic of yourself. Whenever I would sell parts to you I would always imagine you looked like the guy in your avatar. Maybe you will once your vette is up and running!
For those who spent the last decade in a cavern and wonder what my avatar's picture refers to, check here : the Ariel Atom test drive.
12-03-2012, 04:58 PM
#260
Drifting
Thread Starter
Member Since: Aug 2010
Location: Kanuckistan
Posts: 1,617
Received 127 Likes
on
68 Posts
2022 C3 of the Year Finalist - Modified
Yesterday I had time to solder the led driver I received, those are really tiny and I think I will put two of there between each taillight, reducing the central control unit size and complexity.
One is a 650 mA to drive the two 5 led rows of red led, the other one is a 325 mA to drive the central single 5 led row. Both seems to fit each configuration mA bill.
UnfortunatelyI have to report setback on this sub-project.
First, I ordered the wrong drivers, those are using the quiet antiquated MC34063 chip, while I need drivers built on the PT4115 whose offer dedicated PWM dimming pin.
Secondly, I fired my led with my non dimmable drivers, and boy, what a light show. I'm nearing the too-bright-to-face level which is a good starting point
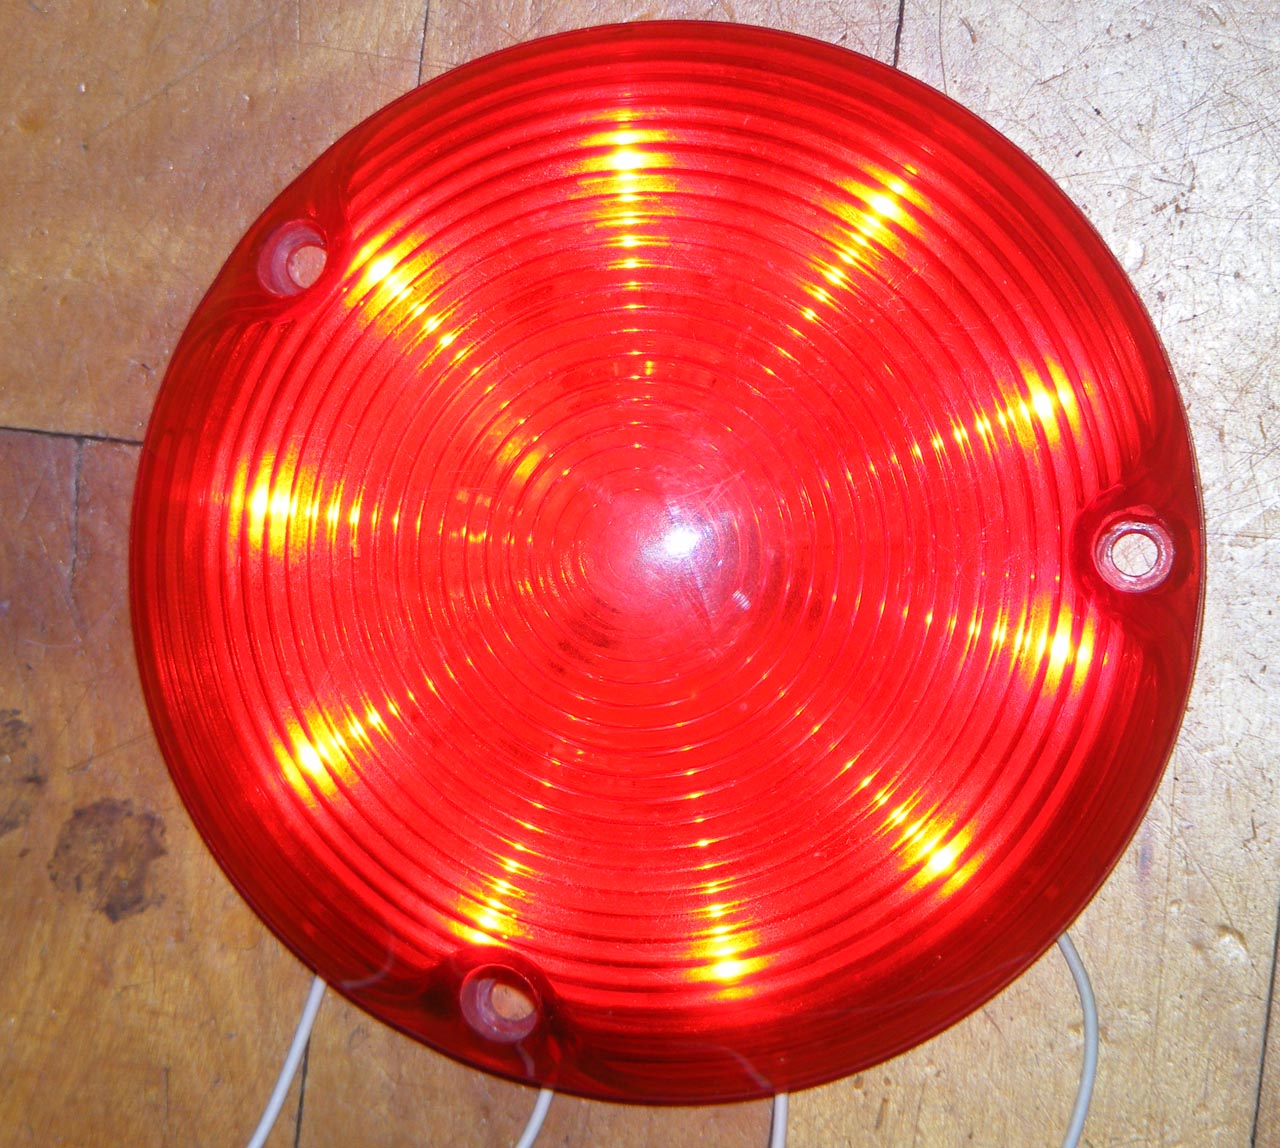
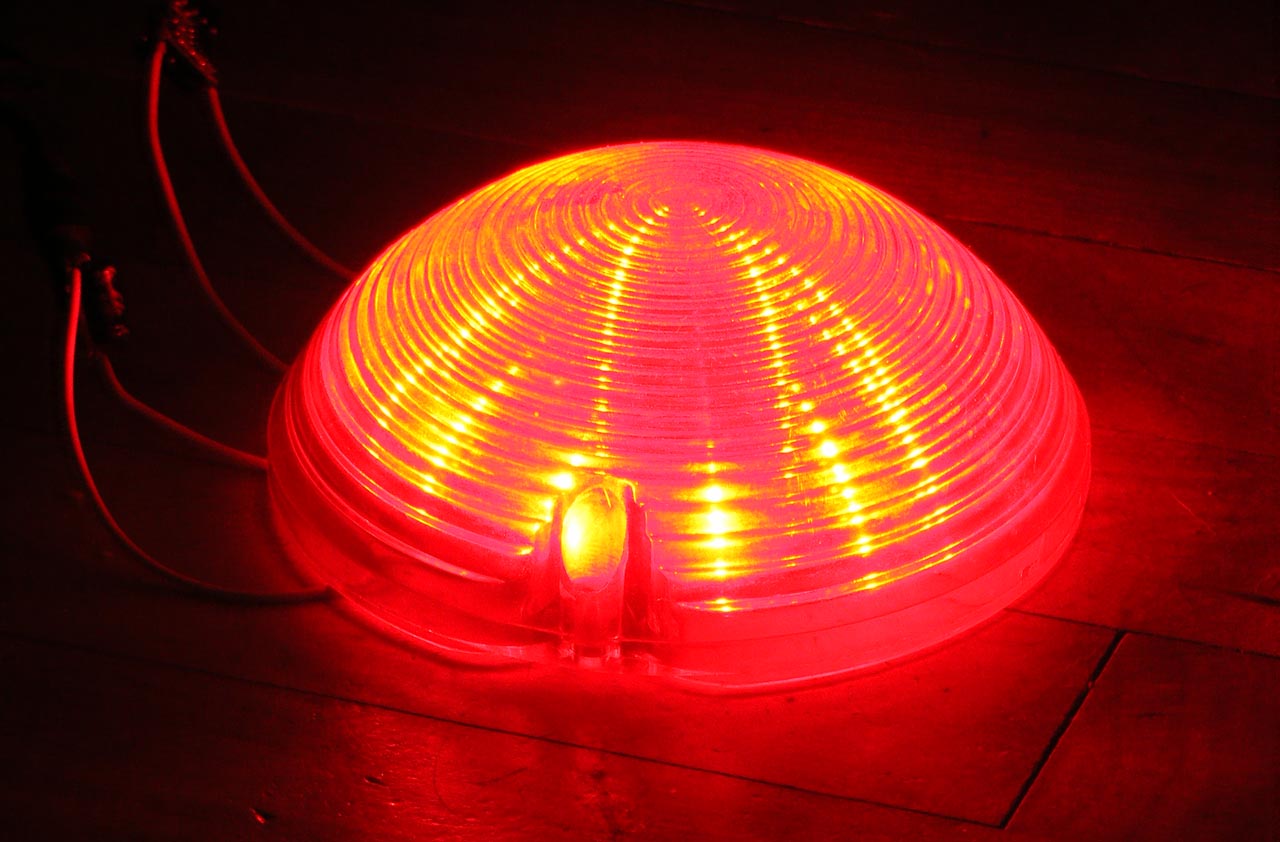
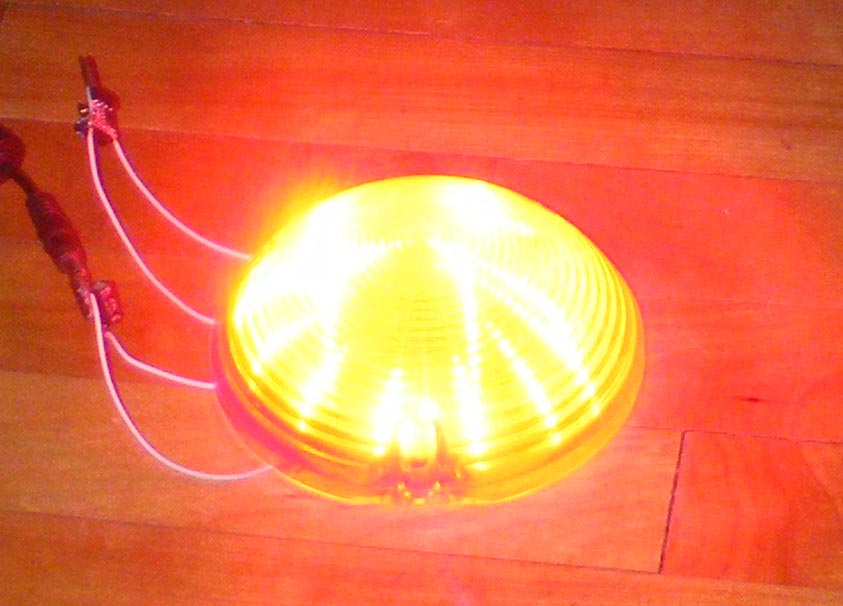
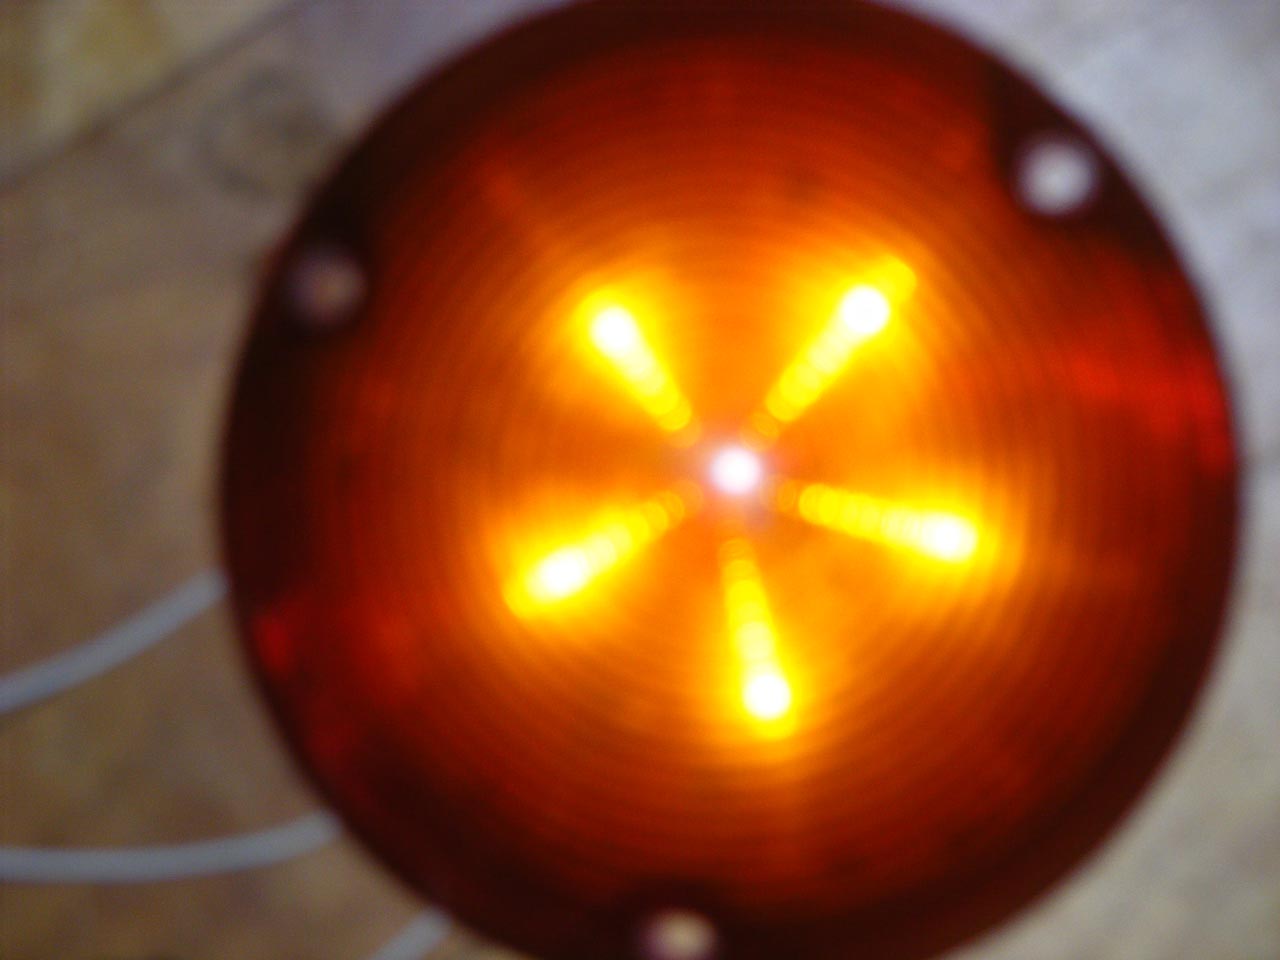
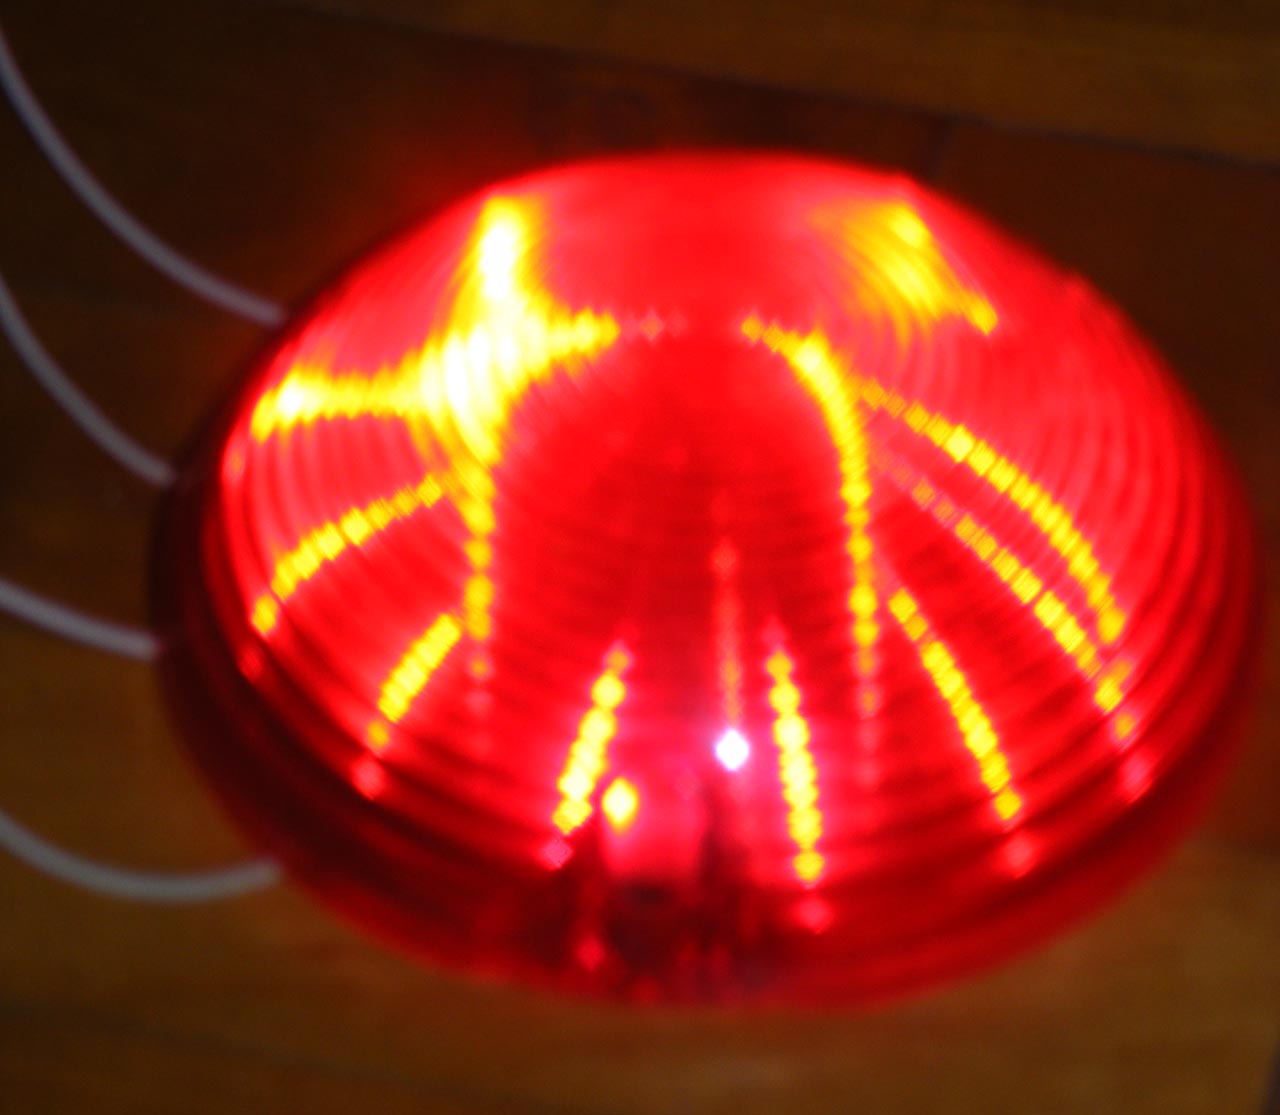
I know it's ridiculous trying to take picture of direct light source, and those was so powerful my camera wasn't too happy trying to adapt to the intensity.
I definitely will need some dimming, at least 30% down. The bad thing it that leds are spreading too much, causing nasty flares when view sideways. So just ordered a set of 5� focusing lens along with the correct led drivers.
One is a 650 mA to drive the two 5 led rows of red led, the other one is a 325 mA to drive the central single 5 led row. Both seems to fit each configuration mA bill.
UnfortunatelyI have to report setback on this sub-project.
First, I ordered the wrong drivers, those are using the quiet antiquated MC34063 chip, while I need drivers built on the PT4115 whose offer dedicated PWM dimming pin.
Secondly, I fired my led with my non dimmable drivers, and boy, what a light show. I'm nearing the too-bright-to-face level which is a good starting point
I know it's ridiculous trying to take picture of direct light source, and those was so powerful my camera wasn't too happy trying to adapt to the intensity.
I definitely will need some dimming, at least 30% down. The bad thing it that leds are spreading too much, causing nasty flares when view sideways. So just ordered a set of 5� focusing lens along with the correct led drivers.
Last edited by Denpo; 08-18-2017 at 09:23 PM.