
My '76 restoration (long post)


 02-03-2012, 01:55 AM
#204
Drifting


Thread Starter
Member Since: Aug 2010
Location: Kanuckistan
Posts: 1,617
Received 127 Likes
on
68 Posts
2022 C3 of the Year Finalist - Modified

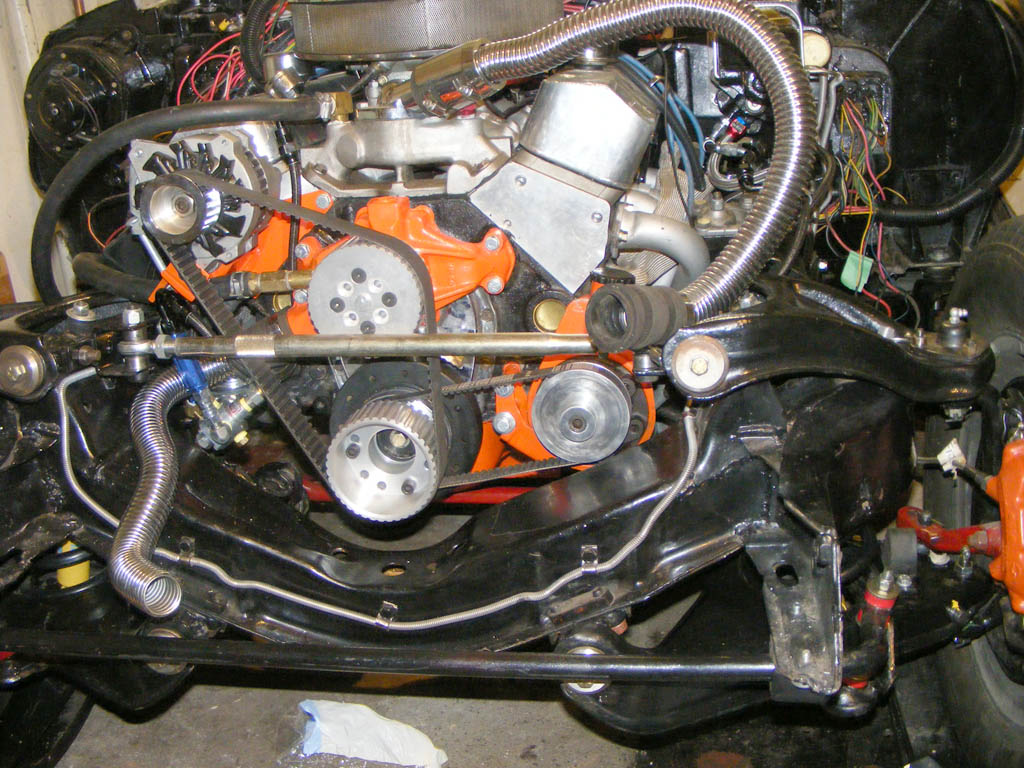
I've considered doing a serpentine mod for a while, for the reliability, but I find the setup bulky, rather non esthetic (unless you spend big $$ for billet) and I still don't address the steering pump access problem.
Then I stumbled on a post on another corvette forum about bilmer belts.
I was hooked.
Ordered a kit on ebay, 115$
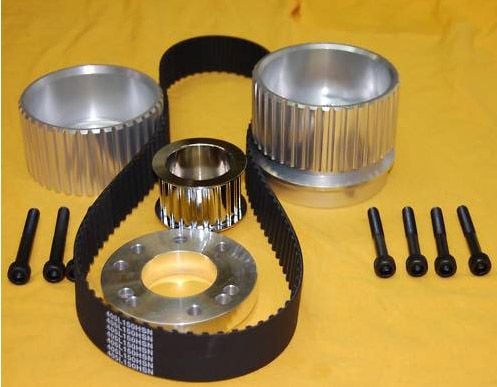
It's a small block long water pump setup. The short water pump model doesn't have the V-belt groove for the power steering.

Problem is that I have a short water pump, so I had a spacer machined, and also had the holes chamfered.

I need the installation to be flush for clearance reason....spreader bar's on the way.

And to address the steering pump issue, I decide to put the alternator on the passenger side. My machinist buddy made me this bracket :

It's just point welded, once I validate the fitting he will fully weld it (TIG).
Here's how it look so far, I will make the tension bracket this week end.

Now the alternator sit in front of the engine rather than on its side, and a bit lower, just behind the electric fan.
Then I stumbled on a post on another corvette forum about bilmer belts.
I was hooked.
Ordered a kit on ebay, 115$
It's a small block long water pump setup. The short water pump model doesn't have the V-belt groove for the power steering.
Problem is that I have a short water pump, so I had a spacer machined, and also had the holes chamfered.
I need the installation to be flush for clearance reason....spreader bar's on the way.
And to address the steering pump issue, I decide to put the alternator on the passenger side. My machinist buddy made me this bracket :
It's just point welded, once I validate the fitting he will fully weld it (TIG).
Here's how it look so far, I will make the tension bracket this week end.
Now the alternator sit in front of the engine rather than on its side, and a bit lower, just behind the electric fan.
Last edited by Denpo; 02-03-2012 at 11:02 AM.
02-03-2012, 09:22 AM
#205
Drifting

Denpo--
Looks very nice... Is that a groove on the Crank pulley for your PS?? How close is the spreader bar to the new belt... From the picture listed it looks very close... I know how funny camera angles can make items look like they touch...
Must be nice to have a "machinist buddy"!!! He must come in handy all the time LOL!!
Great work, that belt is not going to slip...
Rogman
02-03-2012, 10:53 AM
#206
Drifting
Thread Starter
Member Since: Aug 2010
Location: Kanuckistan
Posts: 1,617
Received 127 Likes
on
68 Posts
2022 C3 of the Year Finalist - Modified
Denpo--
Looks very nice... Is that a groove on the Crank pulley for your PS?? How close is the spreader bar to the new belt... From the picture listed it looks very close... I know how funny camera angles can make items look like they touch...
Must be nice to have a "machinist buddy"!!! He must come in handy all the time LOL!!
Great work, that belt is not going to slip...
Rogman
Looks very nice... Is that a groove on the Crank pulley for your PS?? How close is the spreader bar to the new belt... From the picture listed it looks very close... I know how funny camera angles can make items look like they touch...
Must be nice to have a "machinist buddy"!!! He must come in handy all the time LOL!!
Great work, that belt is not going to slip...
Rogman
Yes the groove you saw is for the steering pump.
Thanks, but that's my buddy you have to compliment, he opens up so much new possibilities.
We have an agreement, I fix his computers and stuff, he does me lathe, mill and TIG
 02-17-2012, 12:51 AM
#208
Drifting
Thread Starter
Member Since: Aug 2010
Location: Kanuckistan
Posts: 1,617
Received 127 Likes
on
68 Posts
2022 C3 of the Year Finalist - Modified
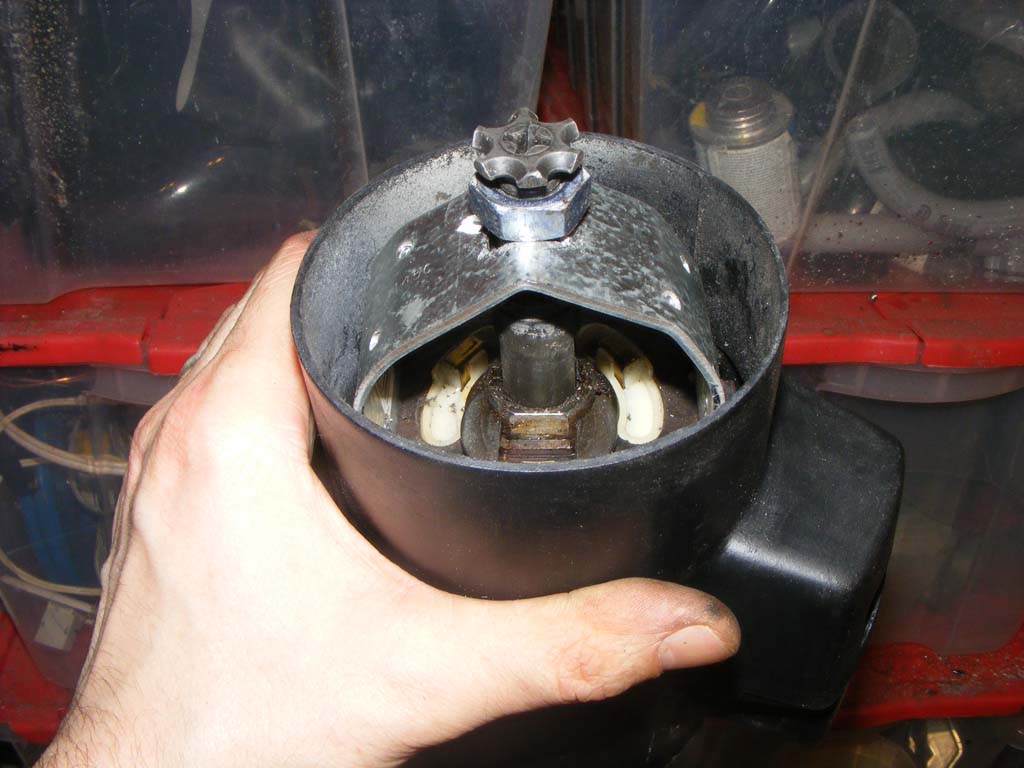
Do you guys wanna know how Bubba fixes window regulators?
Here's how :


Of course the assembly barely moves, no wonder the motor was blowing fuse on a regular basis.
Nothing to save here, I need a new regulator for my passenger side.
Good side : I could remove the motor, it's in good condition, even with the miserable life he had.
Just when I thought the replace-that-broken-part season was over *sigh*
Here's how :
Of course the assembly barely moves, no wonder the motor was blowing fuse on a regular basis.
Nothing to save here, I need a new regulator for my passenger side.
Good side : I could remove the motor, it's in good condition, even with the miserable life he had.
Just when I thought the replace-that-broken-part season was over *sigh*

 03-06-2012, 01:09 AM
#211
Drifting
Thread Starter
Member Since: Aug 2010
Location: Kanuckistan
Posts: 1,617
Received 127 Likes
on
68 Posts
2022 C3 of the Year Finalist - Modified
Once again, it's been a while since last update. Sorry guys, too much work, no time for posting.
First reason it took so long, we went totally overboard with the Gilmer belt experiment.
At least a good opportunity to show younger generations the danger of a free run at the machine shop.
Since the I had to have a special pulley done for the steering pump, we tried to catch best of both world.
Here's the result.


The crankshaft pullet has been machined to the serpentine pattern.
Still got to find the proper length belt.
Another thing that took time was the doors.
I think I'm done for the mechanical part of the it. Finally.
I've received my replacement regulator from Ken's corvette part, disassembled both regulator, changed the motor gear, cleaned the spring and everything.

I basically had to apply the same treatment to the passenger door, cleaning the rust, glassing shut so small rust hole, filling some hole and gluing bottom on the panel.
I did one experiment on the door seams between door structure and panel:
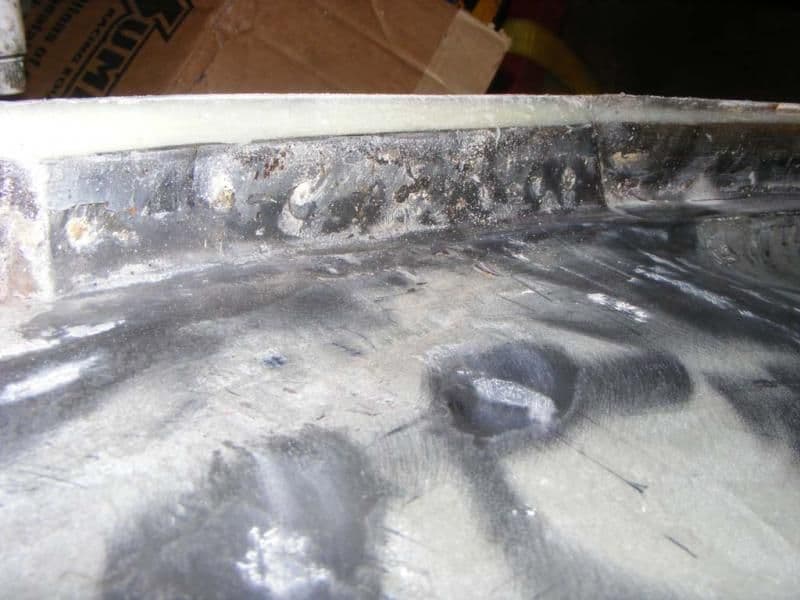
This is epoxy resin with fiberglass powder added. The specialized shop sells it by the pound, better wear a real mask when you do the mix.
I might be wrong, but apart the consistency, wouldn't this be the perfect filler?
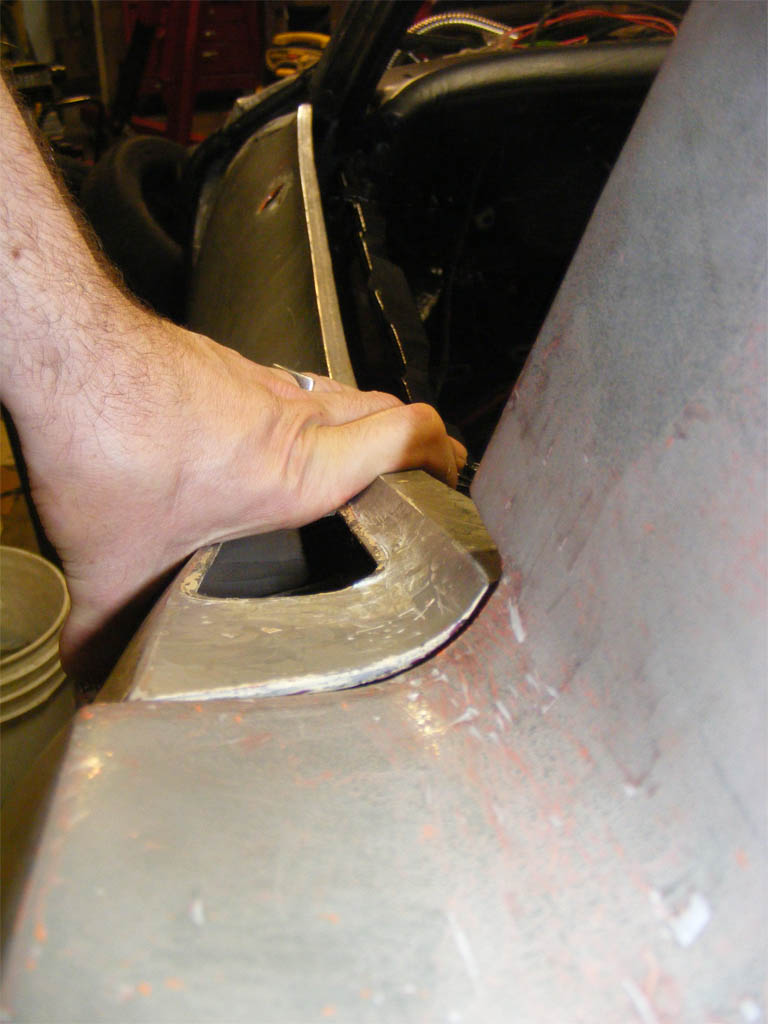
Once the the door gut where checked cleaned and reinstalled (except the glass), I went to the daunting task of installing and aligning the door.... alone.
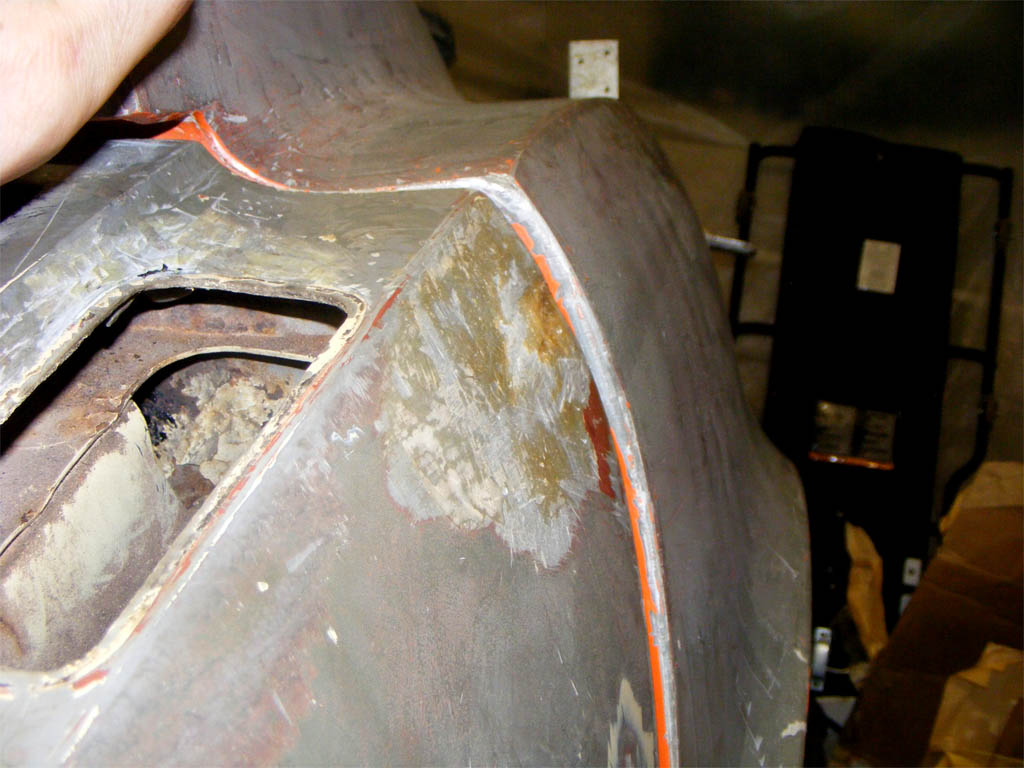
Holly molly, that was some sport, for a mean result :


The shapes don't match. at all. crap.
For the bottom, I think it's the rear panel's fault, but for the top is rather a case of "oh looks like it's been damaged on this side too". You see the red pattern on the door skin...
Maybe it's just normal, you tell me, anyway, some serious glassing ahead.
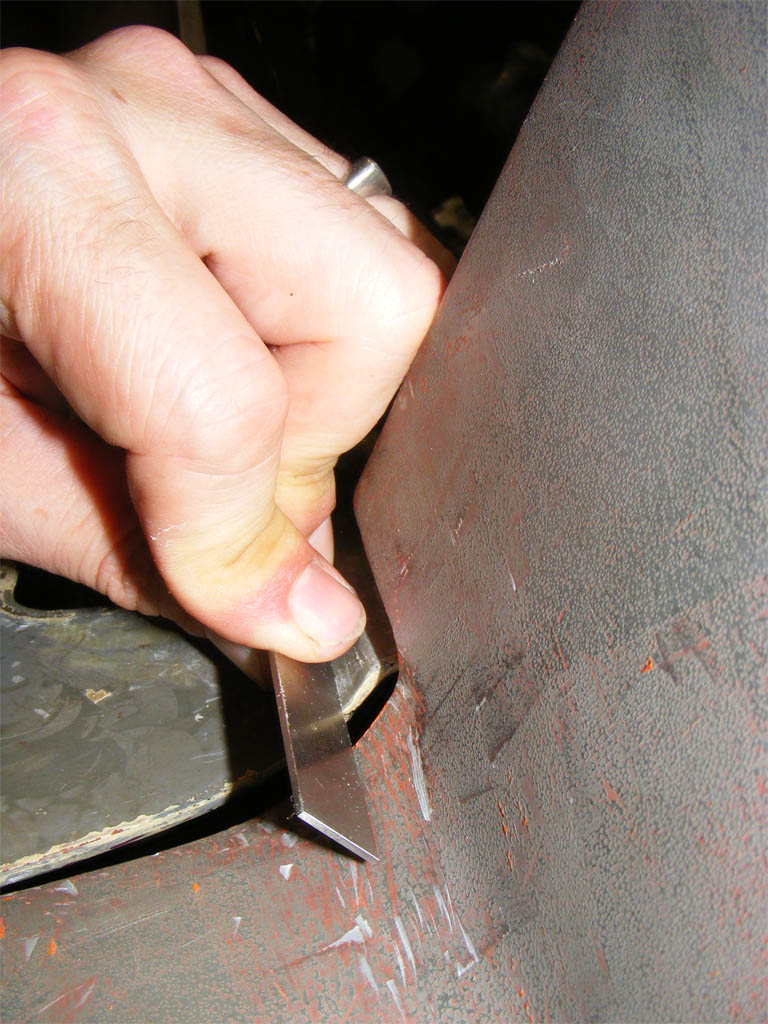
By the way, yes I know the body is full of nicks, I'm not very proud of that, that was before I discover the razor blade method. Hopefully all the damages are in the picture, the rest of the body is nice and smooth.
One cool point is that I could get the feeling of the rebuilt hinges, it's gorgeous, smooth and firm, no play whatsoever.
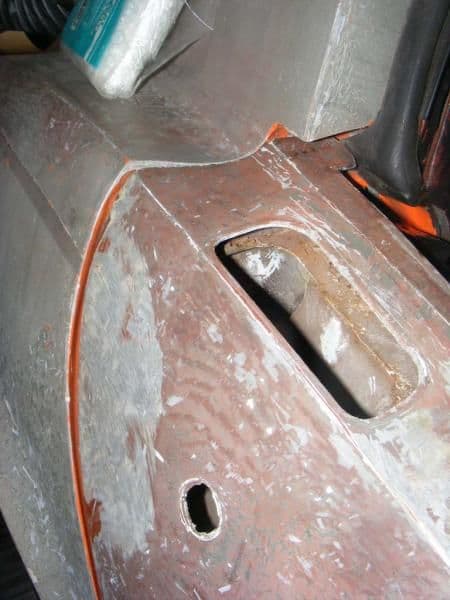
One last stuff:
Some may remember I bought ages ago a '80 bumper on the cheap, well, that was too cheap. I realized how hard to would be to make it look OK, so I went on a hunt and snatched a good prey at good price.

Brand new Eckler '80 bumper. That will save me a lot of time.
First reason it took so long, we went totally overboard with the Gilmer belt experiment.
At least a good opportunity to show younger generations the danger of a free run at the machine shop.
Since the I had to have a special pulley done for the steering pump, we tried to catch best of both world.
Here's the result.
The crankshaft pullet has been machined to the serpentine pattern.
Still got to find the proper length belt.
Another thing that took time was the doors.
I think I'm done for the mechanical part of the it. Finally.
I've received my replacement regulator from Ken's corvette part, disassembled both regulator, changed the motor gear, cleaned the spring and everything.
I basically had to apply the same treatment to the passenger door, cleaning the rust, glassing shut so small rust hole, filling some hole and gluing bottom on the panel.
I did one experiment on the door seams between door structure and panel:
This is epoxy resin with fiberglass powder added. The specialized shop sells it by the pound, better wear a real mask when you do the mix.
I might be wrong, but apart the consistency, wouldn't this be the perfect filler?
Once the the door gut where checked cleaned and reinstalled (except the glass), I went to the daunting task of installing and aligning the door.... alone.
Holly molly, that was some sport, for a mean result :
The shapes don't match. at all. crap.
For the bottom, I think it's the rear panel's fault, but for the top is rather a case of "oh looks like it's been damaged on this side too". You see the red pattern on the door skin...
Maybe it's just normal, you tell me, anyway, some serious glassing ahead.
By the way, yes I know the body is full of nicks, I'm not very proud of that, that was before I discover the razor blade method. Hopefully all the damages are in the picture, the rest of the body is nice and smooth.
One cool point is that I could get the feeling of the rebuilt hinges, it's gorgeous, smooth and firm, no play whatsoever.
One last stuff:
Some may remember I bought ages ago a '80 bumper on the cheap, well, that was too cheap. I realized how hard to would be to make it look OK, so I went on a hunt and snatched a good prey at good price.
Brand new Eckler '80 bumper. That will save me a lot of time.
04-18-2012, 01:17 AM
#214
Drifting
Thread Starter
Member Since: Aug 2010
Location: Kanuckistan
Posts: 1,617
Received 127 Likes
on
68 Posts
2022 C3 of the Year Finalist - Modified
Quiet a while since last update, well, vacations have been fantastic but not in a restful way.
I actually caught a bit of a down since back home
Anyway I'm kinda stuck for the moment, so I haven't spent much time in the garage lately.
The next step I'm facing (door/front clip alignment) is pretty intimidating, I need to brace myself up
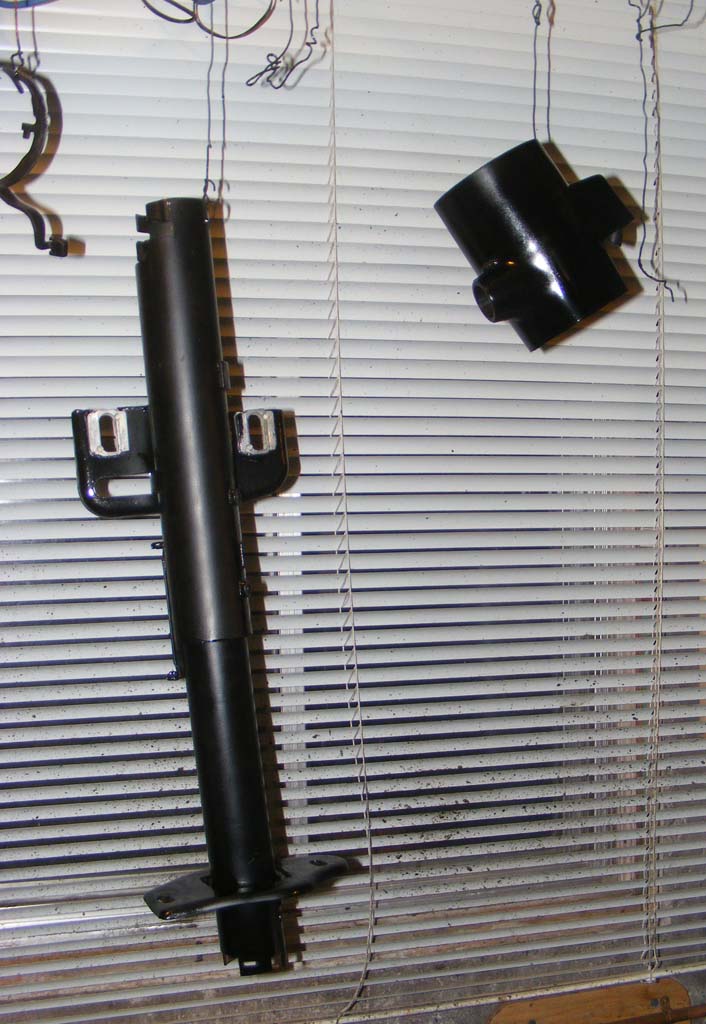
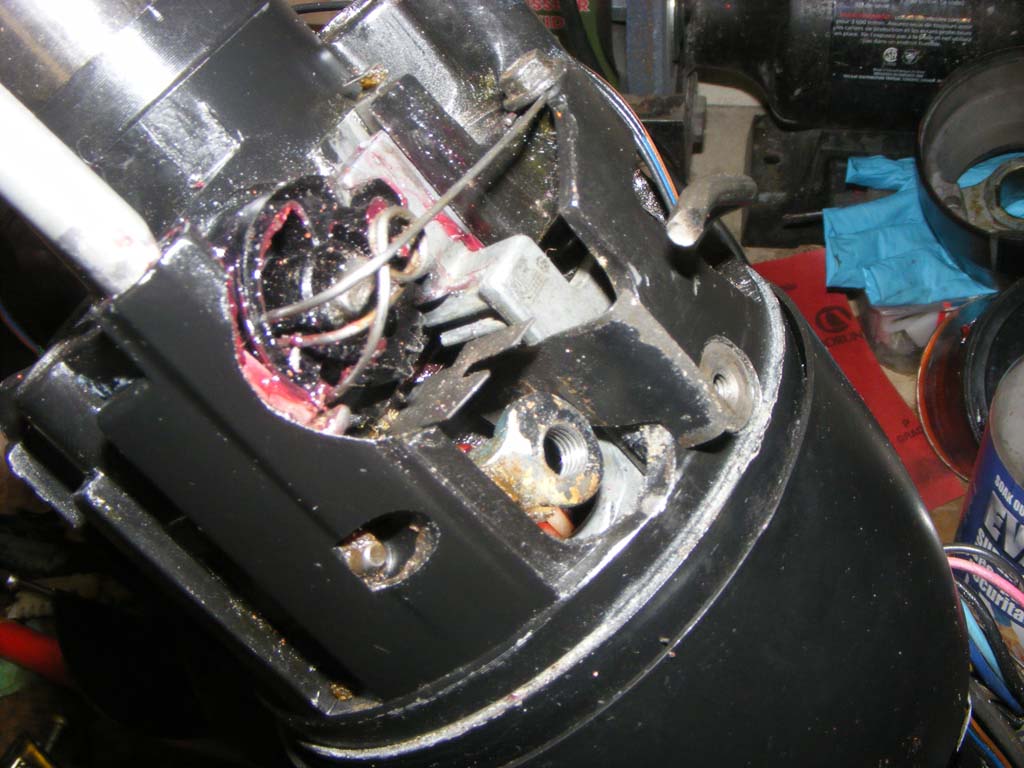
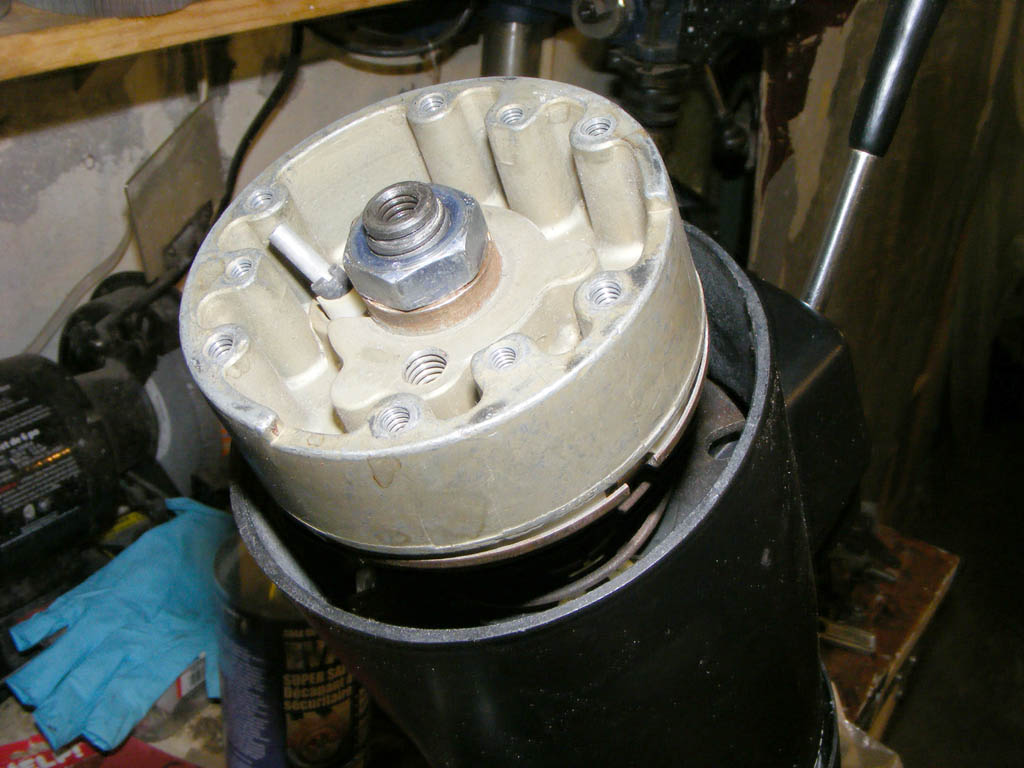
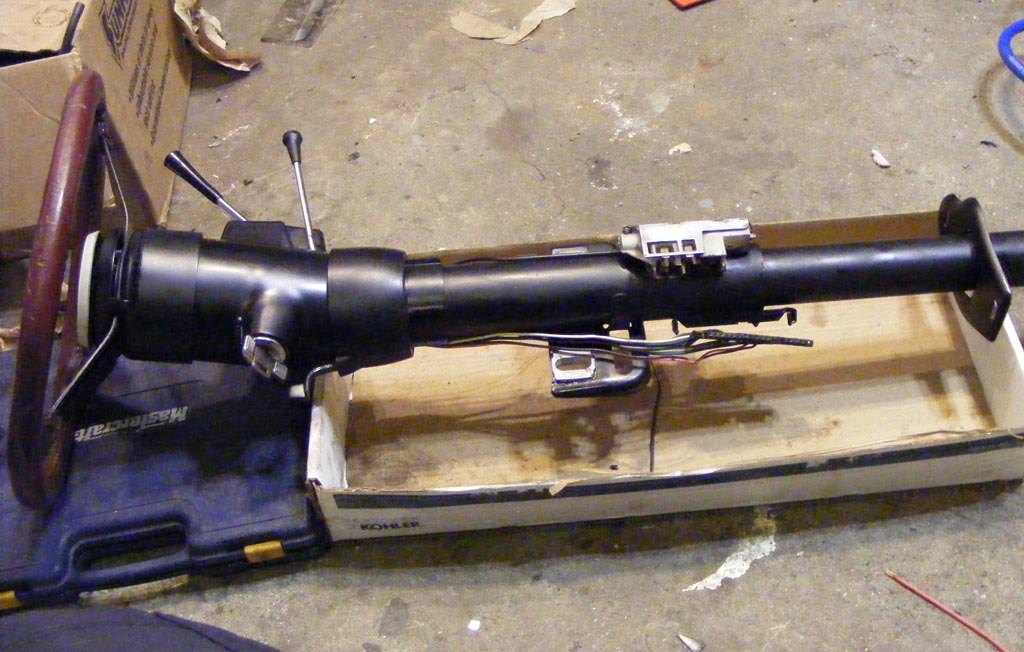
In the meantime, here's some pic from my steering column I rebuilt just before going in vacations.
The '80 replacement column was working fine, slight problem : it had been collapsed for real before.
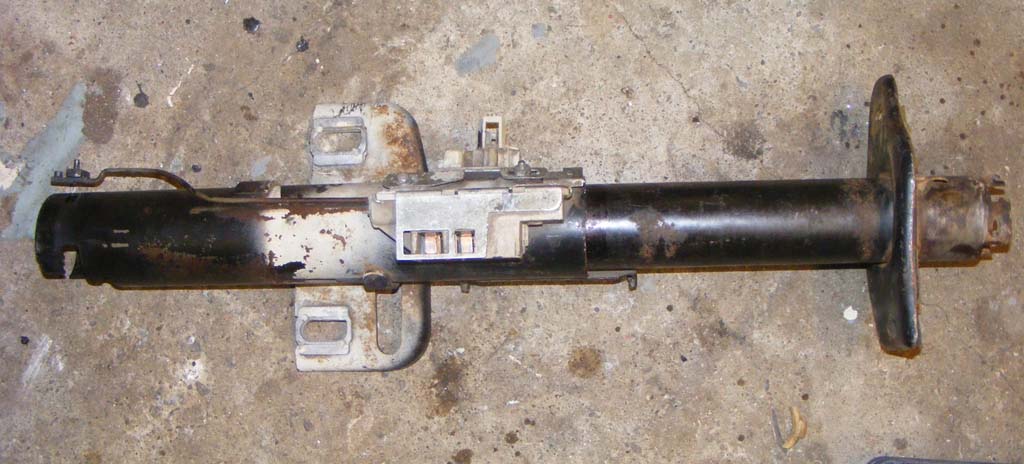
I had to stretch out 1/2 the lower inner tube on the press.
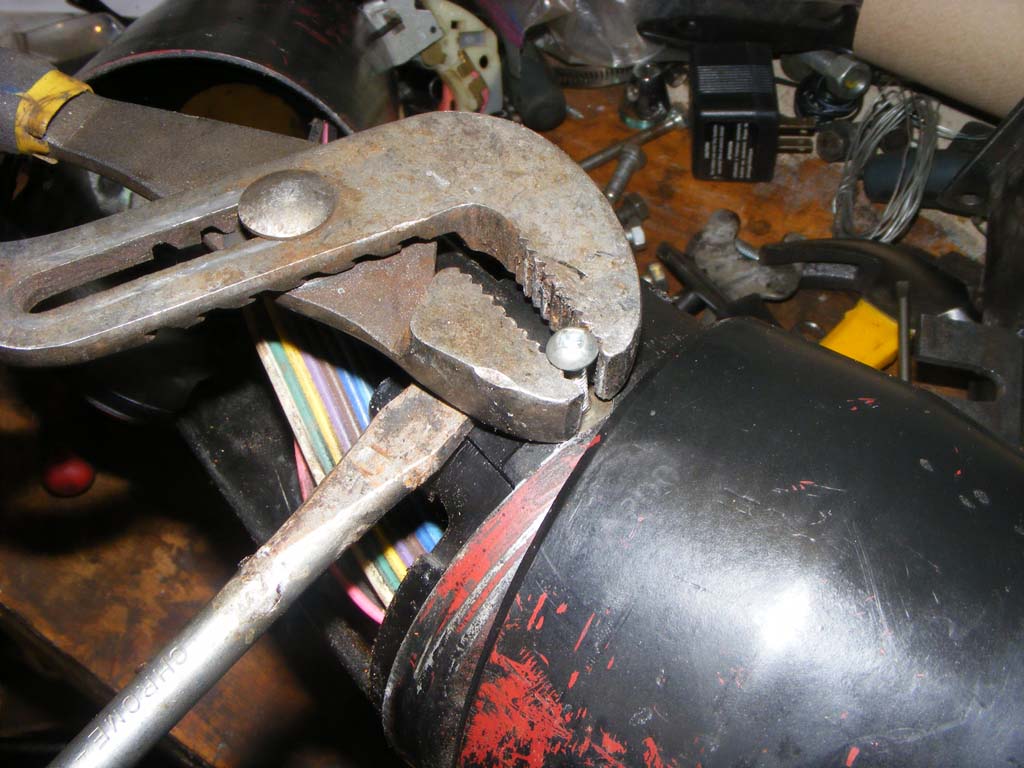
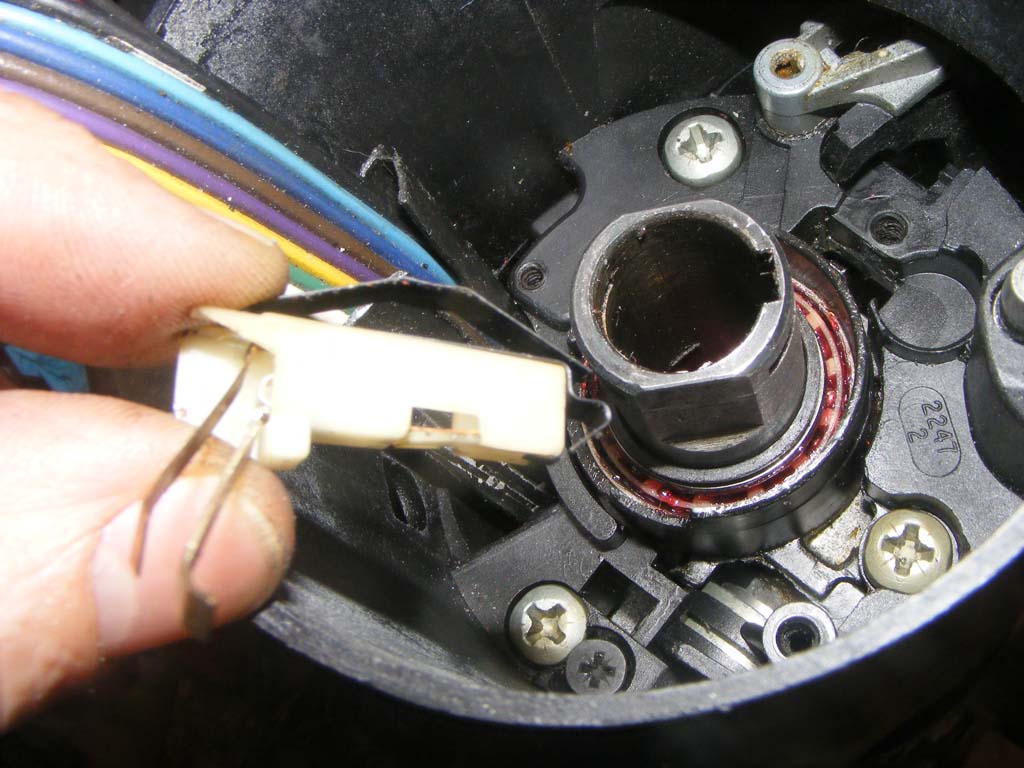
Here's my ghetto pusher to remove the column lock plate retainer.
And my ghetto way to pull out the tilt axis pin.
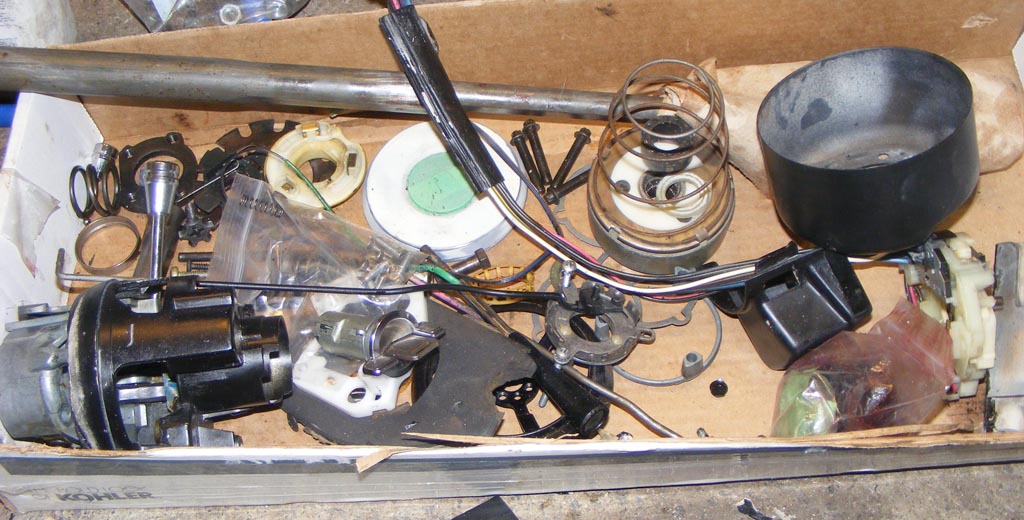
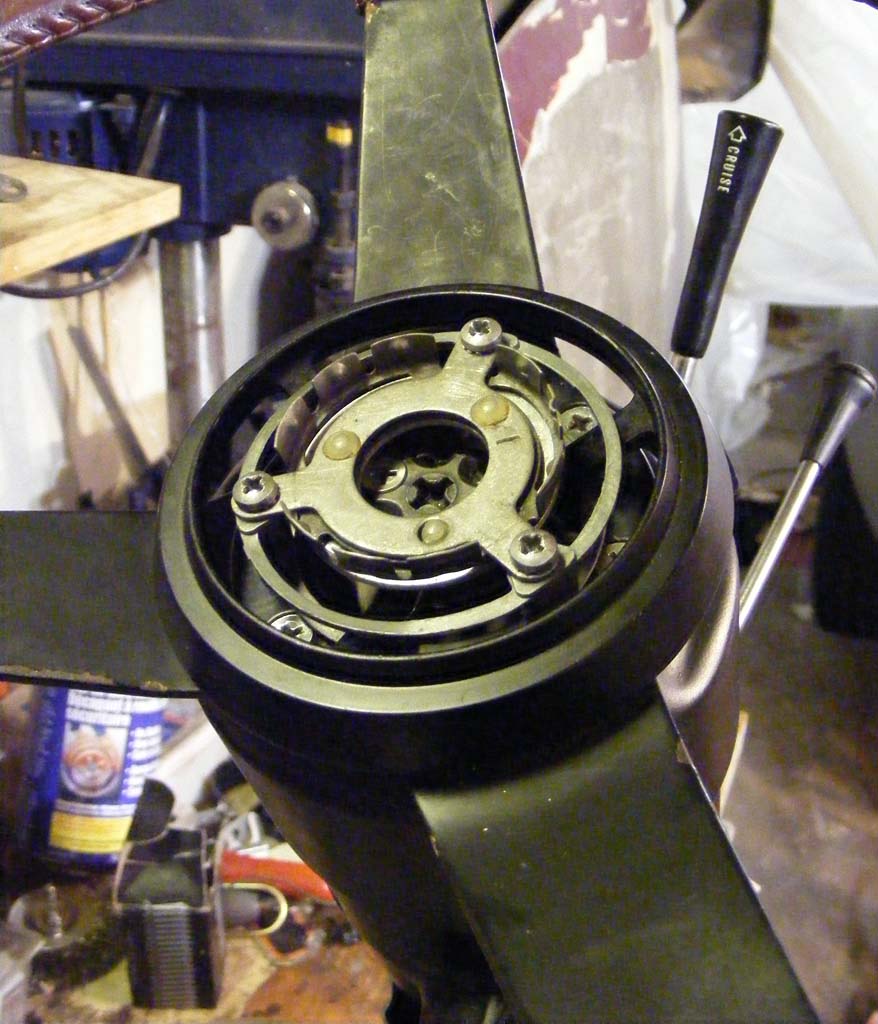
I did not changed the bearings, they looked good enough, I cleaned them, re-packed with synthetic grease and declared them good to go. It not like those was spinning at thousands of RPM for hours.
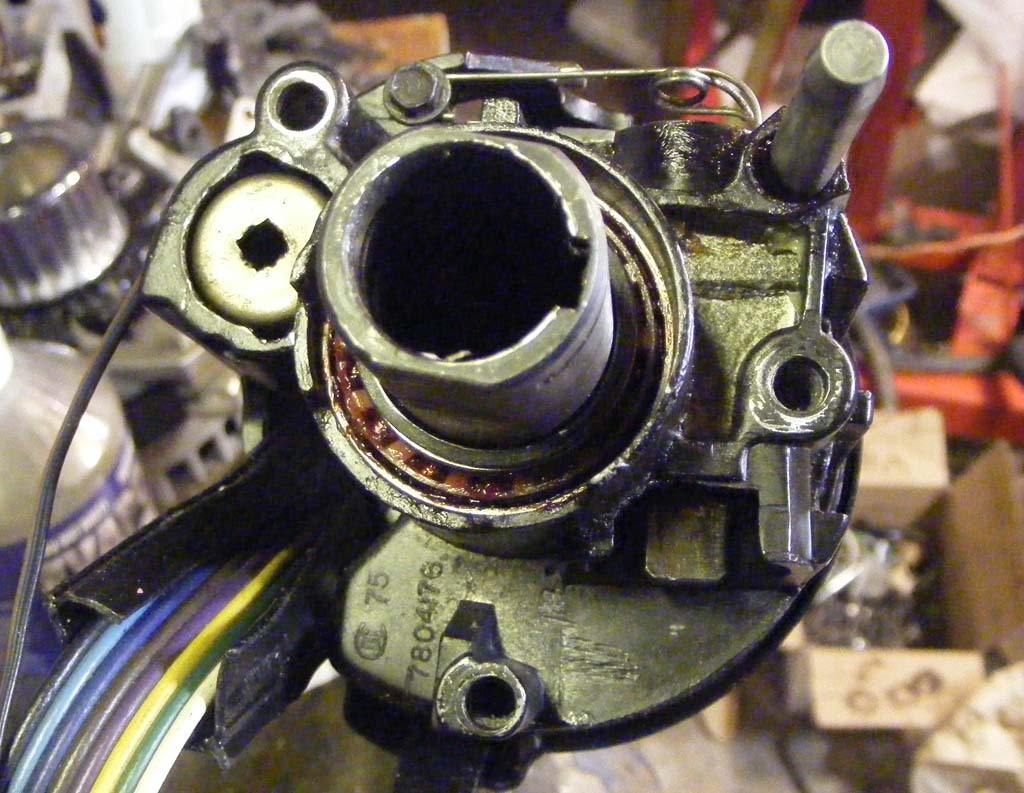
The plastic retainer was in surprisingly good shape, didn't break, still soft.
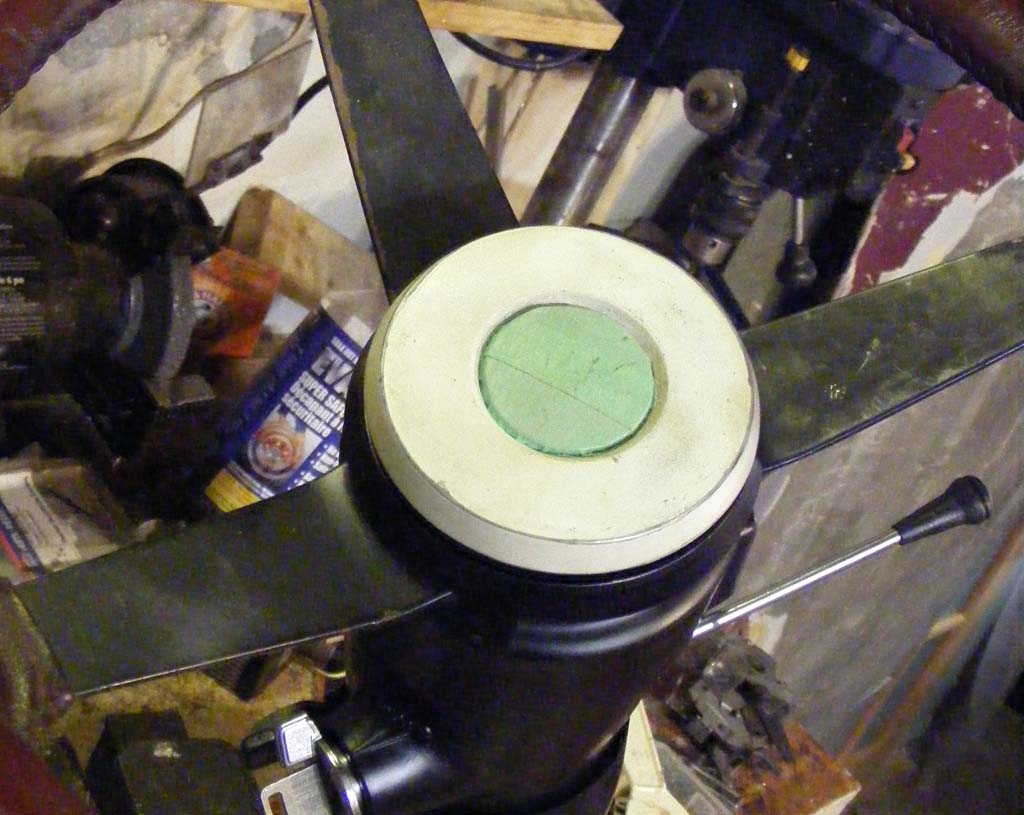
The pin in not in the best shape and seems too short, it doesn't touch the metal leg of the piece that goes on top of that. I'll get back to that later.
And yes, the clip is missing, it's just that I took the pic to soon.
I actually caught a bit of a down since back home
Anyway I'm kinda stuck for the moment, so I haven't spent much time in the garage lately.
The next step I'm facing (door/front clip alignment) is pretty intimidating, I need to brace myself up
In the meantime, here's some pic from my steering column I rebuilt just before going in vacations.
The '80 replacement column was working fine, slight problem : it had been collapsed for real before.
I had to stretch out 1/2 the lower inner tube on the press.
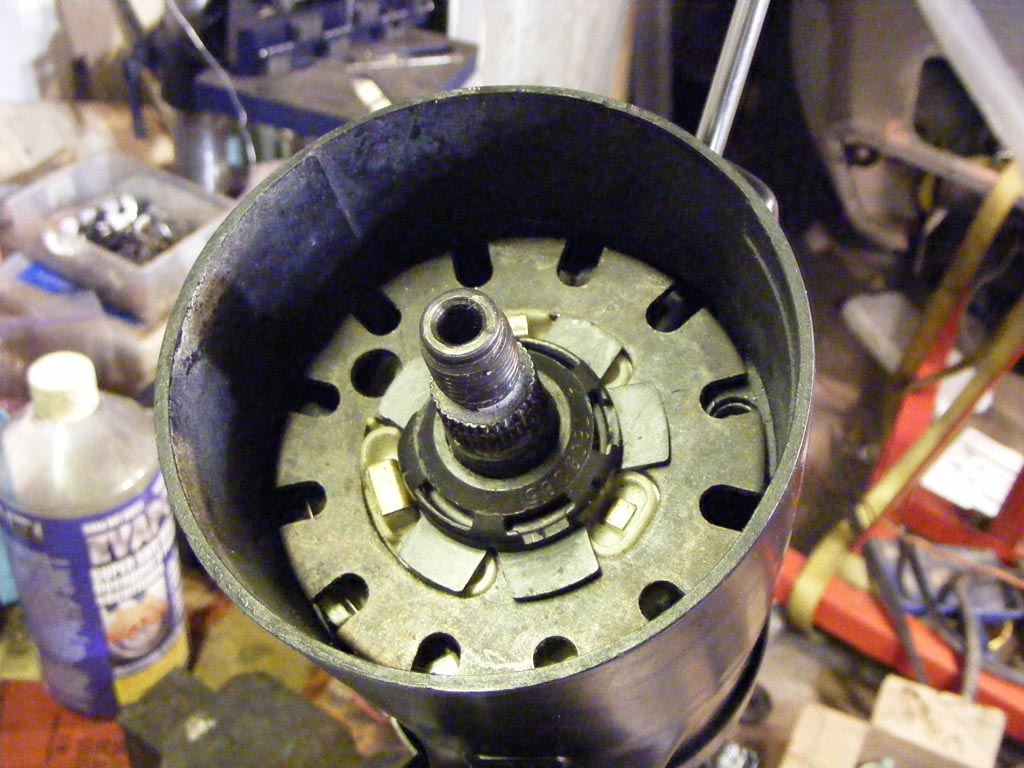
Here's my ghetto pusher to remove the column lock plate retainer.
And my ghetto way to pull out the tilt axis pin.
I did not changed the bearings, they looked good enough, I cleaned them, re-packed with synthetic grease and declared them good to go. It not like those was spinning at thousands of RPM for hours.
The plastic retainer was in surprisingly good shape, didn't break, still soft.
The pin in not in the best shape and seems too short, it doesn't touch the metal leg of the piece that goes on top of that. I'll get back to that later.
And yes, the clip is missing, it's just that I took the pic to soon.
Last edited by Denpo; 08-17-2017 at 07:37 PM.
05-24-2012, 07:19 PM
#215
Drifting
Thread Starter
Member Since: Aug 2010
Location: Kanuckistan
Posts: 1,617
Received 127 Likes
on
68 Posts
2022 C3 of the Year Finalist - Modified
Hi Everyone, here's some news from the front.
The resto have been slowed down for a while. There's been the vacations, and then I decided to quit my job and start my own company.
Enough to keep a man away from it's cave for a while.
Let's start with the good news :
Finally I can call a wrap on two of my subproject :
-The gilmer belt setup
Finally received the serpentine 6 ribs small belt for my PS pump. I was really unsure I measured the length right, turned out to be the perfect size :
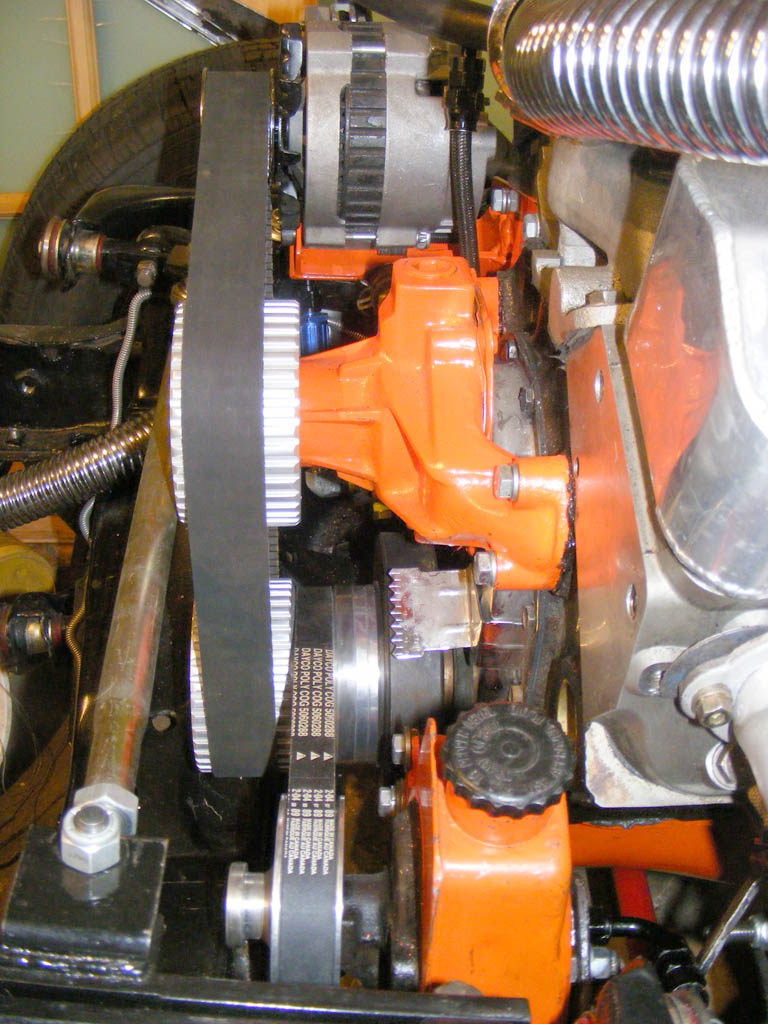
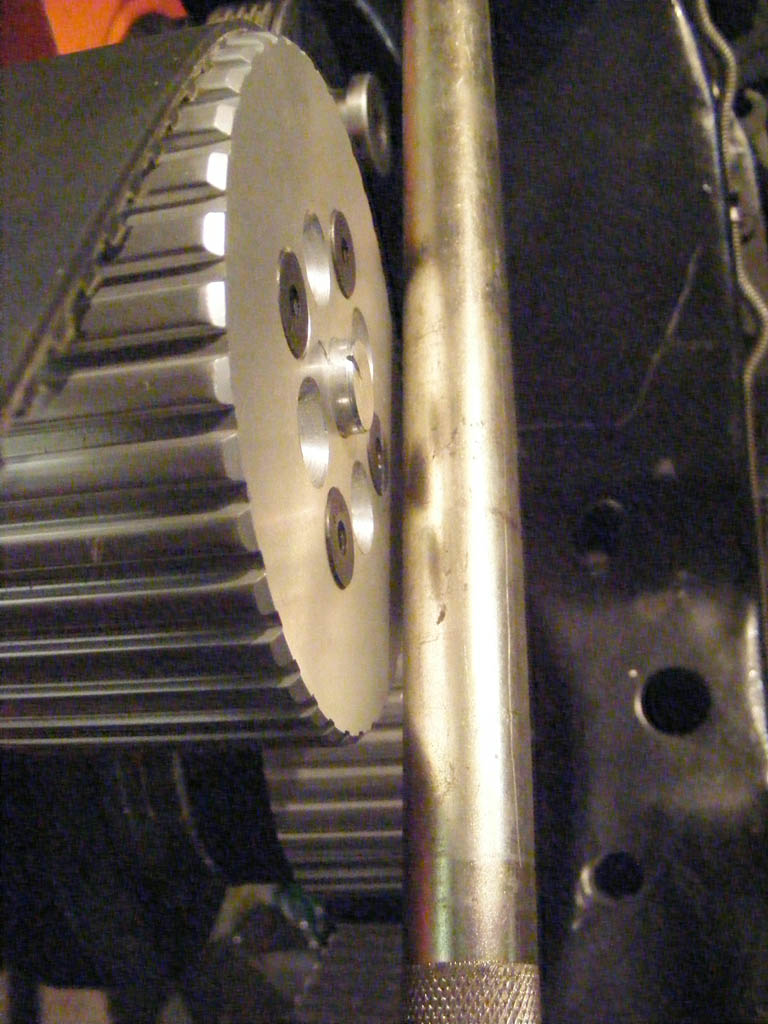
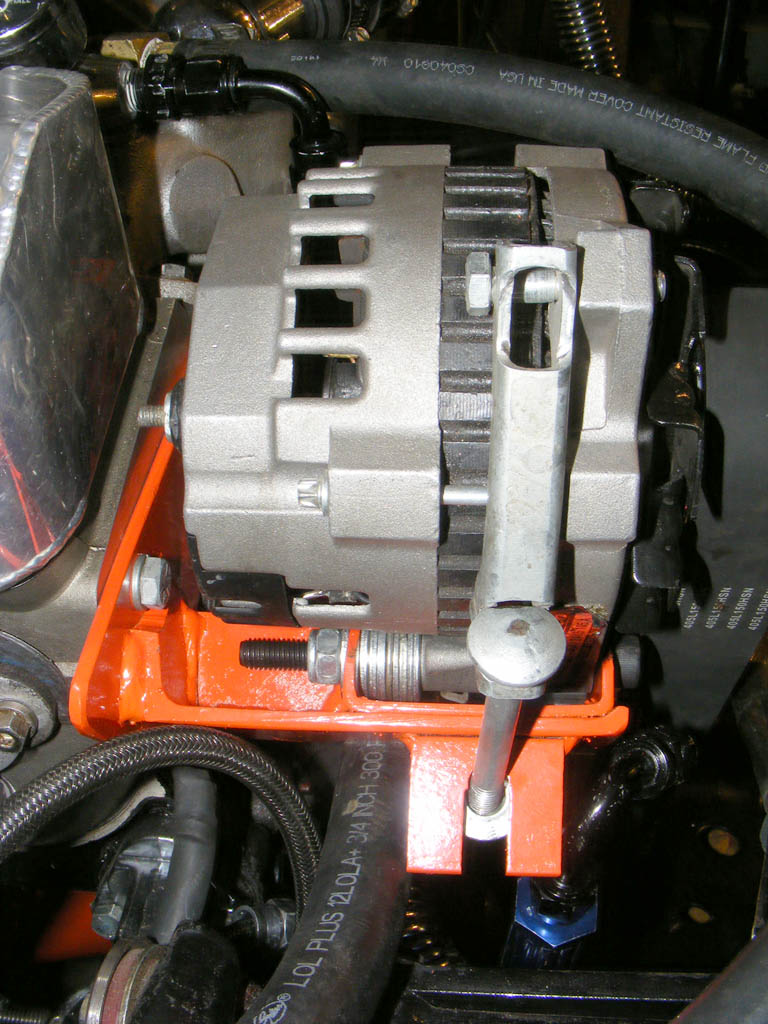
One last concern, the water pump pulley is really close to the spreader bar, only 1/8". I don't know how much an engine can move in that direction, but I got the feeling it will touch. You tell me.
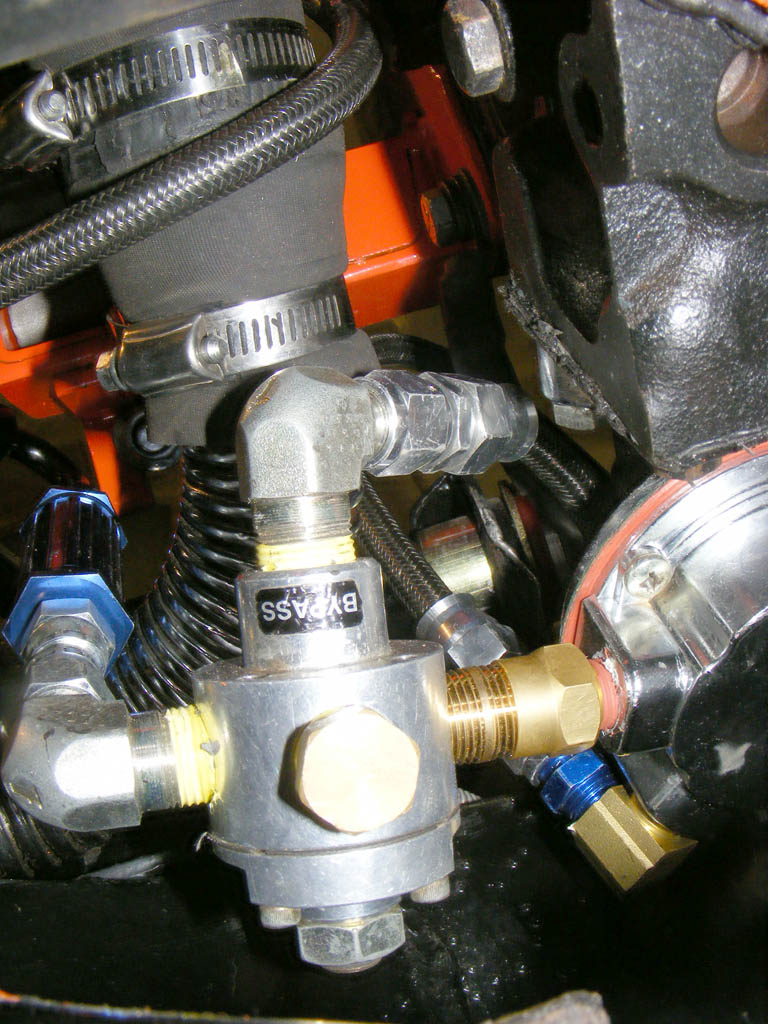
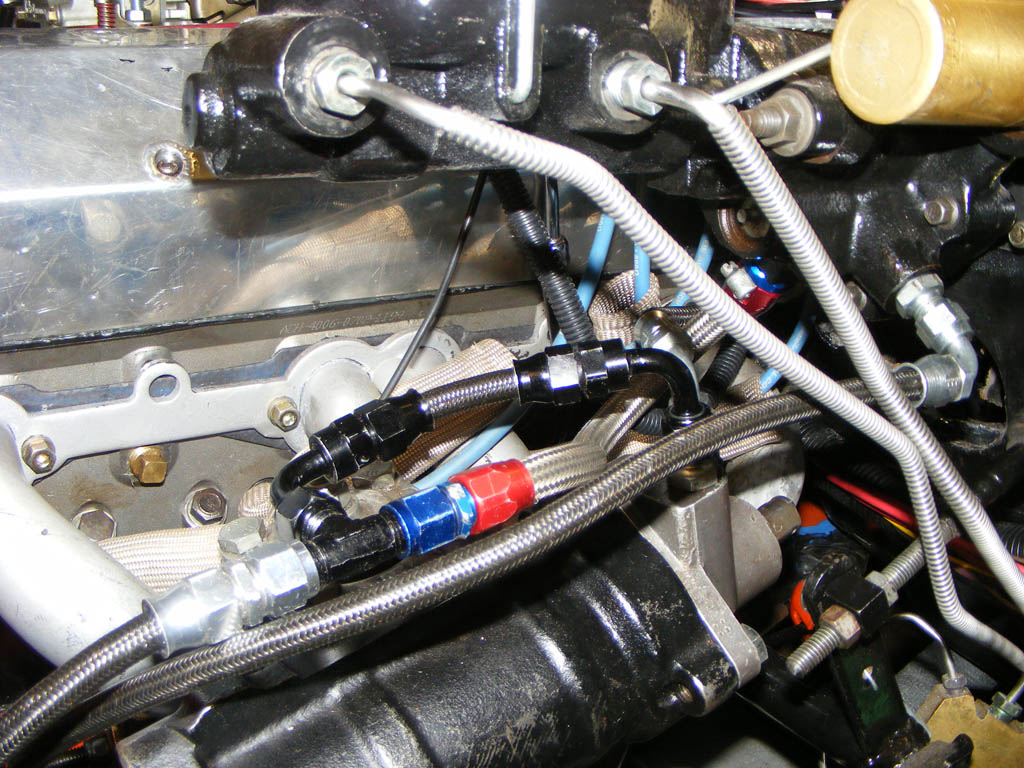
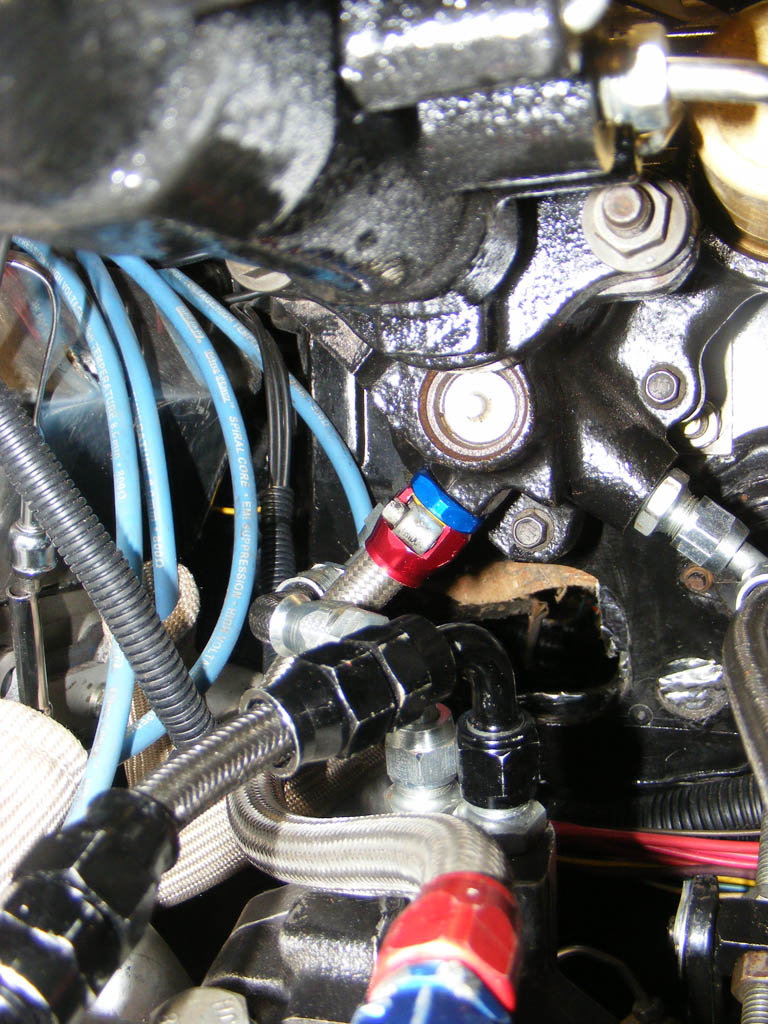
Packing the fuel line was a bit more complicated than expected. It looks a little 'messy' but everything feels solid.
Here's my custom bracket finished, we added some meat because it was still flexing. I put a 10mm bolt instead of the original 3/8", alternator don't wiggle on its axis anymore
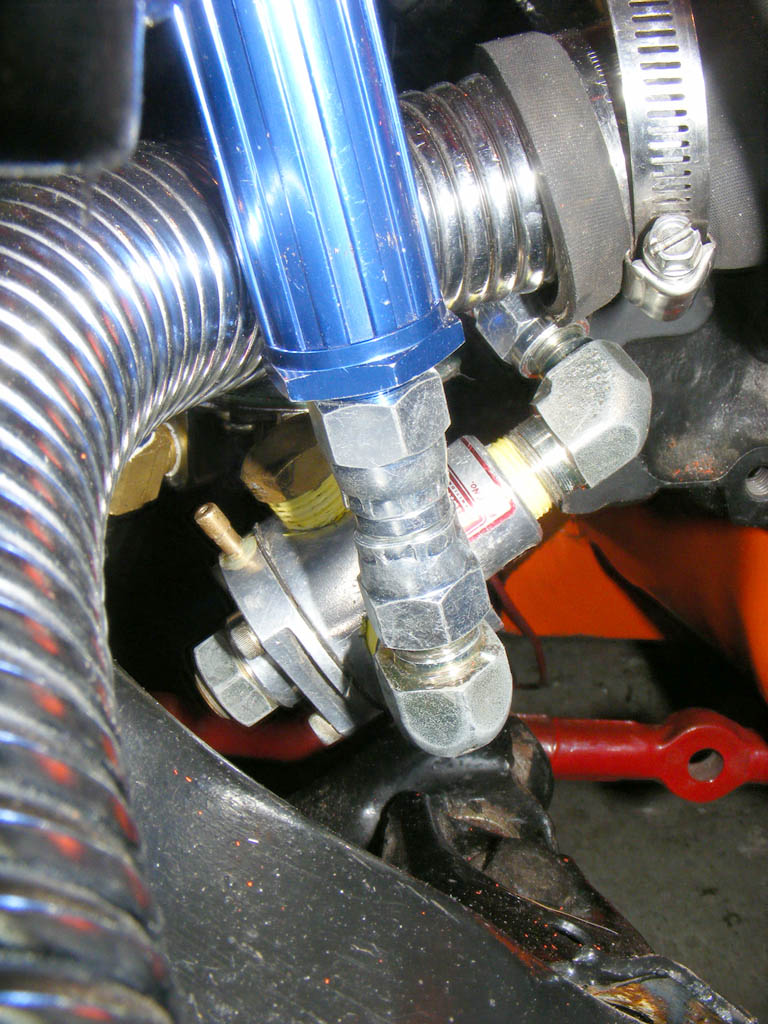
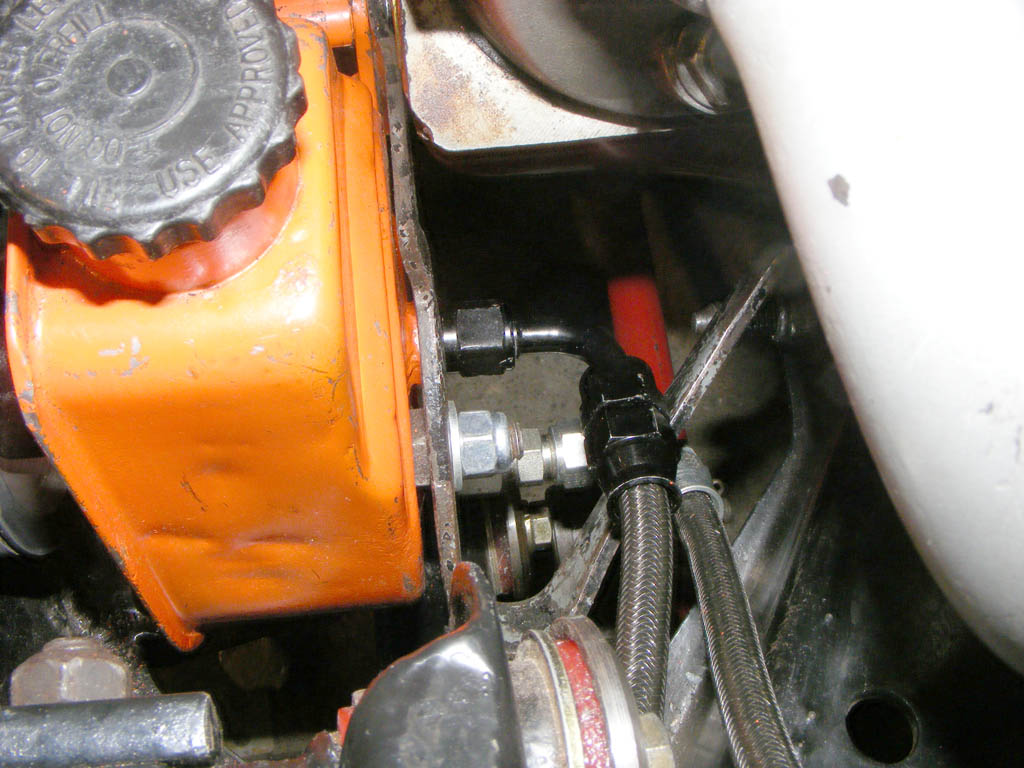
Another completed project is the borgeson/hydroboost setup.
Took me some time to get the hoses right, but now they are.
I used steel -6AN fitting for the line of high pressure, so I can tighten them really hard.
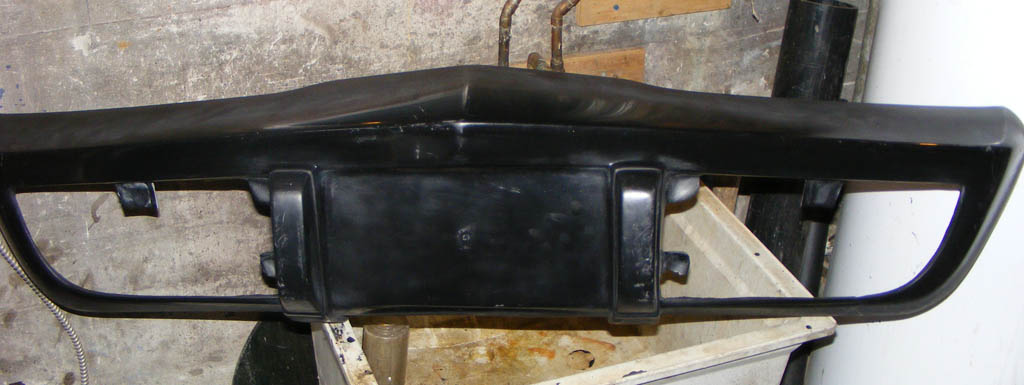
While being away from the garage I still could find time to find good bargain.
Bought a fiberglass front bumper, that's another completion, it was my last missing body part.
Got is from CF member lvmyvt76, thanks you!
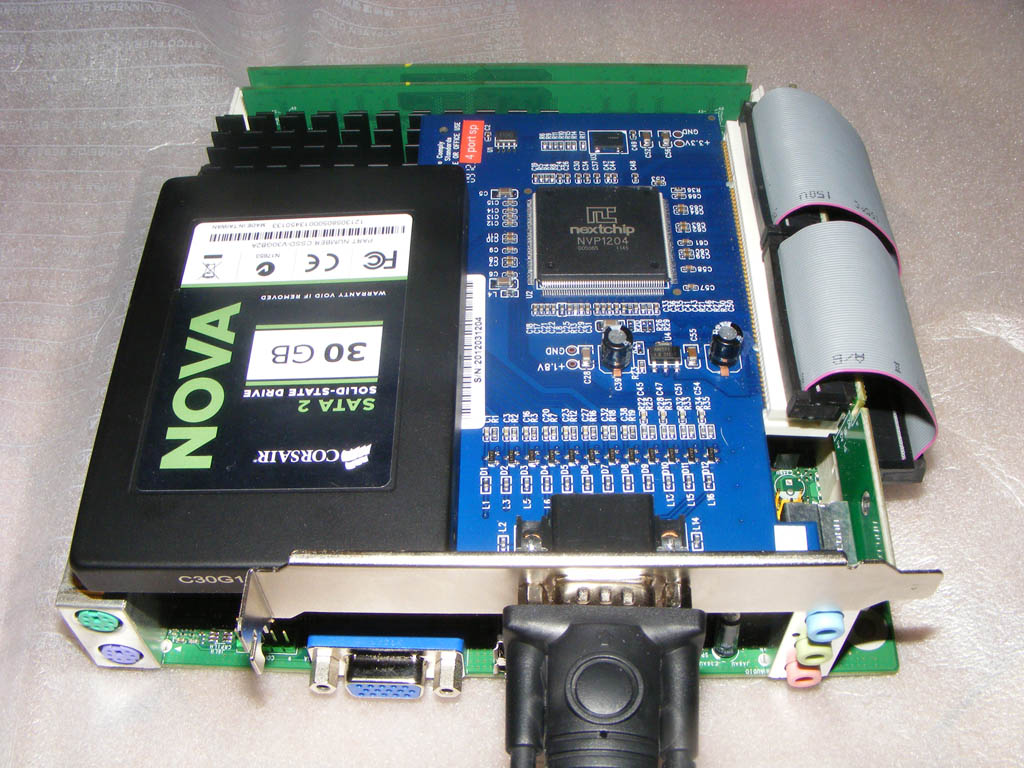
I also found a good deal on part to make my carputer :
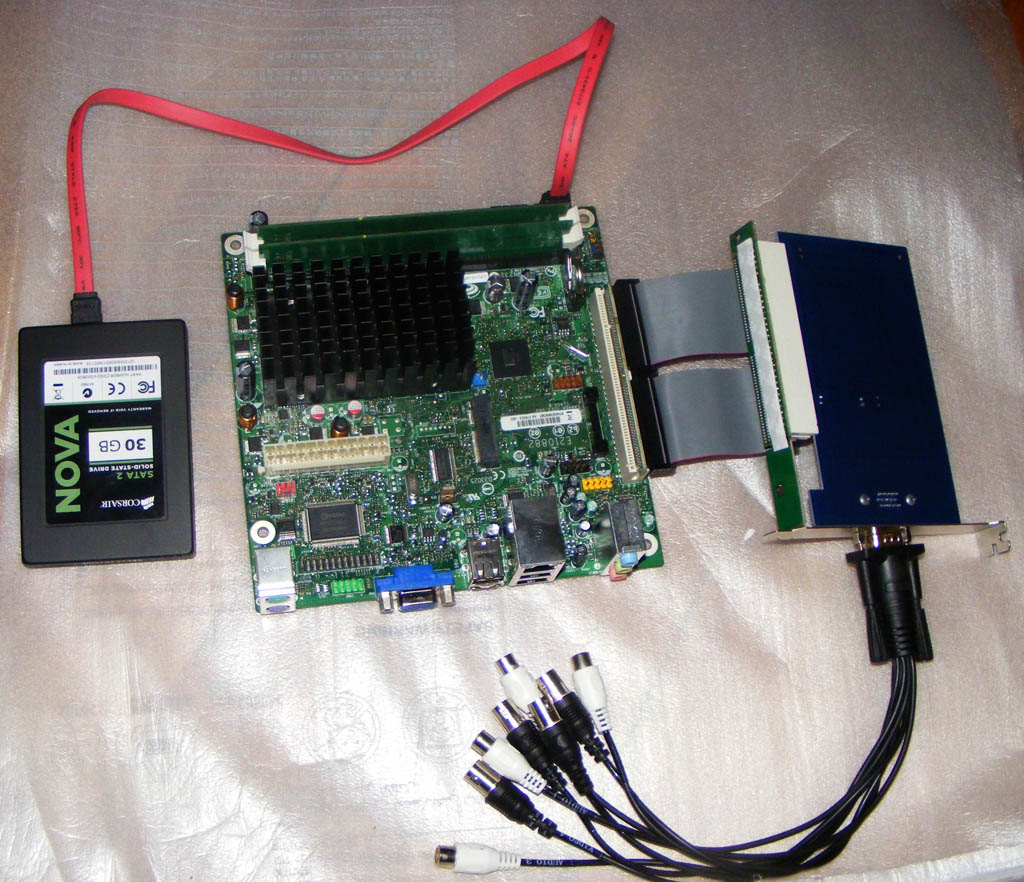
Atom 510 motherboard, 2 Go of RAM, 30Gb SSD hard drive (to survive the rough idle vibrations), and a 4 input video capture card (yes, there will be at least 4 camera in the car).
I'll probably to a custom enclosure out of some aluminum plate.
Also ordered and arduino nano microcontrolleur to deal with the sensor reading.
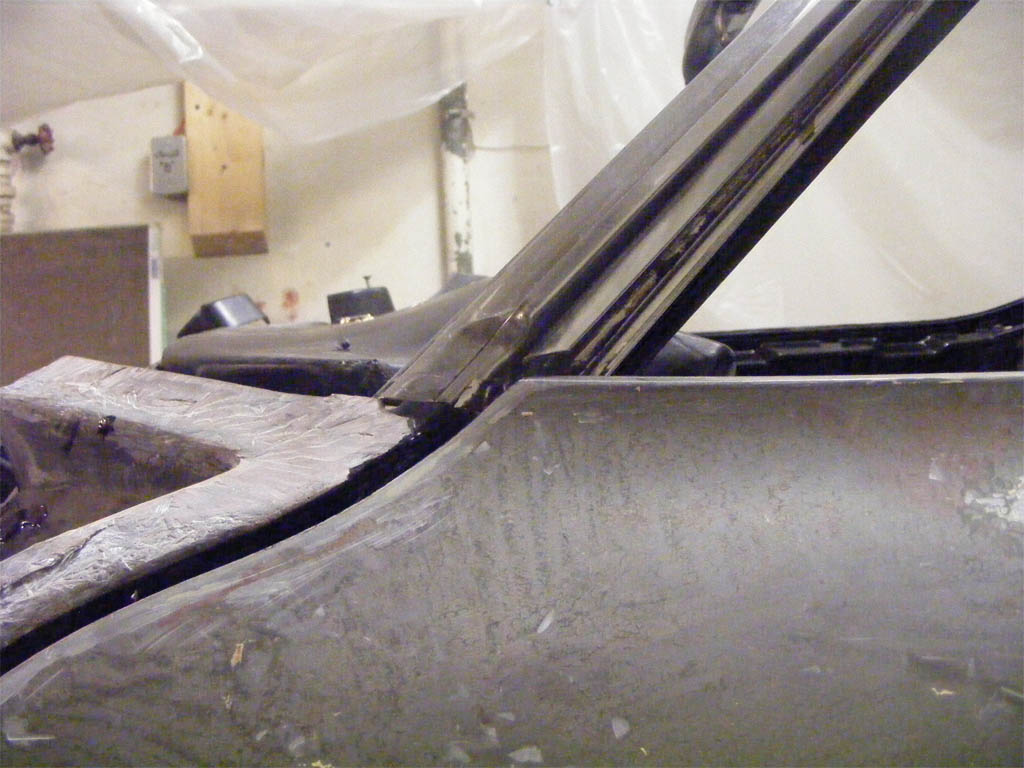
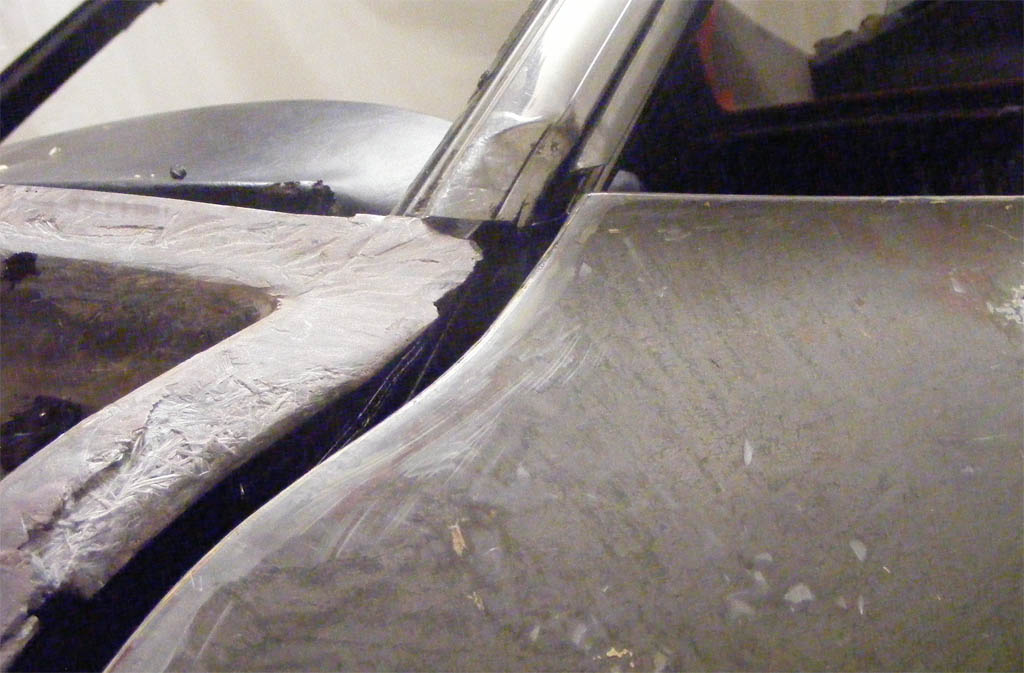
Ok, that was the sunny side, now here's the trouble : door alignement.
We did a couple of attempts, all wrong.
I found this post from Stinger on CF : http://forums.corvetteforum.com/1573830691-post14.html
It was making sense, so I tried to first align align upper flat side of the rear of the car.
The result is not really encouraging
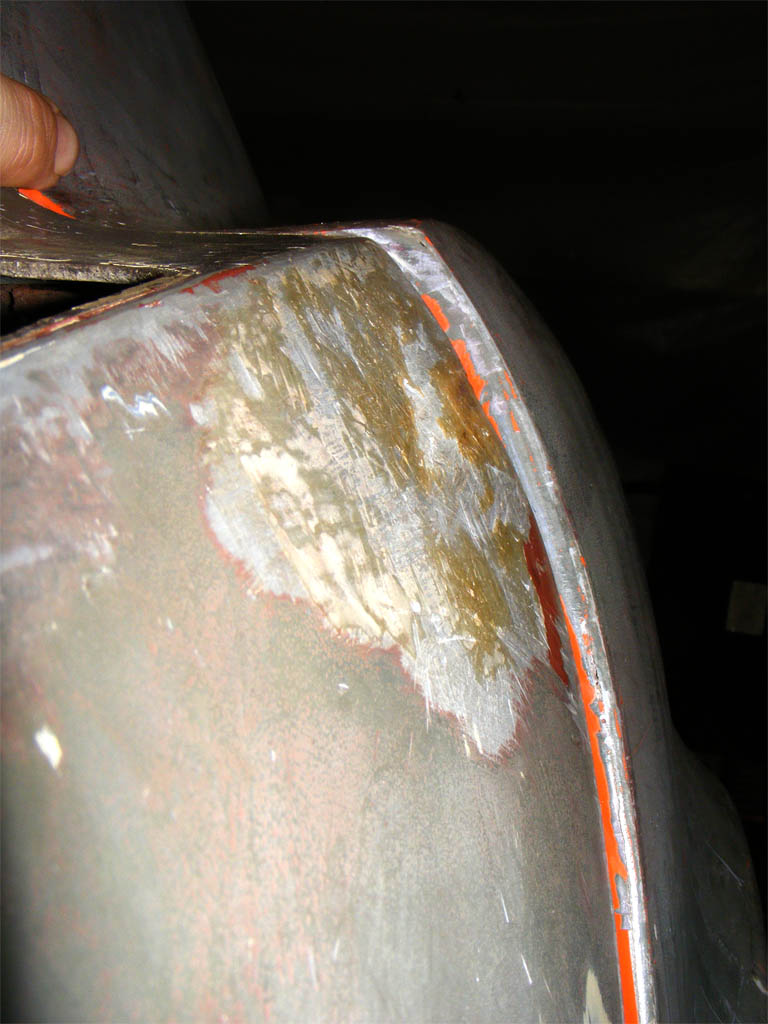
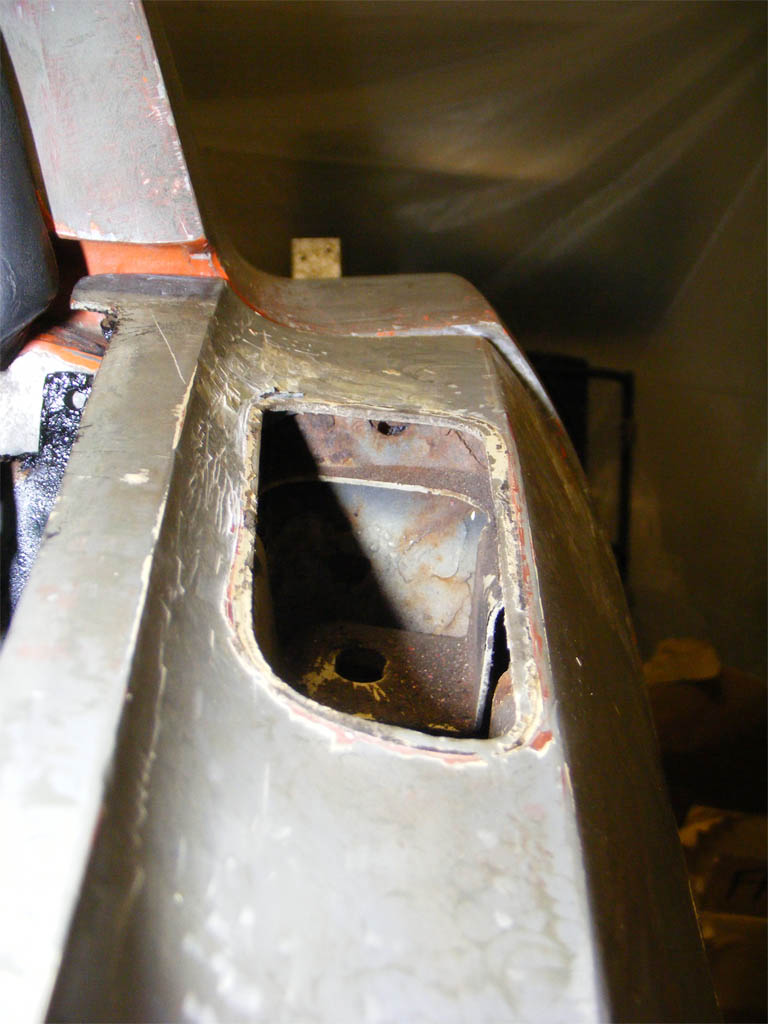
I don't know whish one is wrong, the door or the body, but you can definitely tell the body and the door don't come from the same car.
*sigh*
I still don't know how I'm gonna do.
Glass the door? trim the body? seperate the rear quarter panel at the door and glue is back tighter?
Any advice are welcome.
At the front I think I got it right, at least until I test fit the front clip.
So yeah I'm moving forward, it's that feeling that the finish line is moving forward in time even faster.
Still got the faith tho.
The resto have been slowed down for a while. There's been the vacations, and then I decided to quit my job and start my own company.
Enough to keep a man away from it's cave for a while.
Let's start with the good news :
Finally I can call a wrap on two of my subproject :
-The gilmer belt setup
Finally received the serpentine 6 ribs small belt for my PS pump. I was really unsure I measured the length right, turned out to be the perfect size :
One last concern, the water pump pulley is really close to the spreader bar, only 1/8". I don't know how much an engine can move in that direction, but I got the feeling it will touch. You tell me.
Packing the fuel line was a bit more complicated than expected. It looks a little 'messy' but everything feels solid.
Here's my custom bracket finished, we added some meat because it was still flexing. I put a 10mm bolt instead of the original 3/8", alternator don't wiggle on its axis anymore
Another completed project is the borgeson/hydroboost setup.
Took me some time to get the hoses right, but now they are.
I used steel -6AN fitting for the line of high pressure, so I can tighten them really hard.
While being away from the garage I still could find time to find good bargain.
Bought a fiberglass front bumper, that's another completion, it was my last missing body part.
Got is from CF member lvmyvt76, thanks you!
I also found a good deal on part to make my carputer :
Atom 510 motherboard, 2 Go of RAM, 30Gb SSD hard drive (to survive the rough idle vibrations), and a 4 input video capture card (yes, there will be at least 4 camera in the car).
I'll probably to a custom enclosure out of some aluminum plate.
Also ordered and arduino nano microcontrolleur to deal with the sensor reading.
Ok, that was the sunny side, now here's the trouble : door alignement.
We did a couple of attempts, all wrong.
I found this post from Stinger on CF : http://forums.corvetteforum.com/1573830691-post14.html
It was making sense, so I tried to first align align upper flat side of the rear of the car.
The result is not really encouraging
I don't know whish one is wrong, the door or the body, but you can definitely tell the body and the door don't come from the same car.
*sigh*
I still don't know how I'm gonna do.
Glass the door? trim the body? seperate the rear quarter panel at the door and glue is back tighter?
Any advice are welcome.
At the front I think I got it right, at least until I test fit the front clip.
So yeah I'm moving forward, it's that feeling that the finish line is moving forward in time even faster.
Still got the faith tho.
Last edited by Denpo; 08-17-2017 at 08:04 PM.
05-24-2012, 09:19 PM
#216
Drifting
It's been a while since I had dropped in to see your progress, things are moving along nicely.
Projects like this are a little over whelming, but look at the journey you have already completed.
You have come a long way, it won't be long before you get it back on the road.
Riggs
Projects like this are a little over whelming, but look at the journey you have already completed.
You have come a long way, it won't be long before you get it back on the road.
Riggs
 05-25-2012, 12:24 PM
#218
Drifting
Thread Starter
Member Since: Aug 2010
Location: Kanuckistan
Posts: 1,617
Received 127 Likes
on
68 Posts
2022 C3 of the Year Finalist - Modified
It's been a while since I had dropped in to see your progress, things are moving along nicely.
Projects like this are a little over whelming, but look at the journey you have already completed.
You have come a long way, it won't be long before you get it back on the road.
Riggs
Projects like this are a little over whelming, but look at the journey you have already completed.
You have come a long way, it won't be long before you get it back on the road.
Riggs
It won't be that long but it will be at least one more year to get the body right.
You're right, I'm coming from a long way. Sometimes I go read my own thread to remember that, that gives me an extra boost.
05-25-2012, 12:30 PM
#219
Drifting
Thread Starter
Member Since: Aug 2010
Location: Kanuckistan
Posts: 1,617
Received 127 Likes
on
68 Posts
2022 C3 of the Year Finalist - Modified
Primarily for video monitoring purpose, I want at least two camera at the front and two at the back to help me maneuver in those SUV filled towns, as well as GPS.
It could also play MP3 even if I'm not even sure yet if I'll put a sound system in it, the car is soo loud anyway.
I'm gonna do some test with OLED display, if it goes well I might do an all digital center panel gauge set. We'll see.
It could also play MP3 even if I'm not even sure yet if I'll put a sound system in it, the car is soo loud anyway.
I'm gonna do some test with OLED display, if it goes well I might do an all digital center panel gauge set. We'll see.


