
My '76 restoration (long post)
 12-12-2011, 11:58 PM
#181
Drifting


If your garage is what I see in you profile pic I wish I had your garage to put my press in 
Mine is one vette wide, 1.75 vette long, when I had both my 76 and the donor car was in, the only way to reach the other side of the room was the interior of the car or the engine bay
Mine is one vette wide, 1.75 vette long, when I had both my 76 and the donor car was in, the only way to reach the other side of the room was the interior of the car or the engine bay
Rogman

 12-31-2011, 09:43 PM
#183
Drifting

Thread Starter
Member Since: Aug 2010
Location: Kanuckistan
Posts: 1,617
Received 127 Likes
on
68 Posts
2022 C3 of the Year Finalist - Modified

After being bedridden almost all last week thanks to a bad back, I felt much better this week and could move forward in several areas.
First I could take advantage of a week of holiday to go shopping. Bought fiberglass mat, epoxy resin and structural epoxy panel glue. I'm all set for the incoming bodywork sessions.
I could move foward with my T5 swap.
The driveshaft have been shortened and balanced.
The engine is now back in the car, and I've made a custom bracket for the transmission mount:
I took the stock support, cut it flush to mounting ears on the cross member, then welded a big piece of L shaped steel beam.
Then with a protractor and a jack under the bellhousing I aligned the engine 3� downward, that the lowest point you'd what the transmission tail to be anyway.
Then took measure to make the smaller bracket with the slope.

This way I keep my red flashing bushing and I can shim the transmission tail back up without messing with the lateral alignment.
Surprisingly, with the engine at 3�, I don't see any clearance issue, neither tunnel side or parking brake cable/pulley.
Finally a old project revived : the LED taillight
I made a base for the bubble cover, made from plastic cutting board.
I used my column drill a flat grinded drill bit and my hands as some kind of poor man's mill to make the grooves.
RTV silicon for the seal.


Kinda rough looking, but functional. I'd sure have loved those made out of a cnc machined piece of plastic and a PCB.
First I could take advantage of a week of holiday to go shopping. Bought fiberglass mat, epoxy resin and structural epoxy panel glue. I'm all set for the incoming bodywork sessions.
I could move foward with my T5 swap.
The driveshaft have been shortened and balanced.
The engine is now back in the car, and I've made a custom bracket for the transmission mount:
I took the stock support, cut it flush to mounting ears on the cross member, then welded a big piece of L shaped steel beam.
Then with a protractor and a jack under the bellhousing I aligned the engine 3� downward, that the lowest point you'd what the transmission tail to be anyway.
Then took measure to make the smaller bracket with the slope.
This way I keep my red flashing bushing
and I can shim the transmission tail back up without messing with the lateral alignment.Surprisingly, with the engine at 3�, I don't see any clearance issue, neither tunnel side or parking brake cable/pulley.
Finally a old project revived : the LED taillight
I made a base for the bubble cover, made from plastic cutting board.
I used my column drill a flat grinded drill bit and my hands as some kind of poor man's mill to make the grooves.
RTV silicon for the seal.
Kinda rough looking, but functional. I'd sure have loved those made out of a cnc machined piece of plastic and a PCB.
01-01-2012, 01:35 PM
#184
Racer

Member Since: Jul 2010
Location: Manahawkin NJ
Posts: 261
Likes: 0
Received 0 Likes
on
0 Posts
Glad to see the progress.
With the solid mounting of the rear 3 degrees might be a bit much. And I hope you mean 3 degrees more rear pinion yoke angle in a downward direction. I set mine at 0 on the Vette since I feel it is best to have 'equal and opposite' for less chance of vibration on highways. When I back halved the elCamino I set it at 2 down because it has very long ladder bars and the car is built for acceleration. Dan (the guy who you met at the body hand off) set his at 4.5 because he is running leaf springs and lift bars on his 68 Fairlane. All these specs are rear pinion center line angle down in relation to trans yoke center line.
If you did not research the set up procedure to the extent that you researched everything else I can send a few links that explain the hows and why of pinion angle
Tom
PS. its 55 and sunny in NJ, Has the Canadian winter hit you yet?
01-01-2012, 03:22 PM
#185
Drifting
Thread Starter
Member Since: Aug 2010
Location: Kanuckistan
Posts: 1,617
Received 127 Likes
on
68 Posts
2022 C3 of the Year Finalist - Modified
Denis.
Glad to see the progress.
With the solid mounting of the rear 3 degrees might be a bit much. And I hope you mean 3 degrees more rear pinion yoke angle in a downward direction. I set mine at 0 on the Vette since I feel it is best to have 'equal and opposite' for less chance of vibration on highways. When I back halved the elCamino I set it at 2 down because it has very long ladder bars and the car is built for acceleration. Dan (the guy who you met at the body hand off) set his at 4.5 because he is running leaf springs and lift bars on his 68 Fairlane. All these specs are rear pinion center line angle down in relation to trans yoke center line.
If you did not research the set up procedure to the extent that you researched everything else I can send a few links that explain the hows and why of pinion angle
Tom
PS. its 55 and sunny in NJ, Has the Canadian winter hit you yet?
Don't worry, I did extensive research and discussions on the subject.
When I say 3�, it's relative to the frame level, and yes it mean the front of the engine is pointing slightly upward. All sbc intake include this 3-4� slope, to my air cleaner is level to the frame.
But of course it tells nothing about drivetrain alignment.
This angle is a good starting base, my plan is to check is I can set a more favorable pinion angle with a smaller differential bushing. If not I'll see, maybe I'll raise the transmission.
After talking on the other forum we go to I found out you can phase out the pulsating forces not only by having the diff and trans forming opposite angle, but also by forming equal angle. I allegedly called the "W" setup.
All that tells me it's time to take my time, I'll do some test and experiments, but probably later.
Right now my work setup is not ideal, and I want to move on something else.
My two next tasks are rebuilding the column and putting new door hinge pin/realigning the doors.
Happy new year my friend.
Denis
re:ps:Speaking of weather right now it's 36�F which is very mild for the season (like the whole winter so far). We're expecting 10�F this week, but no much -10something yet this season.
01-01-2012, 03:58 PM
#186
Racer
Member Since: Jul 2010
Location: Manahawkin NJ
Posts: 261
Likes: 0
Received 0 Likes
on
0 Posts
What was I thinking??? Of course you researched it, re-researched it and then figured a better way to do it! I never bothered to set engine to frame angle, When the front wheels are 24" off the ground the engine angle changes in relation to the rest of the world. What I am interested in is the pulsating forces you mentioned due to opposite angles not being equal. The Vette has it set static at 0 with the other cars set to be at or close to 0 during WOT acceleration. It seems like you have it well under control.
Let me know if you come up with any tips/tricks for the door pin install and door alignment. My doors are off and I just picked up the pins and bushings. I will be blasting the hinges this week.
Tom
Let me know if you come up with any tips/tricks for the door pin install and door alignment. My doors are off and I just picked up the pins and bushings. I will be blasting the hinges this week.
Tom
01-04-2012, 09:39 AM
#187
Drifting
Thread Starter
Member Since: Aug 2010
Location: Kanuckistan
Posts: 1,617
Received 127 Likes
on
68 Posts
2022 C3 of the Year Finalist - Modified
I've put my door back out and started restoring the hinges.
Pressed out the hinge pin and bushing, nothing complicated here.
Upon cleaning the part the ugly truth showed its ugly nose :
the hinges are probably unrestorable.
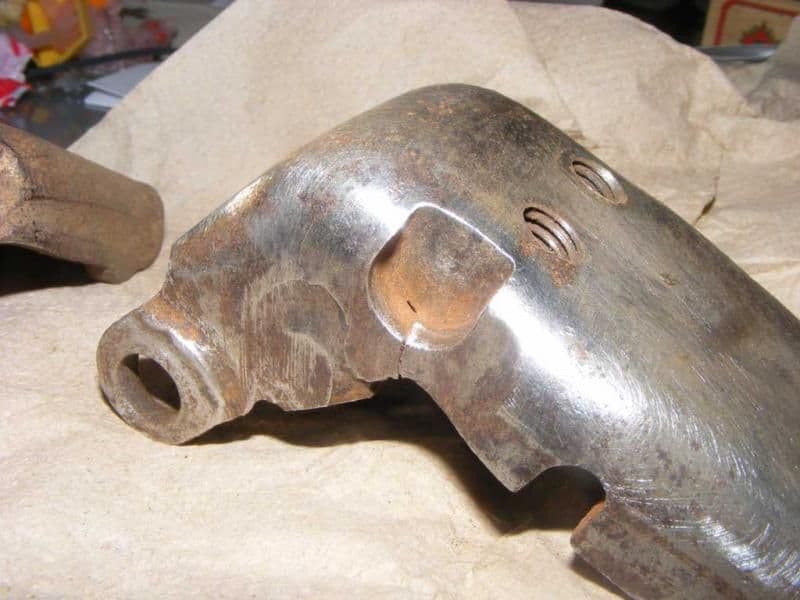


I actually shouldn't be that surprised, the Vette I have, before the resto, had an frontal accident sometimes in its lifetime.
Door are amongst the lasted thing that haven't been changed.
Still I don't quiet see how you can to that to a door hinge.
So right now I'm looking for a set of cheap door hinges worth restoring.
Pressed out the hinge pin and bushing, nothing complicated here.
Upon cleaning the part the ugly truth showed its ugly nose :
the hinges are probably unrestorable.
I actually shouldn't be that surprised, the Vette I have, before the resto, had an frontal accident sometimes in its lifetime.
Door are amongst the lasted thing that haven't been changed.
Still I don't quiet see how you can to that to a door hinge.
So right now I'm looking for a set of cheap door hinges worth restoring.
01-04-2012, 09:45 AM
#188
Drifting
I've put my door back out and started restoring the hinges.
Pressed out the hinge pin and bushing, nothing complicated here.
Upon cleaning the part the ugly truth showed its ugly nose :
the hinges are probably unrestorable.
I actually shouldn't be that surprised, the Vette I have, before the resto, had an frontal accident sometimes in its lifetime.
Door are amongst the lasted thing that haven't been changed.
Still I don't quiet see how you can to that to a door hinge.
So right now I'm looking for a set of cheap door hinges worth restoring.
Sorry to hear that... Those things ain't cheap... Hope you can find a good set of used ones... Betcha someone on here has a good set they'll let you have for a good price...
Rogman

 01-19-2012, 09:03 AM
#193
Drifting
Thread Starter
Member Since: Aug 2010
Location: Kanuckistan
Posts: 1,617
Received 127 Likes
on
68 Posts
2022 C3 of the Year Finalist - Modified
Long time no news, but that doesn't mean the project is stall, quiet the opposite, not enough time to post.
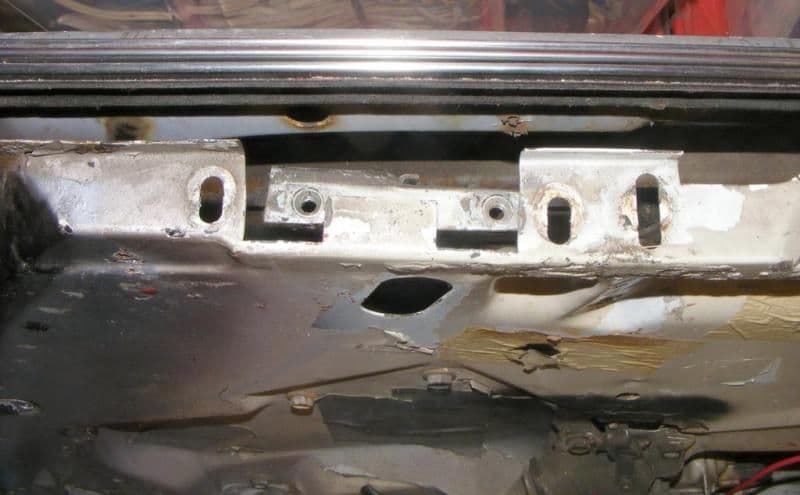
So I removed the driver door, gutted it and stripped it. Grinded all rust and treated it with phosphoric acid.
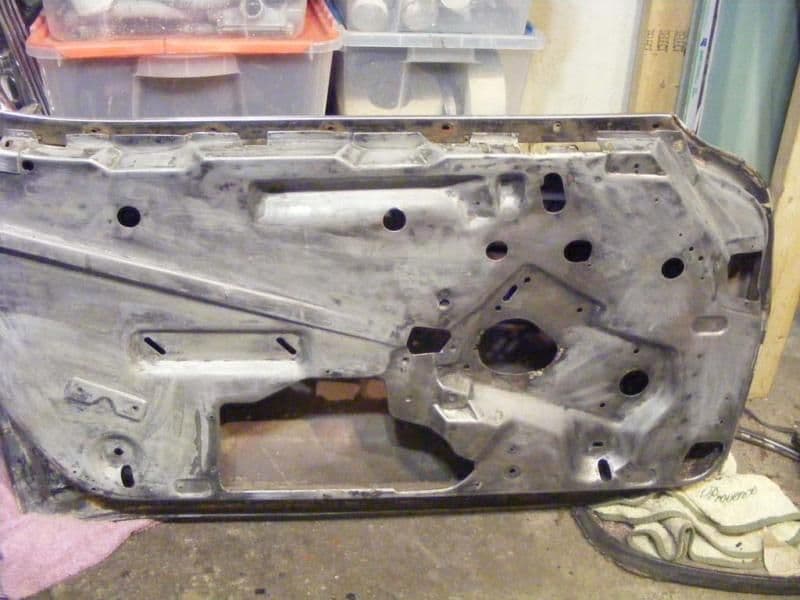
The lower front corner was rusted and badly dented.
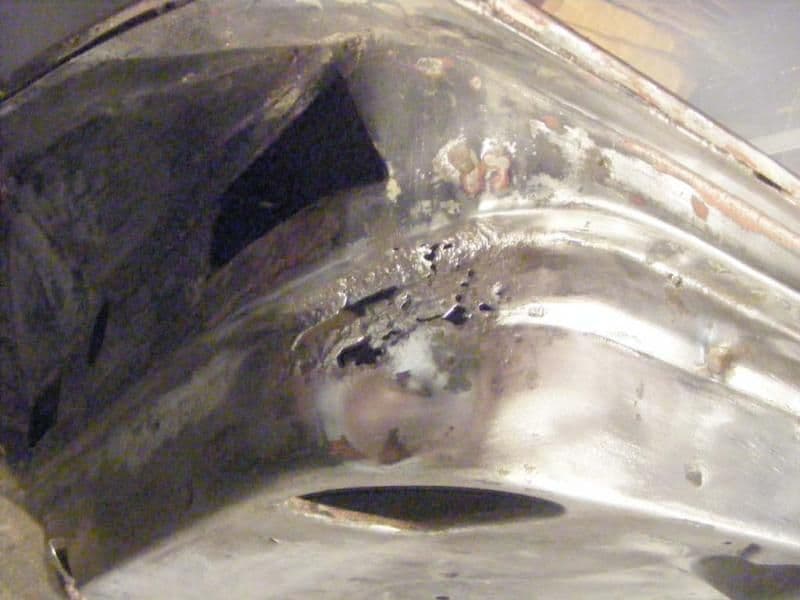
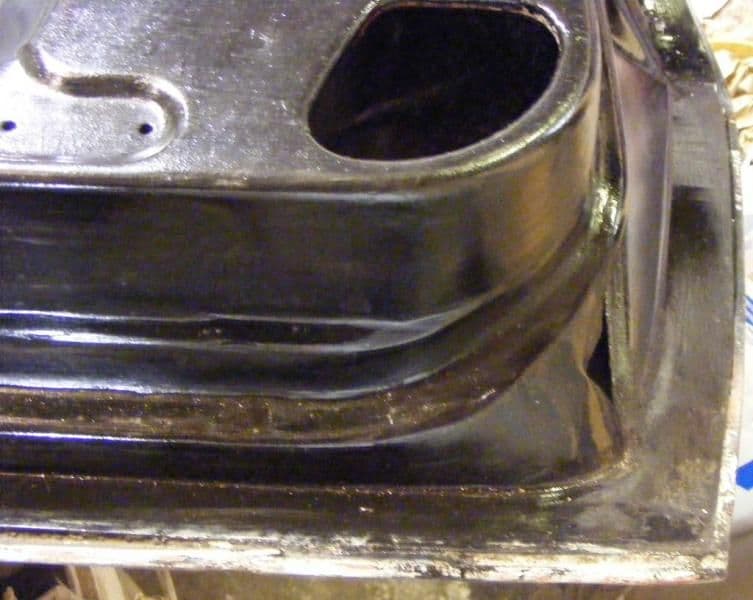
Put 3 layers of woven fiberglass in the back, filled the hole with fiberglass reinforced filler, finished with bondo.

Once painted :
I cleaned all the rails and parts. So much gunk everywhere, that was a tedious job.
Each of these roller for example take an hour to get from a black ball of gunk to this, filled with lithium grease.

The panel bonding was cracked a the bottom of the door. I chickened out on removing the panel, looks simple at the bottom, gets complicated at the top. So I spread the gap, grinded and cleaned it, then glue is back with 3M 8116.
Every track where cleaned and repainted, I decided not to grease anything but the rollers. From what I read greasing the tracks its just a way to gather dust quicker.
One thing I didn't mess with is the motor and the spring.

All little hack I made :
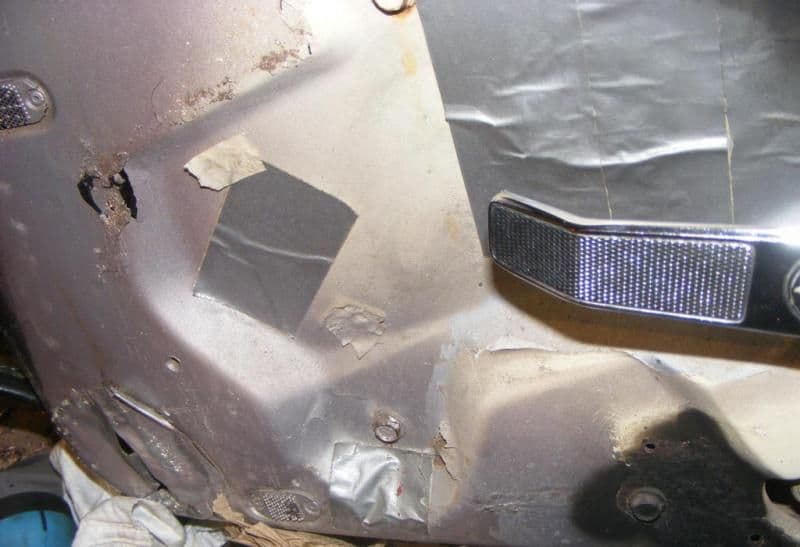
I grinded the metal tab and epoxied a piece of silicon. Result : a much softer/lower sound when you open the door. I looked to do the same with the closing/locking sound, but it would require taking the whole mechanism apart, no thanks.

New stainless fasterner and velcro grips. Notice on the left sign of a previous damage, probably the one that cracked the hinges.
Speaking of hinges, here are those given my Robert 'Full tilt Corvette'. Thank you so much Robert.

And here they are, cleaned, painted, new bushing and spring reinstalled.

Tom, if you have two spare of the hinges part that hold the hinge spring roller, or even just the rollers themselves. If not, I'll get them machined.
Once made I can put the door back in the car, and start the passenger door.
So I removed the driver door, gutted it and stripped it. Grinded all rust and treated it with phosphoric acid.
The lower front corner was rusted and badly dented.
Put 3 layers of woven fiberglass in the back, filled the hole with fiberglass reinforced filler, finished with bondo.
Once painted :
I cleaned all the rails and parts. So much gunk everywhere, that was a tedious job.
Each of these roller for example take an hour to get from a black ball of gunk to this, filled with lithium grease.
The panel bonding was cracked a the bottom of the door. I chickened out on removing the panel, looks simple at the bottom, gets complicated at the top. So I spread the gap, grinded and cleaned it, then glue is back with 3M 8116.
Every track where cleaned and repainted, I decided not to grease anything but the rollers. From what I read greasing the tracks its just a way to gather dust quicker.
One thing I didn't mess with is the motor and the spring.
All little hack I made :
I grinded the metal tab and epoxied a piece of silicon. Result : a much softer/lower sound when you open the door. I looked to do the same with the closing/locking sound, but it would require taking the whole mechanism apart, no thanks.
New stainless fasterner and velcro grips. Notice on the left sign of a previous damage, probably the one that cracked the hinges.
Speaking of hinges, here are those given my Robert 'Full tilt Corvette'. Thank you so much Robert.
And here they are, cleaned, painted, new bushing and spring reinstalled.
Tom, if you have two spare of the hinges part that hold the hinge spring roller, or even just the rollers themselves. If not, I'll get them machined.
Once made I can put the door back in the car, and start the passenger door.
01-19-2012, 10:29 AM
#195
Drifting
Thread Starter
Member Since: Aug 2010
Location: Kanuckistan
Posts: 1,617
Received 127 Likes
on
68 Posts
2022 C3 of the Year Finalist - Modified
Fact is it's a job that requires being gentle, glass scratches easily.
Now that I know and understand the procedure I will take time to document the disseassembly of the passenger door.
Last time it was too stressfull to mess with the camera.
 01-19-2012, 03:34 PM
#197
Drifting
Thanks Rogman, but watch out, it's not as easy as that.
Fact is it's a job that requires being gentle, glass scratches easily.
Now that I know and understand the procedure I will take time to document the disseassembly of the passenger door.
Last time it was too stressfull to mess with the camera.
Fact is it's a job that requires being gentle, glass scratches easily.
Now that I know and understand the procedure I will take time to document the disseassembly of the passenger door.
Last time it was too stressfull to mess with the camera.
Thanks much...
Rogman
01-22-2012, 05:46 AM
#198
Drifting
Thread Starter
Member Since: Aug 2010
Location: Kanuckistan
Posts: 1,617
Received 127 Likes
on
68 Posts
2022 C3 of the Year Finalist - Modified
As requested, this is how I gutted my doors.
Or more precisely, how to removed the window, because that's the only tricky part, the rest is just a question of unbolting everything.
Watch out :
-I'm working on the passenger door.
-My doors have electric window, refer to proper instruction if yours are manual.
In my case the doors were already removed, but if you're removing yours, I suggest you unbolt the hinges from the door, not the birdcase.
If your doors are properly aligned, drill a small (1/8") hole in door metal thru the hinges before unbolting, so you could quickly retrieve the alignment upon re-installation.
Here's the door, in a pretty sorry state.

Two screws on top of the trim, pull gently the velcro apart, and it should come free.
Good news, I'm missing a rod

Ok, first you need to operate the window motor to work comfortably. I took the battery and two rather thick electric cable. Wire the battery's negative to the metal of the door, and connect the positive to one of the two motor's wire depending if you want to raise or lower it.
For now raise the window at its highest position.
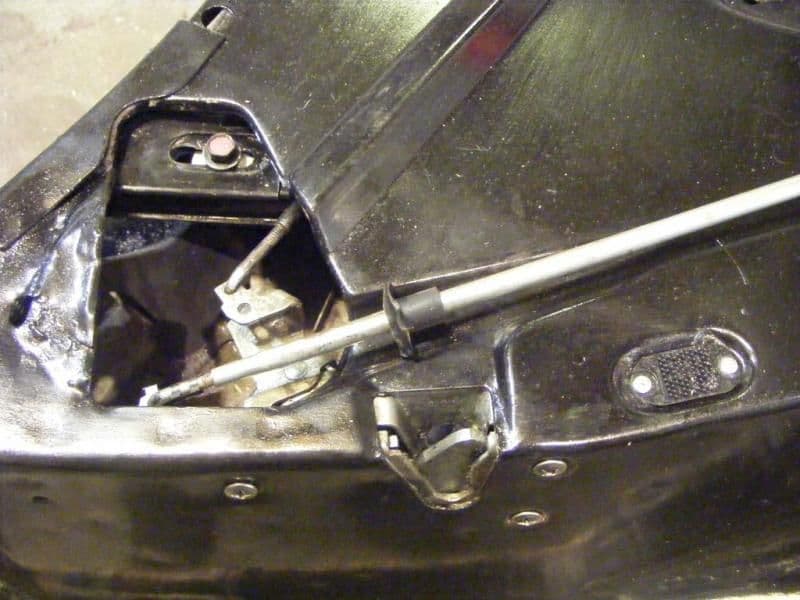
To set the windows free you need to remove 4 bolts.
The two first are the bolts that tie the window to an horizontal metal rail. The first bolt is a the center-right of the picture:

To get the second one, a the front, you need to lower the window a little bit, in order to align it with its service hole (at the top) :

Once those two bolt are out, with a long screwdriver pop out the window from the rail. If it feel too tight, lower the window a little bit more. Once popped out, put the stud above the rail it was connected to :

Now raise the window in the highest position again.
The two other bolts are the rail stop bolts:
Right in the middle of the picture:

And the center-left bolt:
Those are the stop you will then slide out :

Bolts removed:
Now you're almost done, and you should better get some help.
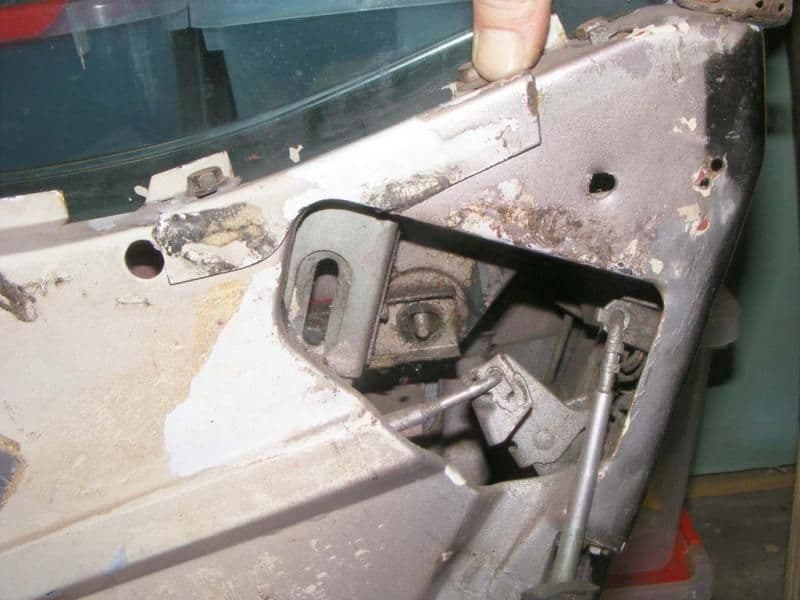
Slide out the back of the window :

Then, one person holds the windows, while another one set the front vertical rail free, by unbolting this :
(image taken after window removed)
and this (bolt at the bottom):
Now that the window is not stable anymore, gently slide the window toward the back, and clear out the way for the front plastic insert that's at the very front of the windows.
Congratulation, your window's out. Now you can mercilessly gut out the rest of the door. If confused, refer to the AIM.
Or more precisely, how to removed the window, because that's the only tricky part, the rest is just a question of unbolting everything.
Watch out :
-I'm working on the passenger door.
-My doors have electric window, refer to proper instruction if yours are manual.
In my case the doors were already removed, but if you're removing yours, I suggest you unbolt the hinges from the door, not the birdcase.
If your doors are properly aligned, drill a small (1/8") hole in door metal thru the hinges before unbolting, so you could quickly retrieve the alignment upon re-installation.
Here's the door, in a pretty sorry state.
Two screws on top of the trim, pull gently the velcro apart, and it should come free.
Good news, I'm missing a rod
Ok, first you need to operate the window motor to work comfortably. I took the battery and two rather thick electric cable. Wire the battery's negative to the metal of the door, and connect the positive to one of the two motor's wire depending if you want to raise or lower it.
For now raise the window at its highest position.
To set the windows free you need to remove 4 bolts.
The two first are the bolts that tie the window to an horizontal metal rail. The first bolt is a the center-right of the picture:
To get the second one, a the front, you need to lower the window a little bit, in order to align it with its service hole (at the top) :
Once those two bolt are out, with a long screwdriver pop out the window from the rail. If it feel too tight, lower the window a little bit more. Once popped out, put the stud above the rail it was connected to :
Now raise the window in the highest position again.
The two other bolts are the rail stop bolts:
Right in the middle of the picture:
And the center-left bolt:
Those are the stop you will then slide out :
Bolts removed:
Now you're almost done, and you should better get some help.
Slide out the back of the window :
Then, one person holds the windows, while another one set the front vertical rail free, by unbolting this :
(image taken after window removed)
and this (bolt at the bottom):
Now that the window is not stable anymore, gently slide the window toward the back, and clear out the way for the front plastic insert that's at the very front of the windows.
Congratulation, your window's out. Now you can mercilessly gut out the rest of the door. If confused, refer to the AIM.
01-25-2012, 08:40 AM
#199
Drifting
Thread Starter
Member Since: Aug 2010
Location: Kanuckistan
Posts: 1,617
Received 127 Likes
on
68 Posts
2022 C3 of the Year Finalist - Modified
Last weekend I could get my door spring roller pins machined.
It was my only option, looks like nobody sell those.
He also made one roller body too, in a harder steel.

What can't you do with a Dremel?
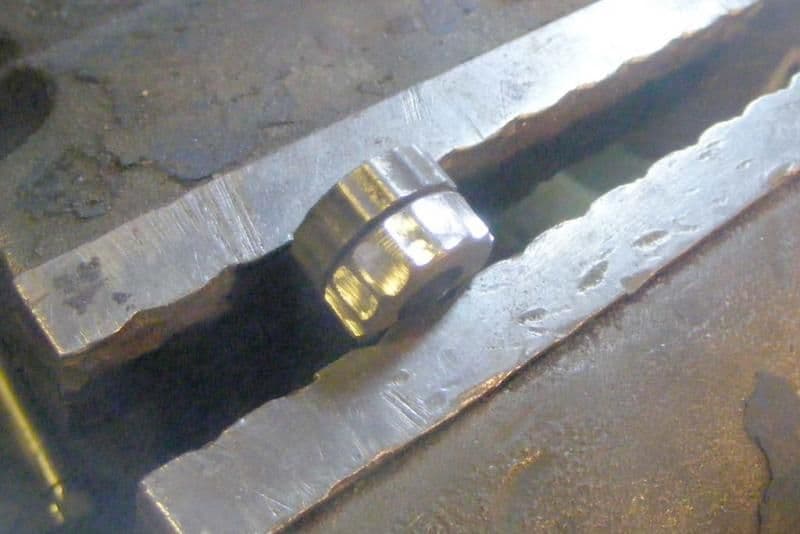

It's black because I tempered it (3 times) to get it as hard as the other roller. And yes, I still have to scrub the rust off.

The last piece of the puzzle being here, I can now declare my door hinges completed, with new pin and bushing :

Now I can put the door back in the car and align for a perfect rear gap. Once done the front clip will be ready for the glue.
I also made a stop at Michel's garage, checkeed his beautiful job on his the birdcage of his '72.
He gave me the lower clutch rod I was missing to get the underside of my transmission conversion complete, thanks buddy!

So for the first time I could press on the clutch pedal. The feel is firm but not too much, it feels right.
It was my only option, looks like nobody sell those.
He also made one roller body too, in a harder steel.
What can't you do with a Dremel?
It's black because I tempered it (3 times) to get it as hard as the other roller. And yes, I still have to scrub the rust off.
The last piece of the puzzle being here, I can now declare my door hinges completed, with new pin and bushing :
Now I can put the door back in the car and align for a perfect rear gap. Once done the front clip will be ready for the glue.
I also made a stop at Michel's garage, checkeed his beautiful job on his the birdcage of his '72.
He gave me the lower clutch rod I was missing to get the underside of my transmission conversion complete, thanks buddy!
So for the first time I could press on the clutch pedal. The feel is firm but not too much, it feels right.