
Rear Body mount repair
 09-18-2009, 02:55 AM
#1
Instructor

Thread Starter
Member Since: Apr 2006
Location: Boiling Springs SC
Posts: 219
Likes: 0
Received 0 Likes
on
0 Posts

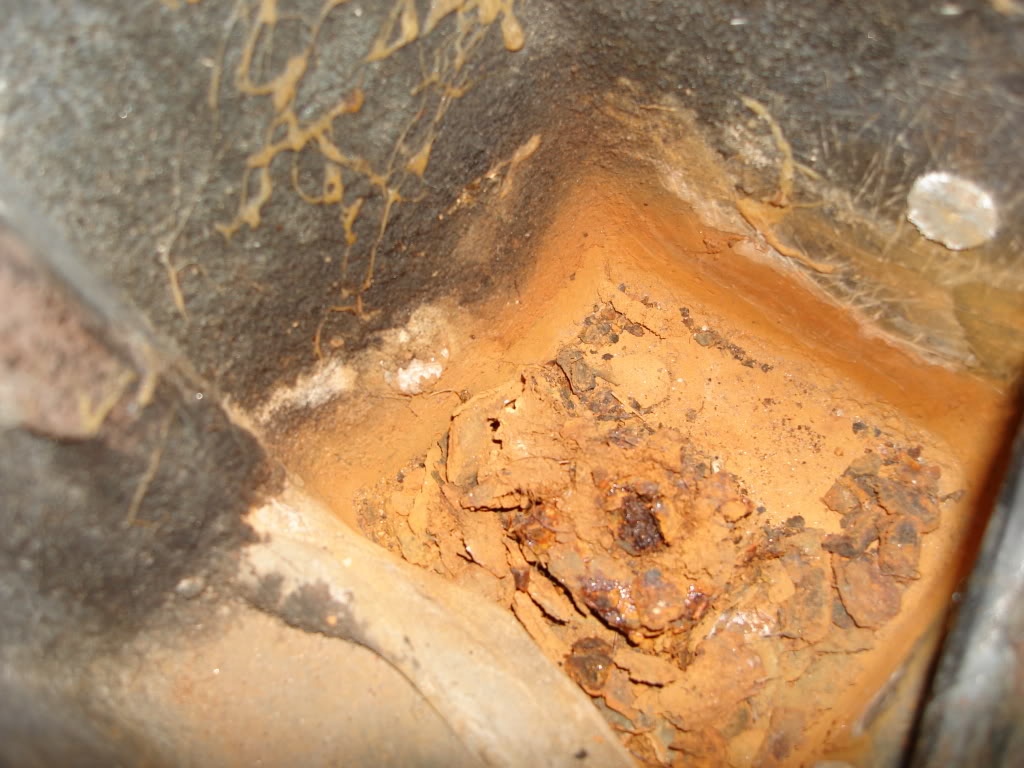
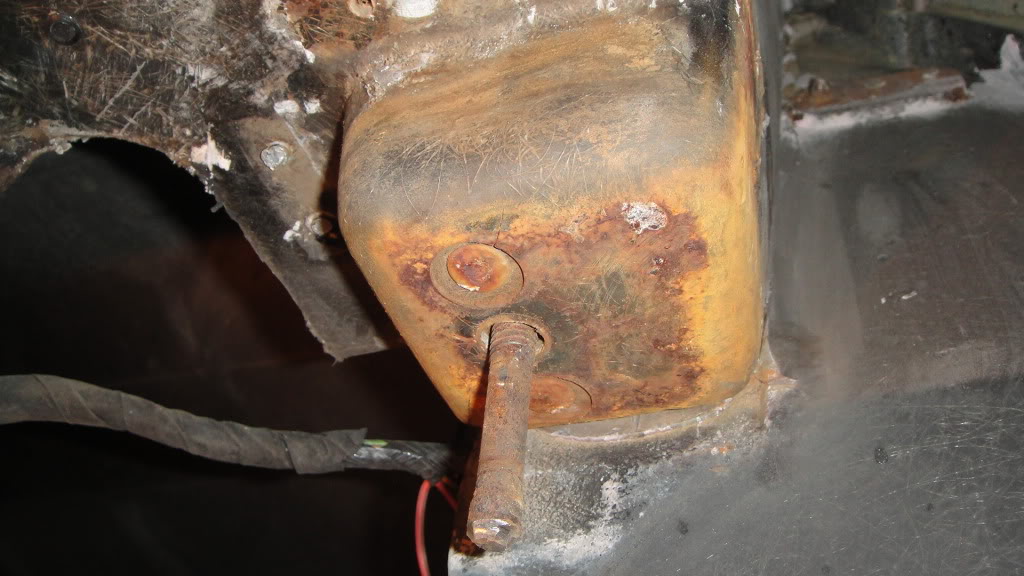
It's still early in the disassembly phase of this rebuild, but I think I have a problem. Any suggestions on repair options?
This is the driver side rear body mount, or should I say what is left of it.
The Passenger side looks fine,
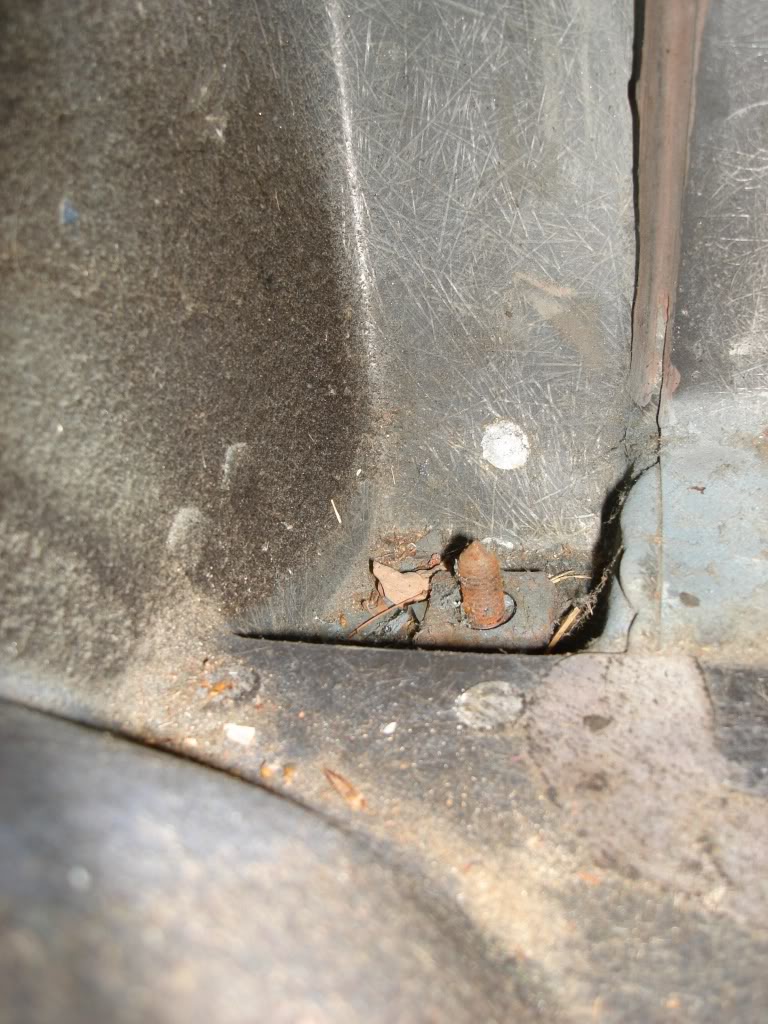
Haven't pulled the access covers in the wheel wells to check them yet! Hit both with PB Blaster to soak for a while. Even though it looks like there probably isn't much holding the rusted one on.
This is the driver side rear body mount, or should I say what is left of it.
The Passenger side looks fine,
Haven't pulled the access covers in the wheel wells to check them yet! Hit both with PB Blaster to soak for a while. Even though it looks like there probably isn't much holding the rusted one on.
 09-18-2009, 07:43 AM
#2
Racer
Member Since: Sep 2005
Location: Wheaton Illinois
Posts: 260
Likes: 0
Received 0 Likes
on
0 Posts
That looks just like my car. Looks like you have a water leak, I would think the antenna is where I would look first. It doesnt make sense to replace the mount and not fix the leak.
You didn't say how extensive of a rebuild you are planning on doing but I would think that would be easy to fix with the body off.
I need to fix mine someday so I will be watching this thread.
Good luck.
You didn't say how extensive of a rebuild you are planning on doing but I would think that would be easy to fix with the body off.
I need to fix mine someday so I will be watching this thread.
Good luck.
09-18-2009, 08:58 AM
#3
Instructor
Thread Starter
Member Since: Apr 2006
Location: Boiling Springs SC
Posts: 219
Likes: 0
Received 0 Likes
on
0 Posts
That looks just like my car. Looks like you have a water leak, I would think the antenna is where I would look first. It doesnt make sense to replace the mount and not fix the leak.
You didn't say how extensive of a rebuild you are planning on doing but I would think that would be easy to fix with the body off.
I need to fix mine someday so I will be watching this thread.
Good luck.
You didn't say how extensive of a rebuild you are planning on doing but I would think that would be easy to fix with the body off.
I need to fix mine someday so I will be watching this thread.
Good luck.
pics:
http://s286.photobucket.com/albums/l...20Restoration/
It looks like my rear Astroventilation drain tubes may be the culprit here, as they were heavily deteriorated. I will recheck the antenna, but it is external to that area, and the panels between the two areas seem to be in good condition. I guess what I'm looking for is info on how to change out the nut & cage assembly that the body bolt engages.
09-18-2009, 09:39 AM
#4
Safety Car

If.... you cant get the bolt out, cut the head of the body mount bolt off,
If the nut cage retainer is still in tack, use a dremel to cut 1 side of the welded tabs,
bend the cage up and remove the frozen unt and bolt.
clean up everything, and put a new nut in place and bend the cage back down on it.
If the retainer(cage) is completely rusted and gone,
just use a regular nut and some locktite. 69VETT
09-19-2009, 03:28 AM
#5
Melting Slicks

Member Since: Apr 2006
Location: Airdrie Alberta
Posts: 2,084
Likes: 0
Received 11 Likes
on
10 Posts

If.... you cant get the bolt out, cut the head of the body mount bolt off,
If the nut cage retainer is still in tack, use a dremel to cut 1 side of the welded tabs,
bend the cage up and remove the frozen unt and bolt.
clean up everything, and put a new nut in place and bend the cage back down on it.
If the retainer(cage) is completely rusted and gone,
just use a regular nut and some locktite. 69VETT
If the nut cage retainer is still in tack, use a dremel to cut 1 side of the welded tabs,
bend the cage up and remove the frozen unt and bolt.
clean up everything, and put a new nut in place and bend the cage back down on it.
If the retainer(cage) is completely rusted and gone,
just use a regular nut and some locktite. 69VETT

in addition, if the glass is damaged, once you remove the hardware, use some duct tape underneath, lay some glass matt on top, after cured drill hole, mount new reinforcement and hardware.

The following users liked this post:
Primoz (02-02-2022)
07-21-2012, 03:13 AM
#7
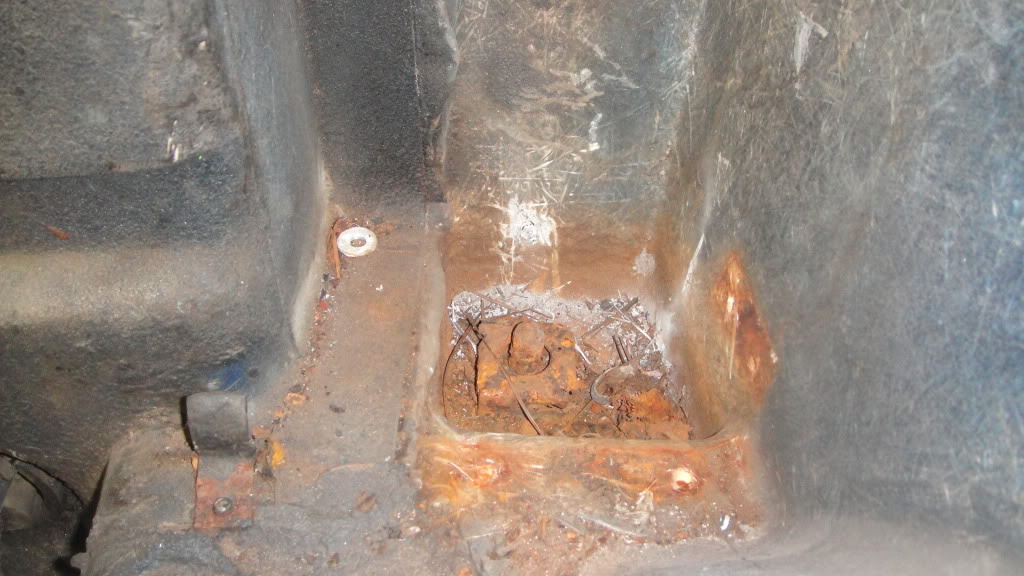
That's right...I have a 73 with exactly the same image but worse...could always be a t-top water leak, but it is most likely from a water leak from the usually non-functioning plenum drain tubes that connect to the back window galley area underneath and go out to the inside fenderwell. Mine had been worn out/clogged/torn for years and water from the back window grilles drained into the car (not my car then). It is a cheap and easy fix as far as the plenum drain tubes (don't re-rivet them to the fender, use small bolts...it's easier to connect and changeout years later). For the mounts, you will need to cut the bolt or bust it off by turning (be sure not to hurt the glass floor in the process...dig out all of the trashed metal everywhere (it will crumble off)...smooth off the alum rivets holding what's left of the body reinforcing mounts off...and see how much of the frame mount is left...I assure you, a big hole will be under where the rubber bushing was sitting. For this, you will need to buy a new frame mount (avail from Corvette Central) for both sides and the body reinforcing mounts and body mounts kit (all from same source). Having done one side, I then took it to a resto shop for the frame mount welding (bumpers and other bushings kept rear of car from falling down). Then I connected the body reinforcng mounts using small bolts versus alum rivets (easy to replace later/clean/paint/etc). The support body a bit in back without hurting fiberglass, remove rear bumper bolts and get enough clearance to jack up body a bit and put the new bushings in place.
Hope that helps...good luck!
Hope that helps...good luck!
The following users liked this post:
sobervette88 (12-21-2018)
07-21-2012, 12:06 PM
#8
Drifting

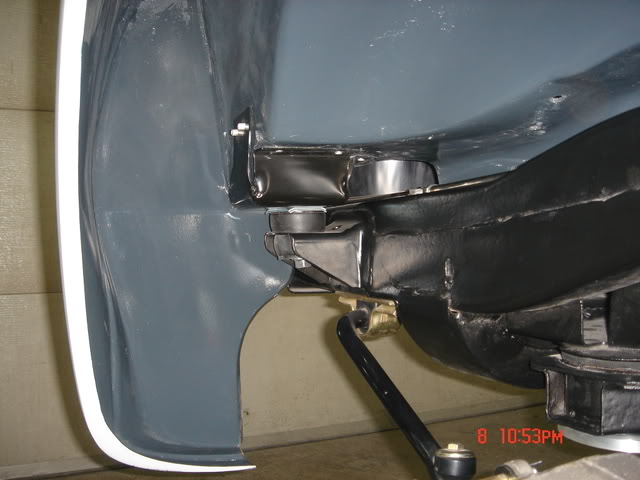
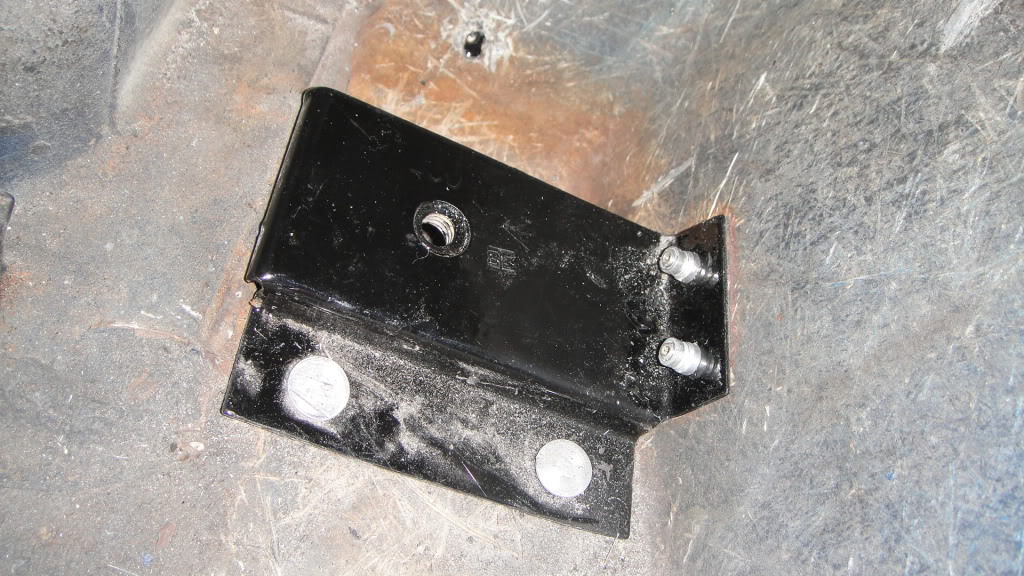
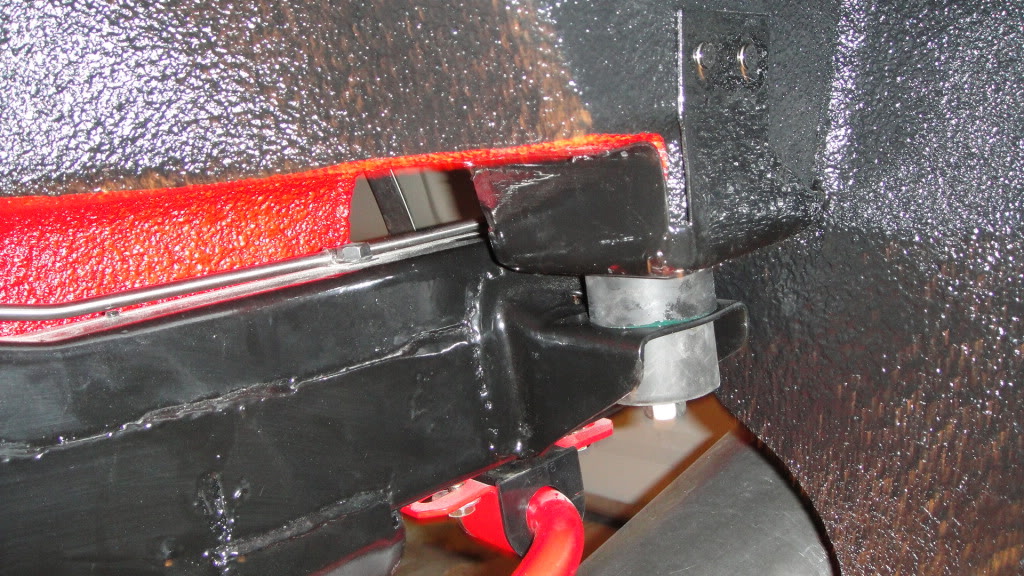
Here's what mine looked like before repair... Did not have to do any glass work... Also, used a combination of aluminum rivets and Hilok fasteners to re-secure... I did not put a fastener in the rear hole as you can see... I will fill this in when I shoot Lizard Skin in the interior...
Rogman
Rogman
09-22-2012, 09:05 PM
#9
Intermediate
Member Since: Sep 2007
Location: Miami Florida
Posts: 42
Likes: 0
Received 0 Likes
on
0 Posts
in the process of changing rear body mounts and bushings. Cage nut and body mounts done. However, creating space for the bushing is another story. Is there any way to slide them in without loosing the #3 bolts?
I would appreciate any suggestions. Thanks
I would appreciate any suggestions. Thanks
09-23-2012, 02:10 PM
#10
Race Director

Member Since: Apr 2011
Location: North of Toronto - Ontario
Posts: 10,876
Received 3,148 Likes
on
2,077 Posts
If it's really closed up, you may need to lift it a little, let it sit, then again, then again slowly over a few days to prevent any cracks, until it it up enough to put the bushing in.
Mooser