
502 CanAm Project Update
 06-14-2005, 12:02 AM
#1
Drifting

Thread Starter

Lots of progress but I didn't get to fire it up 
More Pics under the avitar coming as soon as they are approved....


Tasks Completed this weekend...
Installed Rad Core support, rad/fan/oilcooler unit for good.
Reinstalled header/side pipe on Pass side after modding the frame to clear the O2 sensor in the jet hot headers (off by 1/2" DAMN)
Installed dip stick and moving the Knock sensor to the driver side.
Installed clutch linkage with rod ends (new lock and nut)
Installed rod end seals on Tie rod ends
Installed all new brake bleeder screws and rechecked all new brakeline connections and gravity bled for now. need better job later
Installed new battery mounts, +- Cables, and Battery
Installed new ground straps from engine to frame, cage to frame and fuel sender to frameGravity bled power steering Steeroids and hydraboost after new custom lines
Build relay mount for fuel pump starter and fan relays from S10 blazer parts
Finished fabbing up fuel pump, and fuel cell, Test fit ok, waiting for new style sending unit this week that works with foam for final assembly. Need to run some temp lines to test fire. uses 87 vette pump and sender.
Installed new diff mount bushing and bolts, cleaned and painted diff mounting bracket
Installed new poly Trans mount and Electric speedo sending unit
Removed old "stock" fuel line.
Parts that arrived last week waiting to be installed:
new driveshaft with spicer joints - painted and prepped
New Stewart Warner instruments
4" wide rubber belting for road scraping front air dam
New supples of 3/16 and 1/4 inch closed end pop rivets, weather pack connectors, and Otiker band clamps
New L&R shock mounts, french locks and 1/2 shaft bolts for axle flange
Steering column bottom bearing and associated parts (causing steeroids to bind slightly)
New door frame, hinges, and doors for bat compartment
Parts arriving this week:
misc AN fittings
New Fuel level sender
more rod end seals in 5/16(Clutch linkage), 5/8 (to finish my 6 link strut rods), and 3/4 (steeroids idler)
Parts/tools/material to order this week:
0.062 alum sheet for console, doors, floor and bat/jack doors
Bead roller
4.5 or 5" cowl hood cant decide Rib or Flat


More Pics under the avitar coming as soon as they are approved....
Tasks Completed this weekend...
Installed Rad Core support, rad/fan/oilcooler unit for good.
Reinstalled header/side pipe on Pass side after modding the frame to clear the O2 sensor in the jet hot headers (off by 1/2" DAMN)
Installed dip stick and moving the Knock sensor to the driver side.
Installed clutch linkage with rod ends (new lock and nut)
Installed rod end seals on Tie rod ends
Installed all new brake bleeder screws and rechecked all new brakeline connections and gravity bled for now. need better job later
Installed new battery mounts, +- Cables, and Battery
Installed new ground straps from engine to frame, cage to frame and fuel sender to frameGravity bled power steering Steeroids and hydraboost after new custom lines
Build relay mount for fuel pump starter and fan relays from S10 blazer parts
Finished fabbing up fuel pump, and fuel cell, Test fit ok, waiting for new style sending unit this week that works with foam for final assembly. Need to run some temp lines to test fire. uses 87 vette pump and sender.
Installed new diff mount bushing and bolts, cleaned and painted diff mounting bracket
Installed new poly Trans mount and Electric speedo sending unit
Removed old "stock" fuel line.
Parts that arrived last week waiting to be installed:
new driveshaft with spicer joints - painted and prepped
New Stewart Warner instruments
4" wide rubber belting for road scraping front air dam
New supples of 3/16 and 1/4 inch closed end pop rivets, weather pack connectors, and Otiker band clamps
New L&R shock mounts, french locks and 1/2 shaft bolts for axle flange
Steering column bottom bearing and associated parts (causing steeroids to bind slightly)
New door frame, hinges, and doors for bat compartment
Parts arriving this week:
misc AN fittings
New Fuel level sender
more rod end seals in 5/16(Clutch linkage), 5/8 (to finish my 6 link strut rods), and 3/4 (steeroids idler)
Parts/tools/material to order this week:
0.062 alum sheet for console, doors, floor and bat/jack doors
Bead roller
4.5 or 5" cowl hood cant decide Rib or Flat
Last edited by 84rzv500r; 06-14-2005 at 07:20 AM.
 06-14-2005, 11:12 AM
#2
Drifting
Looks good. I have a question or questions about your wheels. Can you give me the name of the wheel, the size, backspacing, and do you have to run spacers to clear the calipers. I need some inexpensive wheels and I like the look of yours. Thank you.
06-14-2005, 01:29 PM
#3
Team Owner

You should really enjoy a 502  I don't envy the amount of man hours that you have in this project.
I don't envy the amount of man hours that you have in this project.
06-14-2005, 06:21 PM
#4
Drifting
Thread Starter
Originally Posted by CrossedFlags77
Looks good. I have a question or questions about your wheels. Can you give me the name of the wheel, the size, backspacing, and do you have to run spacers to clear the calipers. I need some inexpensive wheels and I like the look of yours. Thank you.

 06-14-2005, 07:39 PM
#7
Race Director

Member Since: Nov 1999
Location: Foxfield CO 1970 Convertible
Posts: 10,642
Likes: 0
Received 5 Likes
on
4 Posts

Looking good! Yes - we need more photos!! (Edit: checked out your photos. Lots of good ones!)
You're single I take it, with all the work you did this weekend.
I took my original fuel line out a couple of weeks ago. Man that was a real beech...
(Edit: checked out your photos. Lots of good ones!)You're single I take it, with all the work you did this weekend.
I took my original fuel line out a couple of weeks ago. Man that was a real beech...
Last edited by Z-man; 06-14-2005 at 07:50 PM.
06-14-2005, 09:16 PM
#8
Drifting
So there is no problem at all with caliper clearance. Cause that is exactly what I wanted to here.
Another question are you using the DOT approved wheels, or which design are you actually using?
Another question are you using the DOT approved wheels, or which design are you actually using?
Last edited by CrossedFlags77; 06-14-2005 at 09:39 PM.
06-14-2005, 11:04 PM
#9
Drifting
Thread Starter
Originally Posted by CrossedFlags77
So there is no problem at all with caliper clearance. Cause that is exactly what I wanted to here.
Another question are you using the DOT approved wheels, or which design are you actually using?
Another question are you using the DOT approved wheels, or which design are you actually using?
 06-15-2005, 06:47 AM
#11
Le Mans Master

Man how I wish I could get that much done in a weekend  Very clean assembly going into the gas tank Me thinking you're going to have lots of fun when done
Very clean assembly going into the gas tank Me thinking you're going to have lots of fun when done
06-15-2005, 08:34 AM
#12
Drifting
Thread Starter
"Clocks"

Clutch Linkage Installed (Note use of Oetiker Clamp on HB return Line)

Header bolts safteywired... Tip: Bend the ends over 180 degrees to keep from poking your fingers

Clutch Linkage Installed (Note use of Oetiker Clamp on HB return Line)
Header bolts safteywired... Tip: Bend the ends over 180 degrees to keep from poking your fingers
06-15-2005, 10:49 AM
#13
Team Owner
When you get a chance could you take some pics of your cage and 4 inch rubber up front?
06-15-2005, 06:02 PM
#15
Drifting
Thread Starter
Originally Posted by gkull
When you get a chance could you take some pics of your cage and 4 inch rubber up front?
06-15-2005, 06:31 PM
#16
Team Owner
I just looked at your first gallery page - sorry!
4" wide rubber belting for road scraping front air dam
4" wide rubber belting for road scraping front air dam
06-15-2005, 10:08 PM
#17
Drifting
Thread Starter
Originally Posted by gkull
I just looked at your first gallery page - sorry!
4" wide rubber belting for road scraping front air dam
4" wide rubber belting for road scraping front air dam

I just finished assembling the fuel cell. I'll wire it up and put it in the car tomorrow night. I need to go over to the Big Rig Store and get a piece of 2" blue silicone hose to connect the input of the tank to the remote filler cap
06-16-2005, 12:42 AM
#18
Team Owner
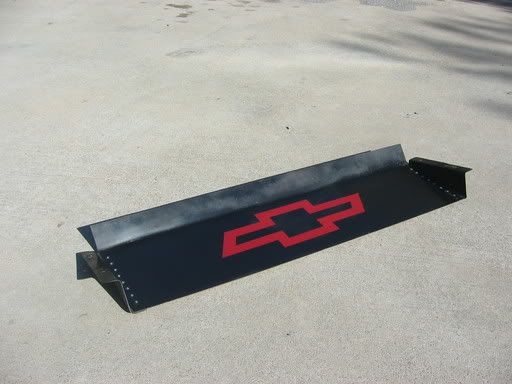
This is 1.5 inch angle aluminum with self taping screws into the frame rails under the radiator with 5.5 inch rubber. Because of the high mounting location on my Daytona front end I reall need 8 or so inch rubber and use a larger aluminum stock

06-16-2005, 01:12 AM
#19
Drifting
Gkull, I saw the way you sealed the bottom of your Daytona front end to draw more air into your radiator and thought of a way I could apply this to my car. I made a front air damn out of sheet metal and it has really lowered my temperatures ALOT. I thought I had some pictures of it installed but I will take some tomorrow.
06-16-2005, 11:21 AM
#20
Melting Slicks

Member Since: Nov 2003
Location: St. Charles Mo
Posts: 2,655
Likes: 0
Received 104 Likes
on
49 Posts
CI 5 & 8 Veteran
Mark, Great to see all your progress Just a couple of lesson learn inputs from my RamJet 502 install. Looks like you have the stock six quart oil pan on yours. I wound up having to switch to a kicked out Moroso seven quart pan to gain adequate ground clearance. the stock pan only gave me 3.5" and it wasn't long before I was the pan on racks and speed bumps.

What transmission are you going to use? If it is a manual tranny make sure you use the correct pilot bearing. the one they call out in the directions is incorrect for the Muncie or Tremec trannys.
Make sure you don't have any vacuum leaks. Ramjet is very sensitive to that. I chased one down in my old headlight actuators that was small but caused major headaches with the MAP sensor.
There is probably more but can't think of them now. Don't hesitate to ask if you have any questions
Bullshark
Just a couple of lesson learn inputs from my RamJet 502 install. Looks like you have the stock six quart oil pan on yours. I wound up having to switch to a kicked out Moroso seven quart pan to gain adequate ground clearance. the stock pan only gave me 3.5" and it wasn't long before I was the pan on racks and speed bumps.What transmission are you going to use? If it is a manual tranny make sure you use the correct pilot bearing. the one they call out in the directions is incorrect for the Muncie or Tremec trannys.
Make sure you don't have any vacuum leaks. Ramjet is very sensitive to that. I chased one down in my old headlight actuators that was small but caused major headaches with the MAP sensor.
There is probably more but can't think of them now. Don't hesitate to ask if you have any questions
Bullshark