When you click on links to various merchants on this site and make a purchase, this can result in this site earning a commission. Affiliate programs and affiliations include, but are not limited to, the eBay Partner Network.
Metallic brake shoes - well, that is interesting!!! Since the brakes worked fine with no leaks, all I ever did was bleed them. Never pulled a drum. Neat find!
Metallic brake shoes - well, that is interesting!!! Since the brakes worked fine with no leaks, all I ever did was bleed them. Never pulled a drum. Neat find!
I was surprised as well! I only pulled one wheel then put it back on so I could resume working under the hood. No leakage or issues on the RF corner. Lots of metallic dust from the pads! Drum hasn't been turned. The wheel cylinder was dry (and original to the car) and the primary shoes are maybe 50% worn, so I conclude the brakes are factory. Provided all the cylinders are dry, I am leaving all that alone and just bleeding them out. to get clean fluid through the system. I've bled and adjusted the brakes on the fuelie multiple times and the pedal still isn't as high and the brake feel as good as this car.
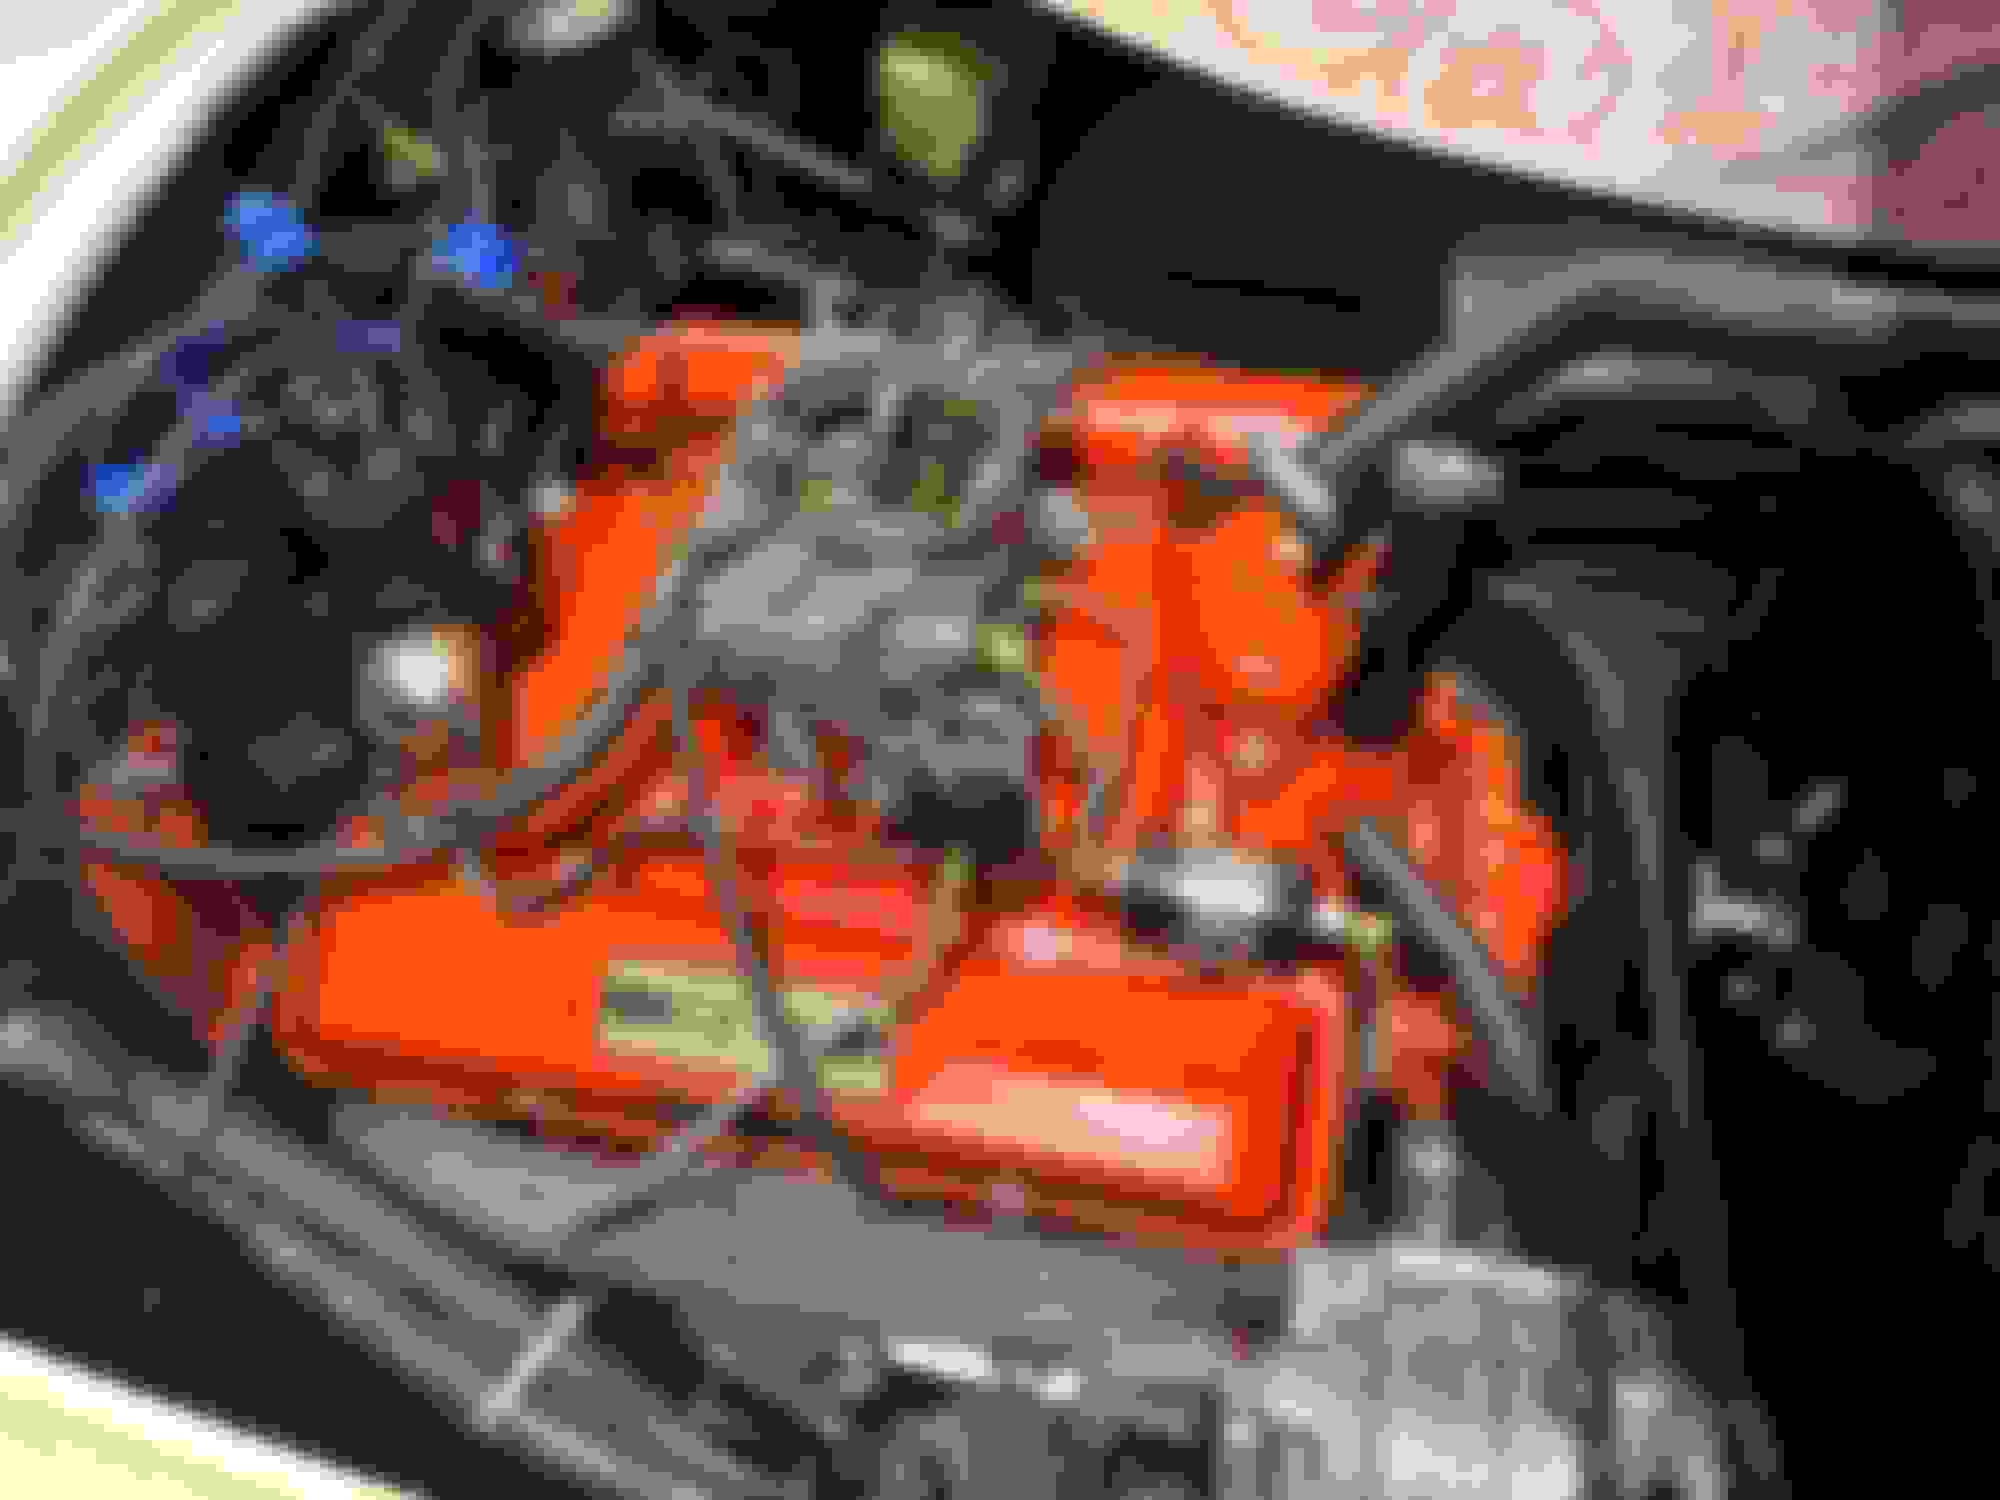
Made some more progress yesterday. I figured out the vacuum leak was at the manifold, so off it came. Engine is pristine inside. Good time to take the mainfold to Redistrip and do a little detailing.
Distributor limit busing had disintegrated, so it was way over-advancing. The vacuum leak plus the excessive advance are probably to blame for the stumble. The carb seems fine but I will go through it anyway while it's off. Will also install the Breakerless SE trigger module.
Make sure to remove the rivets holding the oil splash shield so if there is cooked oil on the bottom of the manifold it can be cleaned. My 67 300hp manifold had about 1/4" caked oil residue stuck to the bottom of the intake plenum out of sight above the splash shield, with low miles it may not be bad but check it good.
Also, tap the heat crossover holes for 1/4" pipe threads so small allen head screws will set flush when snug, just tap deep enough so the plug sets flat when snug.
Love the car...
Thank you. I am following your recommendation and will tap the crossover for NPT hex plugs. I took the shield off and it's pretty clean inside. I hate cleaning parts so I am just going to drop it at the local Redistrip to clean it all out before I squirt it an reinstall. I don't want to do too much detailing because it's a patina car and should stay that way.
Thanks for the alternator pictures, I was curious if the rear half had the seven rectangular slots or six slots and the 1/4" hole by the red positive wire. There was a change over and the 64 cars had a plastic clip taped in the wire harness that pushed into that hole and held the wires tight to the alternator but some 628 alternators have the hole.
Make sure to clean those threads and use a drop of blue loctite on the screw.
If you could can you snap and post a picture of the alternator front showing the fan and pulley.
Some minor progress. I dropped the column and pulled the cluster back far enough to get the temp and oil gauge pod out. What a pain! I am going to struggle to get it back in, but this was the least-invasive way to do it. That column had never been out of the car, I believe.
The temp gauge was indeed stuck. The NOS gauge I had showed a slight difference in the finish (OEM is glossy black, replacement is semi-gloss). So I took the gauge apart and swapped the faces. Now waiting on some resistors so I can calibrate the gauge and reinstall the needle. Not my favorite job.
Also changed the battery tray for a 67 (I just don't like the 63-66 hold-down, too much risk of the cable touching the hold-down in my opinion) and replaced the original battery cables, which were petrified.
Beautiful SWC with great color combo. Keeping as much as possible original by just cleaning etc. Dennis
Dennis, the plan is to leave it as untouched as possible. I debated not painting the intake, but since the top of the engine was already detailed once when the correct intake and valve covers were put back on (it had finned VC's and a 340 intake at one time), that paint isn't original anyhow. So I'm going to chemically dip and repaint the intake. After a few miles it should all have a little patina and blend together. The seats leather is so dry it's beyond saving, but instead of tearing the original seats apart to recover, I bought a second set to install. The paint is an ancient lacquer repaint that looks like original paint and the body still has the panel waviness of an original car that would be lost in a high-quality repaint, so I'm keeping the paint as-is.
I caught a couple hours tonight, so I went through the distributor. Nothing too interesting there, the vacuum cannister was original and works fine, but not knowing how much idle vacuum I will have, I swapped to a B26 which seems to be all-in around 14" of vacuum. Installed the Lectric Limited trigger kit, because I just don't like points. The distributor cap that came off may be original to the car, I don't have the Judging Guide at home to look it up.
The carb is worse for wear, but no stripped holes or damaged parts. Modern fuel shows its effects here, so I am going to finish disassembling and cleaning everything, then reassemble and go through all the adjustments in the manual. For anyone with an AFB, I highly advise NOT to use these aftermarket accelerator pumps. If you have one and experience an off-idle stumble or a lean miss when you accelerate quickly from cruise speed, this is likely your issue. I did a lot of experimenting with these a few years ago on my 340 car, and they just don't work well. The check valve in the accelerator pump well has a very light spring that holds the ball on the seat. The OEM pump (the leather seal with the garter spring), creates a negative pressure when the plunger travels up toward the top of its range. That unseats the ball and allows the well to fill up fully. The accelerator pump can then deliver a complete shot. The rubber lip seal like this one will return to the top of travel and not fully fill the well. I've tested it and proven this is true.
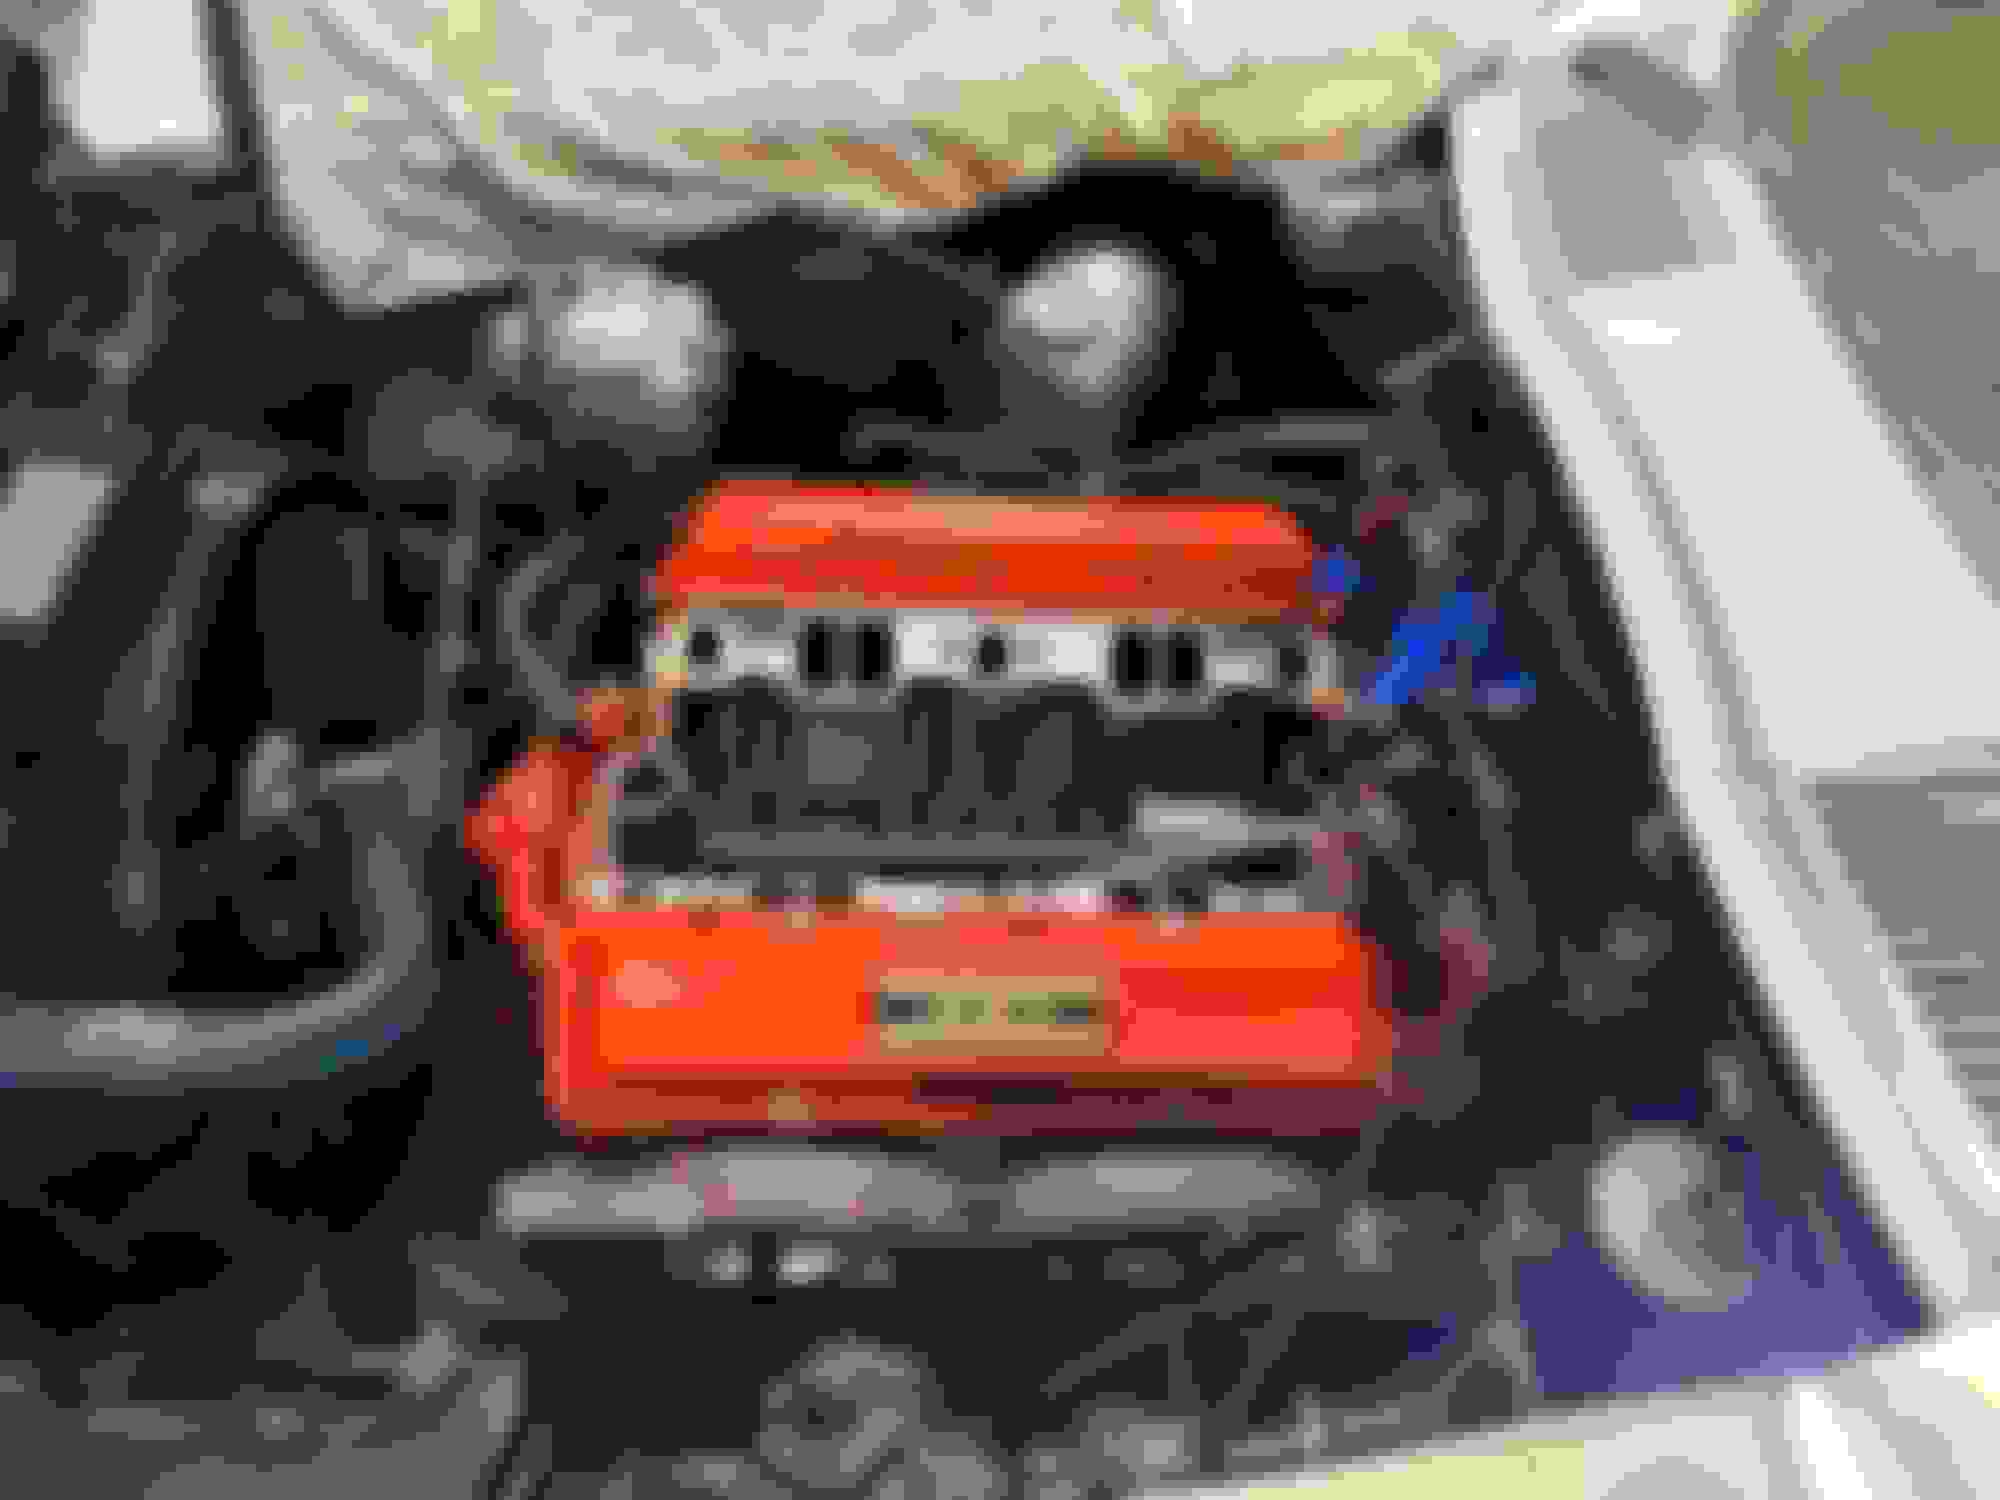
Engine is back together and running. I stripped an painted the intake. Easy install. Needed a new DeWitt's surge tank because the original had a crack.
Recalibrated the temp gauge, though I missed the mark slightly because I'm about 10 degrees too high. Of course after I had the dash apart and the oil pressure gauge in my hand, now it's sticking as well. It reads 0, 20, or 40 PSI, and sometimes doesn't go back to zero. Figures. I'm not messing with that again, engine has plenty of oil pressure so that can be dealt with (or never dealt-with) later.
Engine started easily with the rebuilt distributor and carb. Runs poorly now.
I re-used the original vacuum advance because it bench-tested good, but now on the car it's DOA. Quick find and easy fix when NAPA opens tomorrow. The engine idles OK, but there was still a vacuum leak. Took the carb back off and it was definitely leaking between the carb spacer and steel shim. Carb base is flat and manifold is flat. That spacer is kinda wavy (repro--of course). I ditched the shim and put in a second gasket, and the leak at that location is gone. I picked up 2 more inches of manifold vacuum with the gasket, but something was still wrong because it's pulling only 15" at hot idle.
Messed around awhile longer and found that covering the primaries took about 5 seconds to stall the engine. Must be a vacuum leak elsewhere. Could not find any gasket leaks, but blocking the PCV kills the engine instantly. Took off the PCV and the piston inside was jammed and would not seat . I think it's one of those "looks correct but doesn't work" repro parts. A lot like the correctly stamped vacuum advance cannisters the parts houses sell. NAPA has a functional replacement in stock, so I'm done until tomorrow AM when NAPA opens.
Here are some pics, because that's what people mostly care about:
Nick,
Great update on things. Looks like it is progressing nicely.
Couple of comments…
The Brown 047 copper contact distributor cap is not original. You need a PATENT PENDING No “R” black D-308 cap to be correct. They all have aluminum contacts.
Where can I find an accelerator pump for my 3461 with the leather sleeve.???? I’d like to change mine.
Keep us posted. I’m sure you will be happy with the result.
Nick,
Great update on things. Looks like it is progressing nicely.
Couple of comments�
The Brown 047 copper contact distributor cap is not original. You need a PATENT PENDING No �R� black D-308 cap to be correct. They all have aluminum contacts.
Where can I find an accelerator pump for my 3461 with the leather sleeve.???? I�d like to change mine.
Keep us posted. I�m sure you will be happy with the result.
Dave
Dave, thanks for that. I really didn't know on the cap and haven't looked at the JG.
The carb kits sold by RockAuto are branded HyGrade, and contain the correct accelerator pump. The shipping costs more than the kit. The check valve is not included. If you need the valve, CCS Performance Carburetors has the correct one with the spring.
Finally running (very well) after 2 failed attempts to install the intake. In the end, the oil separator was binding on the bottom of the intake and it was sucking oil at the bottom of the ports at the rear.
I tried to blend the patina of the engine to the new intake. I know the water neck bolts should be painted, will do later.
Contributing to my low manifold vacuum and timing issues was that the breaker plate was binding against the distributor cap. The connector on the Breakerless SE module wasn't bent far enough, and was locked up when the cap was on. This is why you only change one thing at a time when you are tuning an engine. Sometimes my ambition surpasses my ability.
Congratulations on diagnosing the problem and sharing the fix. Perseverance, and a little help from your friends, has solved the issue. Thanks for sharing the solution.
BTW, tidy engine compartment.
Looks good! I like it! Did you happen to shoot a pic of your "modified" can/oil separator? My 63 vert's eng [base 250] has never been out of the car. Heads/intake only; and I seem to remember the "can"/oil separator had a bent flange.
My spare eng build's can has a cut off flange. Was the eng running OK before the manifold removal and replacement? IMHO looks like it was removed some time in the past. Thanks for keeping us all informed !
Aloha,
Rene'
P.S. My interior is also saddle tan with leather seats. I had Al K re-do the leather. Still using the original door panels with "patina" 63's sure are unique!!
 09-24-2023, 11:09 AM


 Dennis