When you click on links to various merchants on this site and make a purchase, this can result in this site earning a commission. Affiliate programs and affiliations include, but are not limited to, the eBay Partner Network.
I decided to try the RIT dye to return the carpet to black as it had places that were red from sunlight bleaching it out. Here is a heads up on what not to do:
1. I performed the burn test to determine if the carpet was nylon. A nylon string burned with a blue flame, fast burn, and balled up on the end. The carpet fragments burned with a yellow flame and produced an ash when crumbled. I assumed it was rayon and selected the standard RIT dye. I think I made the wrong selection.
2. I shampooed the carpet with a rotary brush with the wife's carpet machine. Don't do it, the carpet frayed from the rotary action.
3. I attempted to apply the dye (with soap and salt additives and hot water) with a spray bottle and brush it in, starting with the passenger's side carpet. I got very little dying action after repeated applications.
4. I switched to dye with vinegar and soap in hot water and brushed it in and got a little better result, but not what I wanted.
5. Decided to immerse the carpet in a tub of dye (with the vinegar mix but doubled the amount of dye) and leave it about 24 hours. I was at first happy when I took it out of the tub and sprayed it with fixative. Waited 30 minutes and rinsed it off. When wet, it looked great. Left it to air dry for about 2 days.
6. Put the driver's side in the bath for about 24 hours, then applied fixative, rinsed, and dried.
Bottom line is we have some improvement, but the carpet has a brown tint where it was bleached out and the carpet is a dull black and kind of stiff. Not what I was expecting. I don't know if the RIT DYE MORE for nylon would do the correct job, but the dying process is much more labor intensive than I expected and although total cost is about $25, I would not try it again, new ACC carpet is less than $250 for front from the vendors. Going to see what vendors have at Bloomington Gold as I am in no hurry.
While waiting for the carpet to soak and dry, I sanded and painted the fiberglass panels on either side of the console tower and at the rear quarters. Tried 2 different sprays of semi-flat black enamel only to get fish eye in the second coat . Wiped off the enamel with thinner and cleaner and found a can of semi-flat back acrylic lacquer spray can. The lacquer matched the original finish very well and resolved my fish eye problem.
Put in the BUBBA built console with some final modifications and added a "hang-on" cheap radio with blue tooth, USB, and hands free calling with steering wheel remote (less than $25). Didn't expect the radio to work real well, but it amazes me for the pennies I though I was throwing away. It seems as good as the Kenwood unit I had in the car. The factory AM/FM still works, so didn't want to put an aftermarket radio in the dash / console tower.
So now the seat foam project (bad experience), door latch (repair), seat cover dye / cleanup / repair, new radio,and carpet are finally complete with mixed results.
The wife now wants me to paint the car and I don't have $20K set aside for someone else to do it.
When do you get too old for this sheit?
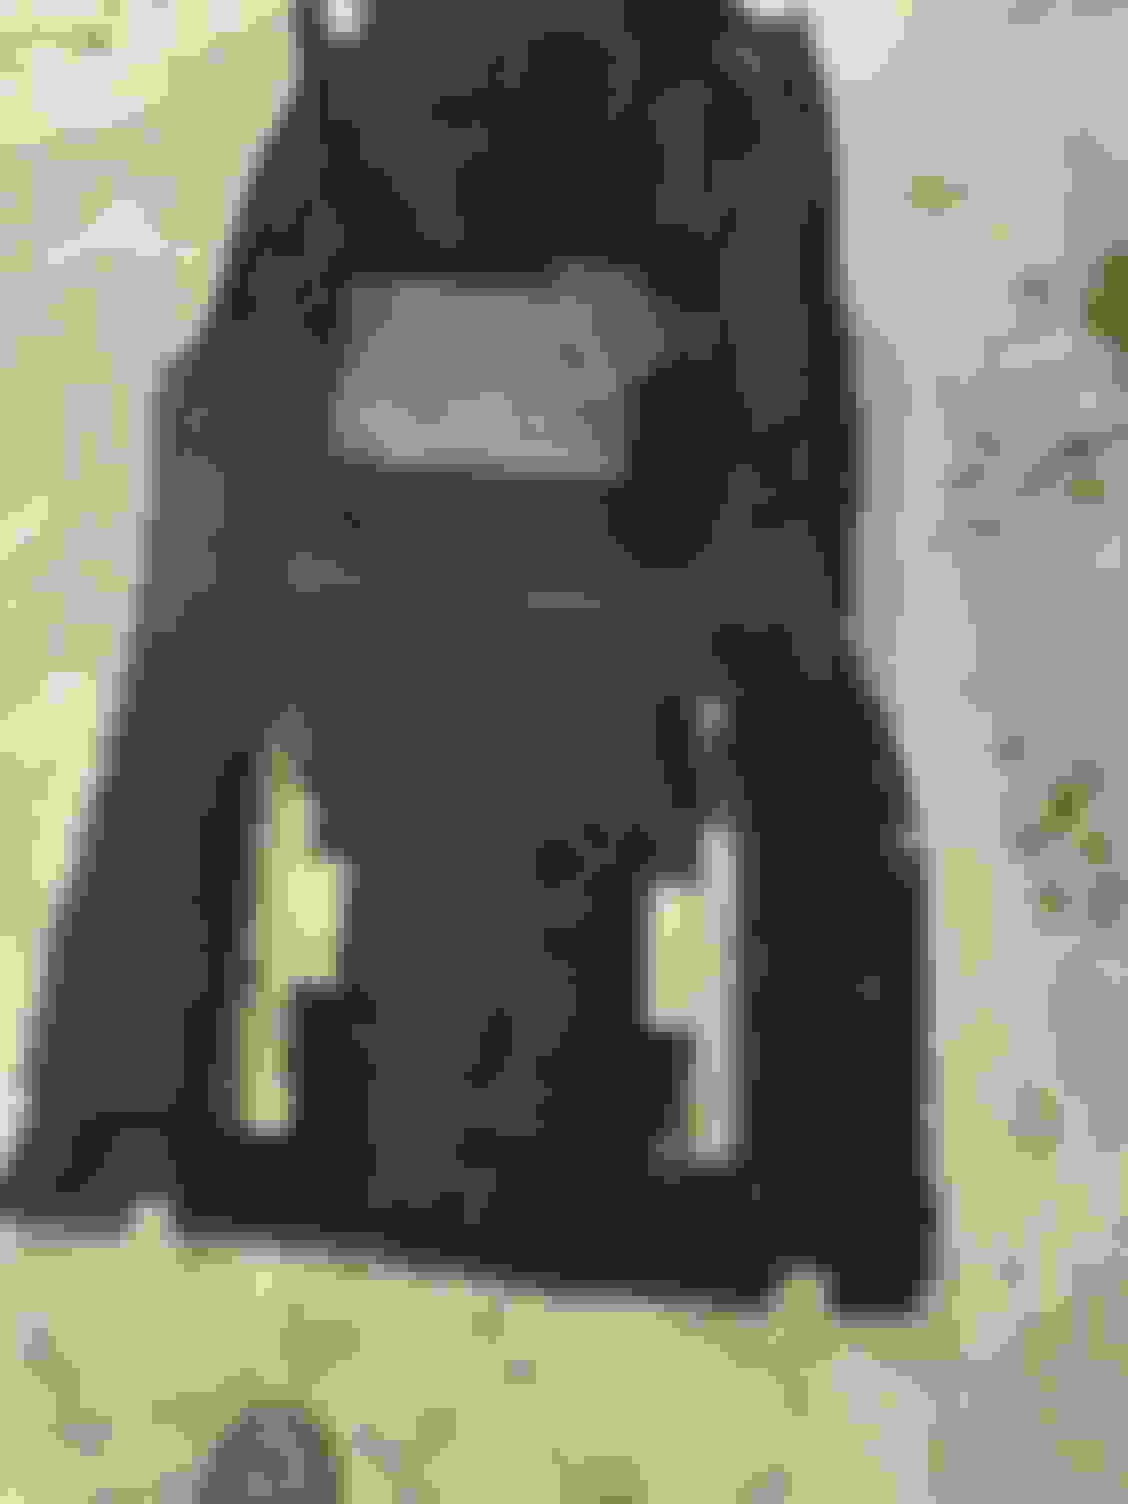
RIT and Salt hand sprayed passenger's side. Then moved to bath of RIT and Vinegar. RIT and Vinegar Driver's side Immersed carpet in bath of RIT dye. Completed carpet has a brown cast rather in the areas that were sun bleached. Will have to work for a while. Quarter panel trim with Dupli-Color black acrylic lacquer paint. Overspray melts in very well. Can you see where I sprayed a test spot?
when I did the RIT dye I just vacuumed the carpet very well. with gloves on took a new kitchen sponge and soaked the dye in the sponge and blotched and rubbed the sponge in the carpet until I got the coverage I wanted. then I put the carpet in the sun for a few hours to dry and touched up as needed.
when I did the RIT dye I just vacuumed the carpet very well. with gloves on took a new kitchen sponge and soaked the dye in the sponge and blotched and rubbed the sponge in the carpet until I got the coverage I wanted. then I put the carpet in the sun for a few hours to dry and touched up as needed.
Sounds like it would have been a lot easier and quicker to install a new carpet kit.
YES SIR. I do regret the wasted time although very little money. I guess the OLDER ARE WISER must not apply here. I don't know how I screwed up other than I didn't try applying the RIT full strength out of the bottle. Won't happen again.
Several years ago when I first got my '66 I too tried the RIT method with similar results. I switched to carpet paint and that worked great. Went from a faded black to a deep dark black. Took a couple of coats though. If you use the spray paint you'll need plenty of ventilation and a respirator.
Several years ago when I first got my '66 I too tried the RIT method with similar results. I switched to carpet paint and that worked great. Went from a faded black to a deep dark black. Took a couple of coats though. If you use the spray paint you'll need plenty of ventilation and a respirator.
$.02 deposited
I had a similar experience using spray vinyl dye on my dark blue carpet in my '66. I only touched up the faded areas that had browned some and it turned out great. Brushing the carpet a bit between coats helped to keep the fibers loose and it was easier to tell him much paint it needed for a good blend.
 03-19-2023, 04:00 PM


 I don't know if the RIT DYE MORE for nylon would do the correct job, but the dying process is much more labor intensive than I expected and although total cost is about $25, I would not try it again, new ACC carpet is less than $250 for front from the vendors.
  Going to see what vendors have at Bloomington Gold as I am in no hurry.
 . Wiped off the enamel with thinner and cleaner and found a can of semi-flat back acrylic lacquer spray can. The lacquer matched the original finish very well and resolved my fish eye problem.
 The factory AM/FM still works, so didn't want to put an aftermarket radio in the dash / console tower.