When you click on links to various merchants on this site and make a purchase, this can result in this site earning a commission. Affiliate programs and affiliations include, but are not limited to, the eBay Partner Network.
So far, cost is less than a hundred bucks and there is very little cost in this chapter: one gallon of stripper, blades, lots of paper towels, and a few disposable paint brushes.
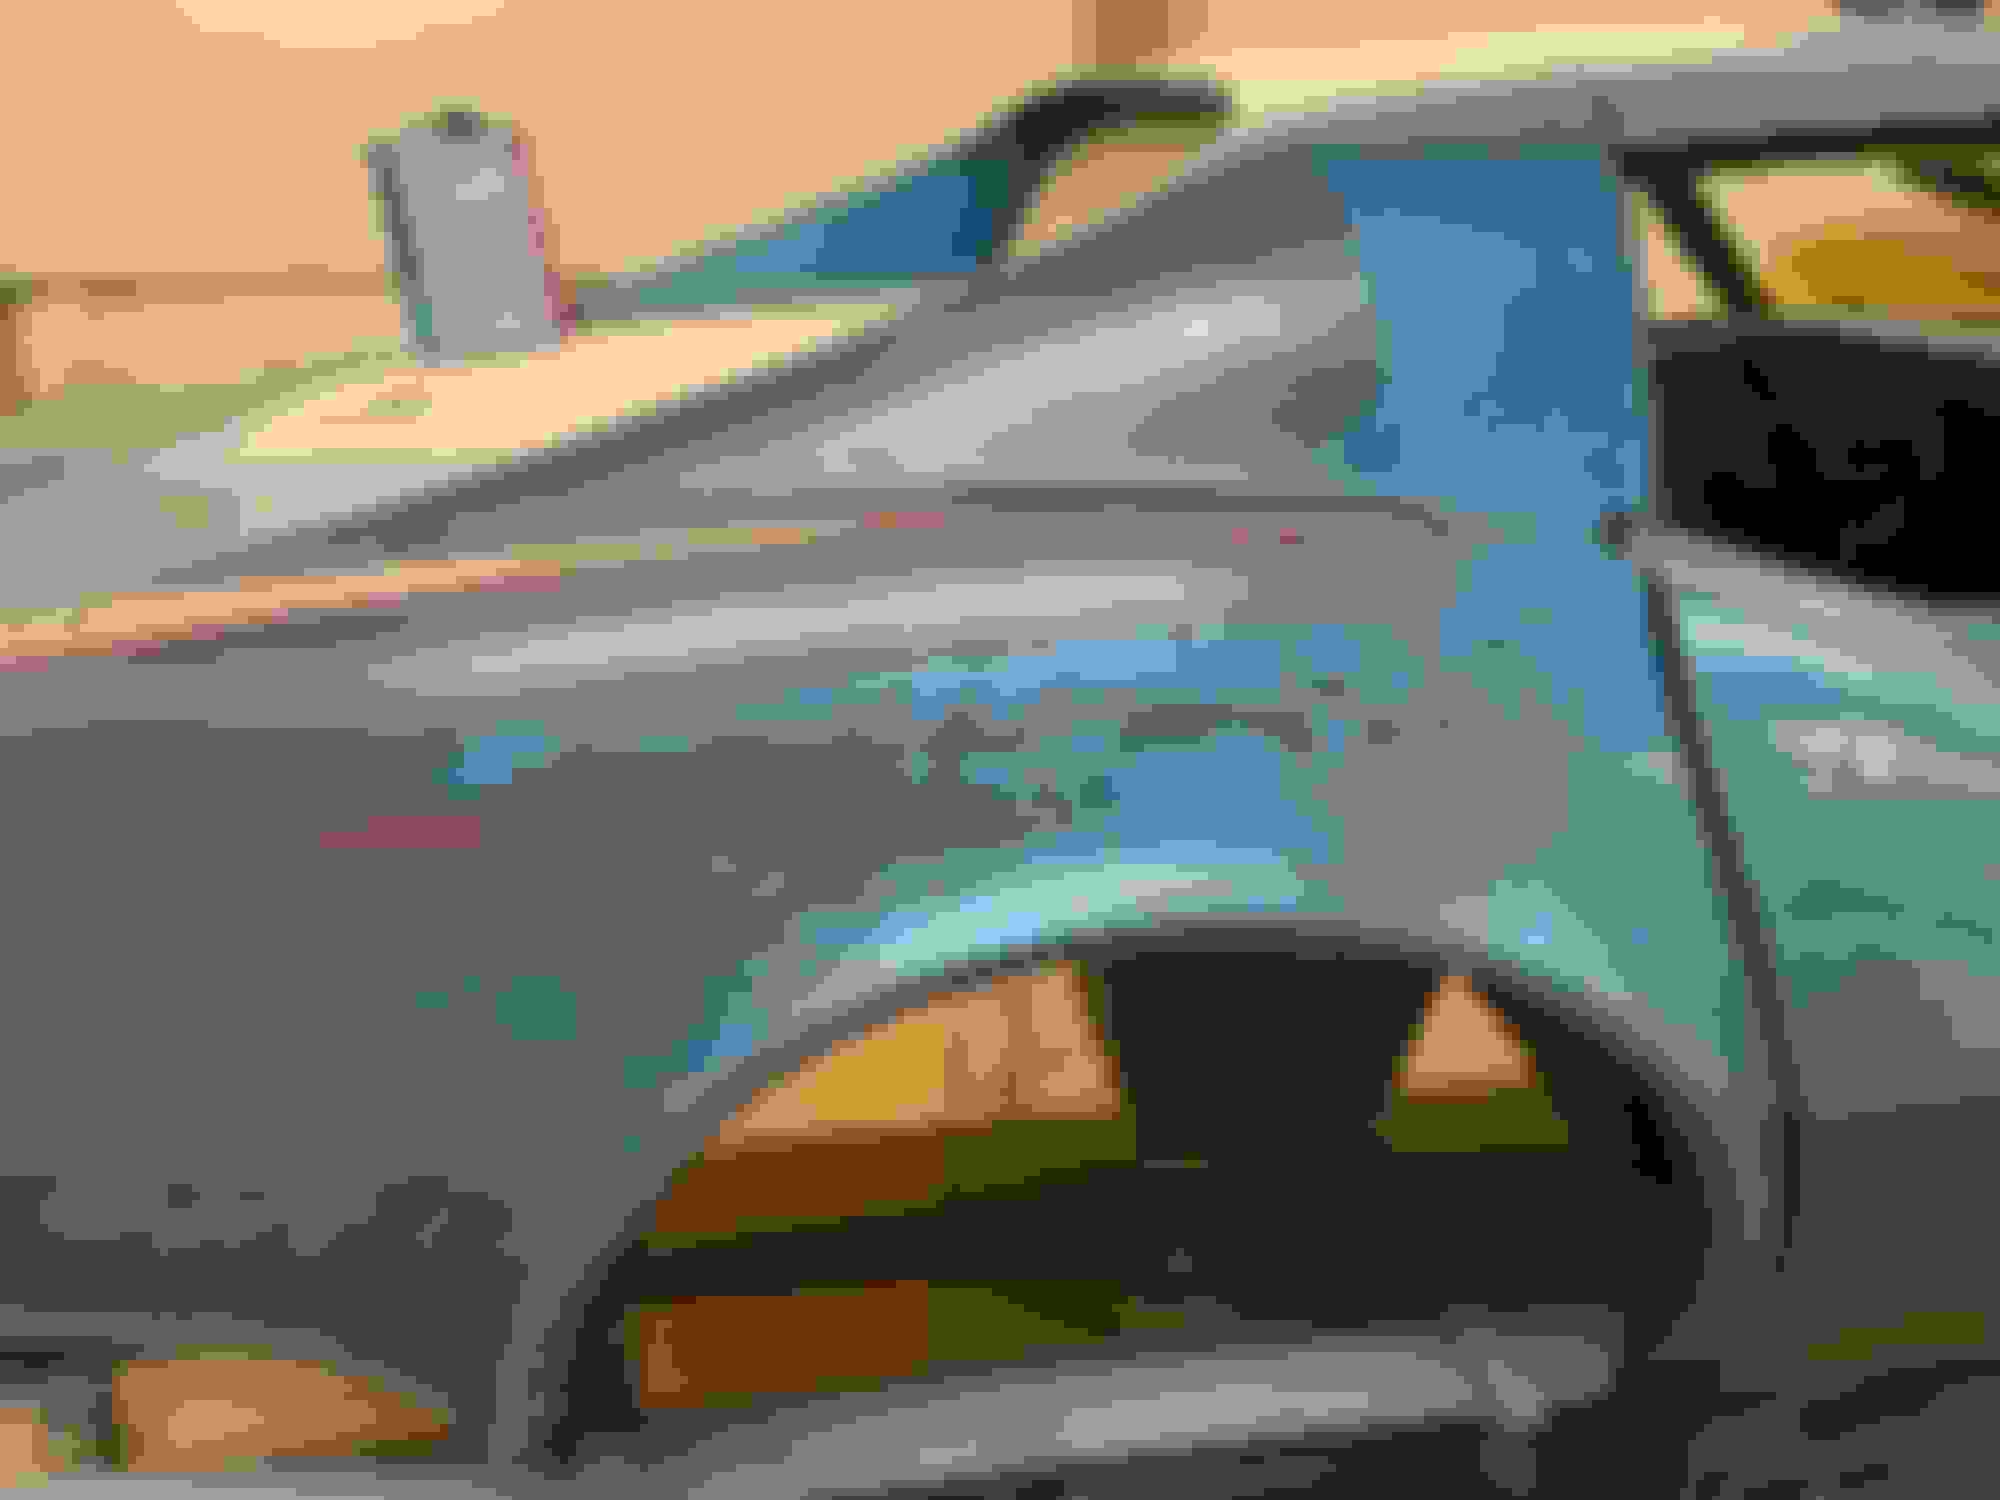
The car is now disassembled, including buckets, hood, rear valance, and windshield molding, glass is still in place. I used a razor blade on about half and Cleanstrip from Lowes on the other half. If doing this again I wouldn't use the blade, it's almost impossible not to nick the surface occasionally. On the concave parts (coupe especially) the razor doesn't work so well.
Brushed the stripper on about a 2'X2' area and wiped it off with a rag soaking wet with water in less than five minutes. Usually about three times and the OE lacquer was off and I had a good clean surface. Water neutralizes the stripper instantly, use plenty of it.
You might skip this next step on a convertible, but on a coupe remove the windshield and side glass. Carefully strip the areas under the windshield and under glass run channels in the door. I did have to buy new glass runs because I couldn't get the old ones out unharmed. Now a problem; it was obvious that removing the molding around the back glass I was going to damage it, so I left in place and used a toothbrush to thoroughly strip and clean around it. I'll address this molding issue again when taping in the next chapter. This car has very nice weather stripping because it was in storage from 1971 to 2019, I'm not changing the color, and it's a driver, so I won't paint the door jams. I'll mention more on the door jams in the next chapter. Notice a factory defect in the roof just to the left of the peak by the glass, it was fixed with some very hard substance. Now another through washing, move it to the painting area where it will be for some time, put it on jack stands and remove the wheels. More in a few days.
I’ll be curious if you have any issues or special procedures for tying/blending the new urethane into the lacquer jambs. I like this series of threads.
Stripper @ the back molding (left in place) might be a problem. It's going to be hard to avoid paint issues unless it's really devoid of all chemical which might be hard?
I�ll be curious if you have any issues or special procedures for tying/blending the new urethane into the lacquer jambs. I like this series of threads.
My 57 had been repaired and painted so many times that I used 36 grit on a long board to strip it and level it at the same time/
The star bursts on the front fenders were ground out and filed with glass mat, followed by a cost of random glass mat over the whole top of the fender.
I�m stripping the paint on my �70 Coupe. I�m using airplane fiberglass stripper and lacquer thinner to rinse it off. Slow, but steady.
KleanStrip aircraft fiberglass stripper was used to strip the paint on my car too. After applying the stripper, when congealed into a blob of sorts a bondo spreader did duty to scrape the mass off onto newspaper spread on the garage floor. Some areas needed a second application of stripper. Water soluble stripper cleanup was followed up with lacquer thinner and a scotch bright pad. . When ready for paint, wax and grease remover was also used.
No ill effects from using stripper the paint on the car was done in 2011.
I�m stripping the paint on my �70 Coupe. I�m using airplane fiberglass stripper and lacquer thinner to rinse it off. Slow, but steady.
Bob K.
Bob, I tried using lacquer thinner to wipe down the stripped paint, but in the Texas summer heat it flashed off too quick. It seemed to re-dissolve the stripped paint and as it flashed re-attach the paint to the body (if that makes sense). Water instantly neutralized the Klean Strip and the paint sluffed off. On OE lacquer I can clean a 2' X 2' area in less than 10 minutes (usually three quick applications and rinses) and the surface is very clean. Again, lots of water.
Stripper @ the back molding (left in place) might be a problem. It's going to be hard to avoid paint issues unless it's really devoid of all chemical which might be hard?
crw41 you are correct, it's a problem. First let me say I would NEVER do this on a metal car for fear of uncovering the steel and not re-coating it. On the rear glass I used a toothbrush and applied the stripper, as soon as the paint started to lift it blasted it with a water hose. Repeated the process until clean. The way the stripper was applied and quickly neutralized; the stripper didn't get behind the trim and on the clips. As far a taping the molding, just roll it around the outer edge and trim if necessary, with a razor. The results are very satisfactory for a daily driver.
It looks like you've had good results with the KleanStrip. I've used it in the past (20 years ago) and had good results also but when I've used it recently it wouldn't soften the paint at all. I think at least in California it has a different formula now? Does anyone know if California KleanStrip is different then say Texas KleanStrip?? Thanks
My car had 3 layers of paint. The original lacquer was easy, but the outer layers were tough. I found an old can of stripper at a yard sale that had methylene chloride, it worked pretty well. Newer stuff wouldn�t touch it
But for most of it just scraping with a razor blade worked best. Then stripper in corners and concave areas. Toughest was areas I couldn�t scrape like irregular door jam surfaces
 12-27-2022, 11:32 PM