C1 & C2 Corvettes General C1 Corvette & C2 Corvette Discussion, Technical Info, Performance Upgrades, Project Builds, Restorations

Control Arm Shaft Removal

Thread Tools
 
Search this Thread
 
Old 03-14-2020, 12:46 PM
  #1  
DomL64
Pro
Thread Starter
 
DomL64's Avatar
 
Member Since: Aug 2013
Location: Norwalk CT
Posts: 685
Received 77 Likes on 49 Posts

Default Control Arm Shaft Removal

Hi everyone !
I'm trying to remove the shafts from the upper and lower control arms to replace the bushings on my 64 convertible.
I know the bushings are pressed in, so the shafts have to be removed first.
How the heck do I remove the shafts so I can replace the bushings ?
I'm sure the answer is in the forum someplace, but, after looking for it, for a while, I give up.

Thank you !
Dom
Old 03-14-2020, 12:53 PM
  #2  
Joe Inama
Drifting

 
Joe Inama's Avatar
 
Member Since: Feb 2013
Location: Reno Nevada
Posts: 1,863
Received 327 Likes on 159 Posts

Default

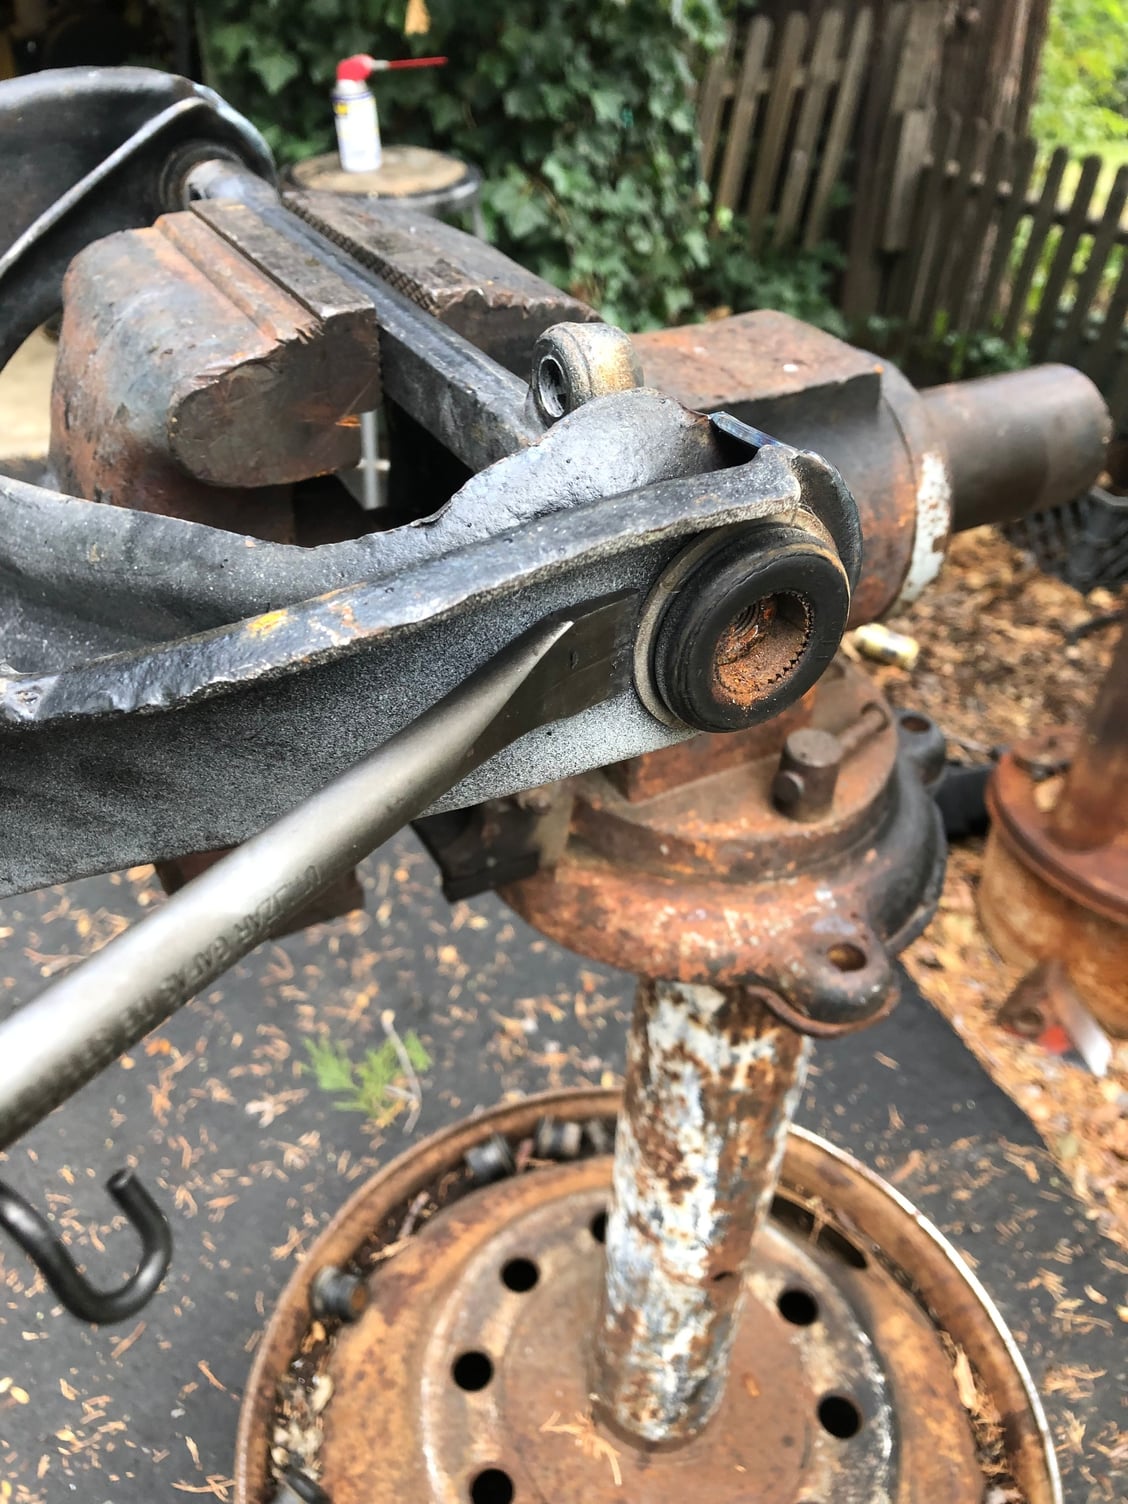
Big hammer and a chisel, inside out. Pain to do but possible 🥴
Old 03-14-2020, 12:54 PM
  #3  
JF in MI
Drifting
Pro Mechanic
 
JF in MI's Avatar
 
Member Since: Jun 2017
Location: Central Michigan
Posts: 1,724
Received 1,309 Likes on 486 Posts
2023 C1 of the Year Finalist - Modified
Default

When I was "in the business" the easiest way was with a flat edge air chisel. Did hundreds that way.
Old 03-14-2020, 12:57 PM
  #4  
dharris45
Burning Brakes

Support Corvetteforum!
 
dharris45's Avatar
 
Member Since: Oct 2009
Location: Clifton VA
Posts: 776
Received 47 Likes on 37 Posts

Default

If you have a service manual it has instruction, but those probably use a press.

Another way is to use a torch (plumbers propane or acetylene) and burn the rubber out. Then the shaft and inner bushing will come out, then use a hammer and chisel to collapse the outer bushing.


Last edited by dharris45; 03-14-2020 at 12:58 PM.
Old 03-14-2020, 01:20 PM
  #5  
BD104X
Burning Brakes
 
BD104X's Avatar
 
Member Since: Sep 2014
Location: Freehold NJ
Posts: 799
Received 204 Likes on 130 Posts
Default

Originally Posted by dharris45
Another way is to use a torch (plumbers propane or acetylene) and burn the rubber out. Then the shaft and inner bushing will come out, then use a hammer and chisel to collapse the outer bushing.
This is how I do em.
Old 03-14-2020, 01:43 PM
  #6  
DomL64
Pro
Thread Starter
 
DomL64's Avatar
 
Member Since: Aug 2013
Location: Norwalk CT
Posts: 685
Received 77 Likes on 49 Posts

Default

I have all 4 to do. Going to try the torch first then the chisel !

THANK YOU ALL VERY MUCH !
Dom
Old 03-14-2020, 01:56 PM
  #7  
Paster
Instructor
 
Paster's Avatar
 
Member Since: Jul 2002
Location: Placerville CA
Posts: 225
Received 60 Likes on 43 Posts

Default

I used the air chisel method described in Lars' suspension rebuild paper and it worked exactly as described. It took about 15 minutes to remove all 8 bushings. You can find his paper via a google search for "Lars suspension rebuild paper". I believe that is an older version of the paper but the bushing removal portion is valid.
Old 03-14-2020, 01:57 PM
  #8  
Rubyred
Pro
 
Rubyred's Avatar
 
Member Since: Aug 2000
Location: Trafalgar IN
Posts: 547
Received 2 Likes on 2 Posts

Default

Originally Posted by DomL64
I have all 4 to do. Going to try the torch first then the chisel !

THANK YOU ALL VERY MUCH !
Dom
It has been several years since I removed/installed mine on my '63 SWC and I don't remember how I did it, but I didn't use a torch though. I know this is obvious, but have a good fire extension next to you if you are torching them. As you know the A-arms were installed before the body was on the frame. The passenger side front (or could be the back) bolt is hard to get to since it is covered with the body. I lucked out and mine was loose enough to get off (the other 3 were not as free). Good luck.
Old 03-14-2020, 02:34 PM
  #9  
reno stallion
Melting Slicks
 
reno stallion's Avatar
 
Member Since: Apr 2013
Location: McCloud CA
Posts: 3,141
Received 1,529 Likes on 807 Posts
C2 of Year Finalist (appearance mods) 2019

Default


Pry outward as the chisel goes behind the bushing. Super simple if you have an air chisel
Old 03-14-2020, 02:59 PM
  #10  
waynec
Drifting
 
waynec's Avatar
 
Member Since: Feb 1999
Location: CA central coast
Posts: 1,806
Received 28 Likes on 22 Posts

Default

take a look at this video, starting about 2Min 25 sec into the video:
Old 03-14-2020, 03:17 PM
  #11  
reno stallion
Melting Slicks
 
reno stallion's Avatar
 
Member Since: Apr 2013
Location: McCloud CA
Posts: 3,141
Received 1,529 Likes on 807 Posts
C2 of Year Finalist (appearance mods) 2019

Default

Originally Posted by waynec
take a look at this video, starting about 2Min 25 sec into the video: https://www.youtube.com/watch?v=aT2jQUB1nIQ
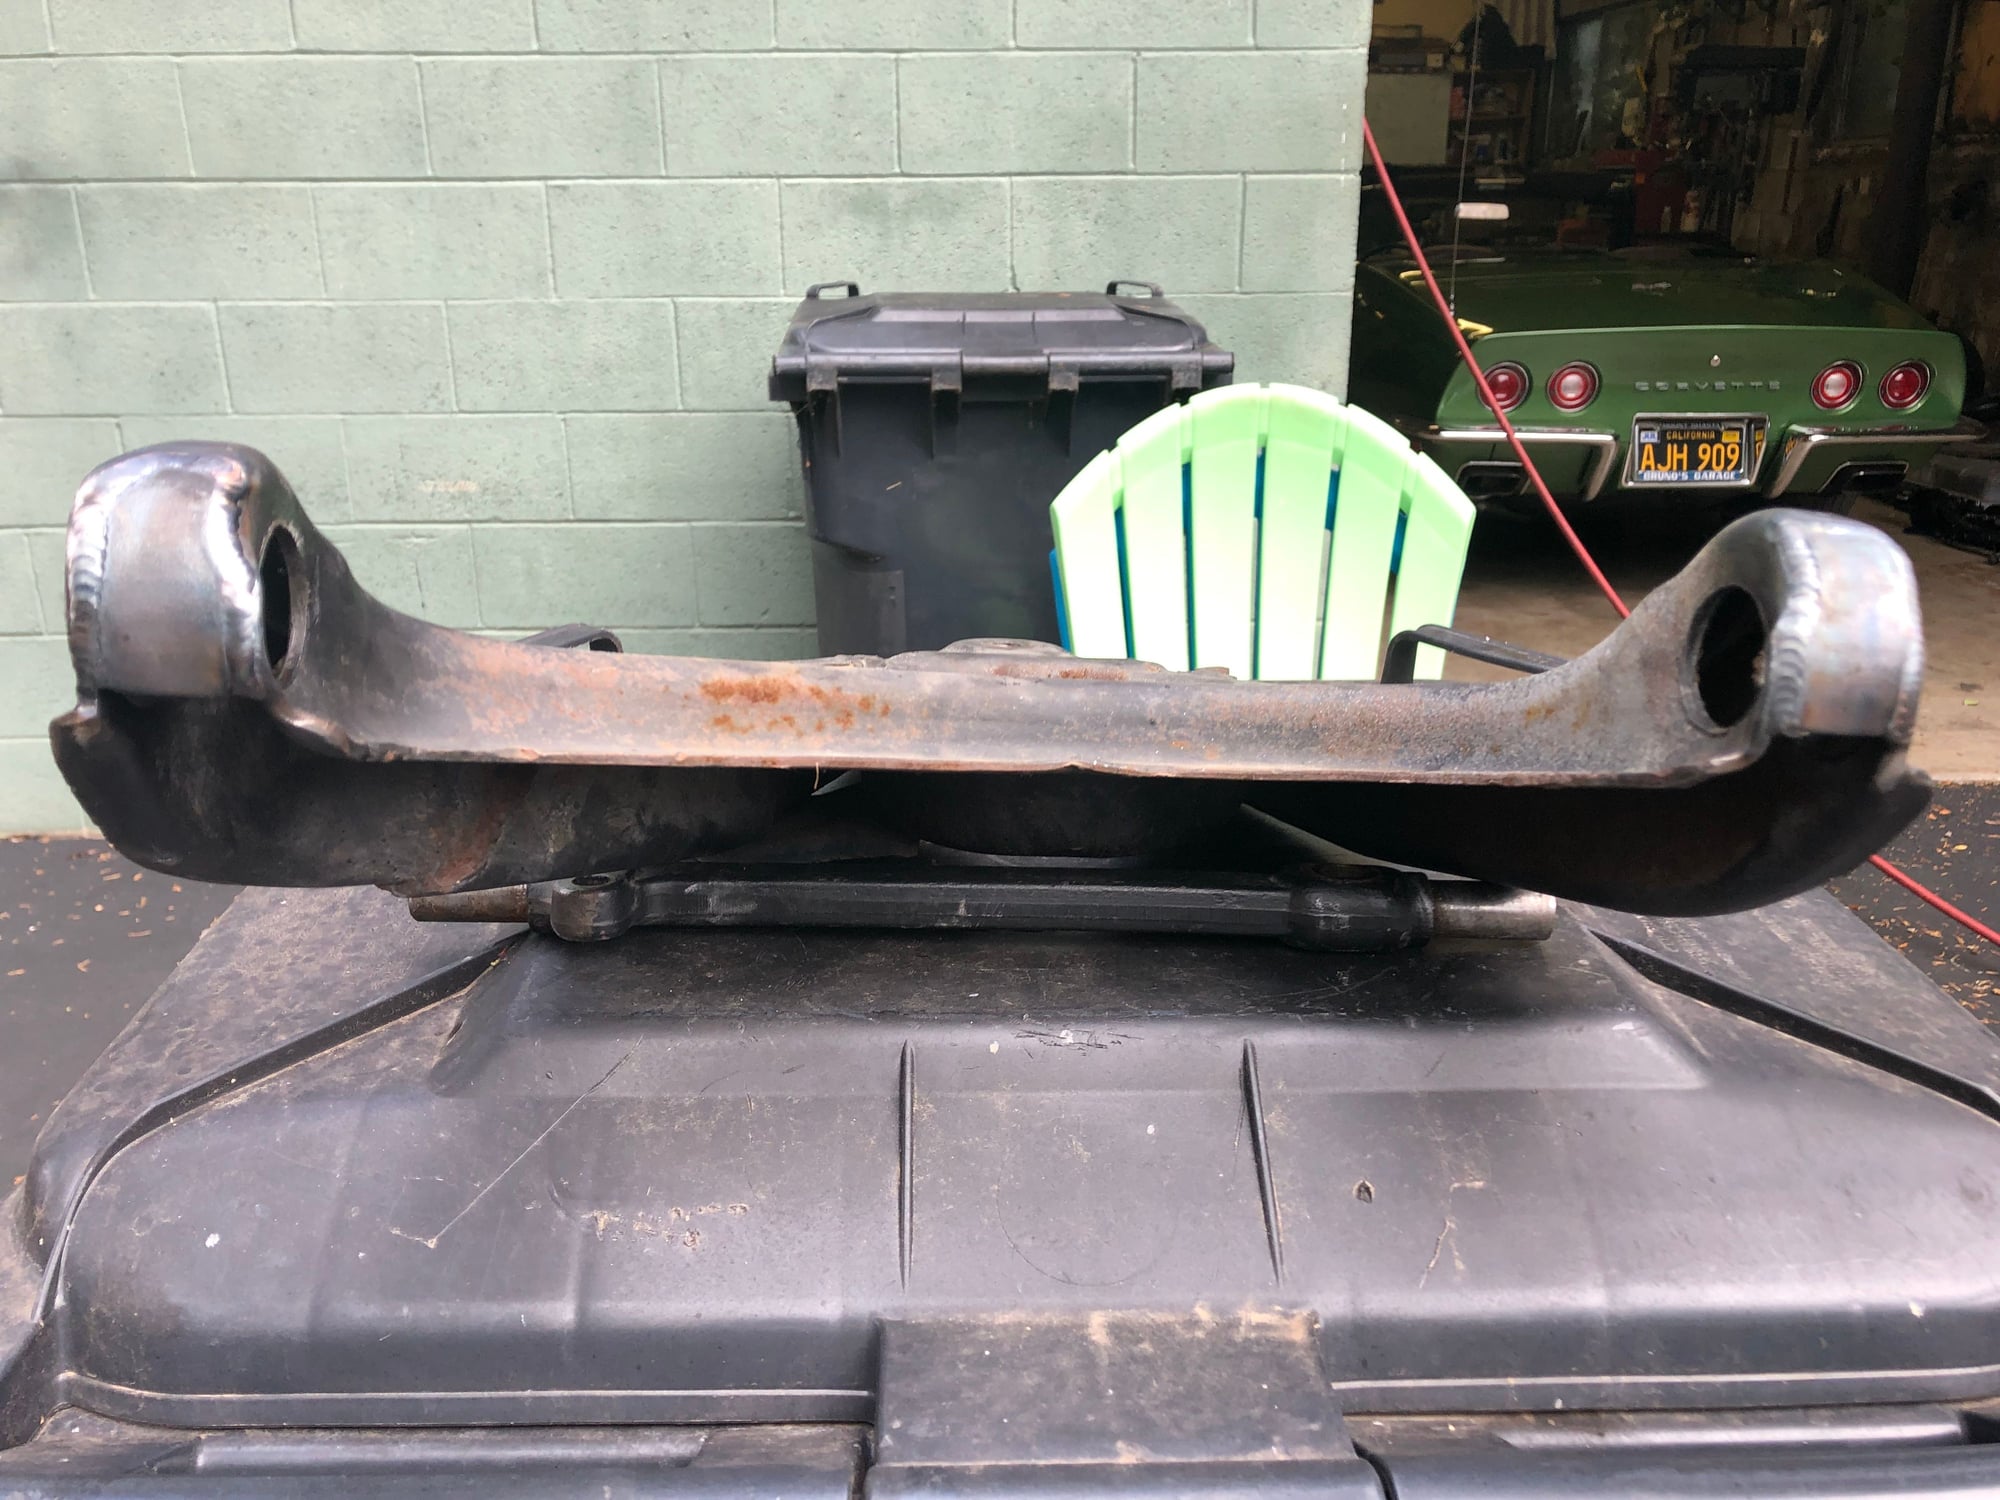
By the time that guy fired up the smoke wrench I had mine out And don't use poly bushings and don't cut the cross shaft
Old 03-14-2020, 05:25 PM
  #12  
DomL64
Pro
Thread Starter
 
DomL64's Avatar
 
Member Since: Aug 2013
Location: Norwalk CT
Posts: 685
Received 77 Likes on 49 Posts

Default

Going to use rubber bushings like original.
Why don't cut the shaft ?
Dom
Old 03-14-2020, 05:27 PM
  #13  
DomL64
Pro
Thread Starter
 
DomL64's Avatar
 
Member Since: Aug 2013
Location: Norwalk CT
Posts: 685
Received 77 Likes on 49 Posts

Default

Up to Harbor Freight I go tomorrow morning !

Get notified of new replies

To Control Arm Shaft Removal


Quick Reply: Control Arm Shaft Removal


All times are GMT -4. The time now is 10:23 AM.