California License Black and YellowPlate Restoration with Photos (Long)
 11-28-2013, 04:45 PM
#1
Melting Slicks

Thread Starter


Finally, my project is done to the best of my abilities. My downfall is perfection and plates were never originally perfect. This is my journey to my end sharing my problems and how I finished them. Many thanks to those who gave me some direction from their experiences.
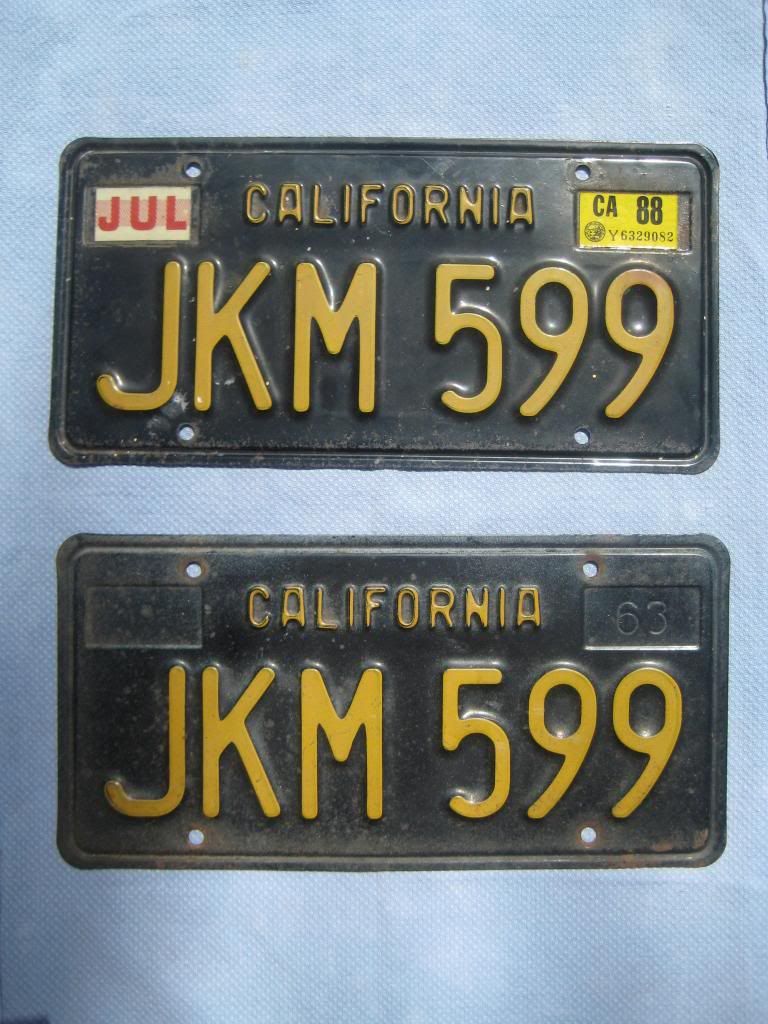
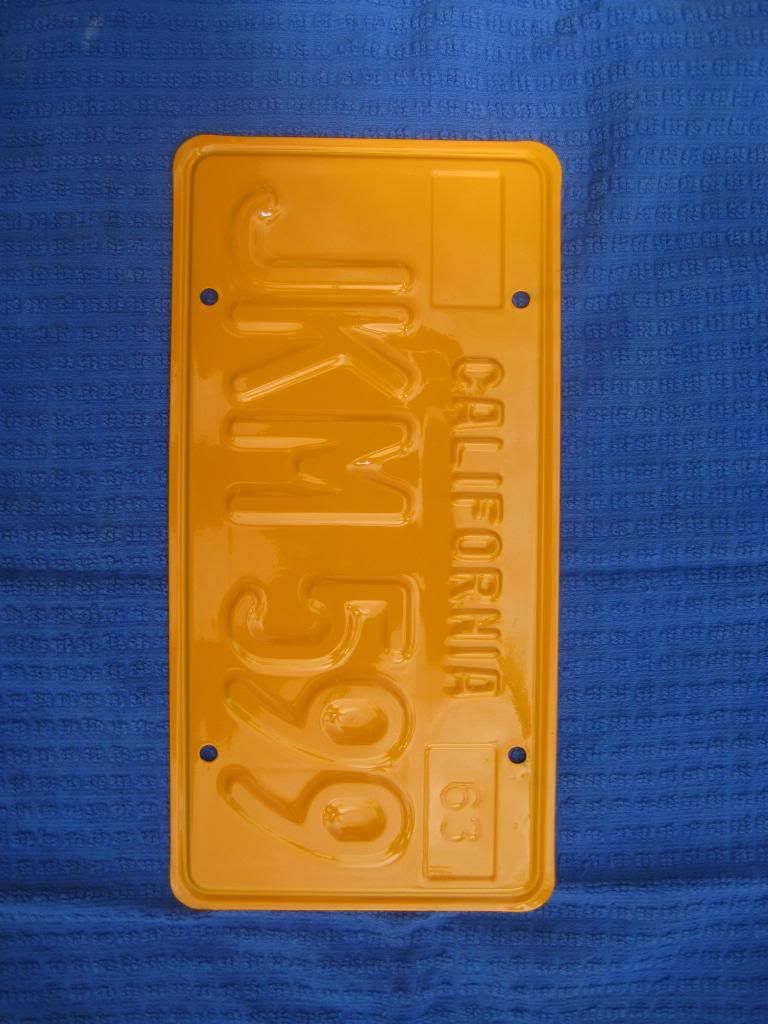
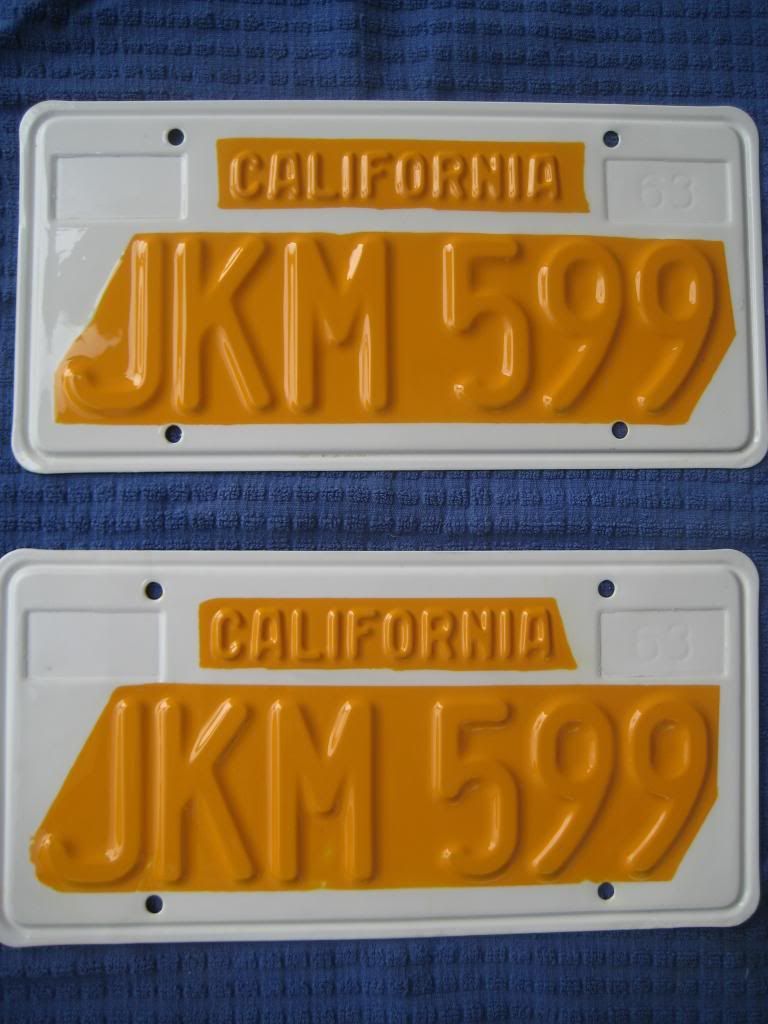
This is the original 40+ year old plates:
I sandblasted the plates and primed with PPG DPLF40:
This was followed by spraying the black and these were the disastrous results:

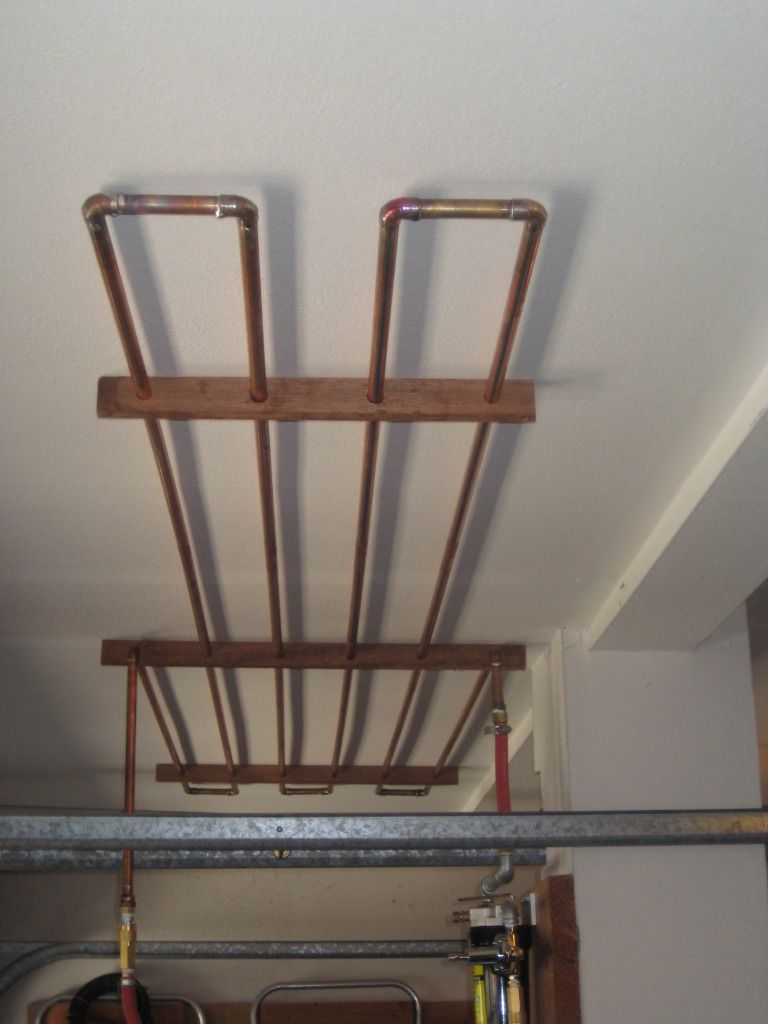
I traced the problems to the compressor as the source of the contamination. At this point, I did the following modifications:
First, I made a cooling run of 50' of copper pipe with soldered connections and fixed to the ceiling.
The line then goes to a "T" where the horizontal branch goes to my first water and oil filter and the vertical line goes to a valve to drain off any water coming out of the copper pipes.
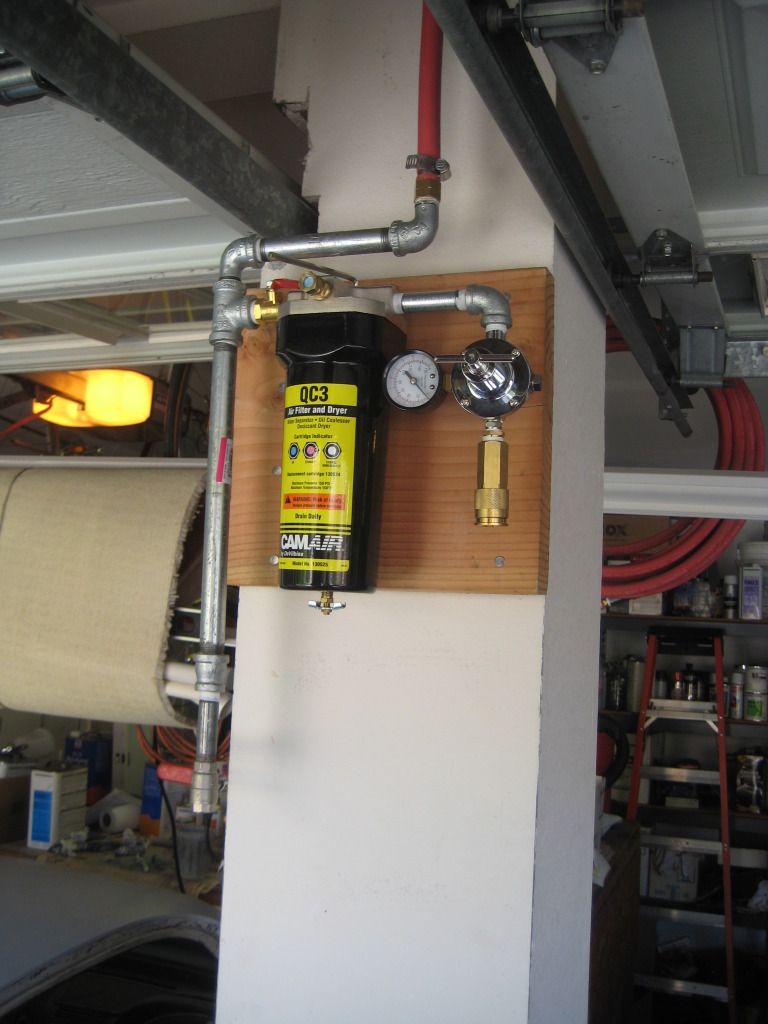
The line is then followed by a large desiccant container and then a final filter.
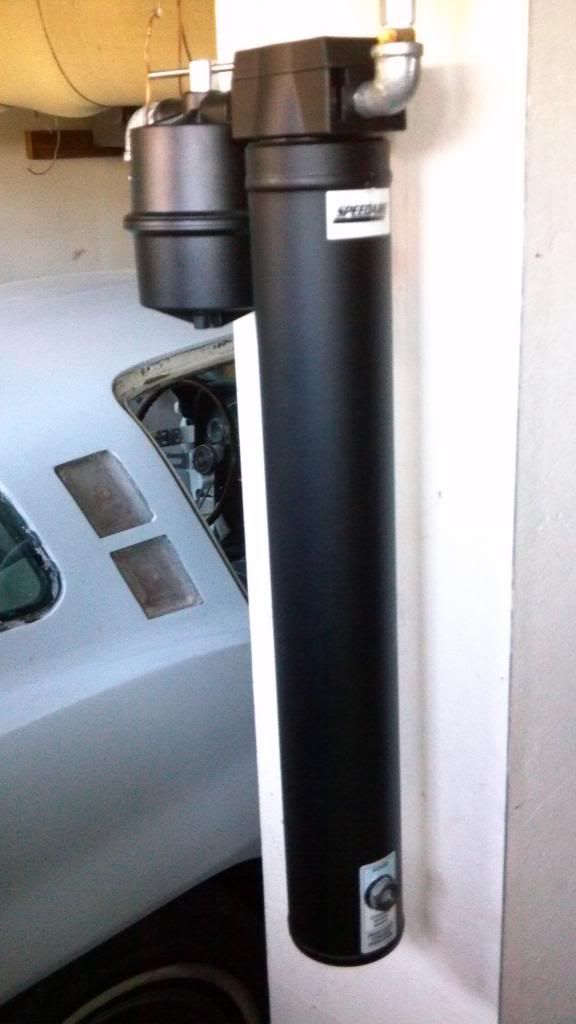
The entire system looks like this (my '64 that I'm working on is in the background):
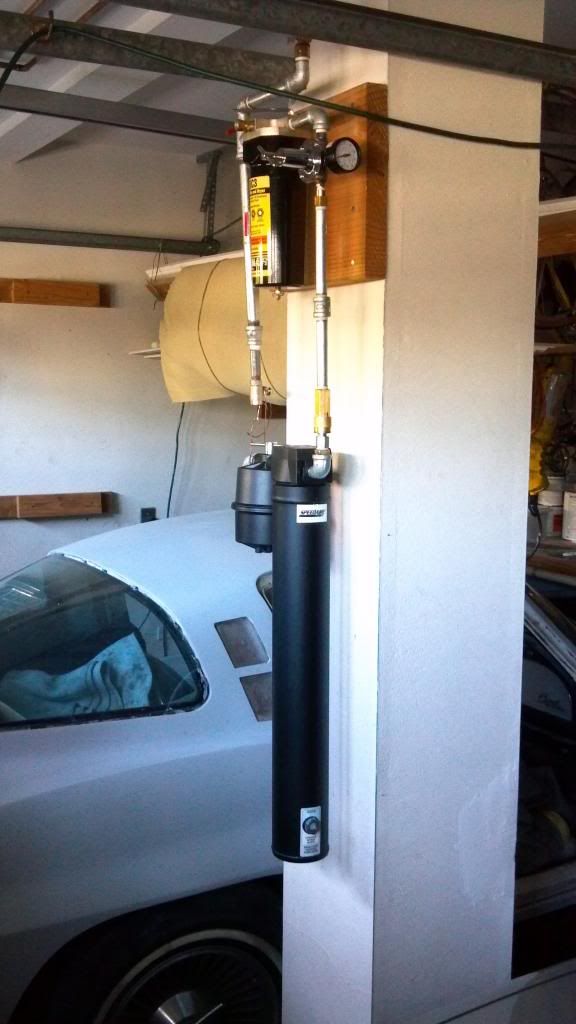
This resolved the issues regarding the contamination.
Next came the yellow color on the black painted plate after it was stripped and reprimed. I used a hard rubber roller, softer silicone roller and a sponge roller all of which put a thin blotchy color that tended to run. Once again, the plates were stripped and reprimed. I then painted the yellow color:
This was followed with black paint:
I then carefully sanded the letters and numbers and after 3 attempts of sanding, stripping repriming and painting, I gave up with that technique. On the paint and body forum, I used the suggestion of DUB of priming, paint the yellow, clear coat, paint the black and sand. This is the point to place the clear coat:
The white is the now California compliant, low VOC, DPLF epoxy primer. The material was thicker than the previously used DPLF. It seemed to be a blessing in that after the primer was sprayed, I block sanded over the letters and numbers and followed the yellow and clear coat with block sanding. The black was then sprayed and this is the result:
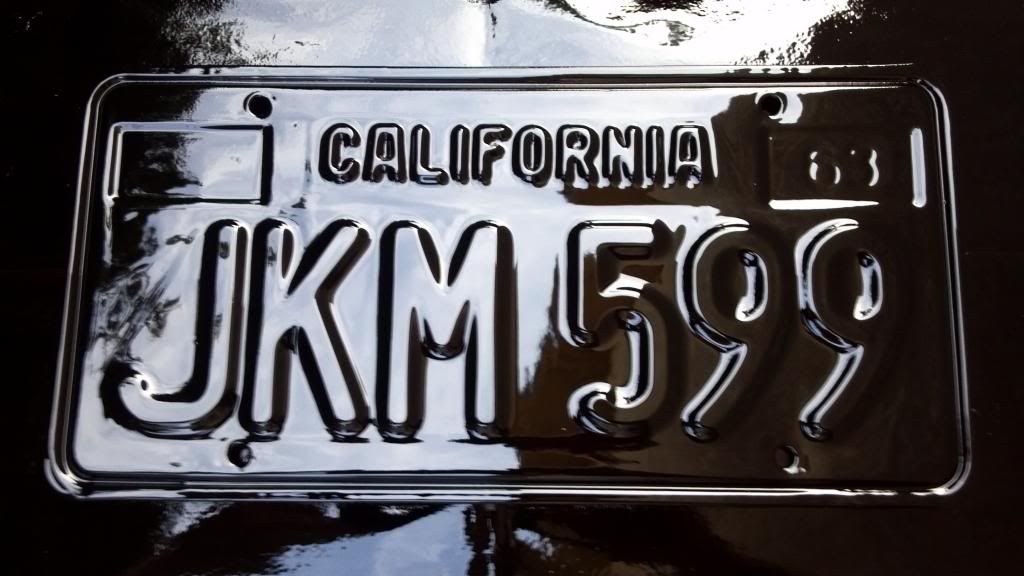
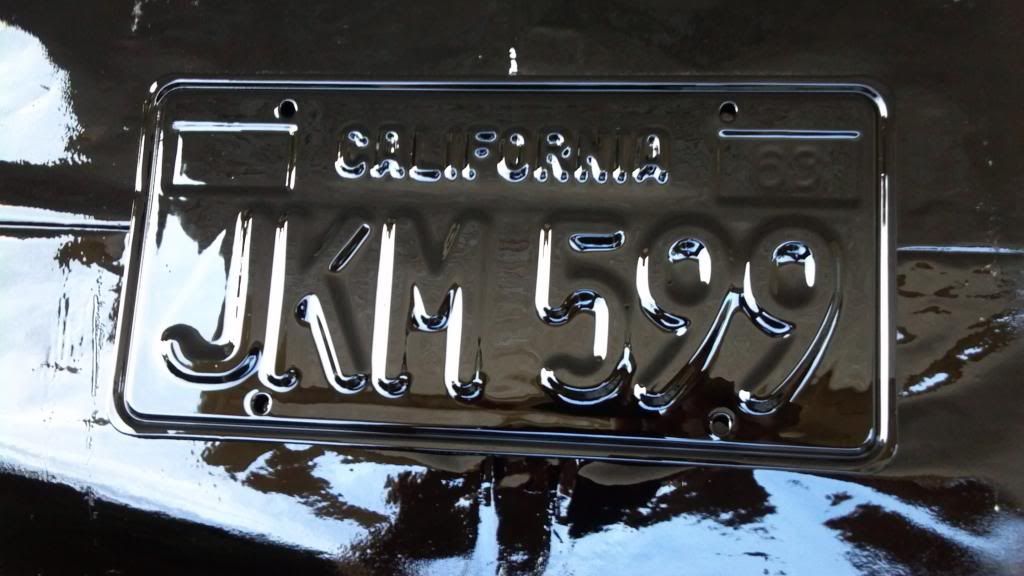
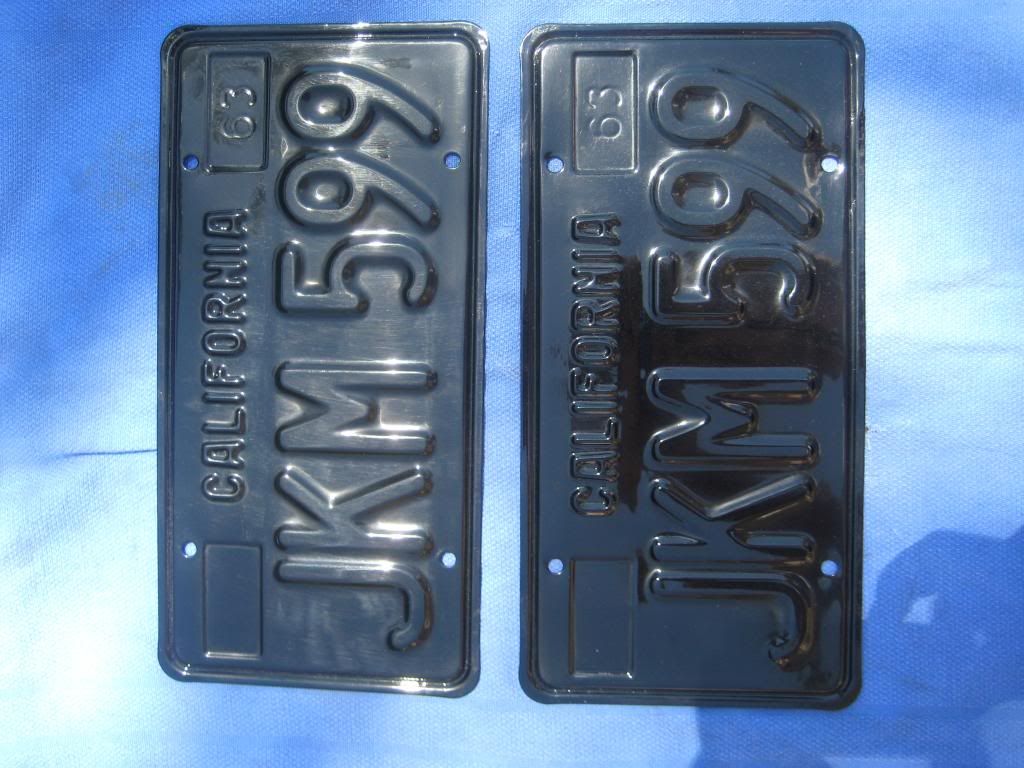
I then sanded and polished the plates and this is the result:
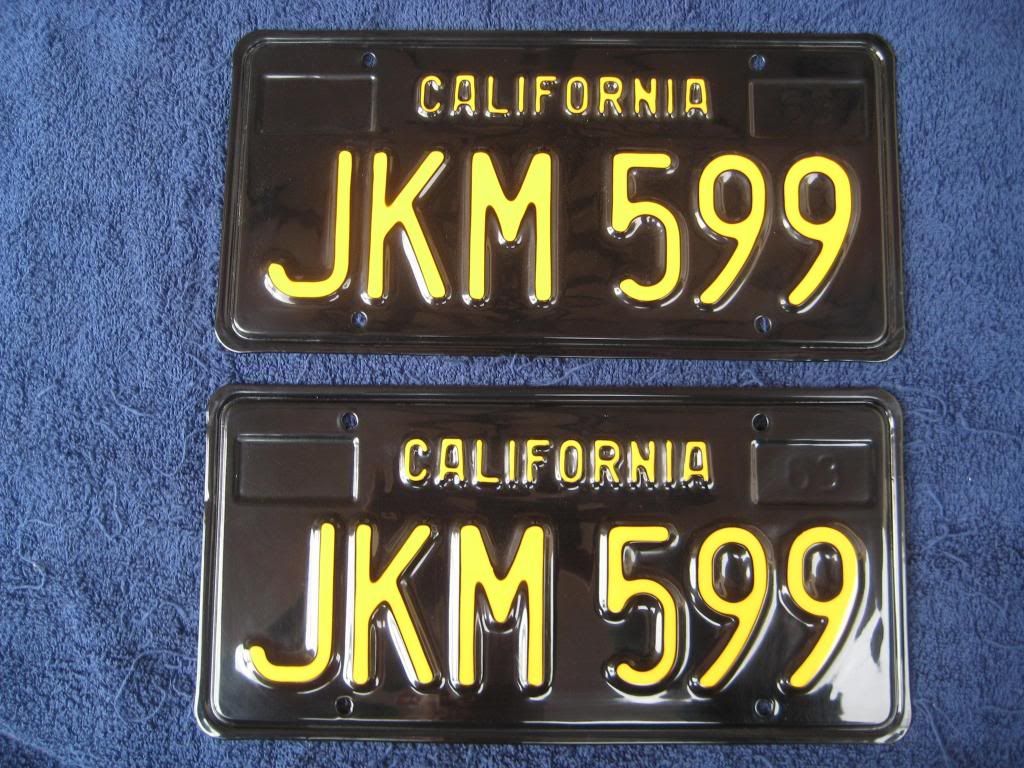
As I said, not perfect but very acceptable. These are the single stage urethane paints/colors I used.
I am not looking for accolades, just wanted to share my trials. I hope this will helps others.
This is the original 40+ year old plates:

I sandblasted the plates and primed with PPG DPLF40:

This was followed by spraying the black and these were the disastrous results:

I traced the problems to the compressor as the source of the contamination. At this point, I did the following modifications:
First, I made a cooling run of 50' of copper pipe with soldered connections and fixed to the ceiling.

The line then goes to a "T" where the horizontal branch goes to my first water and oil filter and the vertical line goes to a valve to drain off any water coming out of the copper pipes.

The line is then followed by a large desiccant container and then a final filter.

The entire system looks like this (my '64 that I'm working on is in the background):

This resolved the issues regarding the contamination.
Next came the yellow color on the black painted plate after it was stripped and reprimed. I used a hard rubber roller, softer silicone roller and a sponge roller all of which put a thin blotchy color that tended to run. Once again, the plates were stripped and reprimed. I then painted the yellow color:

This was followed with black paint:

I then carefully sanded the letters and numbers and after 3 attempts of sanding, stripping repriming and painting, I gave up with that technique. On the paint and body forum, I used the suggestion of DUB of priming, paint the yellow, clear coat, paint the black and sand. This is the point to place the clear coat:

The white is the now California compliant, low VOC, DPLF epoxy primer. The material was thicker than the previously used DPLF. It seemed to be a blessing in that after the primer was sprayed, I block sanded over the letters and numbers and followed the yellow and clear coat with block sanding. The black was then sprayed and this is the result:


I then sanded and polished the plates and this is the result:

As I said, not perfect but very acceptable. These are the single stage urethane paints/colors I used.


I am not looking for accolades, just wanted to share my trials. I hope this will helps others.
Last edited by Dave Tracy; 11-29-2013 at 12:13 AM.


 11-28-2013, 07:45 PM
#4
Melting Slicks

 After the third or fourth try I gave up and sent them out.
 11-28-2013, 08:22 PM
#5
Team Owner

Now that you've got this system down...
How much would you charge to do set...
How much would you charge to do set...

 11-29-2013, 10:40 AM
#8
Pro


Member Since: Feb 2013
Posts: 729
Likes: 0
Received 0 Likes
on
0 Posts
Great very detailed project with super results. If I may offer another perspective. A nice condition original set of black plates probably forty plus years of age with patina that can't be replaced by any process just turns my imagination. Sure the surface is full of imperfections but it years, miles, and conditions displayed have an undeniable character as strong as the lines of a classic car. Some things are not to be challenged by modern day standards. This is the reason I love original paint cars complete with battle scars. They just " belong " in a time capsule.
11-29-2013, 12:21 PM
#9


Maybe a dumb question but what are black plates. Are they the plates that were issued with the car when it was first sold. Did cars as early as 62 have black plates. Was it just CA that had them.
11-29-2013, 12:28 PM
#10
Team Owner
Prior to 63's black/yellow the colors were switched...yellow body/black letters