4 post lift, diy or not
 08-16-2013, 04:40 PM
#1
Racer

Thread Starter

Going to order my lift next week and l am debating on putting it together myself or just bite the labour charge and let them do it while l enjoy my time off. I,d like to here from guy,s who have assembled there own units. Cheers, Elio 
 08-16-2013, 04:51 PM
#2


If your a little handy, with some muscle, save your money and get a buddy over to set it up. I did. Although I used my skidsteer and cherry picker through out the process.
[IMG]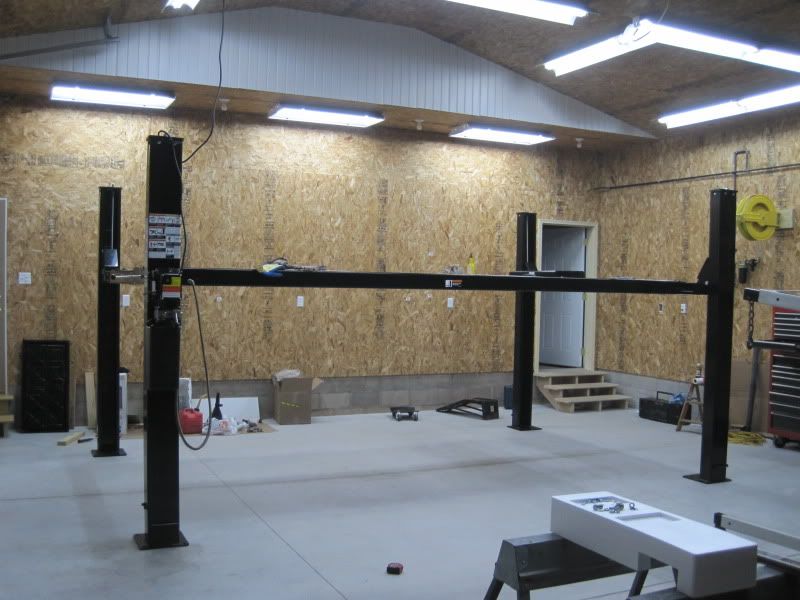 [/IMG]
[IMG]
 [/IMG]
08-16-2013, 04:54 PM
[/IMG]
08-16-2013, 04:54 PM
#3
Pro

I assembled mine literally by myself with a cherry picker and some jacks in about 1/2 a day. I only needed a friend to help me bring all the parts in the garage and set up the basic shape for the ramps. To be honest the parts are a little heavy but you only need to be as smart as a monkey to put it together, even without instructions.
08-16-2013, 04:56 PM
#4
Racer

I assembled mine with the help of one young high school kid. It is very heavy. I put it in the back of a long bed truck and brought it home. Probably not a good idea. Nothing happened but who knows. I took it out of the truck a piece at a time as I assembled it. It took about 6 hours to put together. I bought a two post lift and had it delivered and installed for $450.00 just for comparison of delivery and install. About the same labor and weight. 
08-16-2013, 05:06 PM
#5
Safety Car


If you can change a water pump you can install a lift. Pretty straight forward. Just have 2 or 3 helpers
08-16-2013, 05:19 PM
#6
Race Director

I assembled mine myself but it was a 6000 lb Autolifters (now out of business) and although a very sturdy and safe unit, I think some of the members are possibly a little lighter weight than some other, higher capacity models. I did have a little help unloading it and getting it into the garage. The ramp with the cylinder under it was the heaviest piece by far - I want to say 300 lbs from memory.
08-16-2013, 05:29 PM
#7
Le Mans Master


I did mine in only a few hours. Needed help positioning the treads, especially the one with the cylinder under it as it's very heavy. Everything can be done by one person.
08-16-2013, 05:30 PM
#8
Racer
Thread Starter
Thanks for the quick replies.I am handy and my 20 year old son can give me a hand. I don,t have a cherry picker but a third body can always be found. There install fee is rediculous, price wise, even if they supply the fluid. Elio
08-16-2013, 06:20 PM
#9
Melting Slicks


Let me offer a little different perspective. All companies and conditions are different, so look at all of your options.
I bought a 9,000 lb Quality Lift made by Challenger in 2010. They offered delivery and installation for $500. It included fluids and an extra year’s warranty if they installed it. I had them do it and was happy I did.
Three guys delivered mine as scheduled on the back of a flat bed truck with a forklift. It still took them several hours to assemble, level and check it out. Let me tell you, some of the pieces were heavy!
If you install it, you’ll still have to pay some amount of shipping charge to get it to a nearby trucking terminal. Then, you’ll have to get it home and unloaded. If you don’t have access to an appropriate truck or trailer, that’s an additional rental charge.
I was 65 at the time and really didn’t want to risk my back or someone else’s. Plus, the satisfaction of not having to worry about any possible assembly or parts issues with a turnkey job is priceless! For a couple of hundred dollars difference, let the experts do it.
08-16-2013, 06:28 PM
#10
Racer
Thread Starter
That,s true Mike but the delivery is $140 which is reasonable for a 1800 lb. shipped unit in my driveway and the install is $600 dollars. I can take my time and spend all day for a $6oo dollar savings.
Last edited by ed,s64; 08-16-2013 at 06:31 PM.
08-16-2013, 07:28 PM
#11
Race Director
I assembled mine myself but it was a 6000 lb Autolifters (now out of business) and although a very sturdy and safe unit, I think some of the members are possibly a little lighter weight than some other, higher capacity models. I did have a little help unloading it and getting it into the garage. The ramp with the cylinder under it was the heaviest piece by far - I want to say 300 lbs from memory.
08-16-2013, 08:13 PM
#12
Melting Slicks
I would check to make sure.
08-16-2013, 09:35 PM
#14
Melting Slicks<br><img src="/forums/images/ranks/3k-4k.gif" border="0">


Member Since: Nov 2002
Location: Jamison Pa
Posts: 2,845
Received 234 Likes
on
180 Posts
St. Jude Donor '11-'24


I did mine myself. Not too bad. I used my quad to drag to pcs into the garage. I used old carpet to protect the floor.
I did have Mohawk install my A-7 lift. It is quite a bit heavier.
Bob K.
I did have Mohawk install my A-7 lift. It is quite a bit heavier.
Bob K.
08-16-2013, 10:25 PM
#15
Safety Car
I and a buddy did two of them the same day in my shop. The second one took about half the time. I purchased Direct Lifts. It was not difficult. Good luck!
08-16-2013, 10:50 PM
#16
Burning Brakes


DIY, not all that difficult.
I did mine with a helper with a bad back who could not lift much.
Just be sure to readjust lift a few days after using as per the suggested directions.
I did mine with a helper with a bad back who could not lift much.
Just be sure to readjust lift a few days after using as per the suggested directions.
08-16-2013, 10:56 PM
#17
Melting Slicks
I have installed 4 of these lifts,and dis-assembled one and moved to a new location.
Recommended tools:
1) Engine Hoist for positioning the ramps on the cross members. The main ramp weighs 400 lbs or so.
2) Two refrigerator dollies (4 wheels) so assist you in moving the heavy parts into the garage and positioning them. It always seems that you need to rotate one or both of the ramps 180 degrees and the dollies are the quickest way to do it.
3) Come-along to assist on attaching the cables to the piston, along with a couple of 6 foot chains and a couple of quick links.
4) Check your socket sets. Some of the nuts are pretty large.
5) At least one, but preferably two buddies until the ramps are positioned and locked down.
6) Lots of beer - not a tool for the lift, but for the buddies.
Remember also that you will need hydraulic fluid.
I installed mine about 4 years ago and the directions were very poor.
Hopefully the current instructions are better and more accurate.
You might want to search the internet for some step-by-step illustrated instructions as another reference point.
Good luck and the team is here in case you run into any issues.
08-17-2013, 02:29 PM
#18
Safety Car

Did mine with help of 2 friends (2 people can do) and a small hoist.
Picked it up at freight company 8:00 AM and was done early after noon.
A few hand tools
A/C on
Beverages for after job done
George


Picked it up at freight company 8:00 AM and was done early after noon.
A few hand tools
A/C on
Beverages for after job done
George
 08-17-2013, 04:06 PM
#19
Pro
I paid a local guy with a rollback to pick the lift up at a trucking terminal and he was able to slide the bundled lift off of the rollback and into the garage. Then I assembled it by myself with the use of a come along to lift the ramps into position as I didn't have a cherry picker at the time. It was actually very easy and straight forward.
This past spring I moved into a new house about 5 miles away and instead of taking the lift all apart I called the guy with the rollback and we winched the lift up onto the rollback using the wheels that came with it. I placed 2x4"s into the columns so the legs didnt fall once it was on the rollback. Then we just strapped it down and away we went.
This past spring I moved into a new house about 5 miles away and instead of taking the lift all apart I called the guy with the rollback and we winched the lift up onto the rollback using the wheels that came with it. I placed 2x4"s into the columns so the legs didnt fall once it was on the rollback. Then we just strapped it down and away we went.
08-17-2013, 09:53 PM
#20
DIY for sure. I have done a few lifts and recently this 4-post. I had 3 helpers for a total of 4 guys. The ramps are heavy and as some have said too heavy for 2 guys. I preferred the man power vs a engine host although must admit the engine host is a darn good idea. I have also moved a few and the experience is good if you ever need to move your lift. Let us see it when your done.

