Will be doing a body off on my '64 coupe
 06-17-2012, 06:07 PM
#1
Burning Brakes

Thread Starter

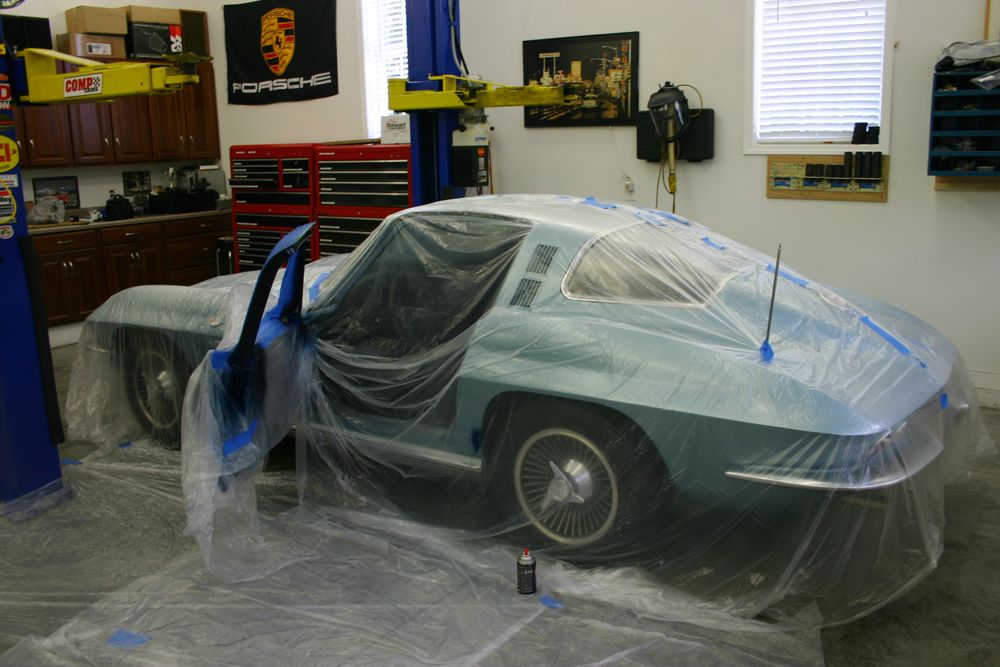
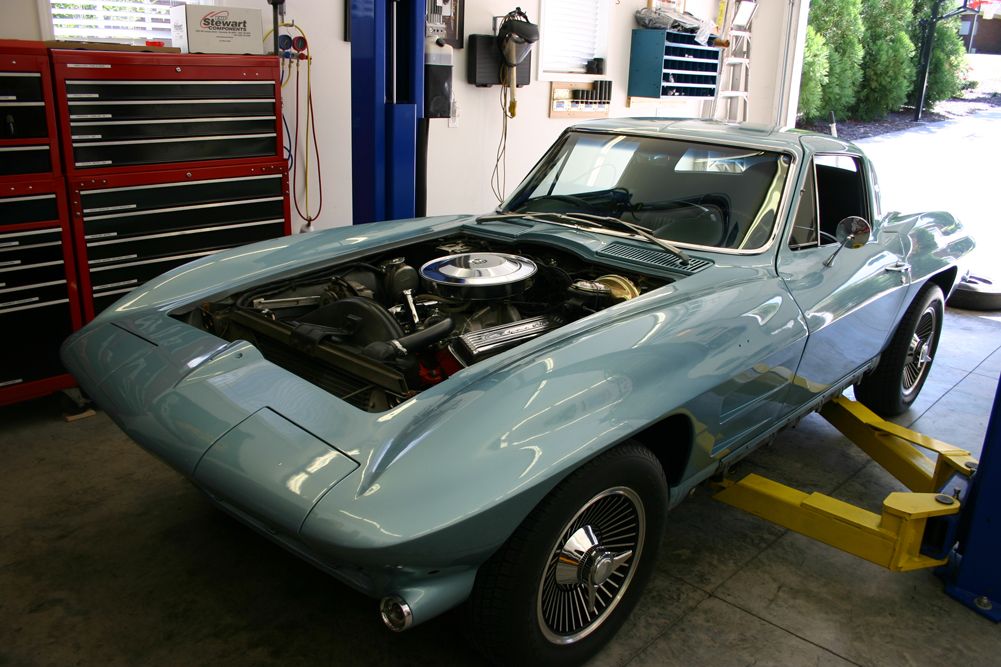
Last Thursday evening at our weekly local cruise-in, I had a drunk back into the right front of my car. The police hauled him off to jail. Minor damage, but, at a minimum, the nose will have to be painted. My body shop guy and the insurance appraiser are meeting tomorrow to discuss how we are going to proceed. The paint on my car is older and while it is only OK, it at least matches. My argument for painting the whole car is that the nose will look so much better than the rest of the car plus my body guy says it will be really tough to match it because of the age of the paint and the silver blue color.
Either way, the whole car will be painted. That then creates the perfect opportunity to remove the frame and paint the frame. I have one area of rust showing on my frame and may discover other areas once everything is exposed. I have a lift so, by following the instructions I have found, I don't see a big issue removing the body. I plan on having the frame and ancillary parts blasted and powdercoated. I have some oil leaks on my matching numbers engine, tranny and rear end and plan to address those issues as well.
While I do not plan on having the car judged, I do not want to do something stupid on the bottom. I have seen a number of C2's where the entire bottom of the car was painted black, including the bottom fiberglass. My car does not have any paint in these areas. Am I correct to assume these areas were not painted from the factory?
www.jerryforthofer.wordpress.com
Last edited by jerhofer; 08-13-2012 at 10:20 PM.
 06-17-2012, 06:11 PM
#2
Race Director


Member Since: Jan 2002
Location: Close to DC
Posts: 14,534
Received 2,126 Likes
on
1,465 Posts
C2 of the Year Finalist - Modified 2020

Correct! Do I hear the little feet of "project creep"?  Dennis
Dennis
06-17-2012, 07:14 PM
#3
Team Owner


I was at the Gold Hill cruise in yesterday with my 65 coupe and two eye witnesses to your incident came up at different times and told me about what happened to your car at Sonic. Sorry to hear it, but sounds like you have a plan.
06-17-2012, 11:06 PM
#4
Burning Brakes
Thread Starter
Yes, you do!! I have all of the Vintage Air parts sitting in the garage and was planning on beginning the installation soon. Now I will make sure it is complete before the car is painted. Don't want to work over freshly painted fenders. Plus it will make it easier to install with the body and frame separated. I also have an aftermarket radio and speaker to go in while the original radio goes to storage. It will be a busy summer.
www.jerryforthofer.wordpress.com
www.jerryforthofer.wordpress.com
Last edited by jerhofer; 08-13-2012 at 10:21 PM.
06-17-2012, 11:42 PM
#5
Burning Brakes
Thread Starter
My wife and I have not had a good past five weeks. Five weeks ago on a Monday afternoon, I stopped at a traffic light in my 2001 Porsche 996. Ahead of me was a large dump truck pulling a heavy duty trailer loaded with a huge pallet of stone and a bobcat for unloading it. He had stopped under the railroad arms and decided to coast back. He never saw my little black car and it opened up the top of my right front fender like a can opener plus smashing the headlight. $4700 repair.
That Friday, we purchased a 2009 Mini Cooper for my wife. On the following Monday afternoon, a guy ran a stop sign and hit her on the right front corner pushing the car into the adjacent railroad tracks. Fortunately, she was not hurt. $9700 repair.
And now this about three weeks later. I got the Porsche back from the body shop a couple weeks ago and we are supposed to pick up the Mini from the body shop tomorrow. I am looking for the volume discount!!
My son offered to let me drive his '79 El Camino as it needs a paint job!!
www.jerryforthofer.wordpress.com
Last edited by jerhofer; 08-13-2012 at 10:21 PM.


 06-19-2012, 09:51 PM
#8
Burning Brakes
Thread Starter
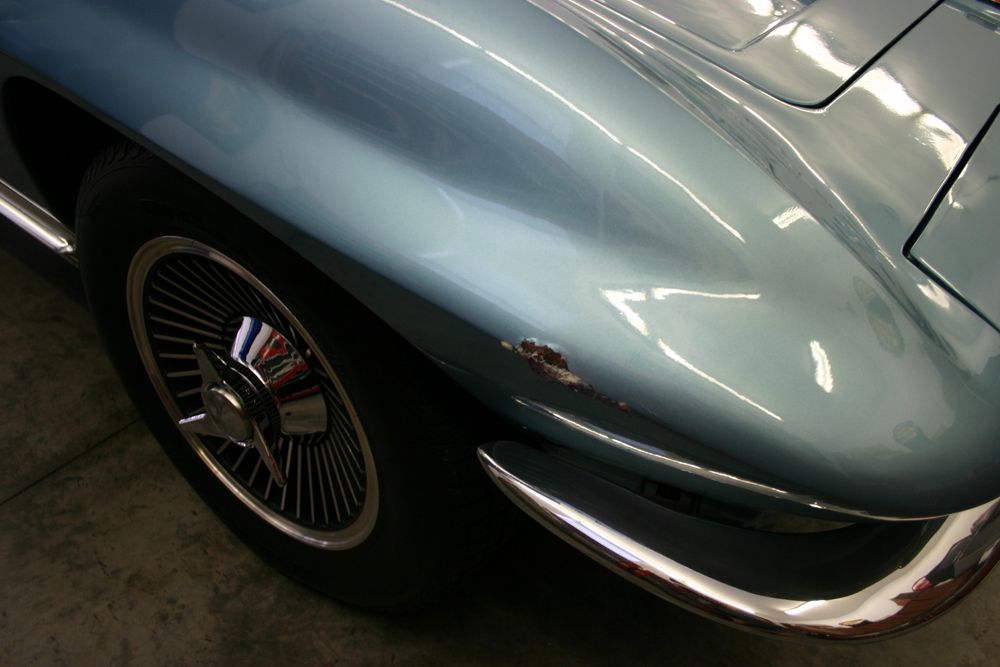
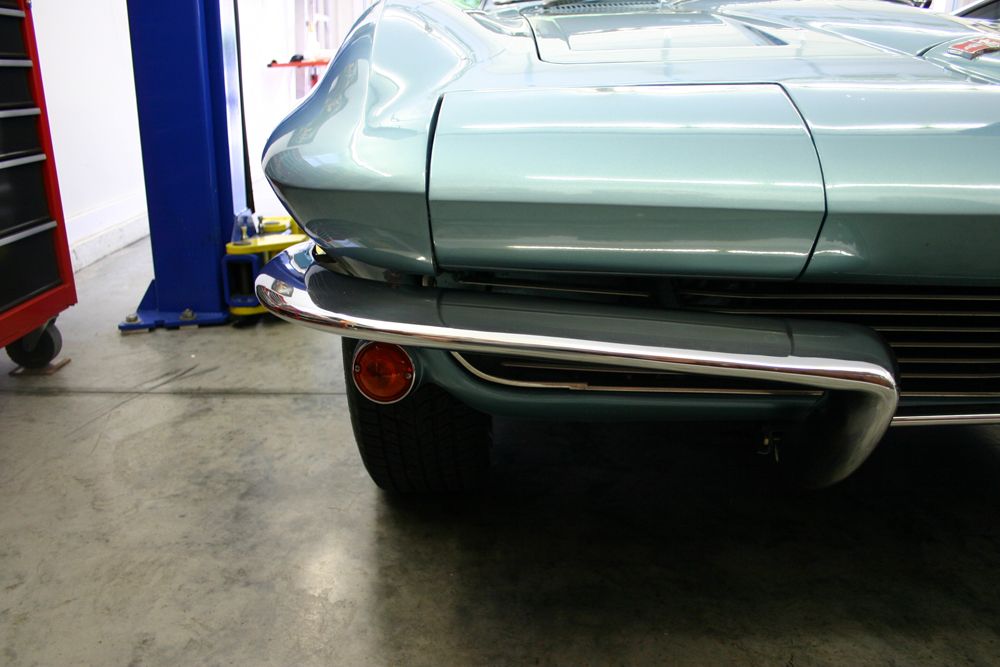
I met with the insurance appraiser and my body guy yesterday. We discovered a couple more damaged items including the grill. We were trying to convince the appraiser to let us at least clear the whole car to have a better chance of making the paint match. The money for this was more than he could approve so he had to talk to Hagerty some more. Haven't heard back yet. Here are a couple pics of the damage.
I had done some preparatory work on the Vintage Air install a couple weeks ago. I painted the compressor brackets. Since I would like this installation to look as stock as possible, I also painted the compressor black.

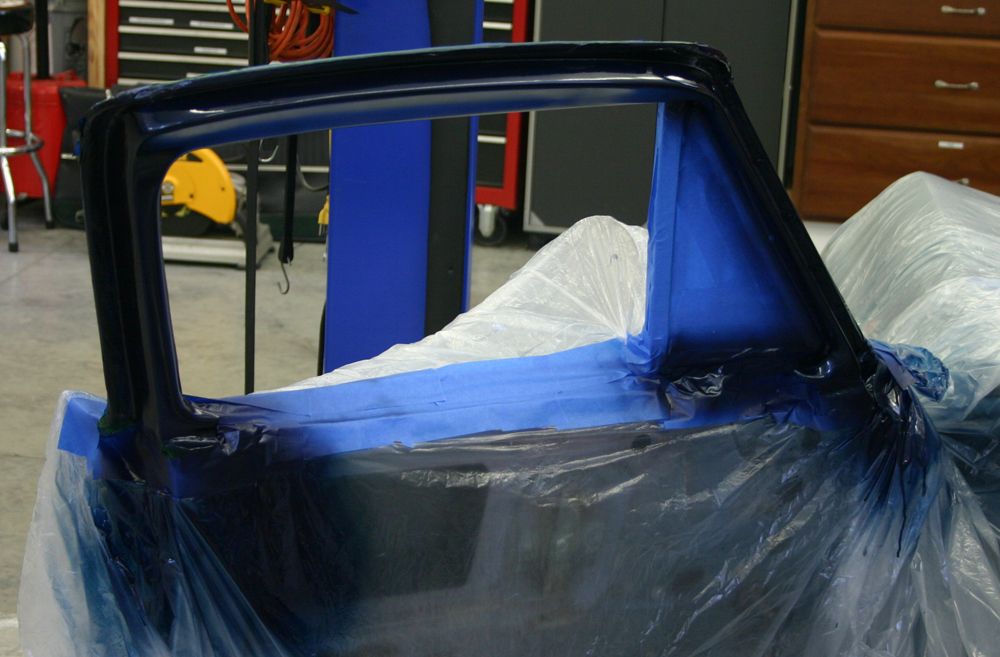
Last week, just before the accident, I finished painting the interior trim around the windshield and above the door as well as the headliner.
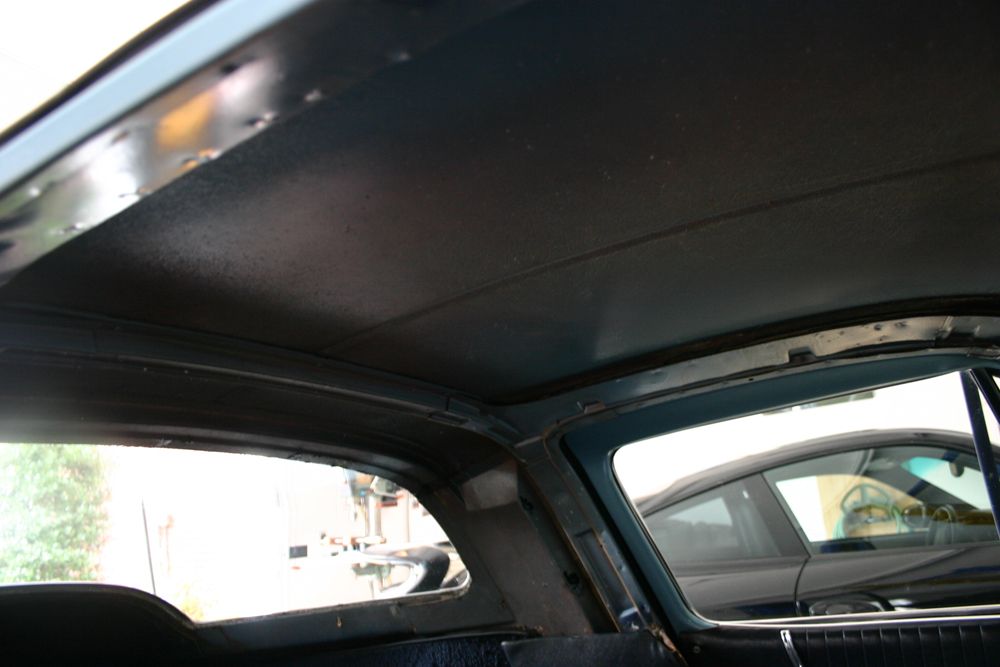
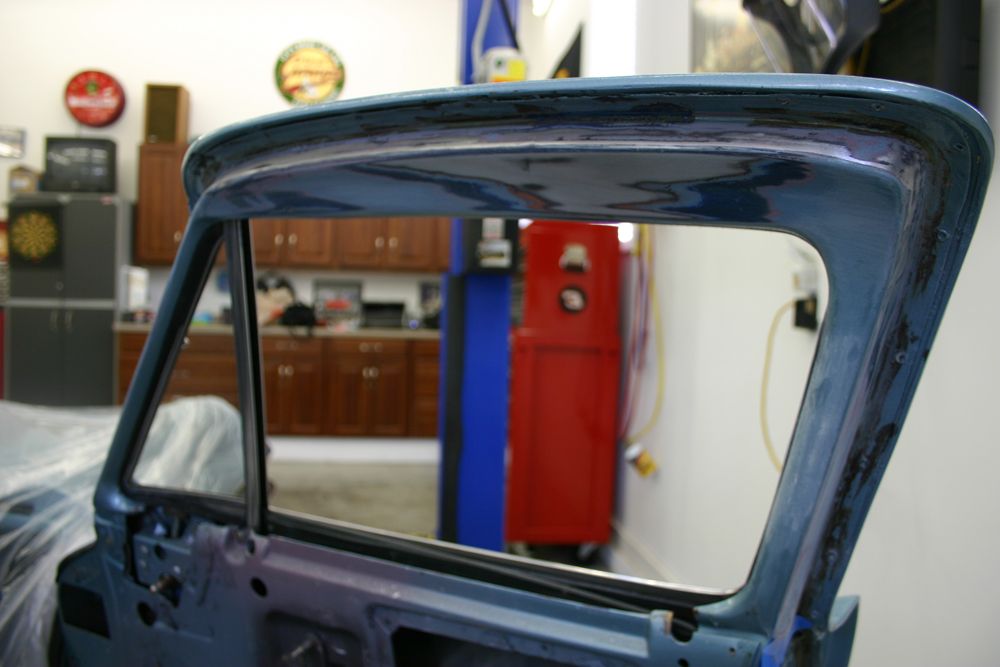
I began to address another issue today. The interior of the door around the window is painted body color which I always thought looked strange. After doing a search, I discovered that area should be painted to match the interior. Today I began sanding and could clearly see what had been dark blue originally. Should look much better once I get some paint on it.
www.jerryforthofer.wordpress.com
I had done some preparatory work on the Vintage Air install a couple weeks ago. I painted the compressor brackets. Since I would like this installation to look as stock as possible, I also painted the compressor black.
Last week, just before the accident, I finished painting the interior trim around the windshield and above the door as well as the headliner.
I began to address another issue today. The interior of the door around the window is painted body color which I always thought looked strange. After doing a search, I discovered that area should be painted to match the interior. Today I began sanding and could clearly see what had been dark blue originally. Should look much better once I get some paint on it.
www.jerryforthofer.wordpress.com
Last edited by jerhofer; 08-13-2012 at 10:22 PM.
06-25-2012, 10:26 PM
#9
Burning Brakes
Thread Starter
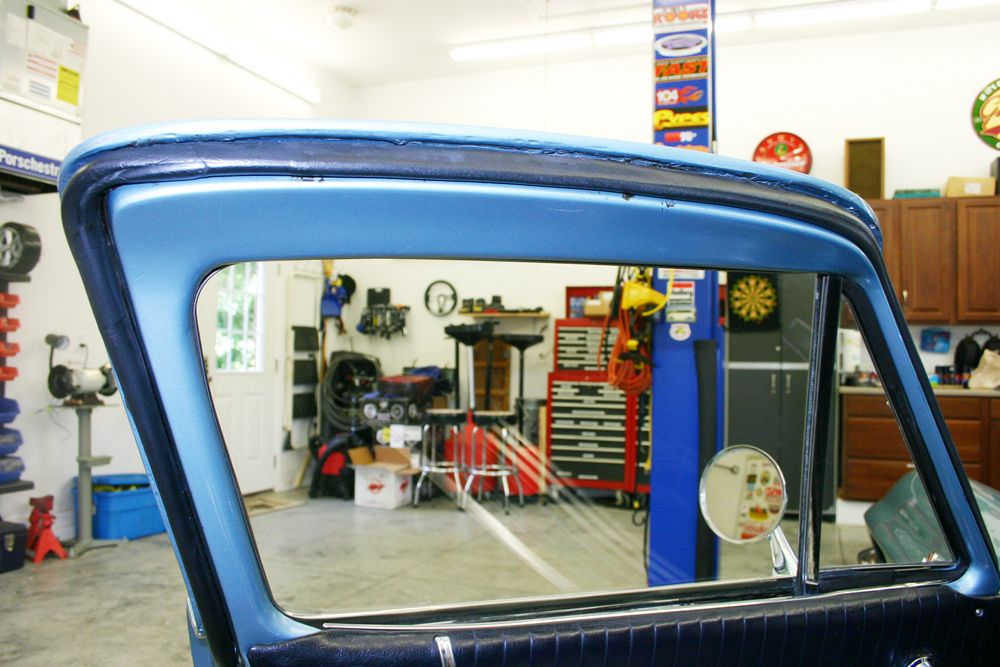
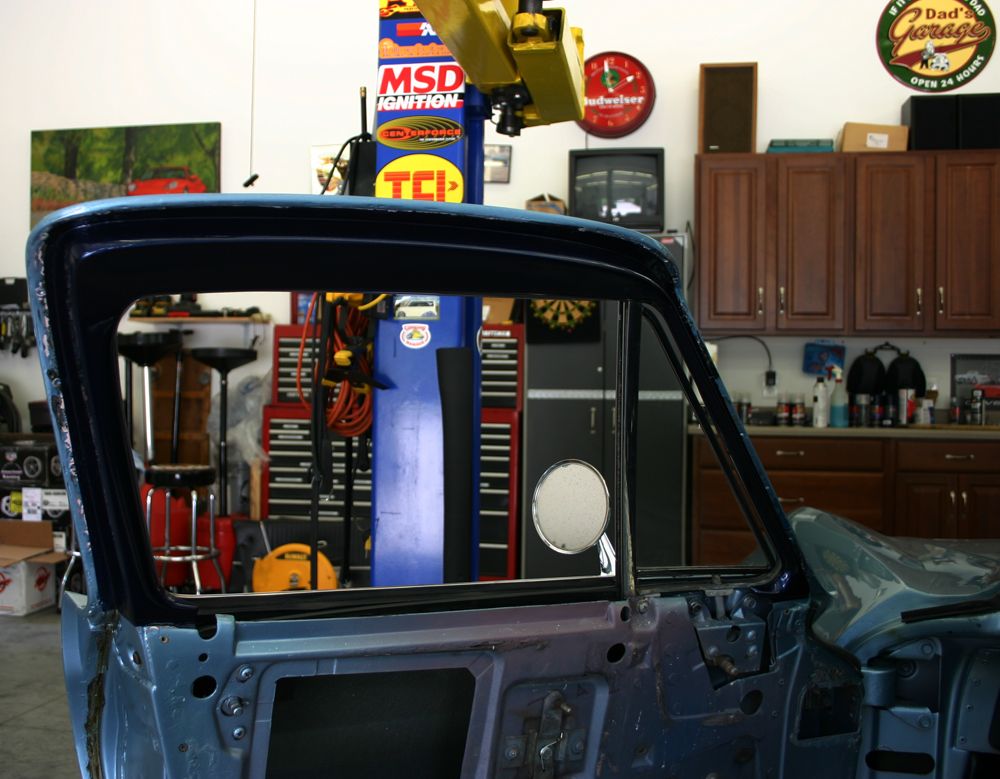
Finished up painting the interior of both doors. Not perfect, but looks much better than before.
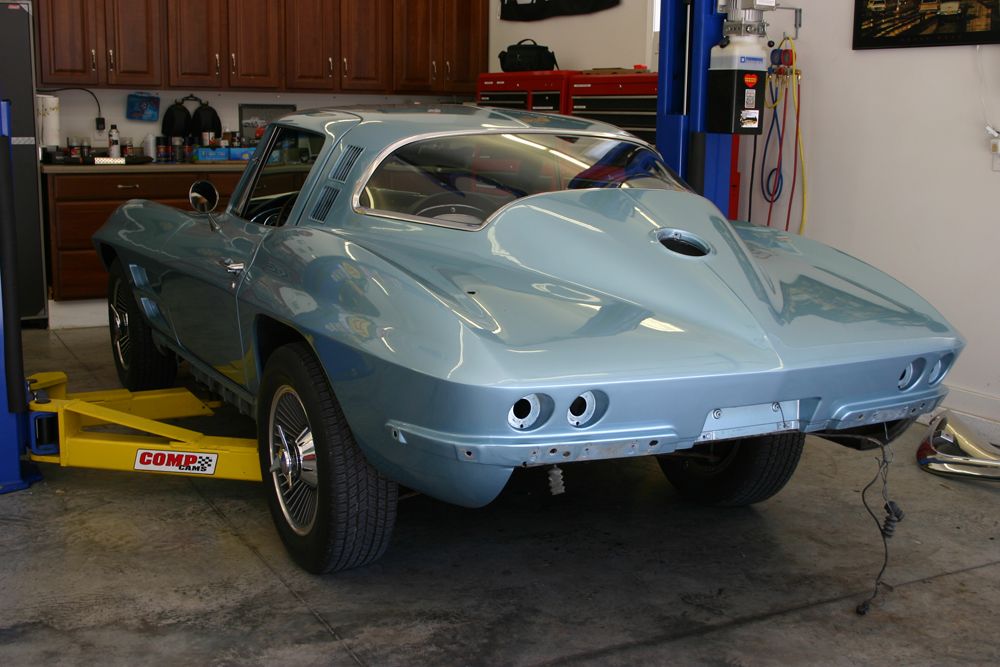
A week ago today the appraiser hired by Hagerty met me and my body shop guy at his shop. The appraiser has a '63 Ford Galaxie with a 390 and understood the situation. While he could not approve painting the entire car, he did approve wet sanding and clearing the whole car. That will go a long way towards getting the paint work done. So, for a relatively small amount of money, I will have the entire car painted.
Hagerty called today to say the check will be coming soon. Fellow forum member Greg Hunt gave me the name of a place in Statesville, NC that did the sandblasting and powdercoating on his car. The pictures of his frame and suspension pieces looked fantastic.
A Camaro club friend gave me the name of a guy to re-seal transmission and rear end. The guy is retired, does this work on the side and is very reasonable. He did the tranny in both my friend's '69 Camaro that he bought new and his '66 Corvette convertible that he bought when it was about 10 years old.
Tomorrow I will begin the preparations for removing the body. The plan is to have everything ready by Saturday so my son can come over to help. One of his colleagues also wants to help as does a friend of mine that owns a couple Vettes. Should be an interesting weekend.
www.jerryforthofer.wordpress.com
Last edited by jerhofer; 08-13-2012 at 10:22 PM.
06-26-2012, 06:52 PM
#10
Burning Brakes
Thread Starter
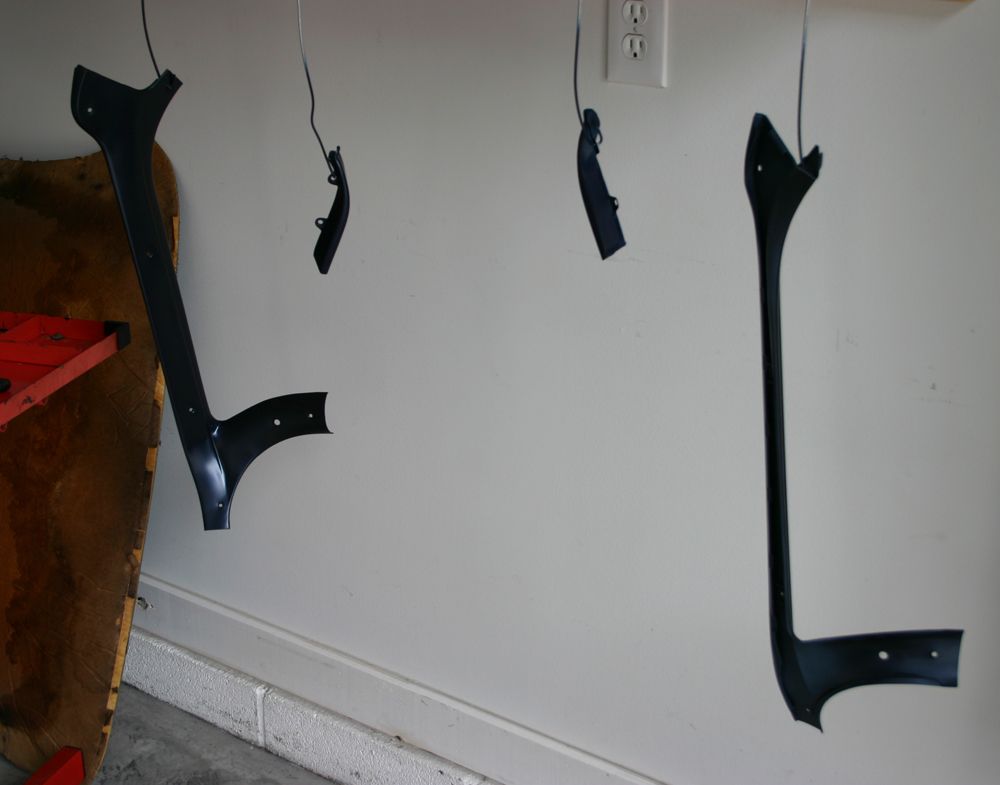
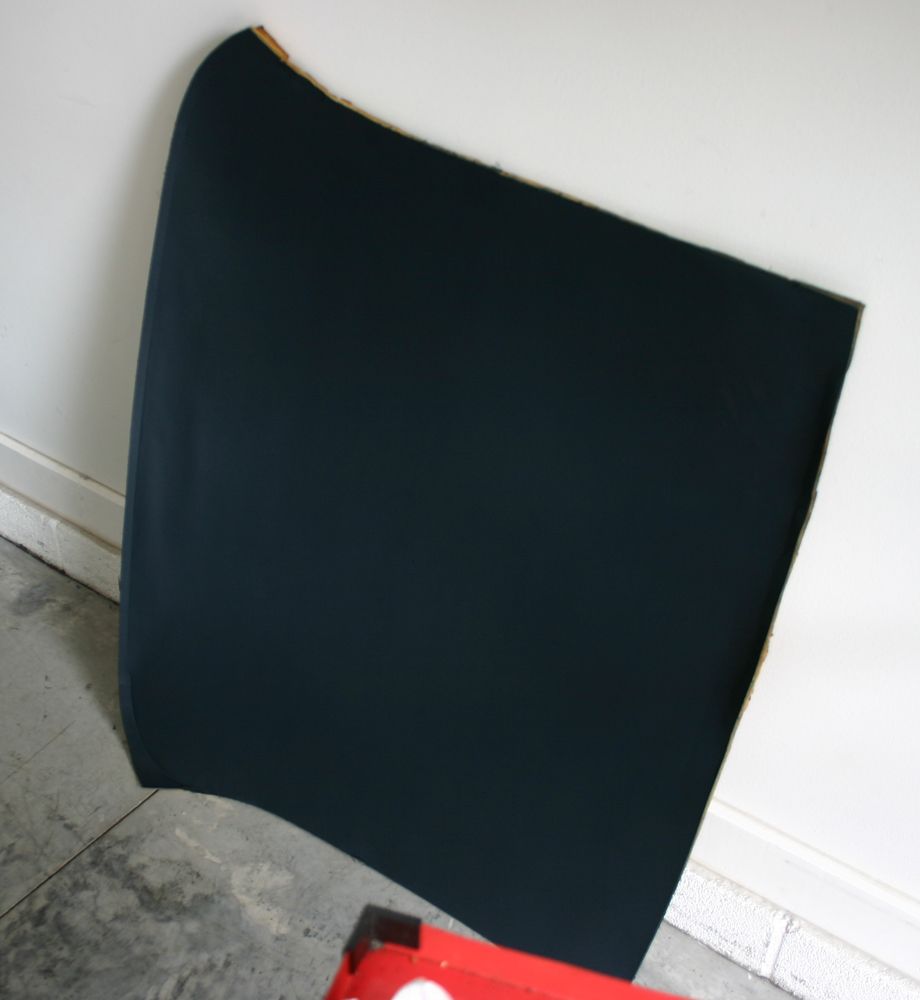
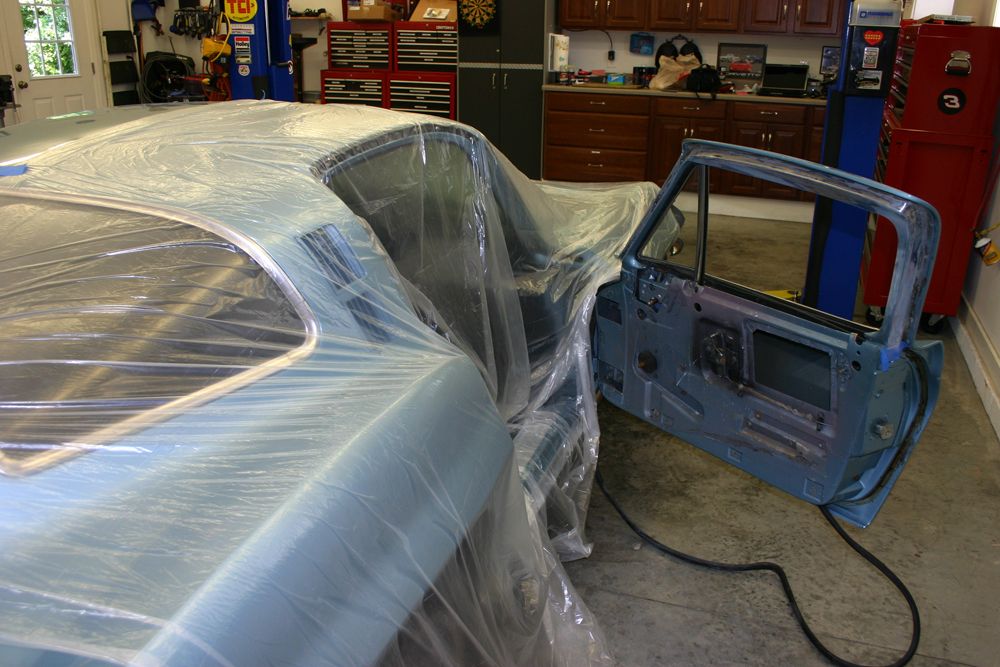
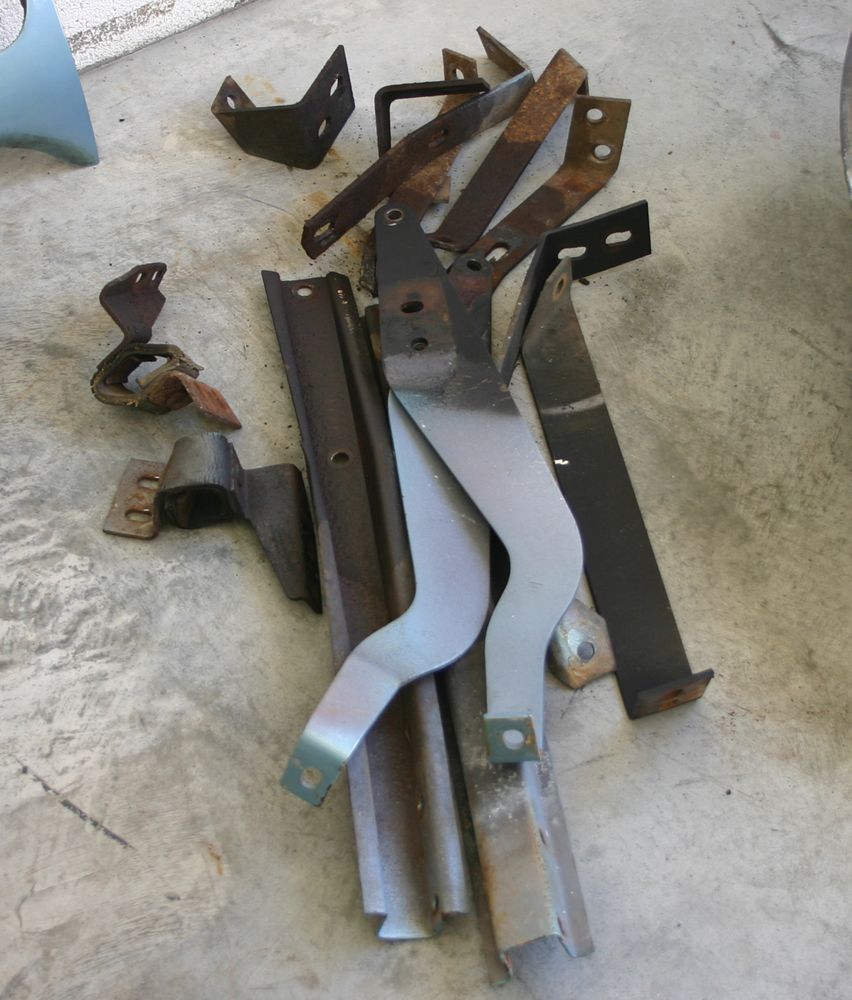
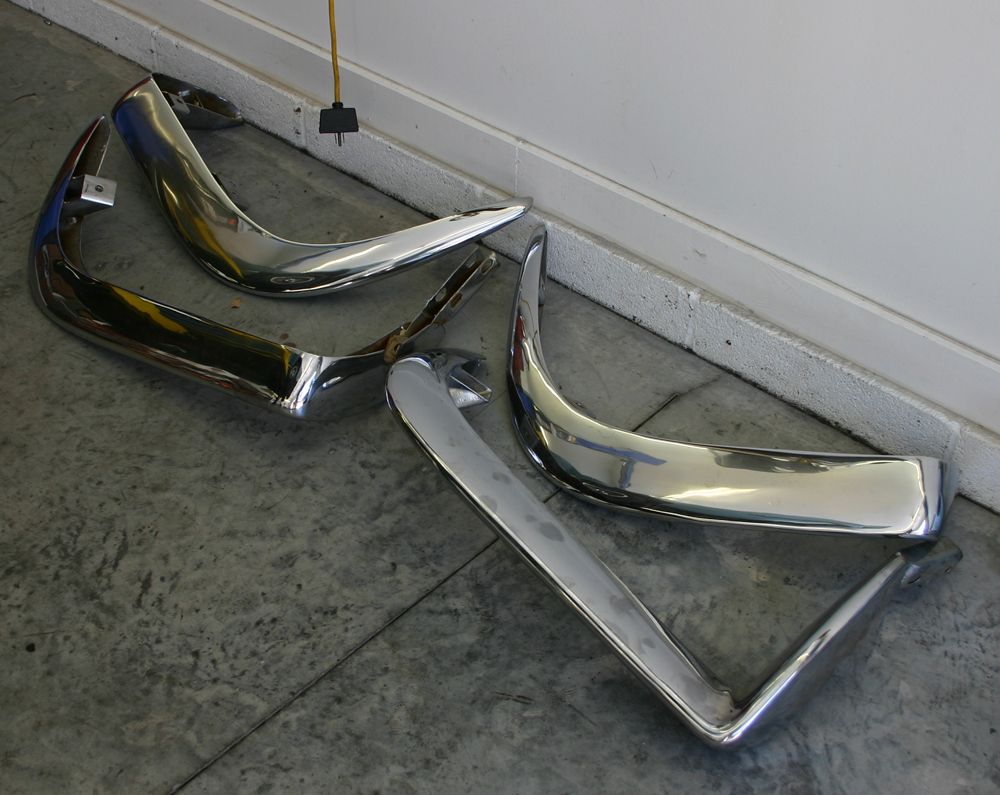
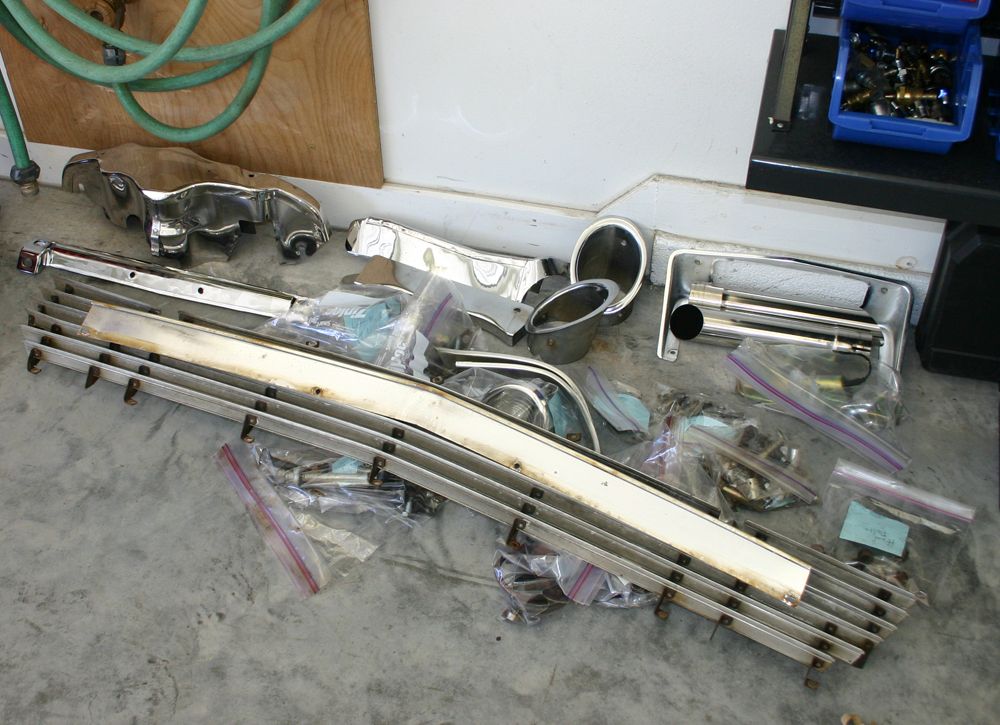
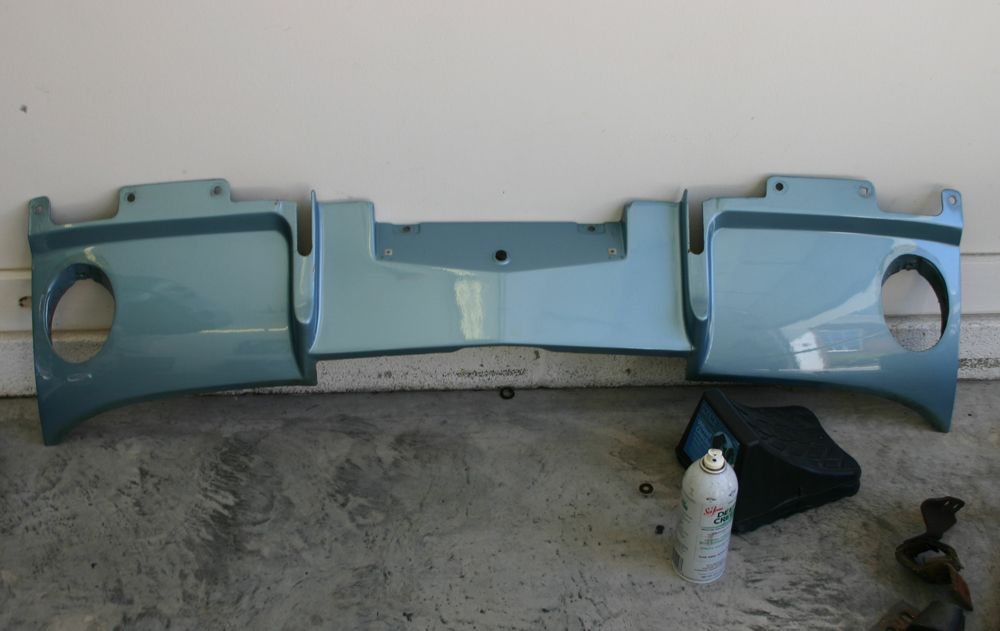
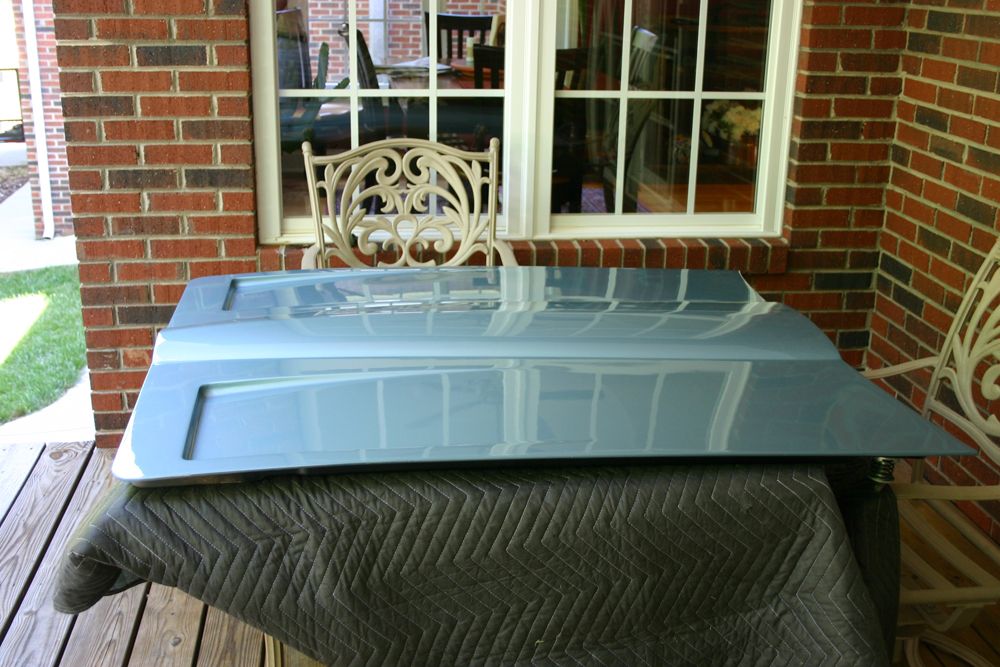
Started work early this morning and worked solid until about 4:00PM. The bumpers and brackets, the rear valance, the tailights, the exhaust, the badges, the hood, the rocker panel covers, and the antenna are all off the car. Some rusty bolts needed persuasion with the impact wrench but no matter as they will be replaced. The exhaust did not have to come off but it sure makes everything easier to get to on the rear of the car. Tomorrow I will continue to complete the list of things to do to get the car ready for body lift off.

Last edited by jerhofer; 08-13-2012 at 10:23 PM.
 06-28-2012, 01:59 PM
#12
Burning Brakes
Thread Starter
If I bought you car, just think of all the fun I would be missing. Dirt falling into my hair, grease on everything, nicks and scratches...who would want to miss that????
07-01-2012, 06:09 PM
#13
Burning Brakes
Thread Starter
http://www.youtube.com/watch?v=VEMJc...&feature=g-upl
I decided to add some pics of the body lift off to go with the video.
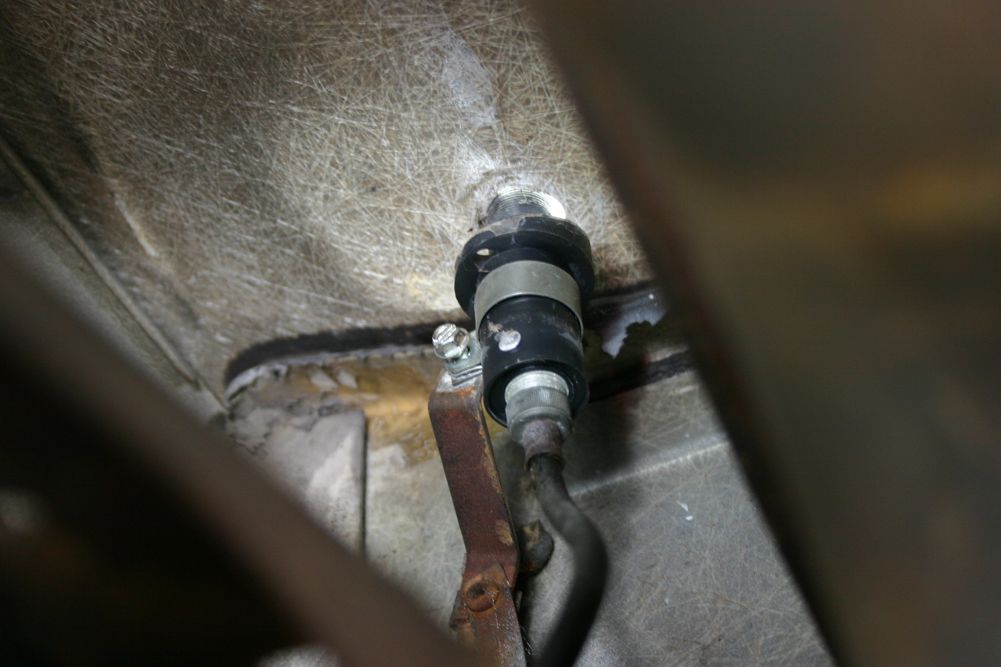
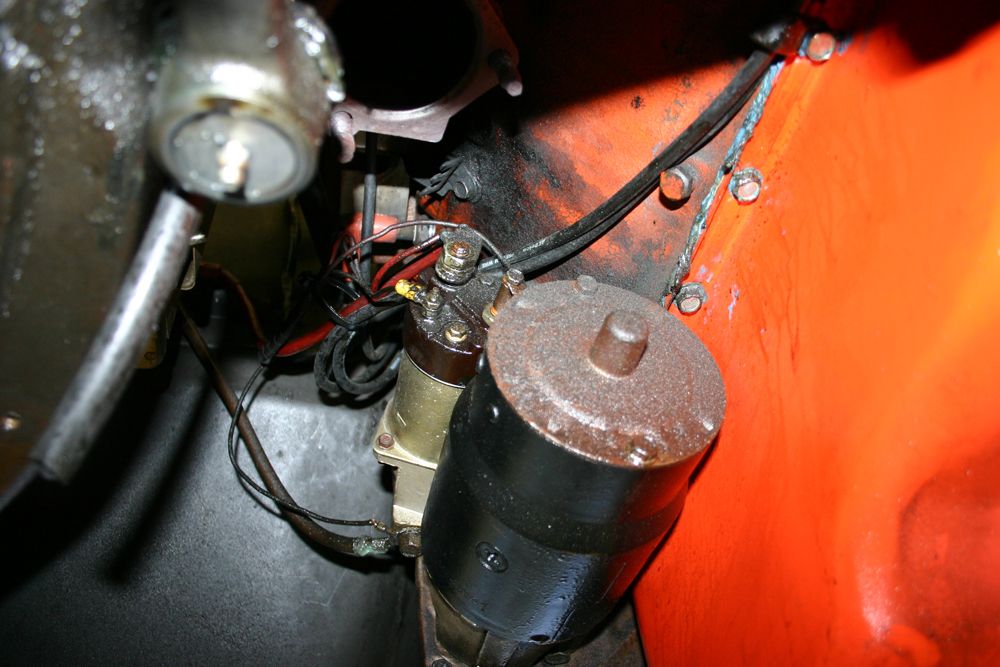
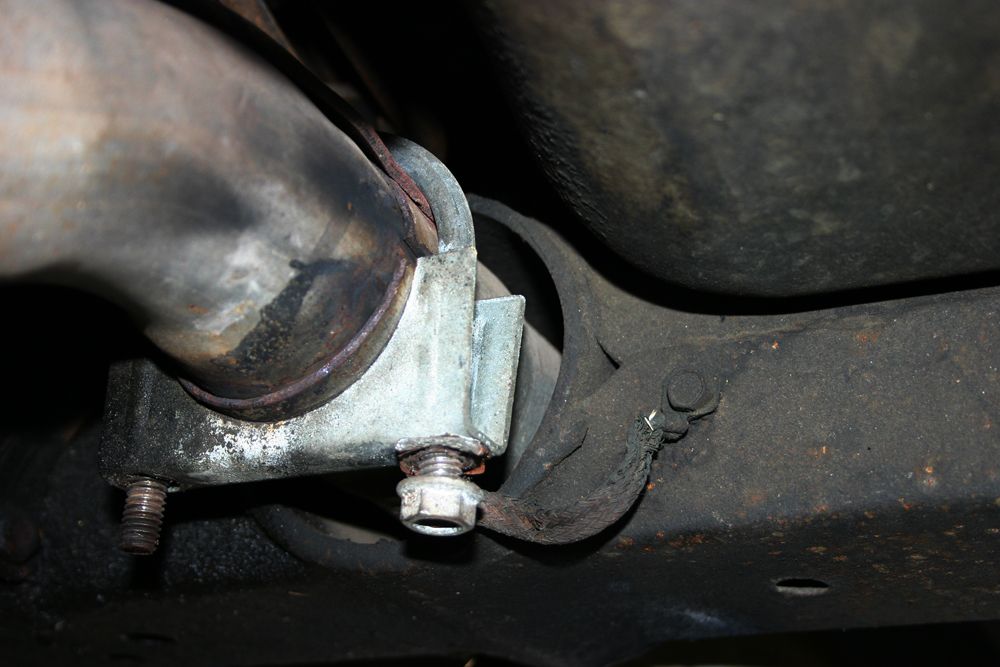
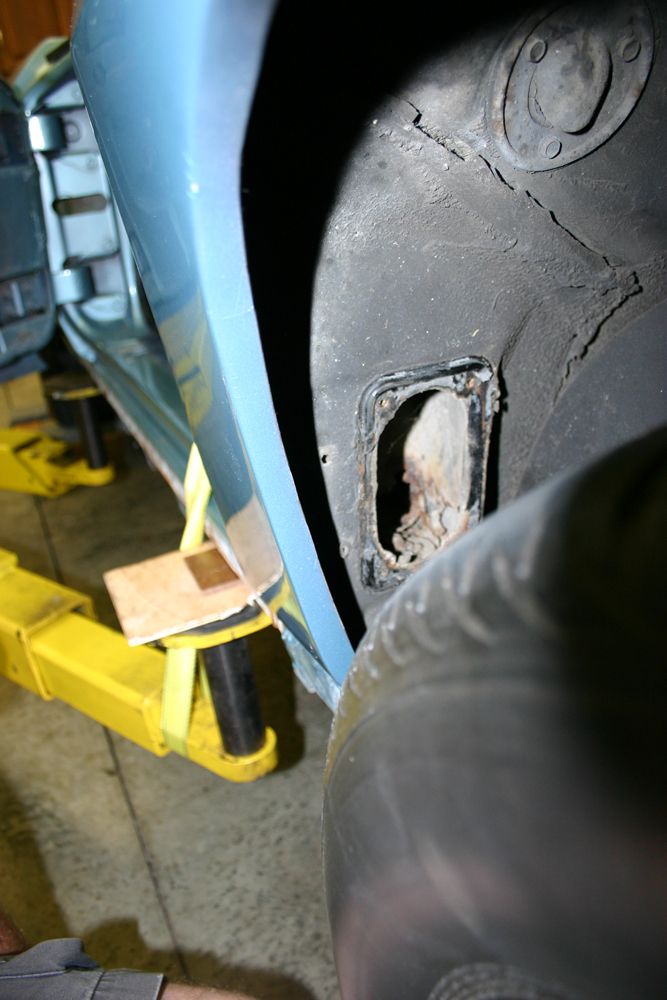
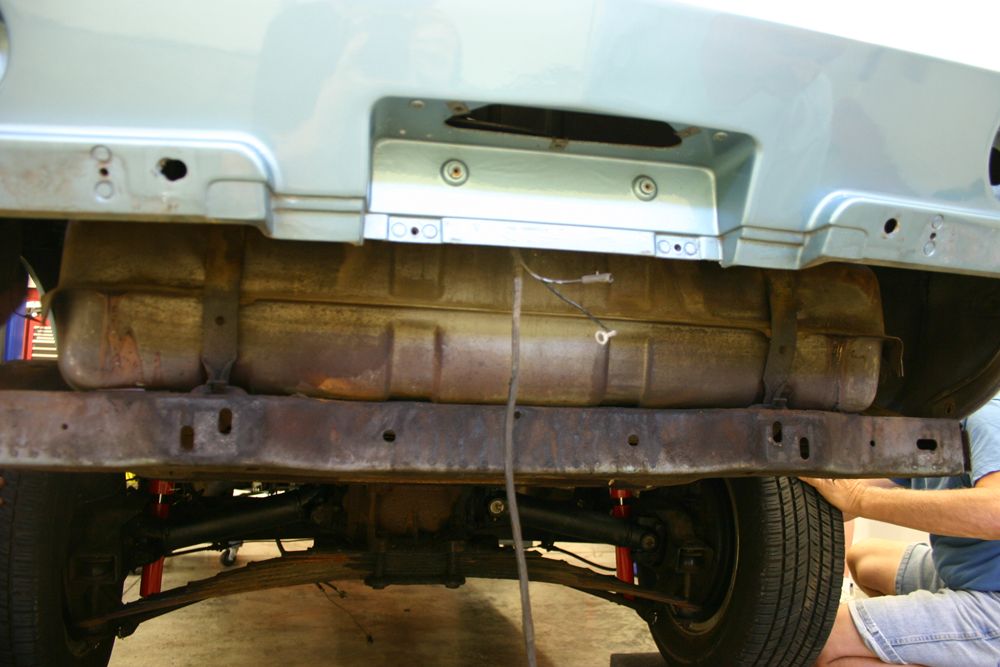
The bumpers and all of the bumper brackets must removed. At the rear, the wiring to the taillights and the fuel tank must be unhooked as well as a ground in the LR wheelwell. While theoretically you do not have to remove the exhaust, once it is out of the way, removing the rear bumper mounts and the tailight wiring is much easier. The antenna must go as well.
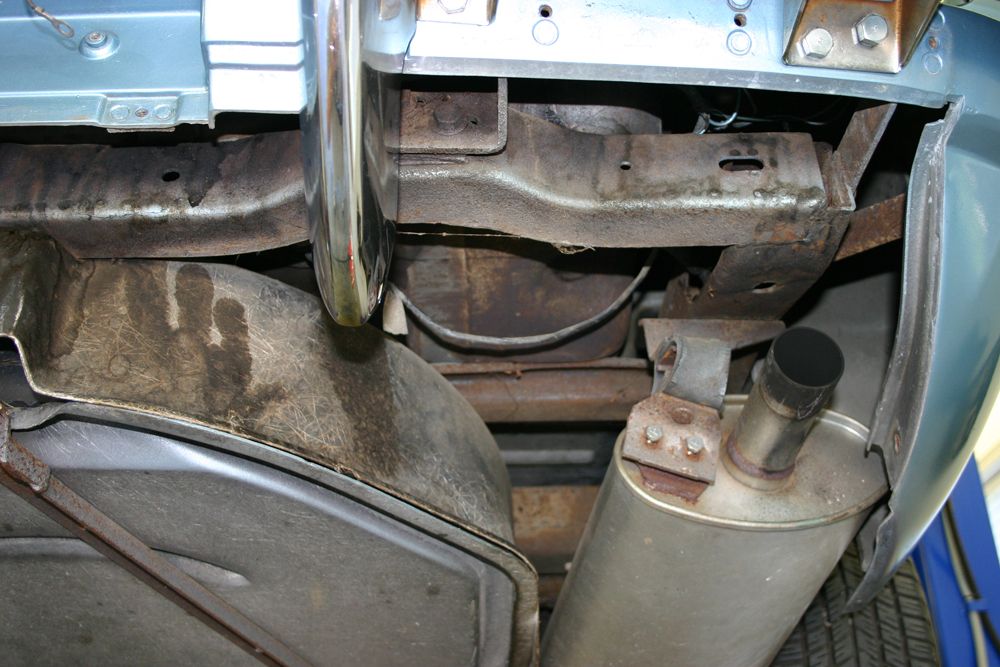
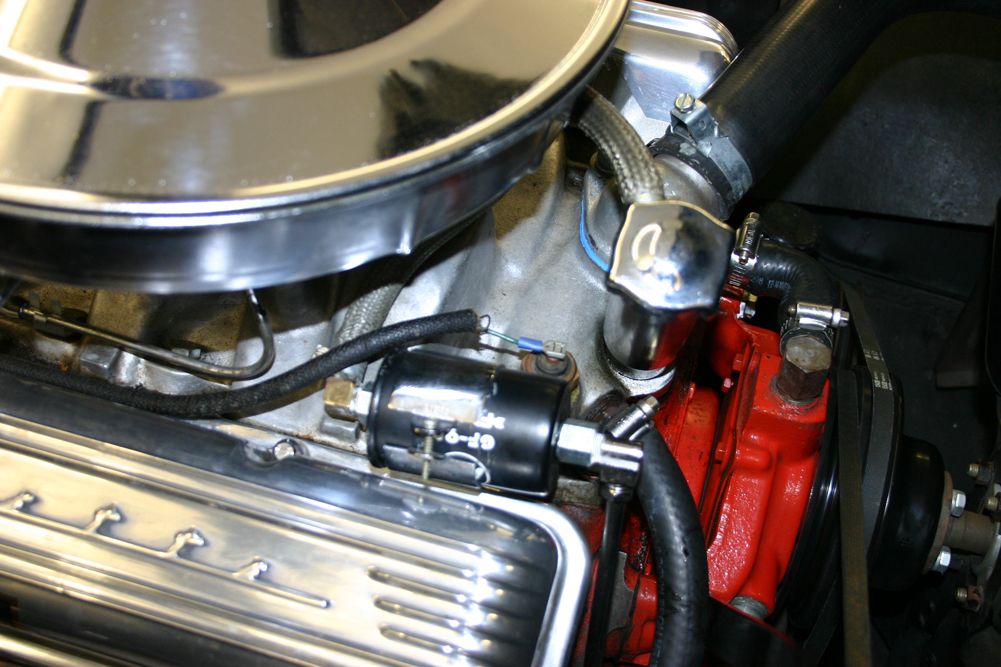
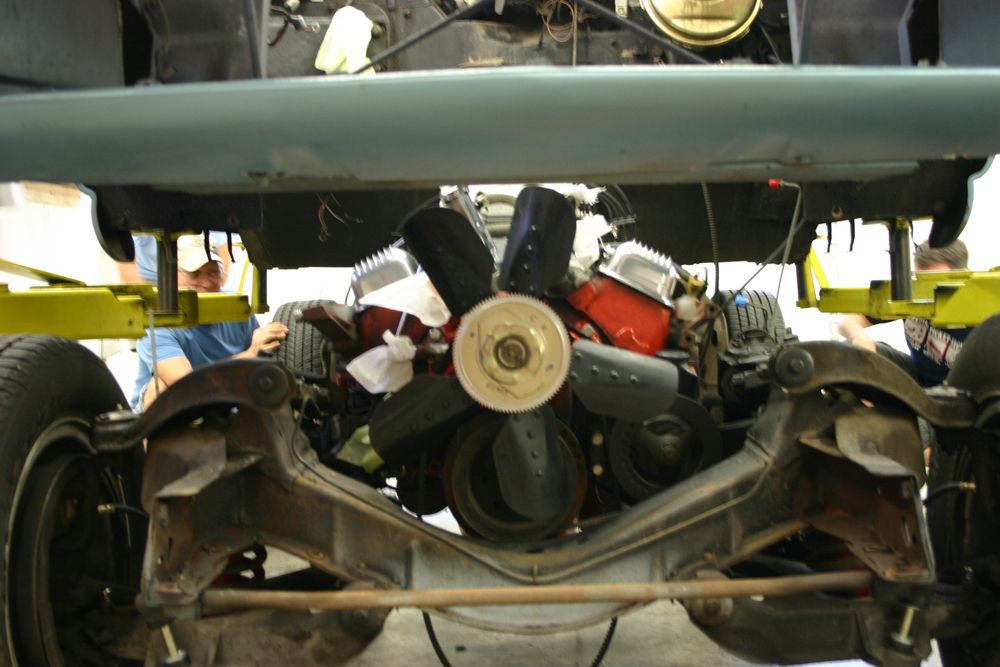
In the engine bay, as you would expect, there are a number of items to unhook. The clutch arm at the first junction after the firewall. The brake lines to the master cylinder. The rag joint on the steering column. To be able to pull the steering column away from the rag joint, the brackets under the dash must be loosened. They do not have to be removed. You also have to unhook the accelerator rod just behind the carburetor. The fuel line must be unhooked at the fuel pump.
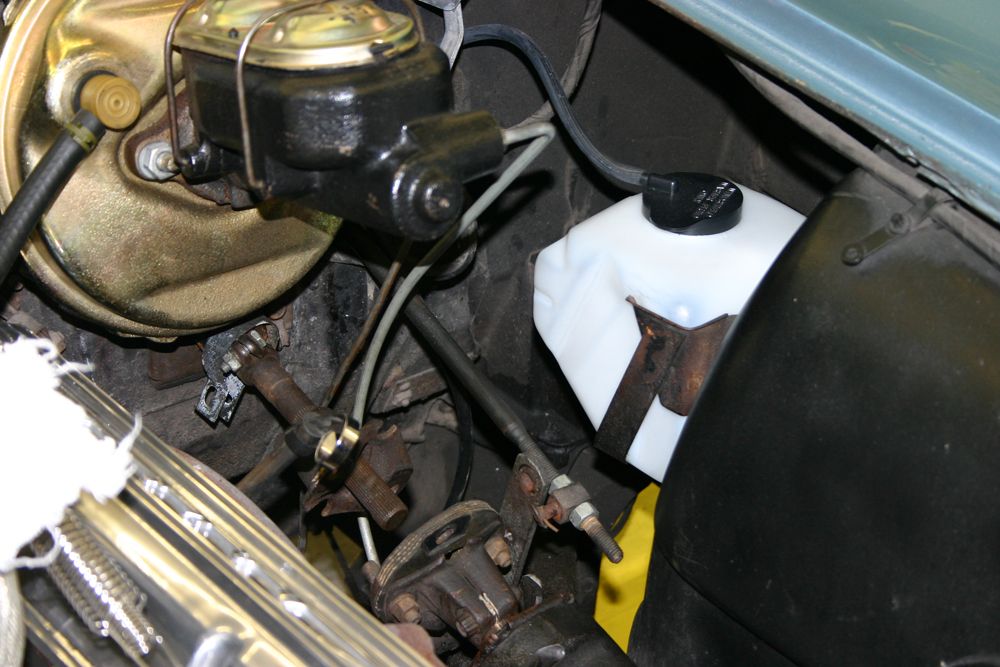
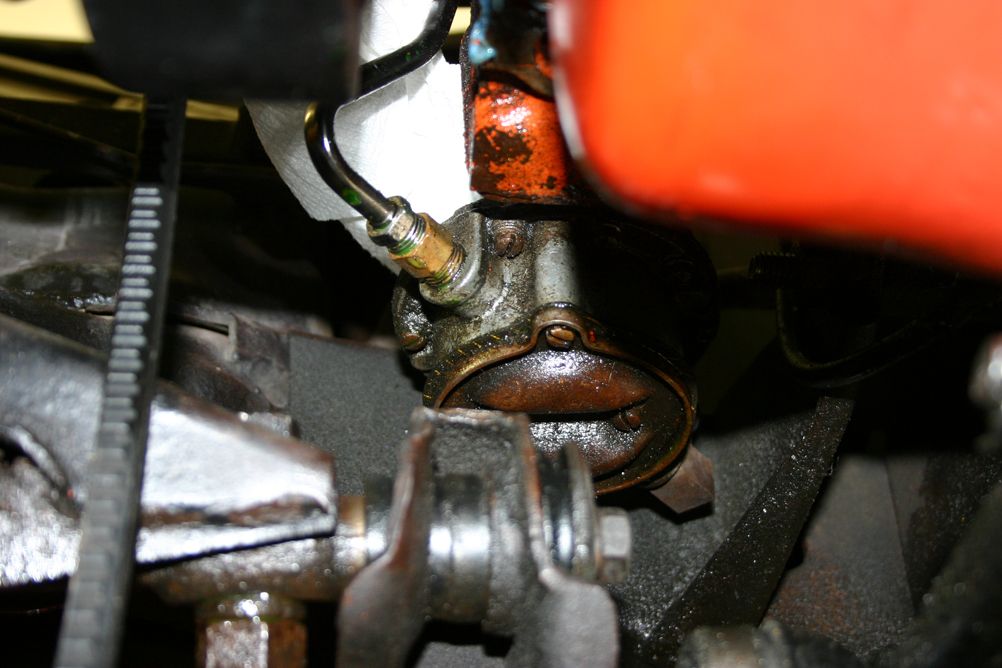
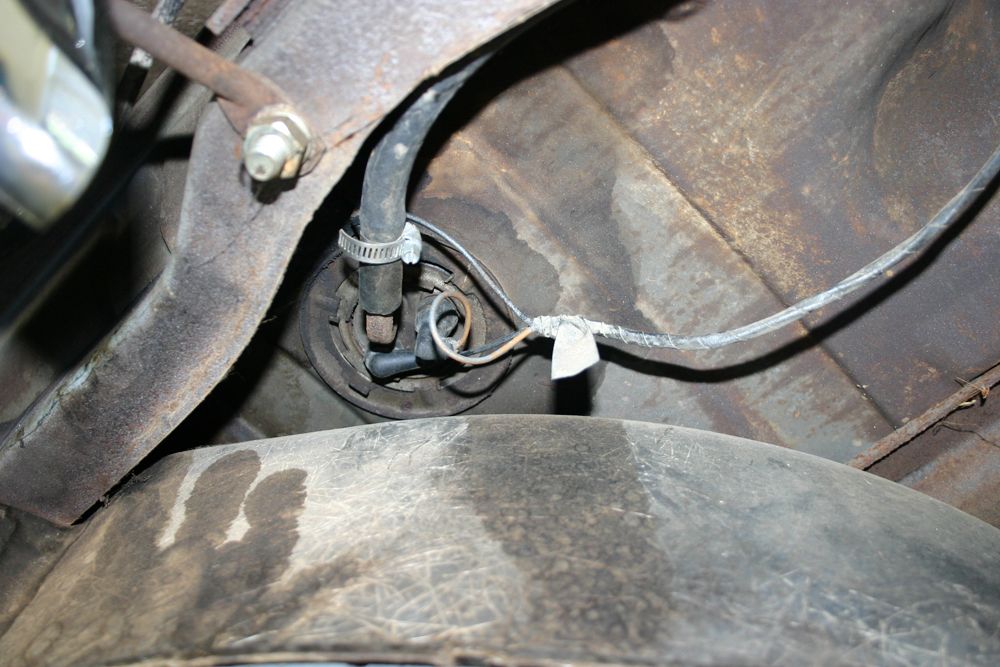
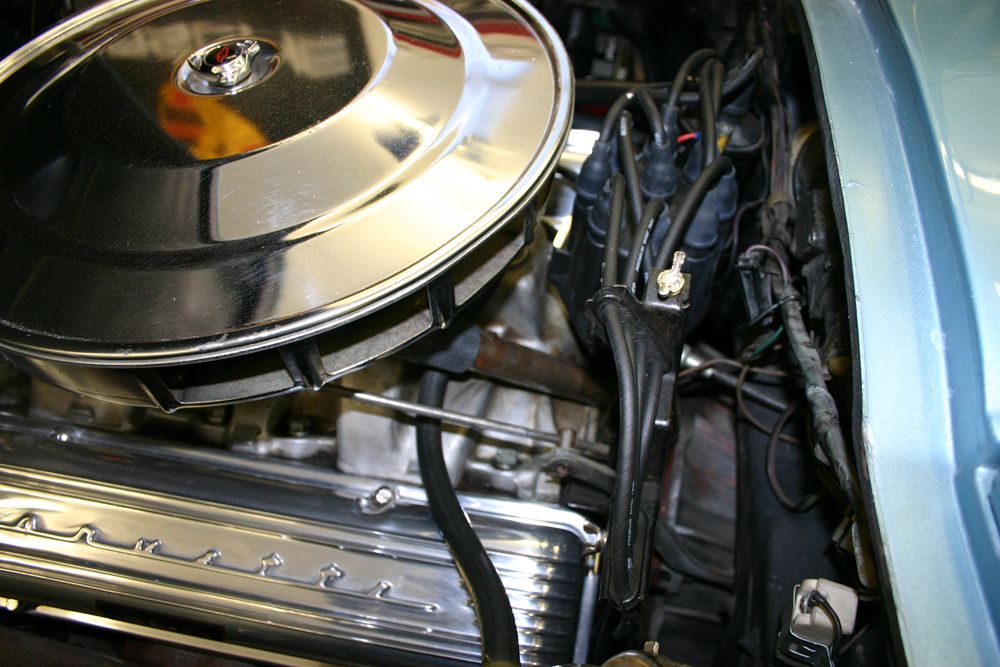
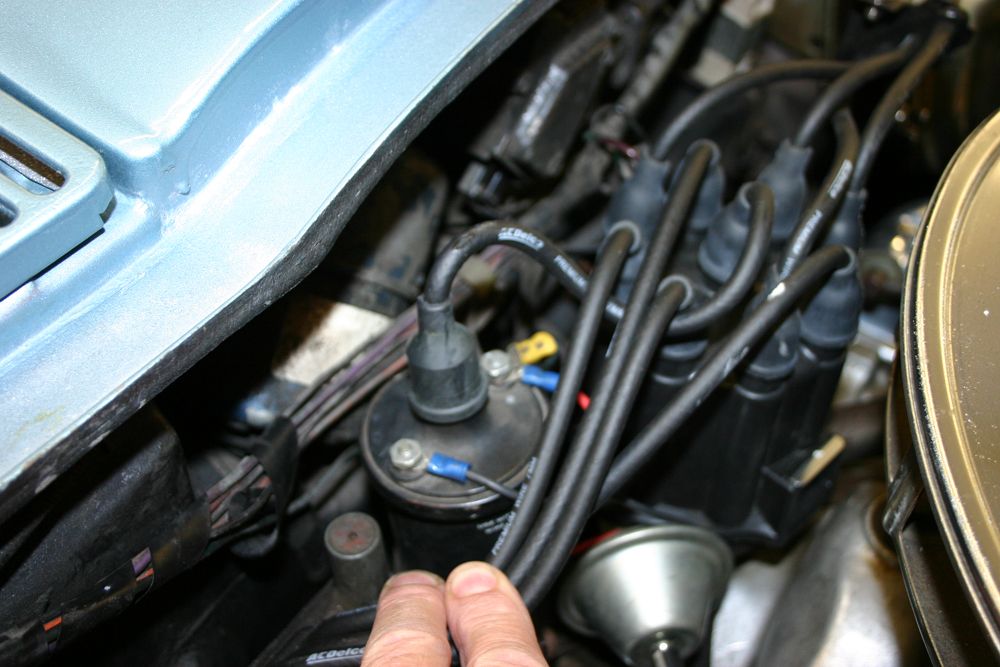
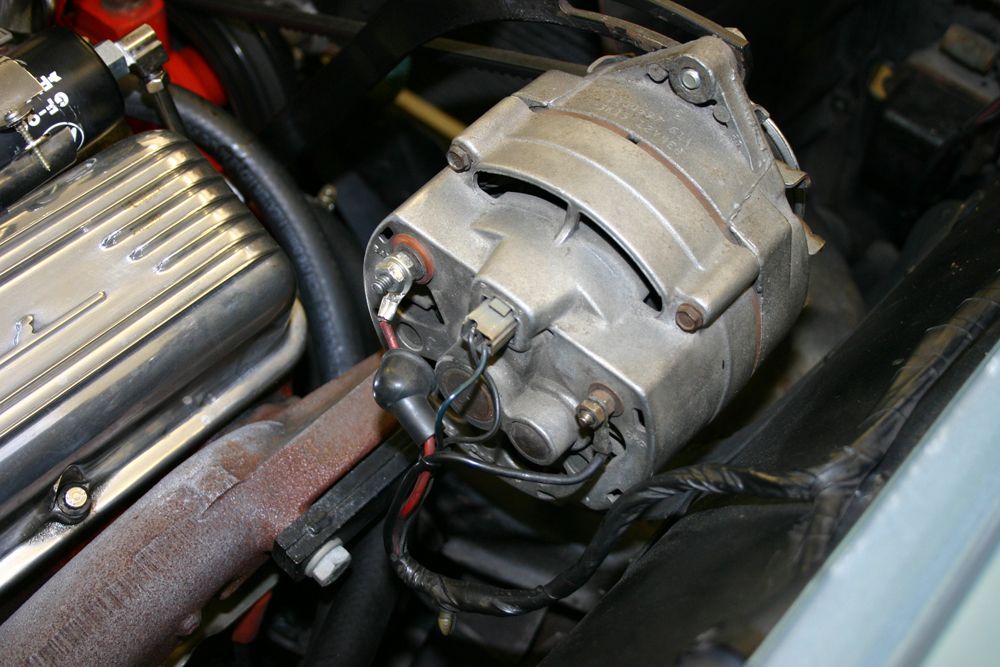
The hood must be removed so you can remove the radiator. All of the radiator and heater hoses have to be unhooked. The tachometer cable must be detached from the distributor. In that same area, the oil line for the oil pressure gauge and, if you have one, the wiring for the back up light must by unhooked. The wiring must also be removed at the alternator, the coil and the temperature sender on the front of the intake manifold. Once you have all of those lines unhooked, be sure they are placed at the firewall out of the way as the body is lifted.
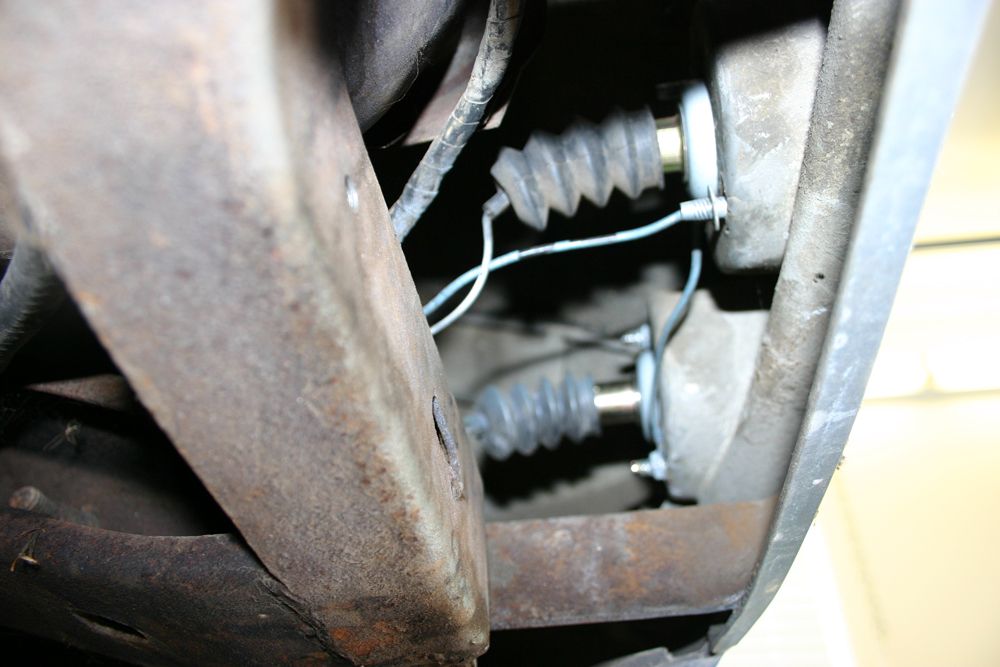
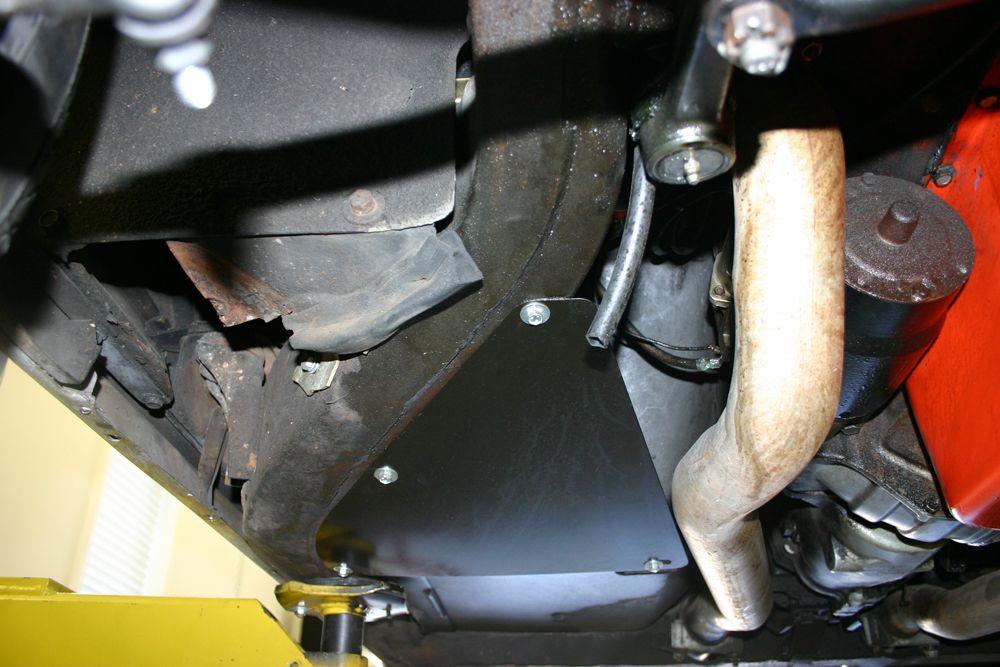
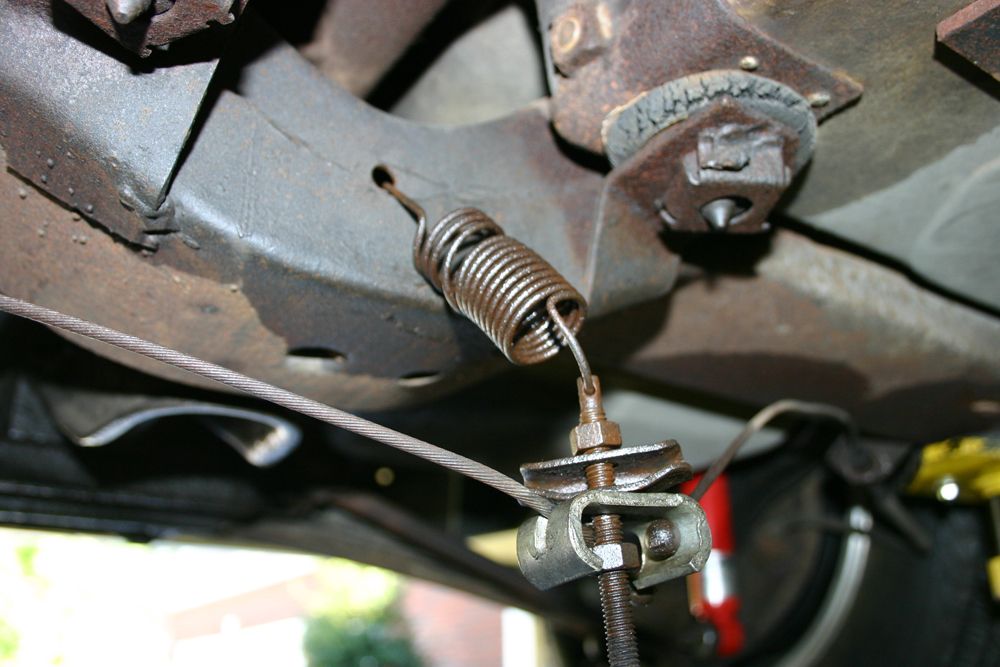
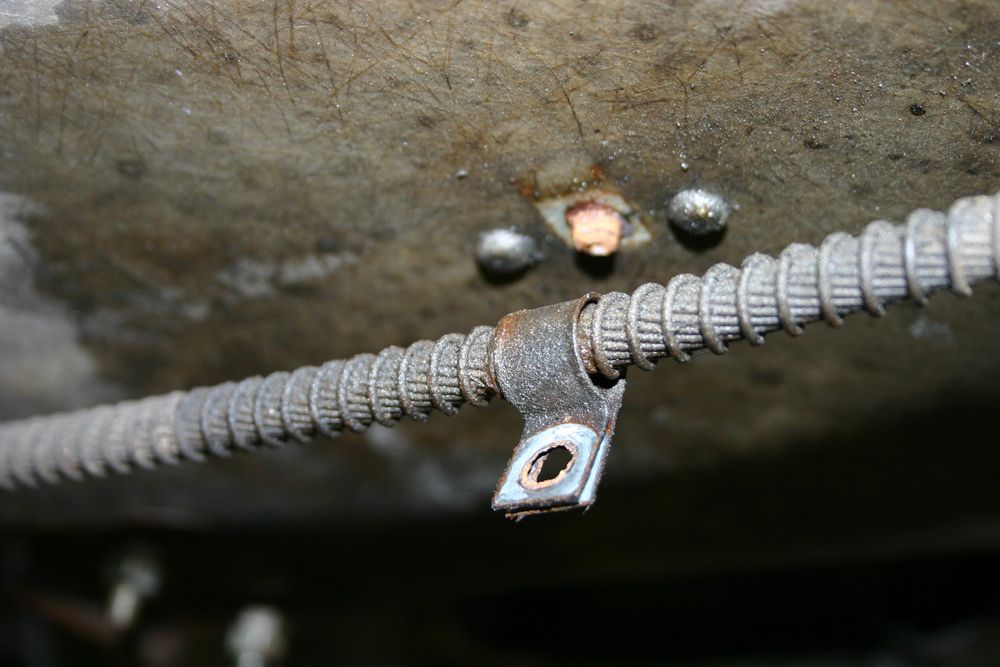
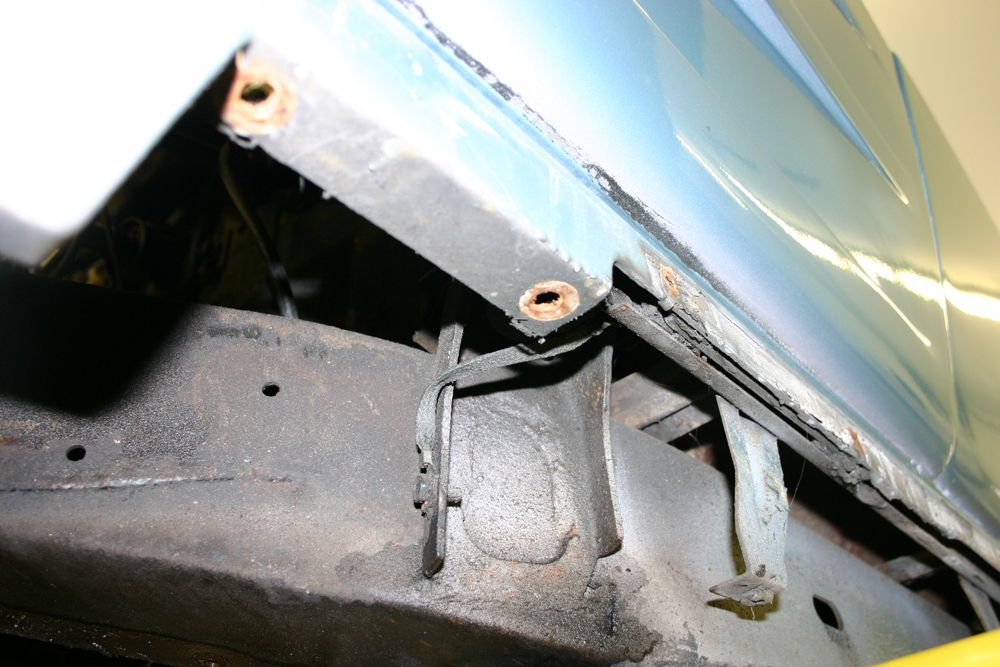
Under the car, both the inner and outer splash shields must be removed. Unhook the speedometer cable at the transmission. The parking brake cable must be unhooked at the rear junction of the cables as well as from the clip attached to the floor. There are two ground strips at the exhaust where it goes through the two holes in the frame. Another ground strap is in the LF wheelwell at the rear by the body mount. All the wires must be removed from the battery and the starter.
Inside the car, the seat belts must be removed. I removed the seat as well to make access to the body mount bolts behind the seat easier to get to and to remove weight. The shifter and the t-handle must be removed but the boot can stay.
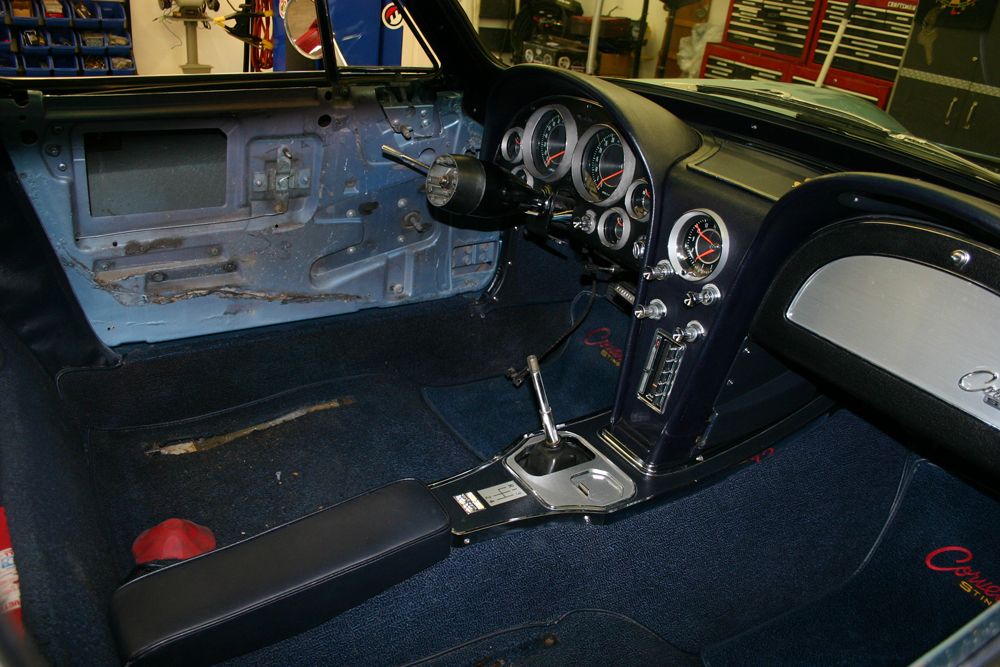
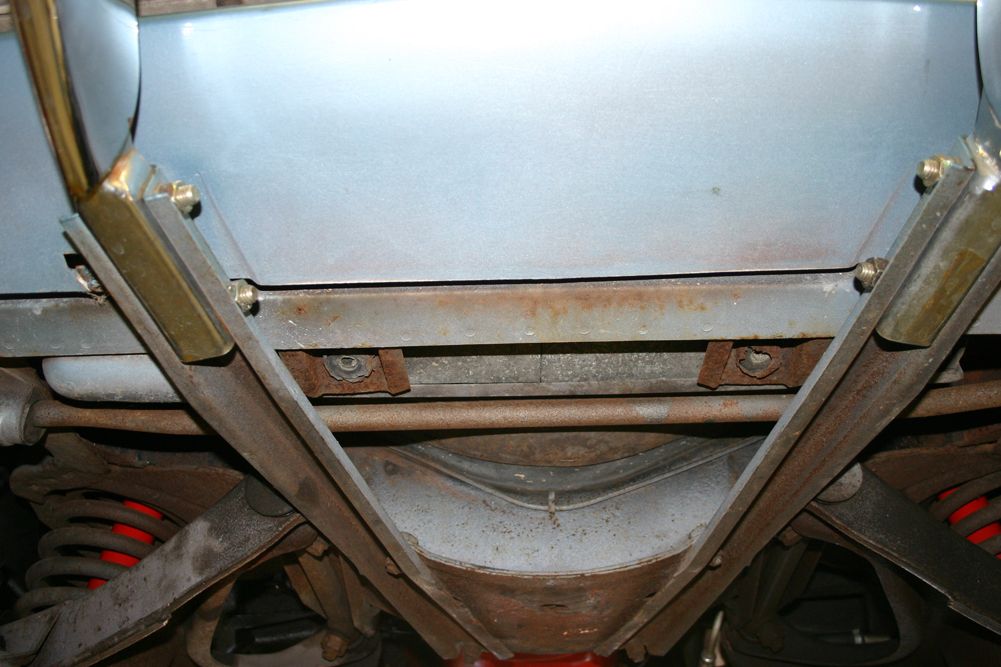
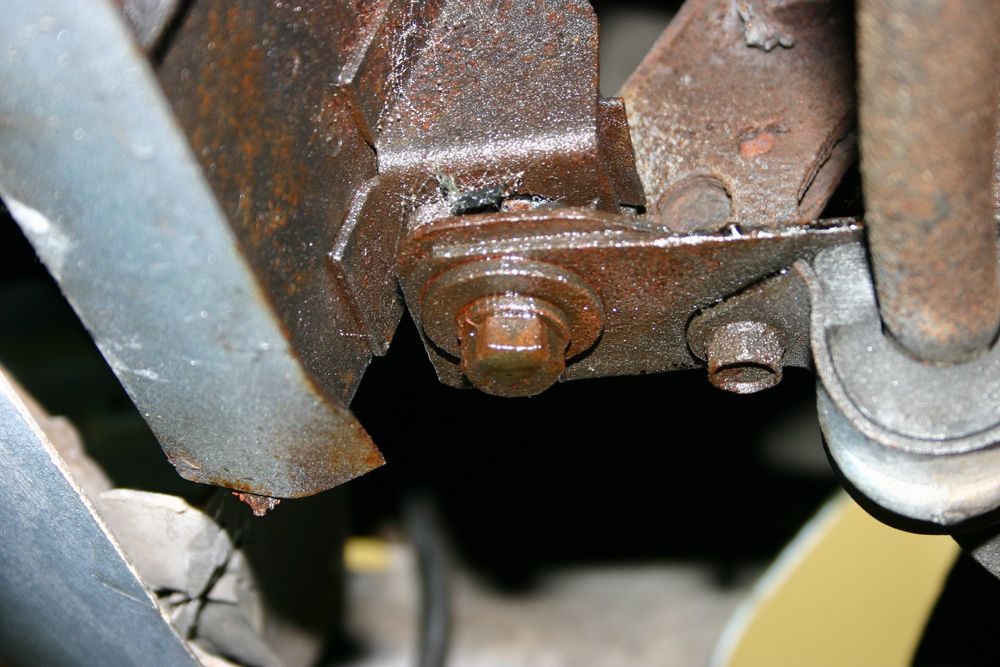
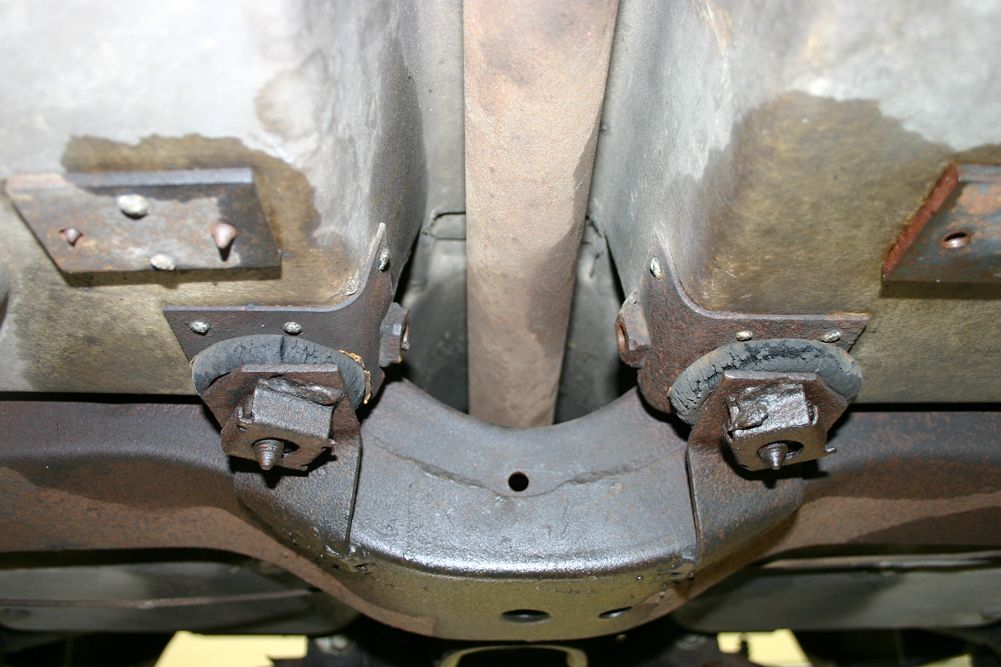
Now the body mount bolts can be removed. We put the car in the air with the frame still attached as it was much easier to get to the bolts. On my coupe, here are two at the radiator support, two just behind the front wheels, two behind the seats next to the center tunnel, two in the rear wheelwell area ahead of the wheel (have to remove a cover plate) and two at the very rear located at the very rear corners of the interior.

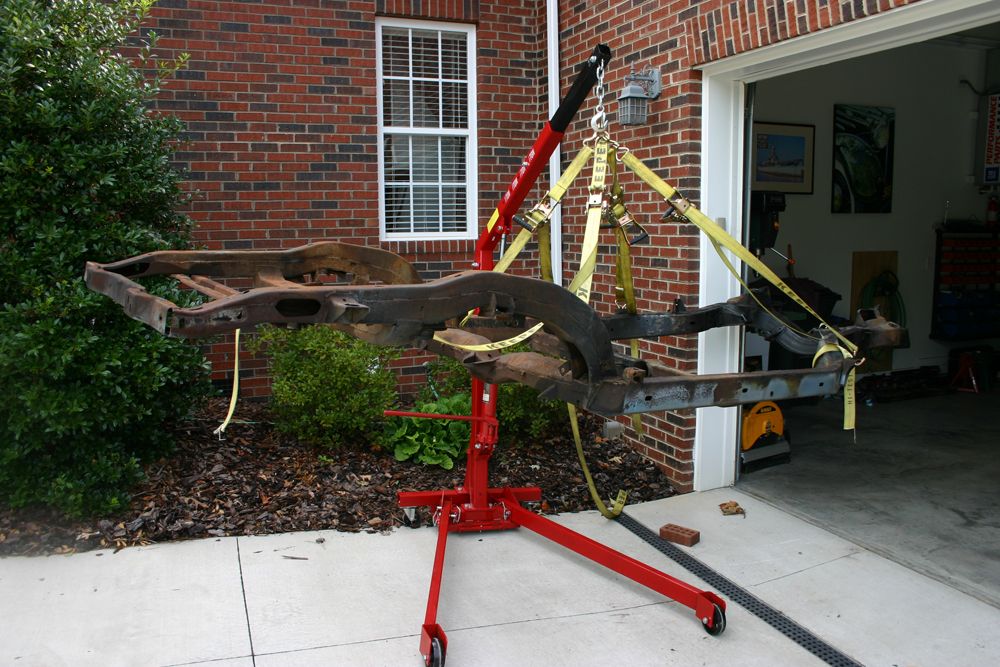
Once all of those had been removed, we positioned the arms of the lift as in the photo below, stationed somone at each corner of the car and began to gingerly lift the body. We also used tie down straps to tie the body to the lift arms. There was an issue clearing the rear most body mounts on the frame. We had set the car down on dollies so it was easy to move the frame forward a bit for clearance.
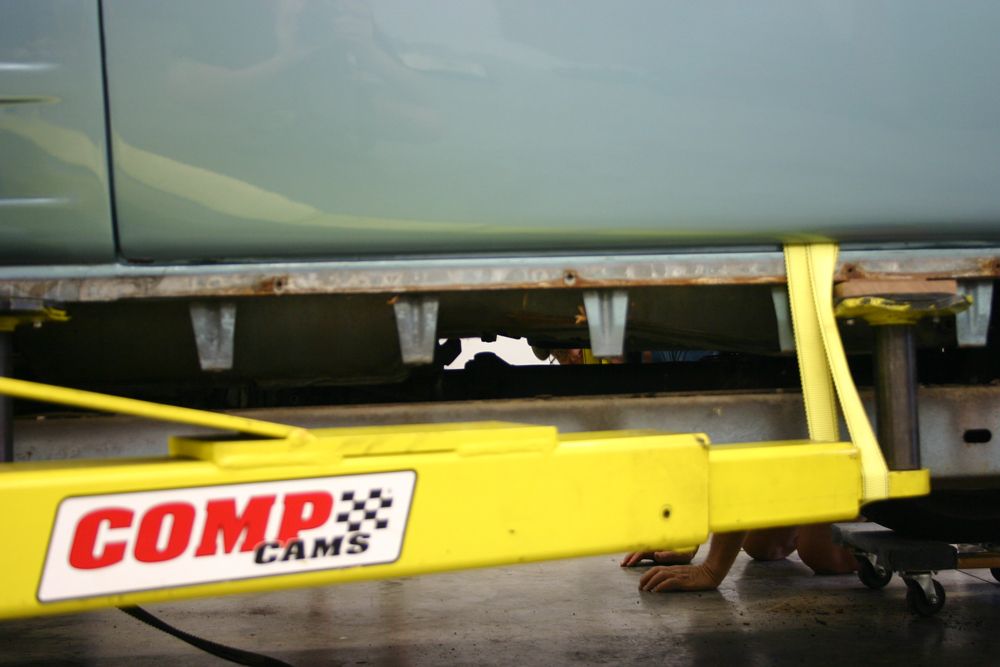
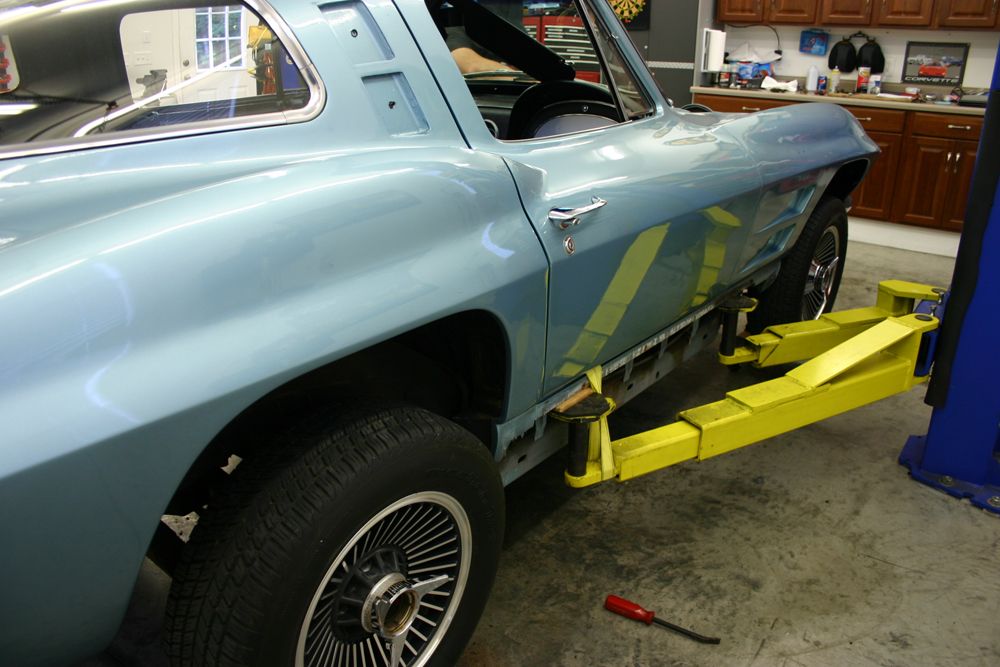

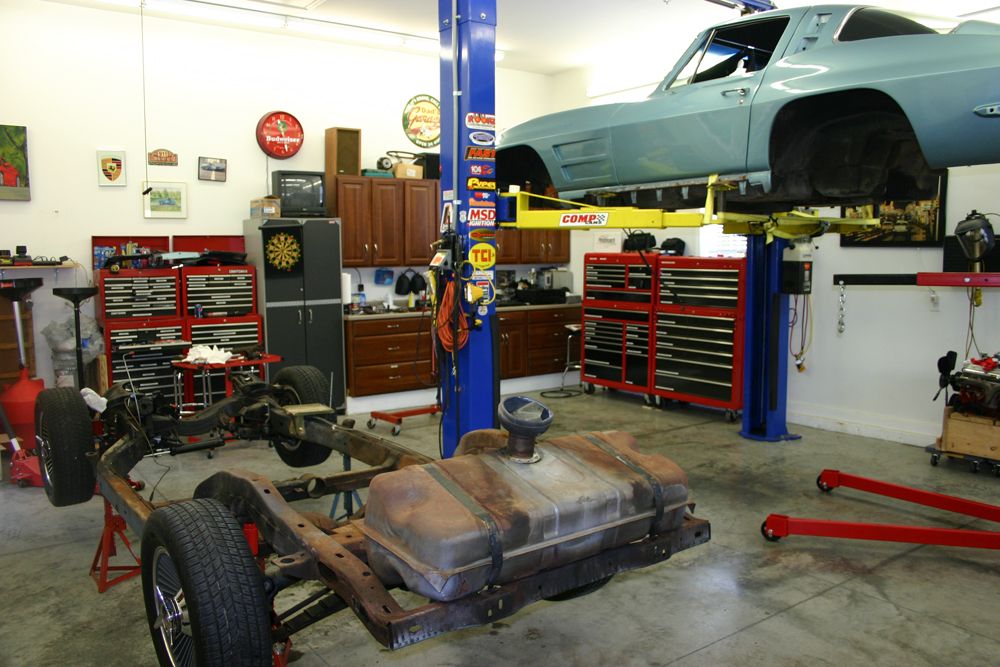
And, voila, the body was in the air with the frame on the floor.
I decided to add some pics of the body lift off to go with the video.
The bumpers and all of the bumper brackets must removed. At the rear, the wiring to the taillights and the fuel tank must be unhooked as well as a ground in the LR wheelwell. While theoretically you do not have to remove the exhaust, once it is out of the way, removing the rear bumper mounts and the tailight wiring is much easier. The antenna must go as well.
In the engine bay, as you would expect, there are a number of items to unhook. The clutch arm at the first junction after the firewall. The brake lines to the master cylinder. The rag joint on the steering column. To be able to pull the steering column away from the rag joint, the brackets under the dash must be loosened. They do not have to be removed. You also have to unhook the accelerator rod just behind the carburetor. The fuel line must be unhooked at the fuel pump.
The hood must be removed so you can remove the radiator. All of the radiator and heater hoses have to be unhooked. The tachometer cable must be detached from the distributor. In that same area, the oil line for the oil pressure gauge and, if you have one, the wiring for the back up light must by unhooked. The wiring must also be removed at the alternator, the coil and the temperature sender on the front of the intake manifold. Once you have all of those lines unhooked, be sure they are placed at the firewall out of the way as the body is lifted.
Under the car, both the inner and outer splash shields must be removed. Unhook the speedometer cable at the transmission. The parking brake cable must be unhooked at the rear junction of the cables as well as from the clip attached to the floor. There are two ground strips at the exhaust where it goes through the two holes in the frame. Another ground strap is in the LF wheelwell at the rear by the body mount. All the wires must be removed from the battery and the starter.
Inside the car, the seat belts must be removed. I removed the seat as well to make access to the body mount bolts behind the seat easier to get to and to remove weight. The shifter and the t-handle must be removed but the boot can stay.
Now the body mount bolts can be removed. We put the car in the air with the frame still attached as it was much easier to get to the bolts. On my coupe, here are two at the radiator support, two just behind the front wheels, two behind the seats next to the center tunnel, two in the rear wheelwell area ahead of the wheel (have to remove a cover plate) and two at the very rear located at the very rear corners of the interior.
Once all of those had been removed, we positioned the arms of the lift as in the photo below, stationed somone at each corner of the car and began to gingerly lift the body. We also used tie down straps to tie the body to the lift arms. There was an issue clearing the rear most body mounts on the frame. We had set the car down on dollies so it was easy to move the frame forward a bit for clearance.
And, voila, the body was in the air with the frame on the floor.
Last edited by jerhofer; 08-13-2012 at 10:24 PM.


 07-01-2012, 08:28 PM
#17
Pro

Jerry,
Nice dissasembly photos, and a great video, thanks for the education. Can you tell me who the sand blaster/powder coat guy is in Statesville?I have some work I need done also.
The paint on your car is awesome, sorry you had this experience. Who did the original paint job, I am considering repainting my 65, it currently has the 50' look.
Thank you,
George
07-01-2012, 08:49 PM
#18
Burning Brakes
Thread Starter
Jerry,
Nice dissasembly photos, and a great video, thanks for the education. Can you tell me who the sand blaster/powder coat guy is in Statesville?I have some work I need done also.
The paint on your car is awesome, sorry you had this experience. Who did the original paint job, I am considering repainting my 65, it currently has the 50' look.
Thank you,
George
Nice dissasembly photos, and a great video, thanks for the education. Can you tell me who the sand blaster/powder coat guy is in Statesville?I have some work I need done also.
The paint on your car is awesome, sorry you had this experience. Who did the original paint job, I am considering repainting my 65, it currently has the 50' look.
Thank you,
George
Statesville N.C. 28625 (704) 878-2912. I understand they do a lot of work for NASCAR teams in the area.
My paint looks better in the video than in person. It is not bad but not perfect. The guy painting my car also painted the '77 Camaro that I sold just before getting the Vette. I had many compliments on that paint job and it was black which is tough to make look good.
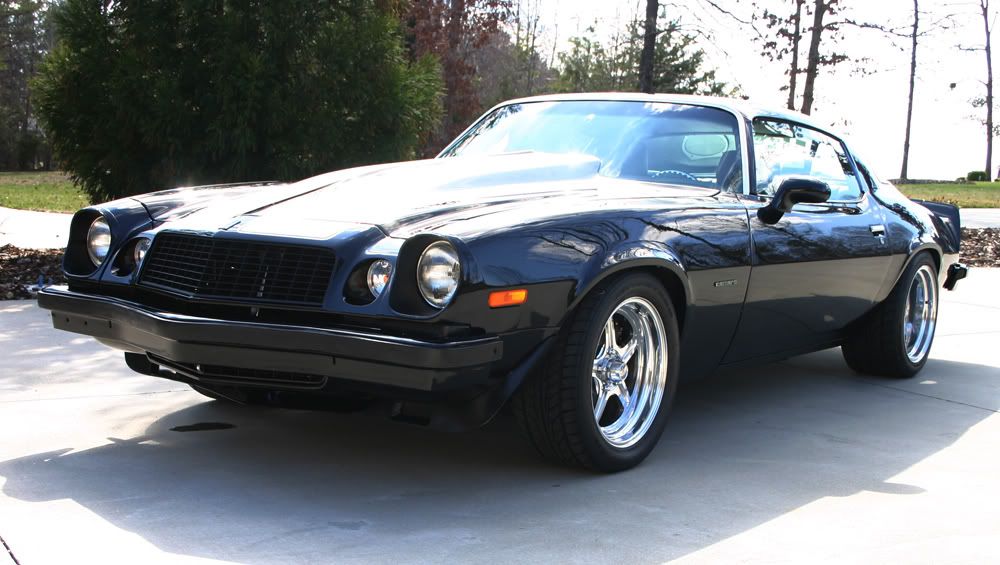
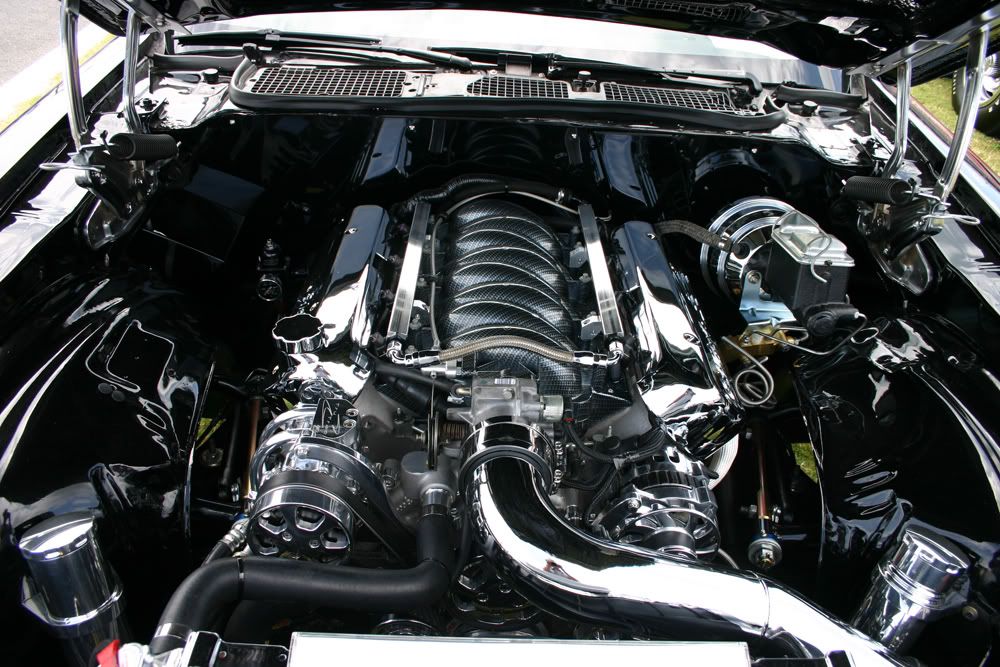
Last summer I installed a LS1 motor in that Camaro and it is really tempting to do that in the Corvette. Still thinking about that.
www.jerryforthofer.wordpress.com
Last edited by jerhofer; 08-13-2012 at 10:25 PM.
07-01-2012, 10:13 PM
#19
Pro
Jerry,
Hi again, thanks for the quick reply, I will contact Diversified about the sandblasting & powder coating. Wow I think the Corvette paint looked awesome, seemed to have a great shine and depth to it, can't wait to see photos of the Clear Coat job. Or maybe see the car live in person, I haven't done much the last year, but am going to start hitting the cruise nights and car shows again.
By the way your Camaro is awesome, both the LS1 and the Black paint.
Thanks again,
George
07-02-2012, 08:27 PM
#20
Burning Brakes
Thread Starter
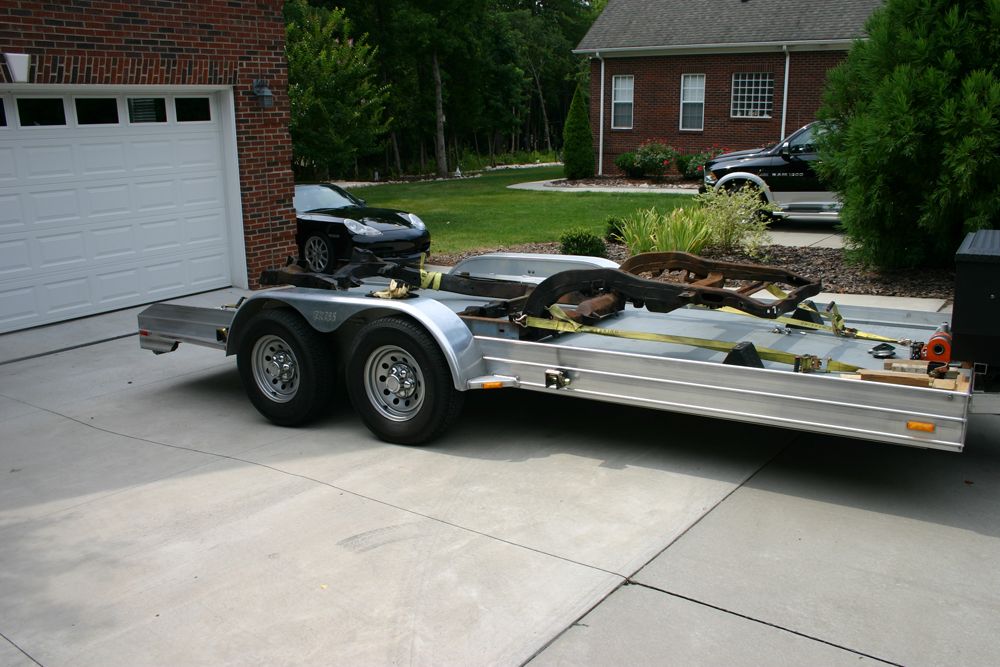
My buddy Reese and I took the frame to the sandblasters today. He will have it ready to pick up early next week. We will haul it back, do the repairs and then haul it back along with the other miscellaneous parts to have everything powdercoated. I also took the rear end to the retired fellow in Harrisburg, NC for a look see. He used to build transmissions and rear ends for Richard Petty racing. I also have decided to stick with the stock motor. Don't want to complicate things anymore.
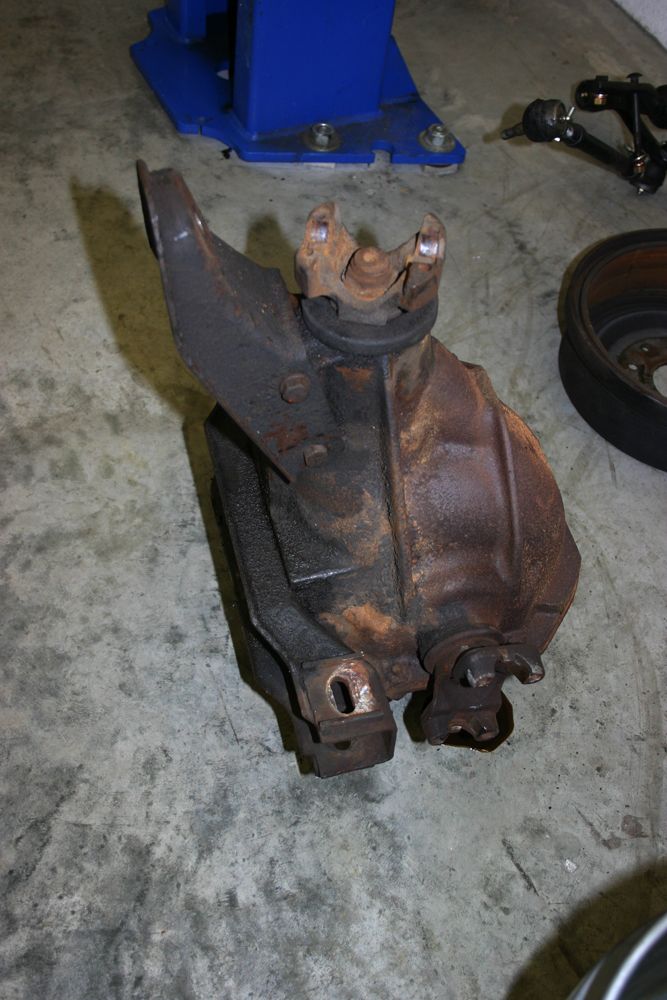
www.jerryforthofer.wordpress.com
www.jerryforthofer.wordpress.com
Last edited by jerhofer; 08-13-2012 at 10:26 PM.