1965 restoration
 12-02-2012, 10:48 PM
#41
Drifting


Member Since: May 2006
Location: Santa Barbara California
Posts: 1,842
Received 139 Likes
on
83 Posts

Steve, I wish I lived closer to you. I would be happy to come over and help you bring your garage up to more code compliant status. You deserve a lot of credit for your endeavor but you are sitting on a potential fire-trap. You have already had input from several other participants on this thread.
Basic and visible observations are: No firebreak between floors (cover that ceiling with 5/8" type X sheetrock and fire tape all seams, mud all screw and/or nail penetrations, contain your exposed romex in a fireprotected niche or within the wall containing the subpanel (make sure to use a fireblock within 12" of the top of the panel if you opt to run the wires straight up in the same wall containing the panel), raise that water heater off the floor to achieve 18" to the flame, make sure you have ventilation to the outside of the garage (many areas require a 4" concrete filled pipe used to protect an auto collision with the gas line feeding the gas water heater and furnace).
Basic and visible observations are: No firebreak between floors (cover that ceiling with 5/8" type X sheetrock and fire tape all seams, mud all screw and/or nail penetrations, contain your exposed romex in a fireprotected niche or within the wall containing the subpanel (make sure to use a fireblock within 12" of the top of the panel if you opt to run the wires straight up in the same wall containing the panel), raise that water heater off the floor to achieve 18" to the flame, make sure you have ventilation to the outside of the garage (many areas require a 4" concrete filled pipe used to protect an auto collision with the gas line feeding the gas water heater and furnace).
 12-03-2012, 09:51 AM
#42
Drifting
Thread Starter
Member Since: Jun 2010
Location: Ball Ground Georgia
Posts: 1,324
Likes: 0
Received 1 Like
on
1 Post
Thanks for all the "code compliance" concerns. They may be code violations where you live but they are not where I live. I am very careful and aware of how I am working. I have fire extinguishers in case something happens. My house has been inspected prior to move when we moved in mid-2007.
I don't use any solvents that emit vapors if the W/H or furnace is in use. If I do need heat I have a non-flame heater I use in the workspace.
Now, back to the restoration....
edit: 65fi sent you a PM...my response seemed terse when I re-read it later and that was not the intent. I get your point and comments, thanks for taking the time to point them out.
Last edited by steveale; 12-04-2012 at 02:25 PM.

 12-03-2012, 11:05 PM
#44
Drifting
Thread Starter
Member Since: Jun 2010
Location: Ball Ground Georgia
Posts: 1,324
Likes: 0
Received 1 Like
on
1 Post
keep grinding on...spent some time tonight "inverted" under the dash. 6'3" 250lbs makes nothing about working under the dash easy.
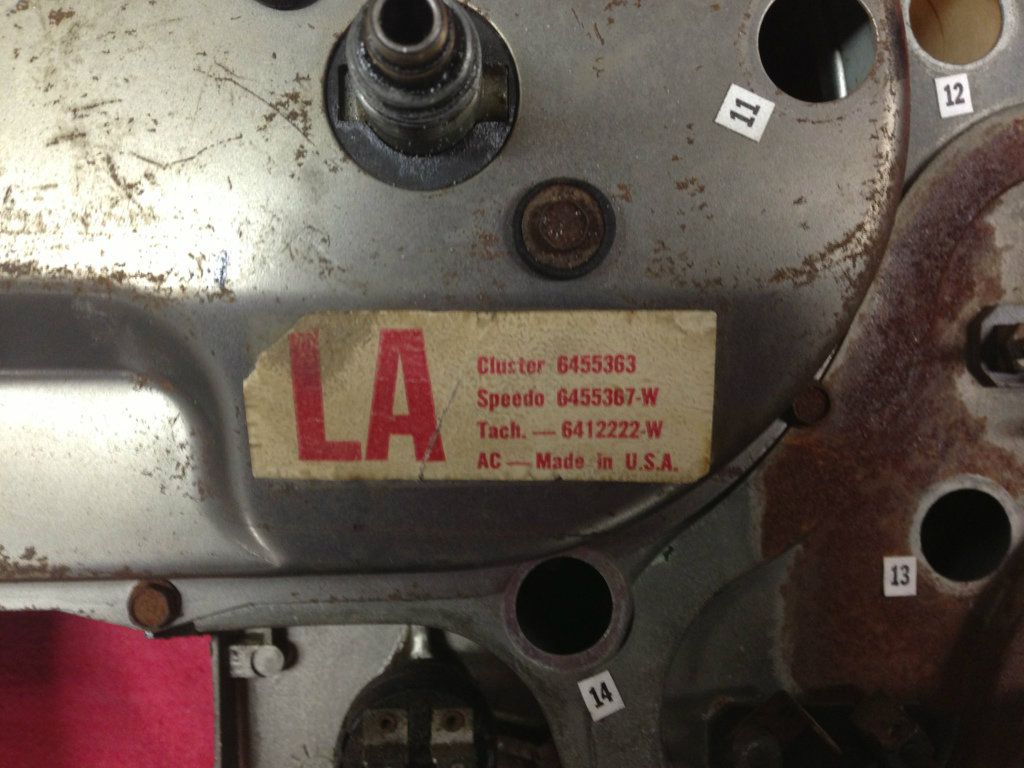
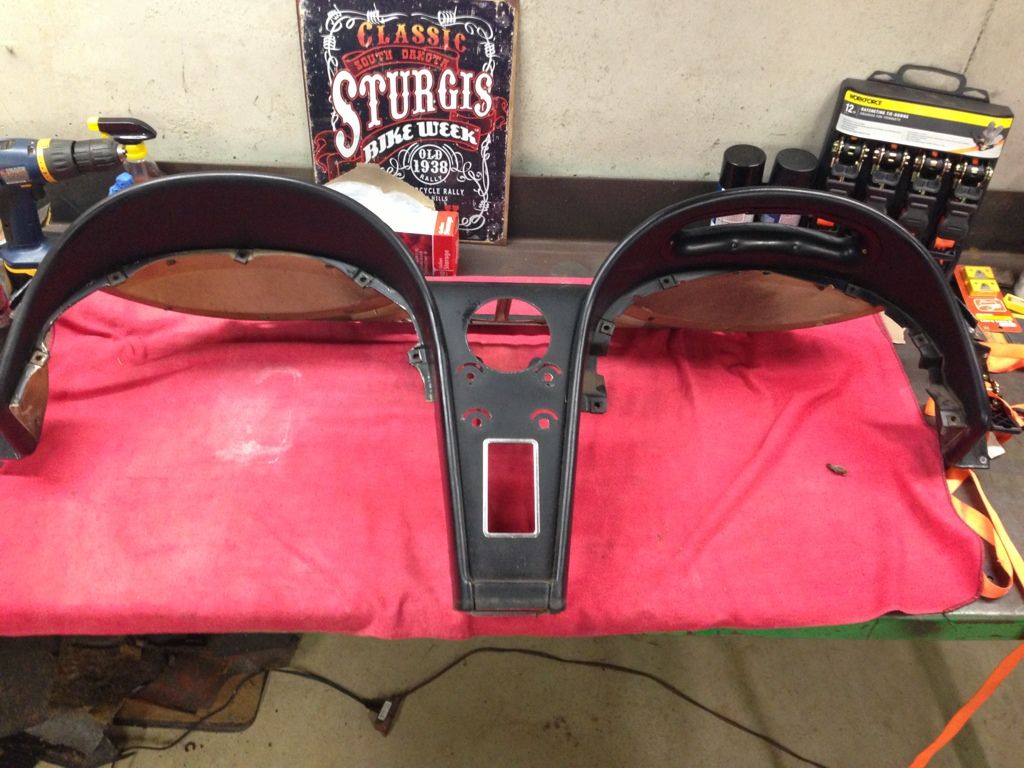
Got a pack of wire markers from the local home improvement warehouse for labeling the cluster, they seem to work pretty good...
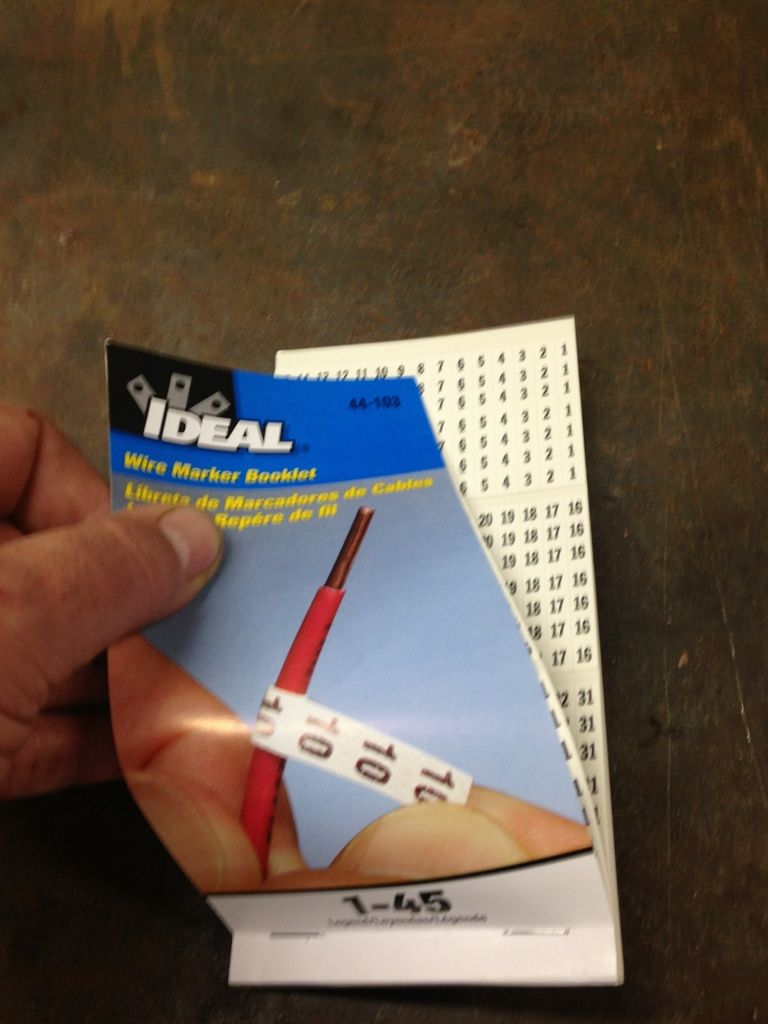
Before
After

Using the bolts made it fairly easy, had it out in about 1 hour. I did not have to take the ignition out. The way I read it, normally you would have to take out the ignition in order to release the "anti-theft" plug on the back of the switch. Mine just pulled right off so I may have to fix that.
Cluster will need a refresh
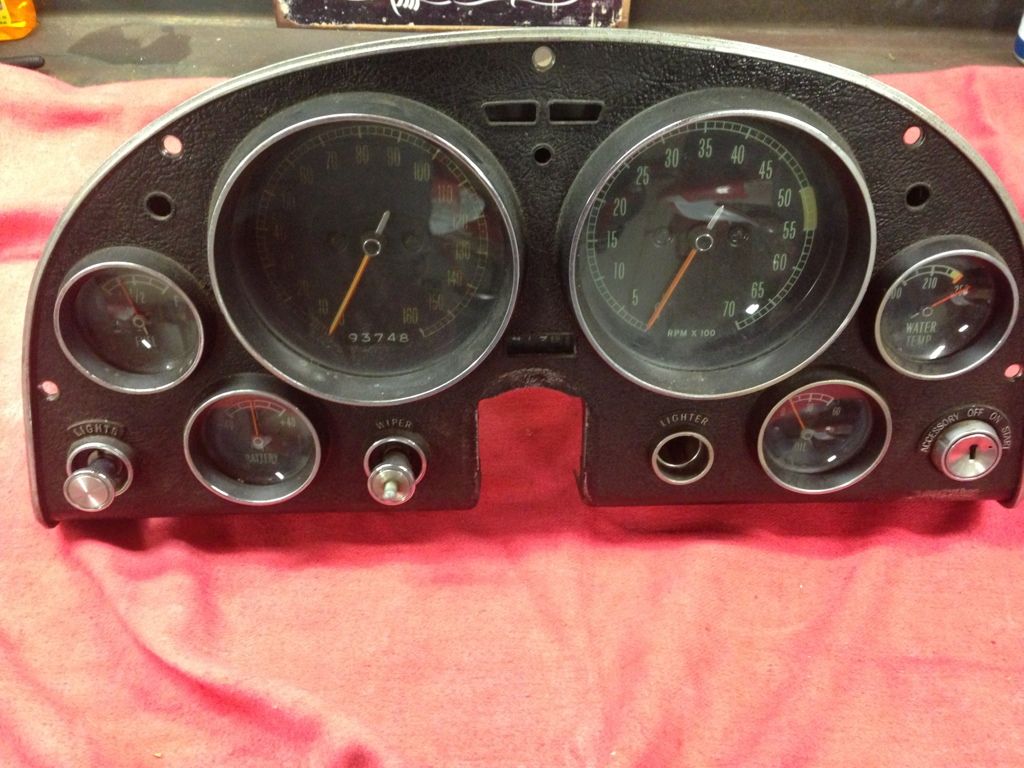
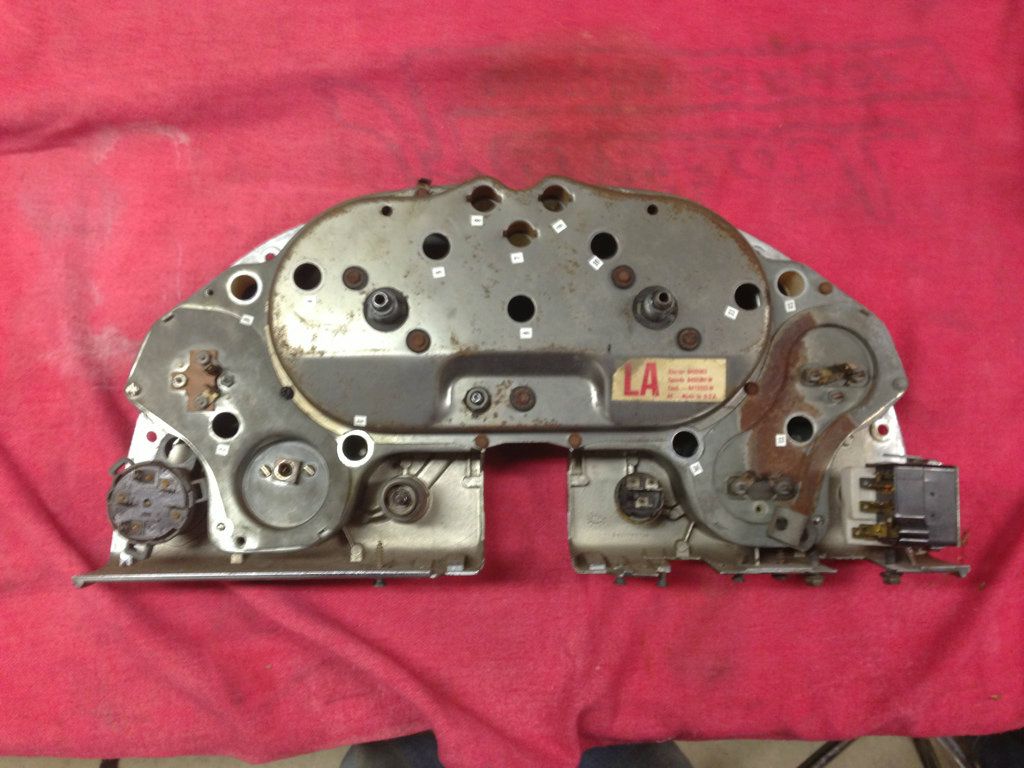
Assume this is correct for my 327/300HP car?
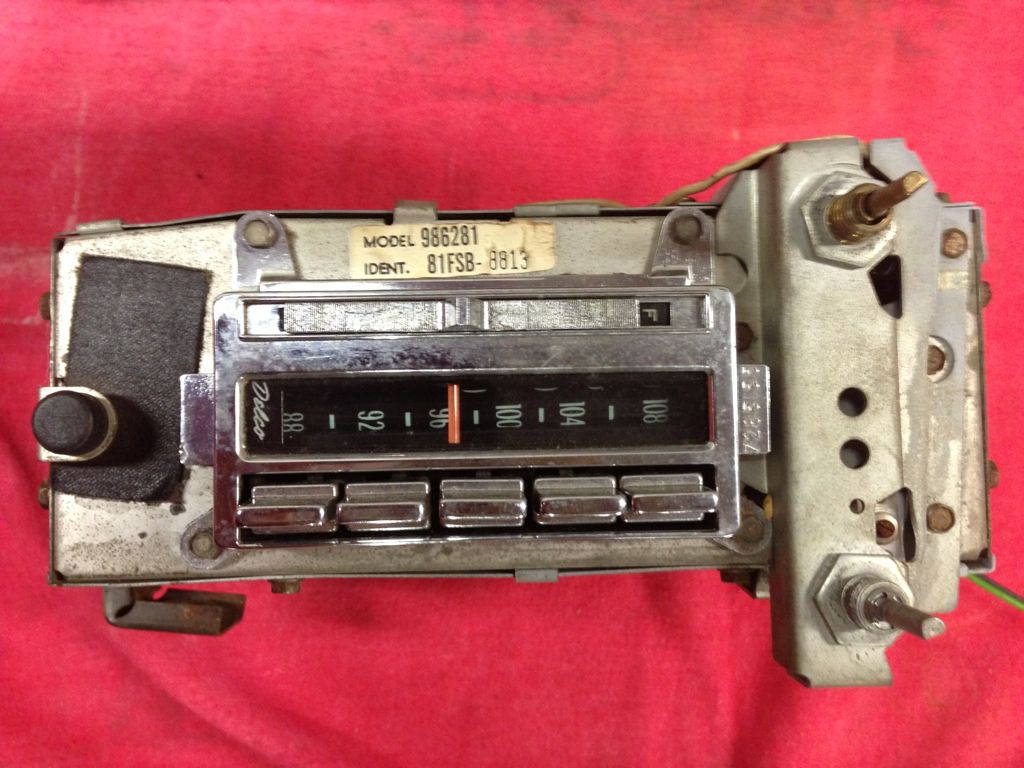
Also got the radio, speaker, grill and defrost duct out tonight. Radio had been rebuilt by a company out of Boston. Has a # written on it, I should call them and see if they still have a record of the work.
Next will be remainder of dash, heater assemblies, and various other interior items.
BTW, can't find how to remove the clock in the service manual or supplemental...is it documented in there?
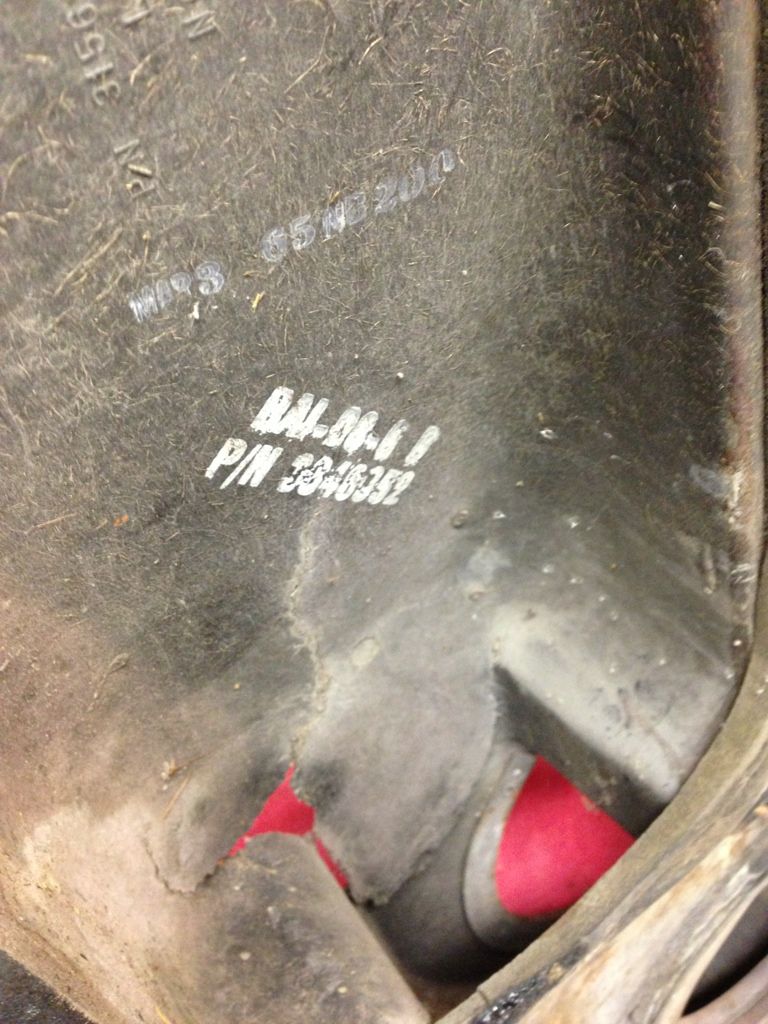
Also, I believe this to be the original jack and lug...do they have a stamp identification to confirm?

Got a pack of wire markers from the local home improvement warehouse for labeling the cluster, they seem to work pretty good...
Before
After
Using the bolts made it fairly easy, had it out in about 1 hour. I did not have to take the ignition out. The way I read it, normally you would have to take out the ignition in order to release the "anti-theft" plug on the back of the switch. Mine just pulled right off so I may have to fix that.
Cluster will need a refresh
Assume this is correct for my 327/300HP car?
Also got the radio, speaker, grill and defrost duct out tonight. Radio had been rebuilt by a company out of Boston. Has a # written on it, I should call them and see if they still have a record of the work.
Next will be remainder of dash, heater assemblies, and various other interior items.
BTW, can't find how to remove the clock in the service manual or supplemental...is it documented in there?
Also, I believe this to be the original jack and lug...do they have a stamp identification to confirm?
12-03-2012, 11:23 PM
#45


It looks like you are making some real progress. I see the welder and the generator. I'm not sure about the I-beam thing. You have a wide garage and I don't consider your ceiling low. Mine is 7', that's low. Why not get an engine hoist and tilter? I'll bet it would cost less then an I-beam and you will surely have a greater ability to move everythings around. You might want to stick to basic needs such as a good sturdy 8 foot workbench, plus-up the lighting and after the project is done, do the floor and all the nice cabinets etc.  Dennis
DennisI then took 1 Inch threaded rod and bolted it to the 4x4 (nuts on both sides of the 4x4s. I then tack welded the threaded rod to the top of the H beam. Removed the 4x4's and welded the rods securely to the top of the beam.
Tossed the 4x4s into the attic. Then took the electric winch and secured it high up in the attic. lowered the cable, wrapped it around the beam. Then lifted the beam. My garage ceiling was finished so I slowly brought the threaded rod up snug to the ceiling then ran the winch so that it punched right through the finished ceiling all along the 30 feet. So about 15 steel threaded rods popped up into the attic.
Lowered the 4x4s over the threaded rods. Then used huge washers and bolted it snug. I was able to lift 454s with ease and it was perfect for lifting out engines and moving them the length of the garage. Later if you decide to finish the ceiling just do the reverse and lower the beam do the ceiling and rehoist.
Lowering the engine onto a mobile stand was easy. I loved the Beam idea because it removes so much crap that sits on the floor not used for long periods of time. Just my opinion.
Lighting
Another suggestion. Stay with the fluorescents but change their direction so they fit in between the trusses. Take two 2x4s and nail them to the top of the trusses. then nail a piece of drwall to the 2x4s then screw your fluorescents to the drywall/2x4s. This will allow you to finish your cieling later if that's what you intend to do and the drywall is already up so the fixtures do not have to move. If you make it so the florescent are even with the finished drywall then later you just throw a 2x4 lens over them.
Floor
Tough call, has to be empty for a few days lol
If garage cleared.
Install an air hose real in the attic. no more hooking a hose on the farkin car lol
Also install an "electrical extension real" smartest thing I ever did. A wall socket always is 4 inches to far away and the extensions on the ground get covered in oil or whatever.
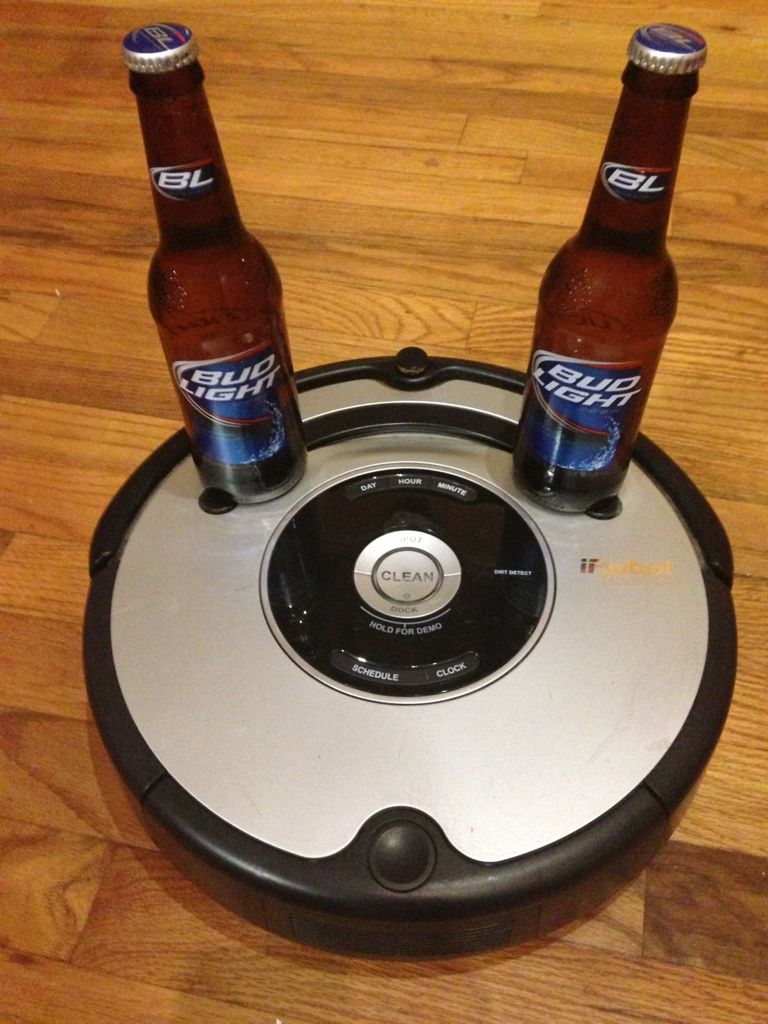
Lastly install a small beer fridge that sits on one of those robotic carpet sweepers. That way it will drop by every hour lol
Last edited by TC233; 12-03-2012 at 11:36 PM.
12-04-2012, 10:49 AM
#46
Race Director

Now there is a great tip I haven't seen before:
"Lastly install a small beer fridge that sits on one of those robotic carpet sweepers. That way it will drop by every hour."
 Rick
Rick
"Lastly install a small beer fridge that sits on one of those robotic carpet sweepers. That way it will drop by every hour."
Rick
12-04-2012, 11:16 AM
#47
Le Mans Master


The label on your gauge cluster is correct for a 300 HP car and the jack is correct as well.
Jim
I'm curious what your VIN is because you have a Type 1 jack that most "think" was only used on very early cars but mine has one as well and it was built April 65 and I know for a fact it is the original.
Jim
I'm curious what your VIN is because you have a Type 1 jack that most "think" was only used on very early cars but mine has one as well and it was built April 65 and I know for a fact it is the original.
Last edited by 1snake; 12-04-2012 at 11:20 AM.
12-04-2012, 12:36 PM
#48
Melting Slicks

 12-04-2012, 01:09 PM
#49
Melting Slicks
Member Since: May 2002
Location: Ontario Canada Ontario Canada
Posts: 2,468
Received 81 Likes
on
45 Posts

You need goof-off (I used it on my past carsworks great) not goo gone
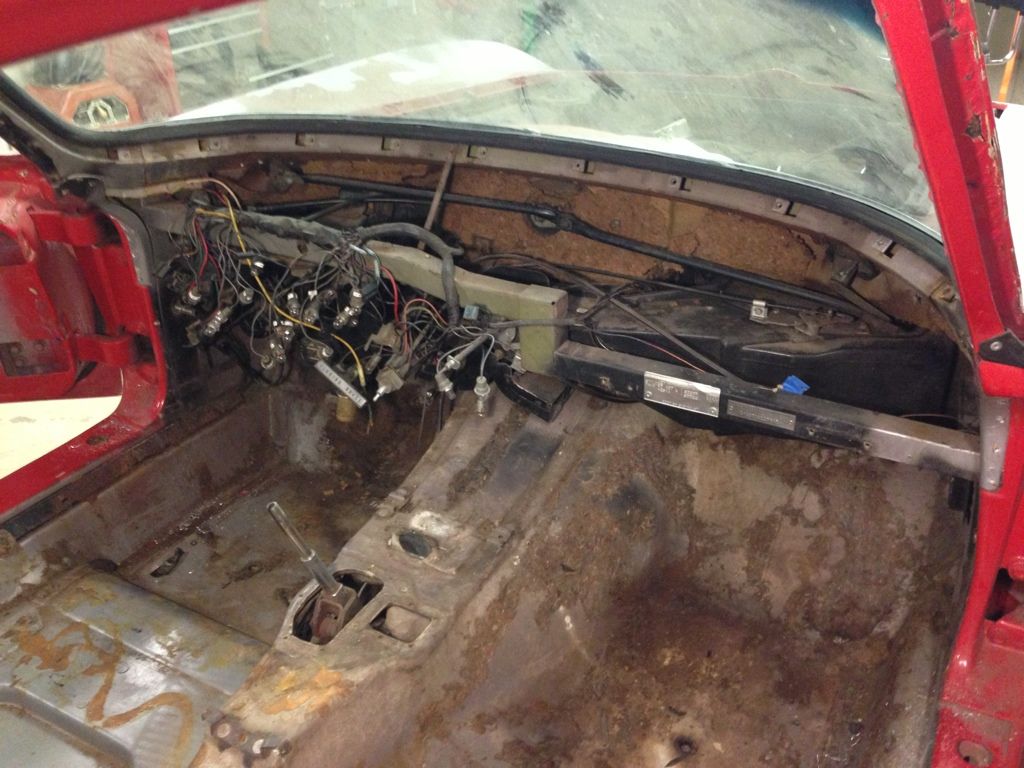
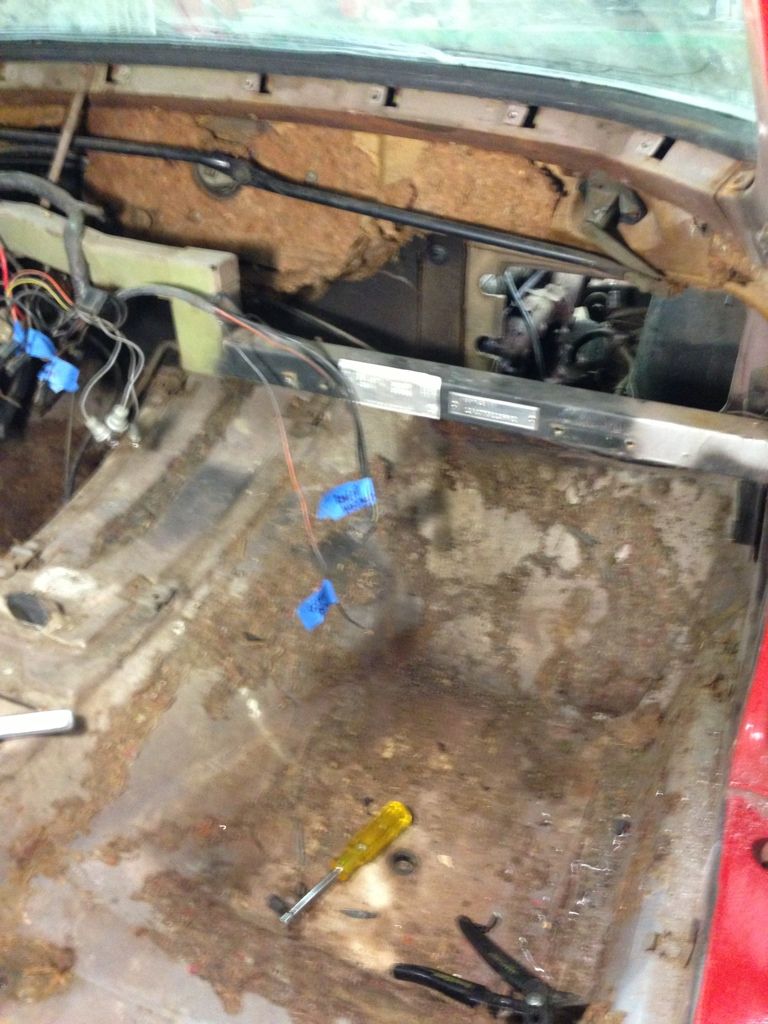
gutting interior, only dash/cluster and rear vent motor left. Steering column is also removed now.
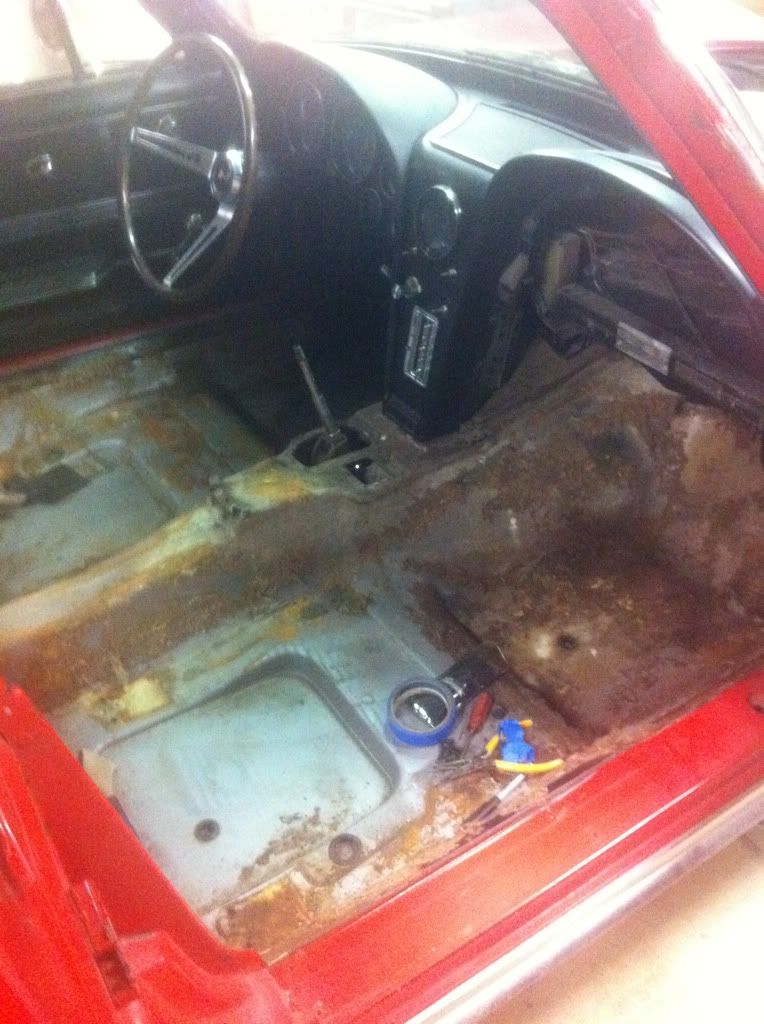
Jute removal is a PITA...found that razor blade seemed to work best on flat areas. Goo gone gel does not seem to be doing anything to the glue residue. Looks like sanding will be the solution.
Jute removal is a PITA...found that razor blade seemed to work best on flat areas. Goo gone gel does not seem to be doing anything to the glue residue. Looks like sanding will be the solution.
Last edited by wilbur; 12-04-2012 at 01:13 PM.
12-04-2012, 01:37 PM
#50
Le Mans Master
I used a wire brush to remove all the threads from the jute padding and then used a razor blade to scrape the dried, brittle glue up. I tried Goof Off but that just made a gooey mess and the fumes are very toxic. Either way, it's not a fun job.
Jim
Jim
12-04-2012, 02:16 PM
#51
Drifting
Thread Starter
Member Since: Jun 2010
Location: Ball Ground Georgia
Posts: 1,324
Likes: 0
Received 1 Like
on
1 Post
The label on your gauge cluster is correct for a 300 HP car and the jack is correct as well.
Jim
I'm curious what your VIN is because you have a Type 1 jack that most "think" was only used on very early cars but mine has one as well and it was built April 65 and I know for a fact it is the original.
Jim
I'm curious what your VIN is because you have a Type 1 jack that most "think" was only used on very early cars but mine has one as well and it was built April 65 and I know for a fact it is the original.
Jim,
118642 approx b'day is May 29 according to the c2 registry. I have a bunch of date stamps on various parts but I don't have them loaded on my photobucket page. I think a lot of the stamps were april/may. Anyways it sounds like the cars are similar production timing. Will verify those stamps tonight.
Did you see my question on the clock? How to remove, I can't find in the service manual. It looks like there are 2 spring type clips...I was tired and said "enough" last night...hoping for an answer before I get home tonight to start working on removing the rest of the dash.
thanks for the help.
steve
12-04-2012, 02:26 PM
#52
Le Mans Master
Jim,
118642 approx b'day is May 29 according to the c2 registry. I have a bunch of date stamps on various parts but I don't have them loaded on my photobucket page. I think a lot of the stamps were april/may. Anyways it sounds like the cars are similar production timing. Will verify those stamps tonight.
Did you see my question on the clock? How to remove, I can't find in the service manual. It looks like there are 2 spring type clips...I was tired and said "enough" last night...hoping for an answer before I get home tonight to start working on removing the rest of the dash.
thanks for the help.
steve
The clock is held in by those two clips. Squeeze the ends together and pull towards you. They come right off.
Jim
12-04-2012, 07:11 PM
#53
Drifting
Thread Starter
Member Since: Jun 2010
Location: Ball Ground Georgia
Posts: 1,324
Likes: 0
Received 1 Like
on
1 Post
Jim,
I forgot until now that I had posted my dates in another thread. Here they are
Body May 27
Engine May 20
Tranny May 22
rear end May 19
Door panel May 27
All vin numbers matching...
Heading out to the shop...updates later.
steve
I forgot until now that I had posted my dates in another thread. Here they are
Body May 27
Engine May 20
Tranny May 22
rear end May 19
Door panel May 27
All vin numbers matching...
Heading out to the shop...updates later.
steve


 12-04-2012, 10:56 PM
#56
Drifting
Thread Starter
Member Since: Jun 2010
Location: Ball Ground Georgia
Posts: 1,324
Likes: 0
Received 1 Like
on
1 Post
Made a little more progress tonight. Got the clock out, it was embarrassingly easy...thanks Jim! Had some stubborn headliner trim screws, had to drill the head off one. Got the dash holding trim out, drilled out the rivets and drove a putty knife under the bond at the bottom base of the dash and it popped right out!
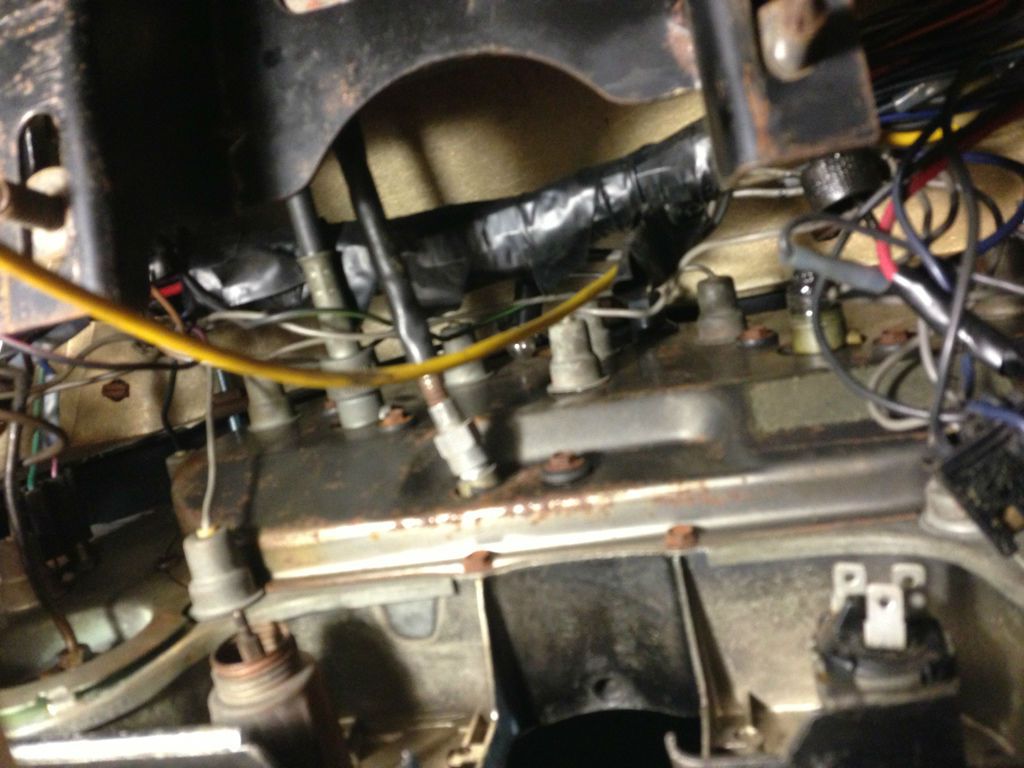
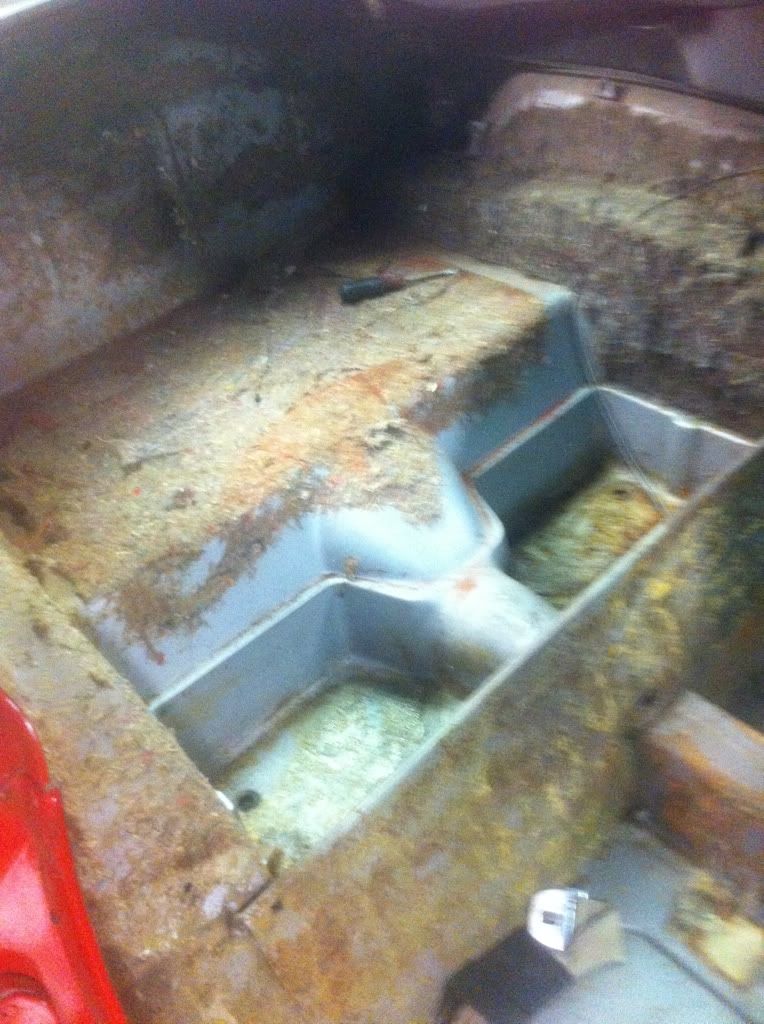
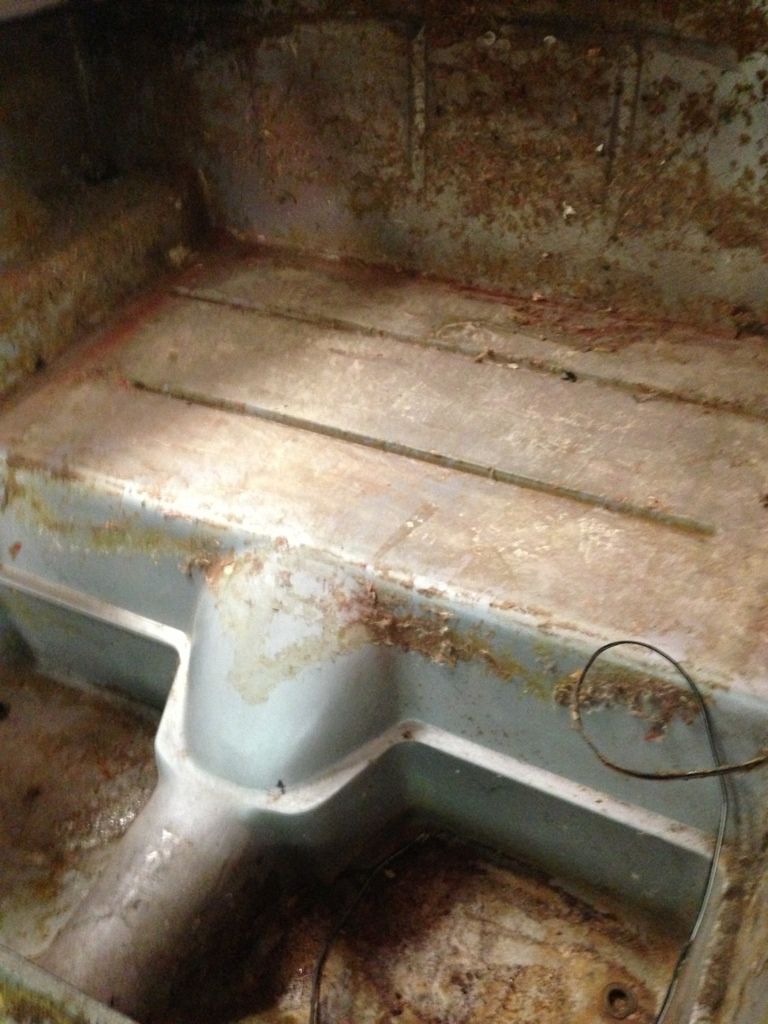
Started getting ready to remove the heater duct work. Had the blower motor already out. Removed the firewall housing and as you see, it appears that someone damaged it at some point...probably during a battery installation. Will have to fix it.
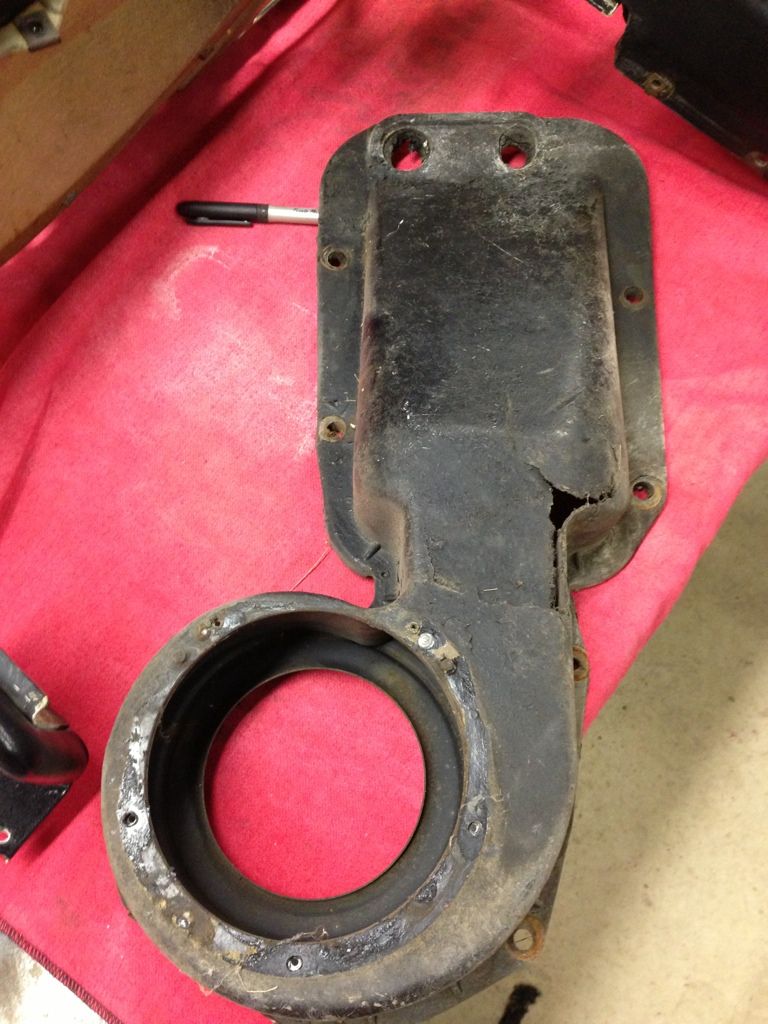
Tomorrow night hope to get the duct work removed, heater core, vent controls and vents...possibly some of the pedal assembly and parking brake lever, etc Probably a couple of more nights before I have the interior gutted...still have to do the glue removal...ugh.
Started getting ready to remove the heater duct work. Had the blower motor already out. Removed the firewall housing and as you see, it appears that someone damaged it at some point...probably during a battery installation. Will have to fix it.
Tomorrow night hope to get the duct work removed, heater core, vent controls and vents...possibly some of the pedal assembly and parking brake lever, etc Probably a couple of more nights before I have the interior gutted...still have to do the glue removal...ugh.
12-05-2012, 09:23 PM
#57
Drifting
Thread Starter
Member Since: Jun 2010
Location: Ball Ground Georgia
Posts: 1,324
Likes: 0
Received 1 Like
on
1 Post
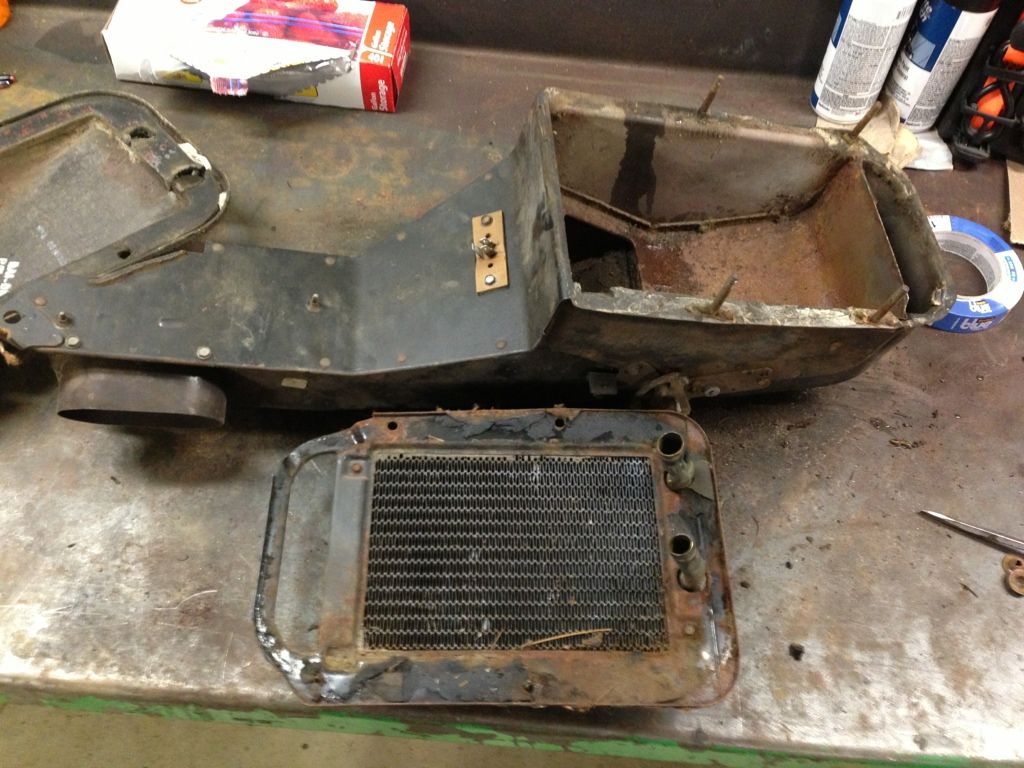
Got the heater assembly out, also the passenger vent and flap, hood latch and master cylinder. Was ready to take the pedal assembly out when my daughter asked me to run her up to the local hooters. I was like "WHAT?" She laughed and said the radio station was giving away Justin Bieber tickets. LOL the thing we do for our kids. Win for her and a win for old dad too ;-)
12-05-2012, 09:41 PM
#58
Le Mans Master
LICS sells a heater box rebuild kit that comes with all the seals, flapper door gaskets and rivets. They also sell the rivet set tools. The only way to clean up and seal the box is to take it completely apart. You'll be glad you did. They also sell the outer cover in case you don't want to fix you broken one.
Jim
Jim
12-05-2012, 11:47 PM
#59
Drifting
Thread Starter
Member Since: Jun 2010
Location: Ball Ground Georgia
Posts: 1,324
Likes: 0
Received 1 Like
on
1 Post
Thanks for the tip Jim...I checked out their website a while back and was impressed with their approach...almost a parts manual type approach, makes it easy to locate what you want.
Side note, daughter didn't win the Bieber tickets, but we got back by 10pm so I got another 1.5 hours of work in. Got the wiper motor out, arm assemblies. Also got the brake/clutch assembly out. Only thing left in the interior is the parking brake, driver vent and wiring if I pull it out. Then getting the jute/glue out and ready for the body lift.
I am thinking about just pulling out all the wiring assemblies as well. I am seeing more butt and "y" splices than seem like their should be. Looks like the deluxe harness sets are up over $1k now. Ugh. But probably worth the investment.
With the wiring assemblies out of the way, scraping, sanding and painting should be a whole lot easier.
thoughts?
12-06-2012, 08:56 PM
#60
Le Mans Master
Yes, replace the wiring harnesses. Mine shorted out on the '65 one time. The interior filled with smoke within a minute, no joking, that fast. No fire started, but I couldn't see or breathe too well. I was on a back road and going pretty slow when it happened. Would have been much worse on the interstate. I think Doc. Rebuild carries large, color, laminated wiring diagrams to make it easy. I used the manual and it wasn't too hard with it either.