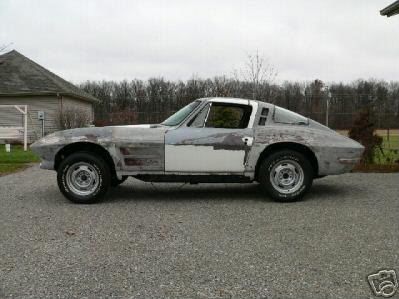
My 64 Coupe Coke Bottle look Restomod build
 11-27-2009, 10:21 AM
#21
Le Mans Master


Love this project so i have to read this thread again.
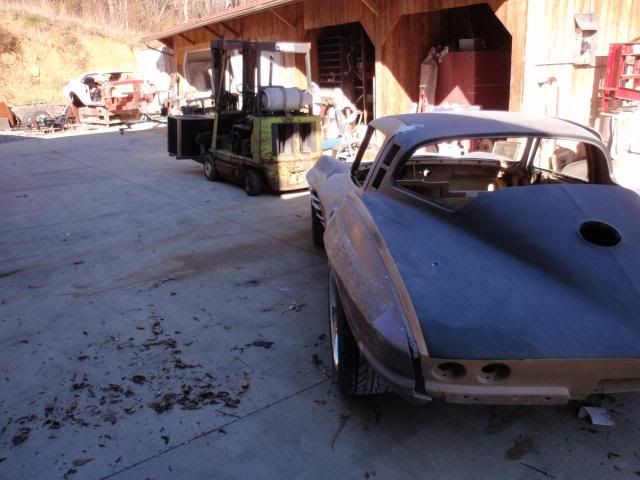
Are you going for 3 rear lamps on each side? I would keep the rear lamps original if it was my car
Are you going for 3 rear lamps on each side? I would keep the rear lamps original if it was my car
Last edited by TheSaint; 11-27-2009 at 10:39 AM.
 11-27-2009, 08:12 PM
#23
Melting Slicks

Thread Starter
Thanks, I appreciate that, along with all the other comments from members here.
Just hope final car meets approval of everyone.
Plan is for adding a third lamp on each side.
If you look at spacing of lamps, at least to me it looks like Chevy's original plan was for another tail lamp or backup lamp. If you add the third lamp and maintain the same spacing between all three, the center one is located about dead center of each rear bumper.
Factory built at least one 64 vette executive car with a third tail lamp installed.
Rear bumpers will not fit even if we can maintain rear quarter panels contour at original bonding strip location. Just no way to bring contour/shape of rear quarter panel back in soon enough to clear at outboard end of bumper.
They will have to be sectioned.
Just hope final car meets approval of everyone.
Are you going for 3 rear lamps on each side? I would keep the rear lamps original if it was my car
If you look at spacing of lamps, at least to me it looks like Chevy's original plan was for another tail lamp or backup lamp. If you add the third lamp and maintain the same spacing between all three, the center one is located about dead center of each rear bumper.
Factory built at least one 64 vette executive car with a third tail lamp installed.
Will the rear bumpers fit the after it have been widened?
They will have to be sectioned.
11-27-2009, 10:48 PM
#24
Melting Slicks
Thread Starter
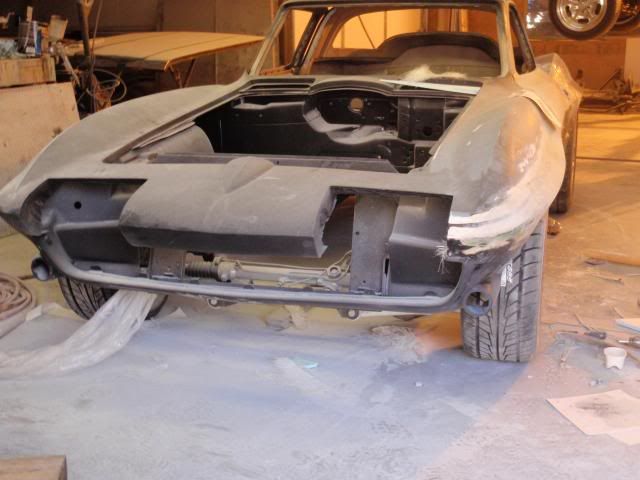
Shop made a little progress on the 64 even with short week.
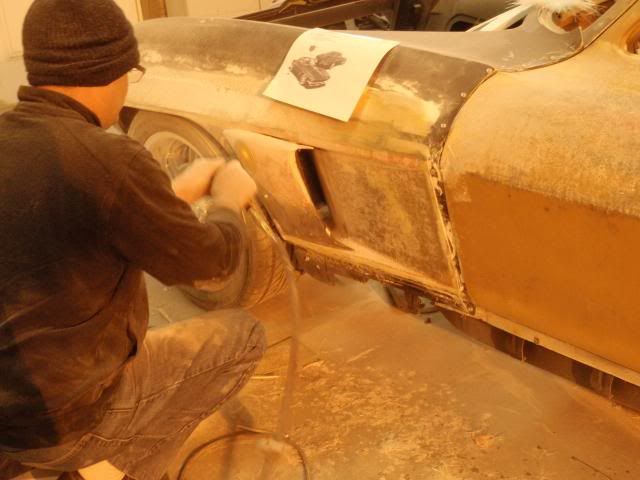
Main work this week was centered on stretching drivers side front fender and adding a functional vent in lower fender panel, to door, and to rear qtr panel to mid point of wheel well.
Plan for next week is to finish up vent area design, do a little contour change to front fender were it rounds around from front, and then move on to re-contouring rear portion of qtr panel.
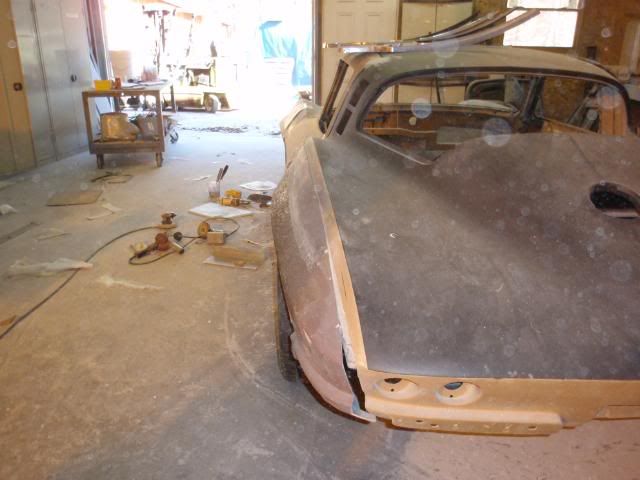
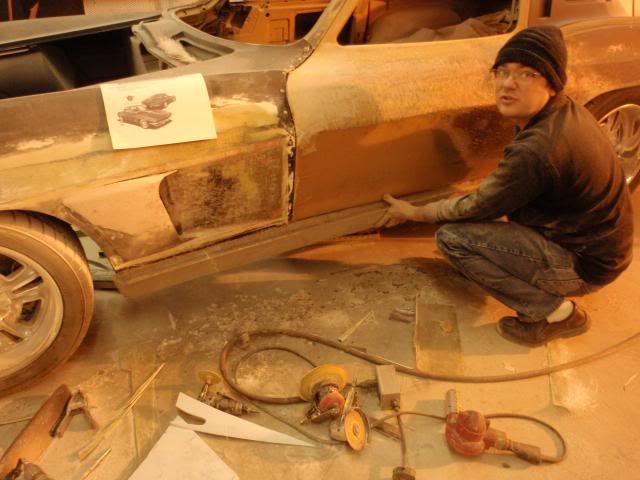
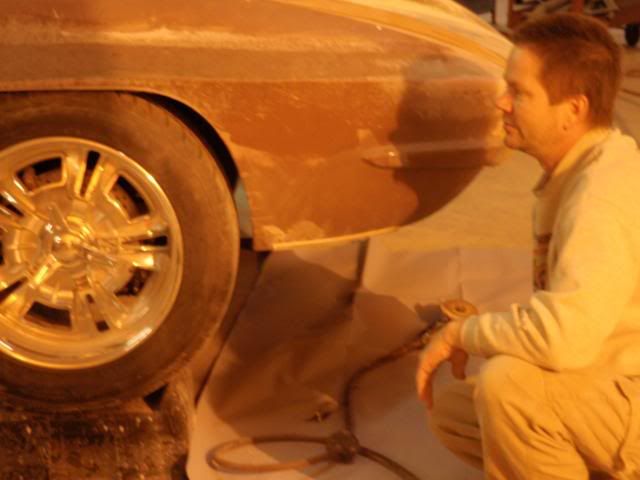
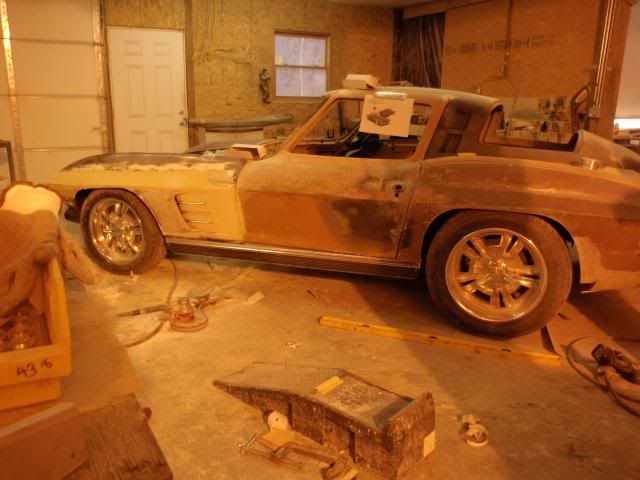
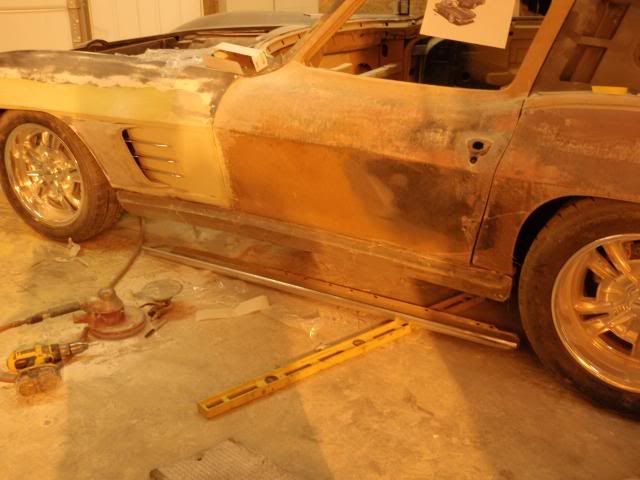
You can see the 3.75" block of wood that's holding rear qtr panel out wards to approximate amount of rear tire we are hope to be able to cover and still contour the quarter so that it's shape is same as stock were it bonds to rear taillight panel in last picture.
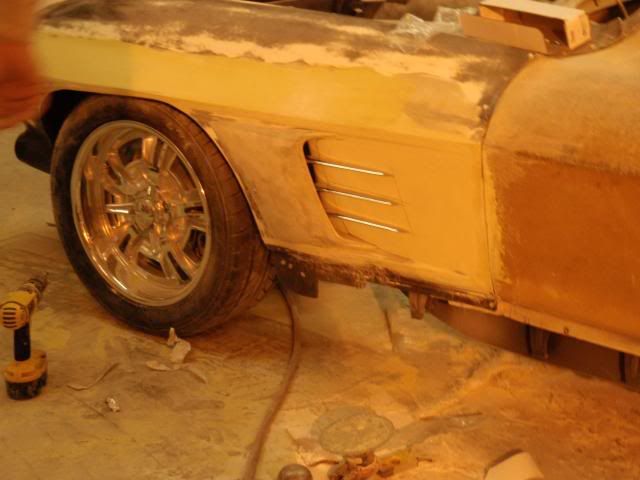
You can see the 2 dummy vents have been removed and replaced with functional one.
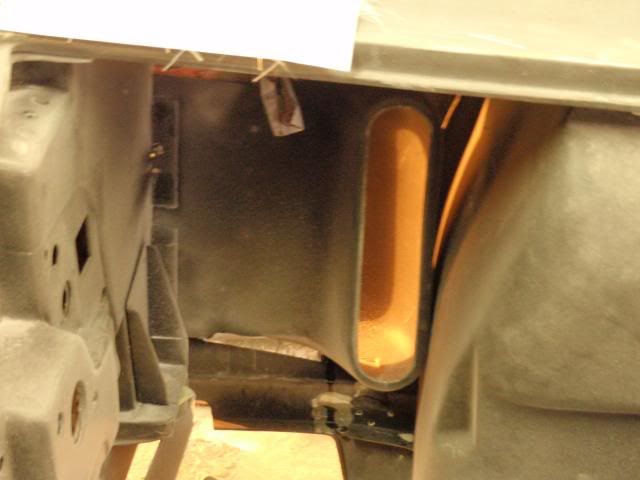
Picture from engine compartment of duct to feed vent. It also provides stabilization to panel to prevent it from flexing.
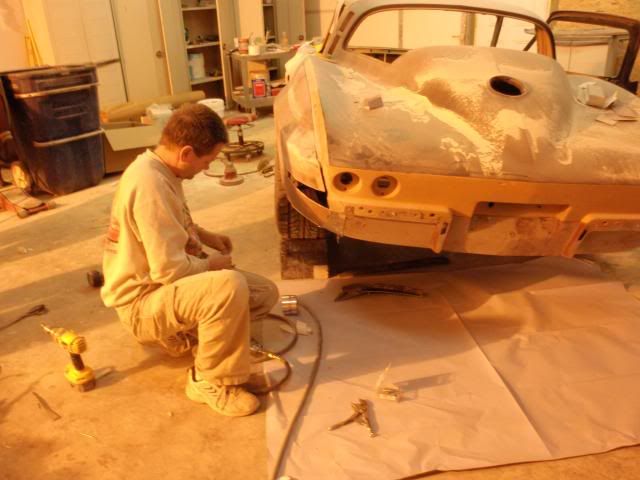
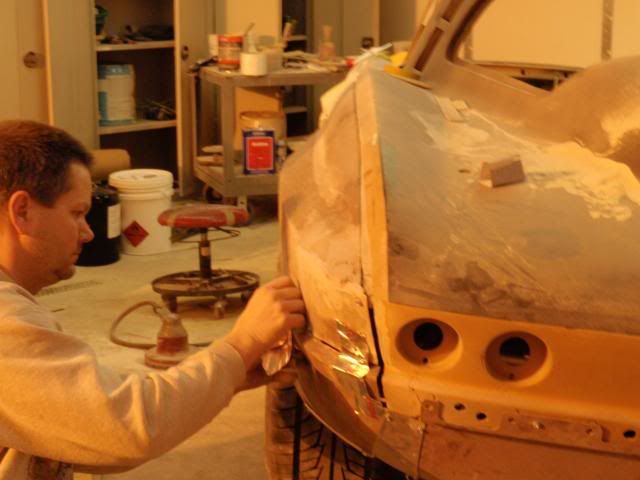
You can see, my old body man is shaping cap/cover for vent duct he made. Piece will be bonded/glassed on and faired in too fender.
Not quite the same as Z06's vent design shown in rendering, but about as close as we will be able to get.
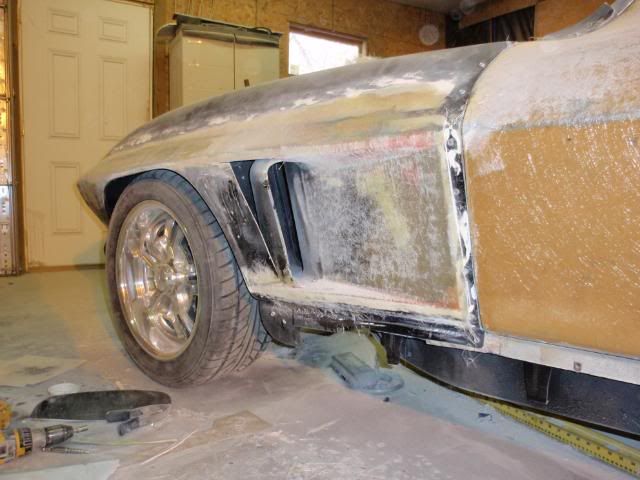
He found time to make a mold off original rocker panel and make a layup off it so I could see how replacement rocker panel might look. May add a piece of BLING for contrast to it were the raised fiberglass area/spear is.
He made some dummy spears out of Styrofoam and taped them on so we could get an idea of how they might look vs maybe using mesh screen to cover the vent opening. Final look for vent exit is still up in the air.
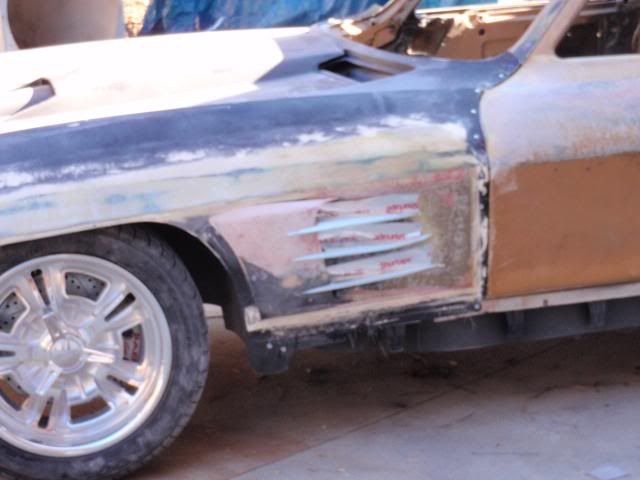

Looks like the Spears are just a little too fat. Going to have to call in Jenny Craig and get them on a diet. May have to down size venturi of vent exit to air to do that.
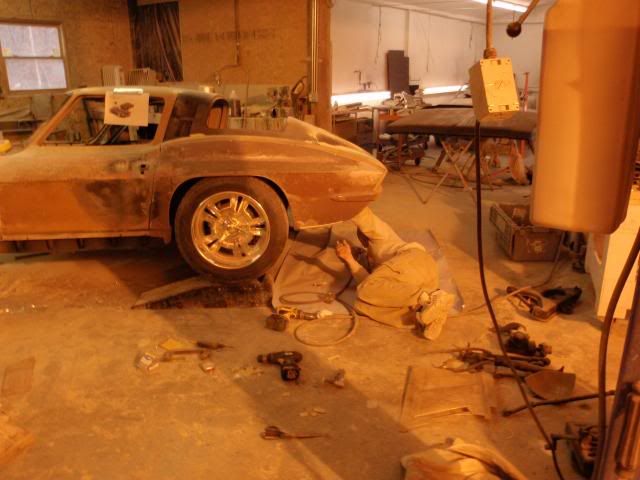
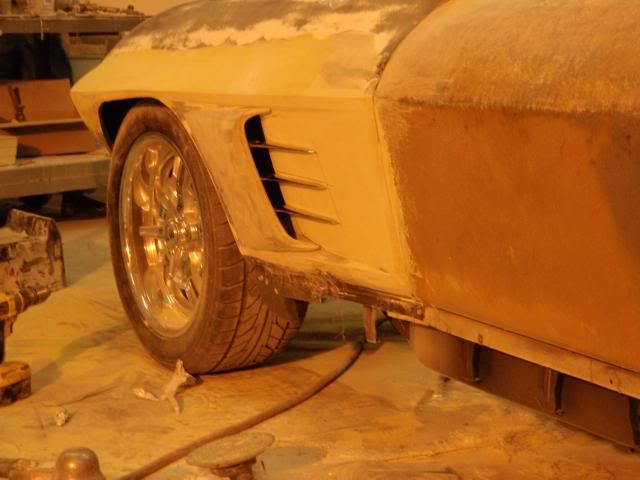
Picture of amount of tire we hope to be able to cover up (notice the 3"x4" block of wood ), yet still bring contour back to stock at rear in hopes of avoiding the rear end bubble look.
PS: I apologize if pictures are skewed your viewing. I can't tell on this end as I've been playing games and my screen resolution is set to play them. I fogot to reset it before downloading from and uploading them and to lazy to redo them if they are.:o
Main work this week was centered on stretching drivers side front fender and adding a functional vent in lower fender panel, to door, and to rear qtr panel to mid point of wheel well.
Plan for next week is to finish up vent area design, do a little contour change to front fender were it rounds around from front, and then move on to re-contouring rear portion of qtr panel.
You can see the 3.75" block of wood that's holding rear qtr panel out wards to approximate amount of rear tire we are hope to be able to cover and still contour the quarter so that it's shape is same as stock were it bonds to rear taillight panel in last picture.
You can see the 2 dummy vents have been removed and replaced with functional one.
Picture from engine compartment of duct to feed vent. It also provides stabilization to panel to prevent it from flexing.
You can see, my old body man is shaping cap/cover for vent duct he made. Piece will be bonded/glassed on and faired in too fender.
Not quite the same as Z06's vent design shown in rendering, but about as close as we will be able to get.
He found time to make a mold off original rocker panel and make a layup off it so I could see how replacement rocker panel might look. May add a piece of BLING for contrast to it were the raised fiberglass area/spear is.
He made some dummy spears out of Styrofoam and taped them on so we could get an idea of how they might look vs maybe using mesh screen to cover the vent opening. Final look for vent exit is still up in the air.
Looks like the Spears are just a little too fat. Going to have to call in Jenny Craig and get them on a diet. May have to down size venturi of vent exit to air to do that.
Picture of amount of tire we hope to be able to cover up (notice the 3"x4" block of wood
), yet still bring contour back to stock at rear in hopes of avoiding the rear end bubble look.PS: I apologize if pictures are skewed your viewing. I can't tell on this end as I've been playing games and my screen resolution is set to play them. I fogot to reset it before downloading from and uploading them and to lazy to redo them if they are.:o


 11-28-2009, 09:29 AM
#27
Le Mans Master
Love this project.
I think you have this great looking body on the car already so be a little careful so it wont be too much.
Only my personal opinion
To much can often be a little overdone.Less can be perfect. And i think you are close to perfect!
What about just go for the cut outs?
Have you any ideas of what colour you are going to go for?
Oh yeah i can picture me this car in Daytona Blue or black.Some colour that makes the widening of the car shine thru.
Last edited by TheSaint; 11-28-2009 at 10:19 AM.
11-28-2009, 01:24 PM
#28
Melting Slicks
Thread Starter
The exception to those changes are changes that I believe improve on them:
1. Trying to limit the amount of exposed tire at front of rear qtr panel's wheel well and sharp angle needed to bring a stretched fender's body-line contour back in to fair in with rear edge of door.
This required moving the outer edge of door out-wards minimum of 1/2" so qtr panel could cover more exposed tire an allow for contouring qtr panel into doors newly contoured look. This is something very few people would want to attempt. Maybe seeing how it was done, will encourage others to make their on improvements rather than go with the flow.
2. Trying to limit amount of exposed tire at rear of qtr panel's wheel well and still fair qtr's contour back to stock where qtr attaches to rear of car.
Right now about all I can tell you about doing this at this time, is the bonding strip panel just behind the wheel well will have to be stretched outward x.x".
Qtr panel will have to have a number of cuts made to it to relive stress to it so it can be re-contoured to blend back in without having to widen the rear end of car. This will be tough to pull off and get the tire coverage I want. Odds are the overall width of car at rear will be wider by minimum of 1.0 inch, are 1/2" per side. More than that and rear end starts to take on a bubble look when compared to stock.
What about just go for the cut outs?
Cutouts are what most people do to their 64's to try and get rid of the built in dummy vent look with addition of different means to add a little bling and stabilize cutouts to help with the 64's bland looks. Cutout with out some bling of some kind are still bland.
At this time, lets just say what I'm trying to do is make my 64 different, and stand out from others.
Basic look is there now. How I handle the adding of bling are going without bling or maybe a mesh screen cover for opening bling, is still a work in process.
Some may dislike what I've had done to date, others may like it, but even if it's ugly, it will make people notice, come over and look at car to see what other things to like are dislike about it...LOL

Have you any ideas of what colour you are going to go for?
Oh yeah i can picture me this car in Daytona Blue or black.Some colour that makes the widening of the car shine thru.
Oh yeah i can picture me this car in Daytona Blue or black.Some colour that makes the widening of the car shine thru.
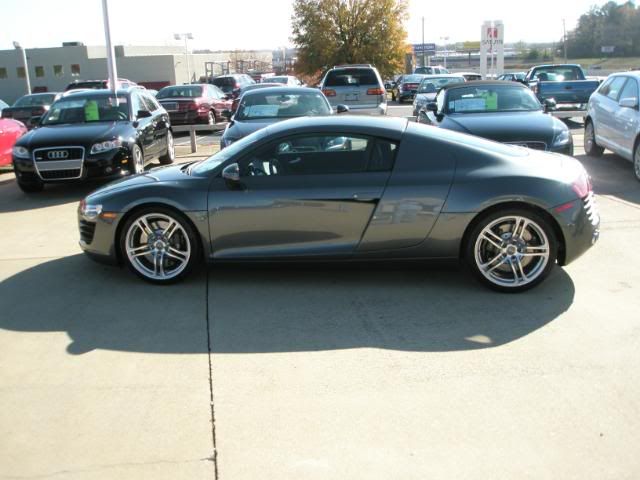
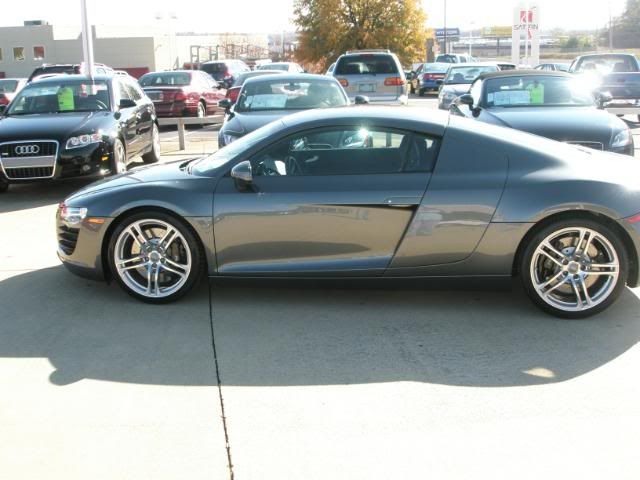
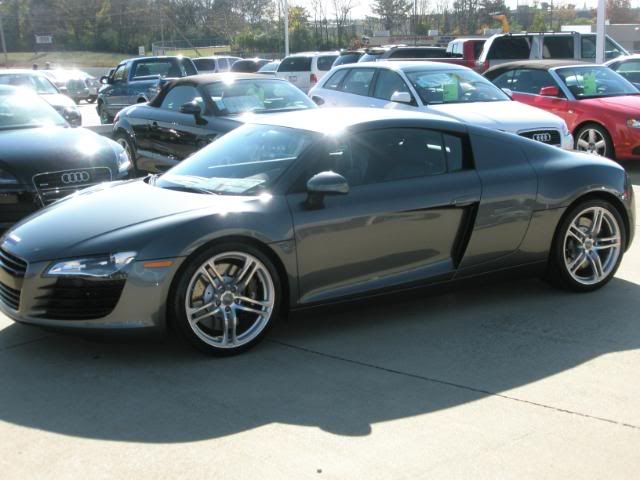
I want to paint it 2008 Audi R8 Daytona Gunmetal Pearlized as it's not a dark Gunmetal. I have not done the research to see if it's a 3 stage Tri-coat color. If it is, an I can't duplicate it to a 2 stage paint then I'll pick another Gunmetal that is 2 stage paint.
PS: I think the shop I'm working does not want a car to come out of their shop that does not look good to most, so they are working to keep me in check. They want car to be an advertisement for them.
11-28-2009, 02:37 PM
#29
Le Mans Master
Going to look up Audi R8 Daytona Gunmetal Pearlized colour right now
What about the interior of the car? Lets here your plans.
What about the interior of the car? Lets here your plans.
Last edited by TheSaint; 11-28-2009 at 02:40 PM.
11-28-2009, 05:52 PM
#30
Melting Slicks
Thread Starter

There was a debate about 2 tone interior or one color using dark contrasting stitching to set it off.
Lets say dash pads and seats will be a corvette sliver leather color from C2, C3, C4, C5 OR C6 years.
One of the 82 Slivers is top candidate from current samples I have been able to get my hands on so far. Problem is the vendor just marked both 82 sliver an I've never seen either before so can't put color name to which is which. It is the smooth grained leather one.
Seats, C6 powered, re-upholstered with 64 style pleats, two tone or single color with contrasting color stitching.
Dash Pads, Leather covered
Door panels, custom design. Two tone or single color.
Carpet, Plush charcoal color or match primary sliver used.
Console area may not be stock.
That's about the best I can do for now.
11-28-2009, 07:56 PM
#31
Le Mans Master

I want to paint it 2008 Audi R8 Daytona Gunmetal Pearlized as it's not a dark Gunmetal. I have not done the research to see if it's a 3 stage Tri-coat color. If it is, an I can't duplicate it to a 2 stage paint then I'll pick another Gunmetal that is 2 stage paint.
PS: I think the shop I'm working does not want a car to come out of their shop that does not look good to most, so they are working to keep me in check. They want car to be an advertisement for them.
PS: I think the shop I'm working does not want a car to come out of their shop that does not look good to most, so they are working to keep me in check. They want car to be an advertisement for them.
Body is PPG, Ferrari 704C Grigio Titanio Metallic (titanium), 37032. Stinger and stripe are PPG, Ferrari 703C.97 Canna Di Fucile Metallic (gun metal), 37217:


 11-28-2009, 08:05 PM
#32
Le Mans Master
We never finished the interior plan...
There was a debate about 2 tone interior or one color using dark contrasting stitching to set it off.
Lets say dash pads and seats will be a corvette sliver leather color from C2, C3, C4, C5 OR C6 years.
One of the 82 Slivers is top candidate from current samples I have been able to get my hands on so far. Problem is the vendor just marked both 82 sliver an I've never seen either before so can't put color name to which is which. It is the smooth grained leather one.
Seats, C6 powered, re-upholstered with 64 style pleats, two tone or single color with contrasting color stitching.
Dash Pads, Leather covered
Door panels, custom design. Two tone or single color.
Carpet, Plush charcoal color or match primary sliver used.
Console area may not be stock.
That's about the best I can do for now.


Don't forget to open up the scoop (literally one way or another) and detail the underside of the hood too.

Last edited by toddalin; 11-28-2009 at 08:15 PM.
11-28-2009, 11:49 PM
#33
Melting Slicks
Thread Starter
My car would be a negative of your. You took the stinger's darker color into interior. I want to take the lighter color into the interior so Your stinger color would be my primary color.
These pictures don't do the R8's paint justice. But it may be close in color to Ferrari color, except the pearlization can add a greenish tint depending on lighting. You can't see it unless you get close up.
 11-29-2009, 02:06 PM
#34
Le Mans Master
The PPG titanium has an obvious blue tint. Depending on the light, angle, etc., the gun metal has a very subtle bronze tint and less metallic than the titanium.
11-30-2009, 07:24 PM
#35
Advanced

Member Since: Nov 2008
Location: Chandler Arizona
Posts: 75
Likes: 0
Received 0 Likes
on
0 Posts

This my "vintage race Coke car" when I first had it done in the early 90's I had a lot of flack from the NCRS group for cutting up a perfectly nice 66. I have raced this guy for years and enjoyed more of it than my stock trailer queen 66 vert. Great project.
12-02-2009, 11:18 AM
#36
Melting Slicks
Thread Starter
You wouldn't happen to know overall width of car at front fenders and rear 1/4's measured at center of their wheel wells?
That would give me and idea how close my car's front and rear wheel tract width is to yours.
Thanks,
PHN
12-02-2009, 11:39 AM
#37
Race Director

Member Since: Mar 2009
Location: Canada's capital
Posts: 19,777
Received 4,583 Likes
on
2,157 Posts
2020 Corvette of the Year Finalist (appearance mods)
C1 of Year Finalist (appearance mods) 2019

Jere, I've been following your build with interest, your bodyman is quite the artist with glass. All along I've had one question in mind. Why did you not go with the aftermarket fat fenders that are available?, like the red one and others, but chose to go labor intensive and invent your own, which turned out to be very similar to those?
_____________ __________
_____________
__________
12-02-2009, 02:15 PM
#38
Le Mans Master
I must say i really like that opened up hood and of course the rest of the car
Seats were done in black and piping matches the titanium of the body. Headliner was done "old school" to go with the overall theme. Whole interior (carpet, door panels, seats, and headliner in vinyl) parts and labor cost $1,825. I found that it is far cheaper just going into a custom interior shop and getting a price to "do the whole job," rather than trying to piece this out through Al Knock and doing the labor myself..., and you can get it the way that you want it.
Don't forget to open up the scoop (literally one way or another) and detail the underside of the hood too.
Don't forget to open up the scoop (literally one way or another) and detail the underside of the hood too.
12-02-2009, 09:04 PM
#39
Melting Slicks
Thread Starter
Jere, I've been following your build with interest, your bodyman is quite the artist with glass. All along I've had one question in mind. Why did you not go with the aftermarket fat fenders that are available?, like the red one and others, but chose to go labor intensive and invent your own, which turned out to be very similar to those?
_______________________
_____________
__________First, lets say I'm not reinventing the Fat Fenders.
Lets say I'm doing a Rev 2 revision to a stock fender...LOL The existing Fat Fenders are Rev 1 & Rev 1A. Neither 1/4 panel Revision met my goals for less of a debris slinger and cleaner looks of 1/4s.
If I were not working with a Shop that knows how to do this, are if I was trying to do this on my own like others, I'd be using Rev1 or Rev 1A fenders too...LOL Would you want to take a sawsall to your doors just to get tire coverage and cleaner looks?
Yes they look close, but I'm hoping the end result will set them apart looks wise too. Also I'm not the first to try for more coverage of rear tire exposure of a stretched 1/4.
Although I did give Bodyman 1.0' stretch 1/4s, it would have been easier for him to stretch stock 1/4s to try and get the amount of front & rear of rear tires exposed I want with less effort due to him having to back out problem with Rev1 or Rev1A stretched 1/4s, not to mention rear wheels back spacing they ordered to get "The look" wouldn't fit under them, so they had to be stretched a little more anyway. I out thought myself when I did that. Should have had more faith in shop.
If I told you it was no more labor intensive to stretch your stock fenders than cost of using pre-stretched front and rear fender and mounting them, would you believe me?
In fact, it might even be cheaper if you had no hit stock fenders, and maybe even if you bought new press molded fenders, even though hand laid would be equal to bought stretched ones and cost would be cheaper.
If you want stretched front fenders, you either stretch stock fenders are use a set that you have to bond on lower fender Turn signal panels. Those fronts arn't cheap either.
There is slightly less than $420.00 dollars in material and labor to stretch that stock front fender on that
 brand new Jig Assembled front end on my car.
 I'm providing you with and others a couple of links to study over and you decide if either using pre-stretched Fenders came out any cheaper than me, and I'm not doing any of the body work myself.
Study over these two links. I found them very informative, and they led me down my current path to try and improve on stretched rear 1/4.
Also go back and re-read my rambling prior post and take a good look two of the pictures of my car and maybe you can understand at what was achieved on front side of 1/4 panel. I think it looks better. Others may like the race look better.
http://www.onr.com/user/richb/rich66/Pages/cars.asp
http://www.computersupport.ca/Restoration/Body.htm
http://www.computersupport.ca/Restoration/Corvette.htm
The only fiberglass worth saving on my car were doors and top. The rear tail light panel has to be replaced too. Car was a barn find, that from the looks of all four corners was raced some before being stored.
Last edited by Poorhousenext; 12-02-2009 at 09:51 PM.
12-04-2009, 12:06 AM
#40
Melting Slicks
Thread Starter
Went to shop today for my weekly view of progress and pay the Piper trip.
Another part of trip was to see if we could stretch rear of qtr panel to get the tire coverage I wanted.
Got there and shop also wanted to try see if we could come to a decision on final look an trim/bling of front fender vent so they could proceed with knowledge that what they were doing and what I wanted were one in the same so they could go all out on getting the left hand side of car done and then move to right side and duplicate them there.
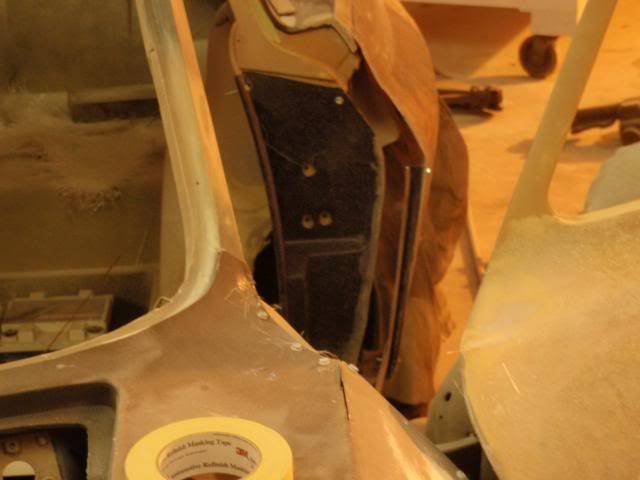
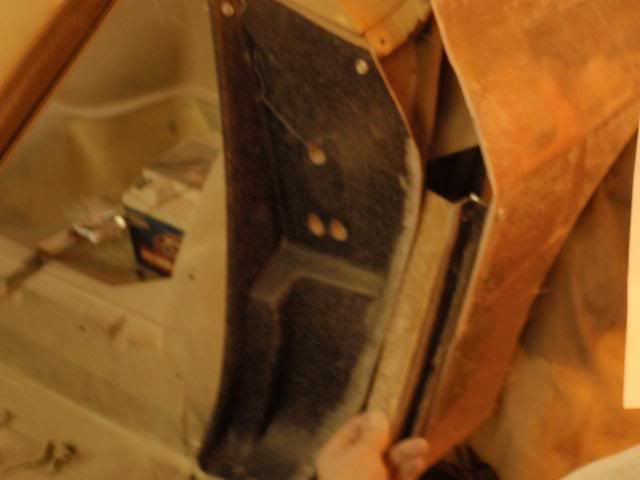
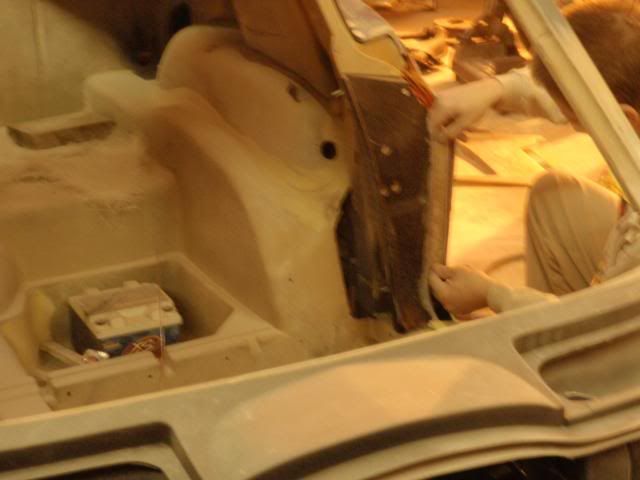
When I got there one of the body men was working on door jam that needed to be changed due to moving the door skin outward along with the rear qtr panel to get tire coverage on forward end of qtr panel. Took a couple picture of that. Jam looks to be the most complicate change to body.
Door Jam.
Now the big if on project has been, can we stretch the rear quarter panel to provide better tire coverage on side, without causing a bubble effect to look of rear end. I hope we have achieved that goal.
It took about 30 mins to do what you see, with a little coaching of panel and body man to get the darn thing where I wanted it. In fact we got the front and rear of wheel well opening within 1/8 of each other so we have the same tire coverage on front and rear of wheel well opening. Oddly enough that extra 1/8 of and inch outwards is on the rear side.
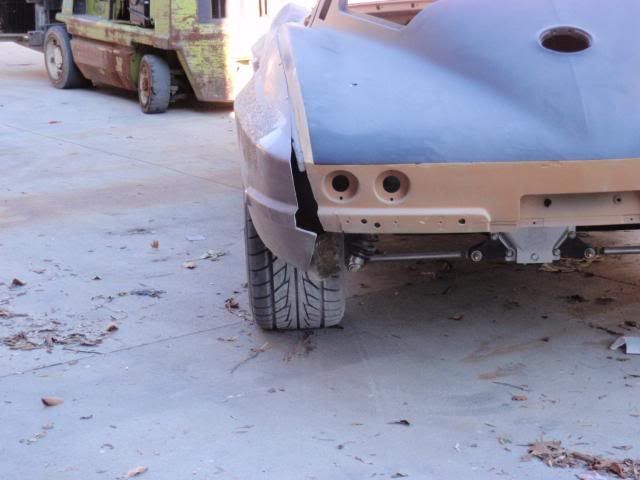
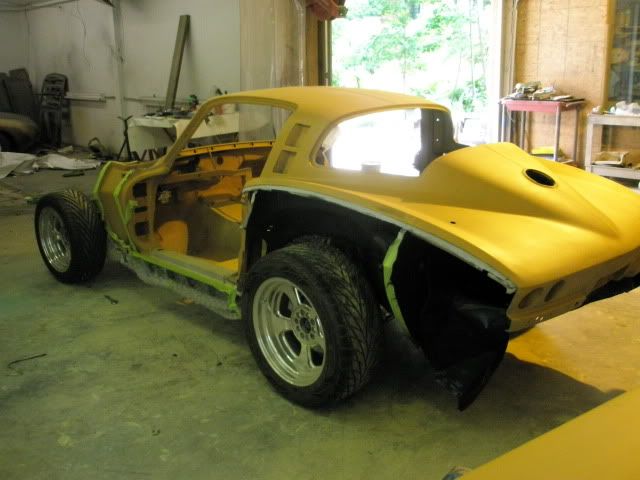
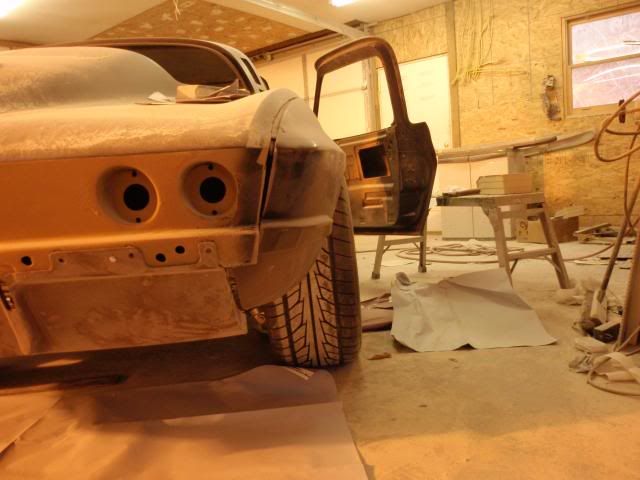
View of Right Rear quarter panel from rear. Note that Tire & Wheel are canted inwards to get tire inside the 1.0" GTS stretched 1/4, so there would be even more tire exposed without that. Note also were the end point of 1/4 is at on rear tire.
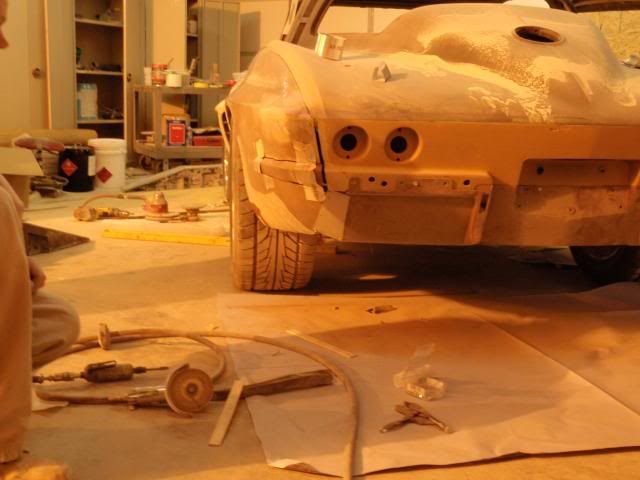
Pre-stretched try by using 3" x 4 " block of wood.
As you can see we were able to stretch the 1/4 to get same tire coverage on front and rear of wheel well opening.
Front side of wheel well to compare tire exposure.
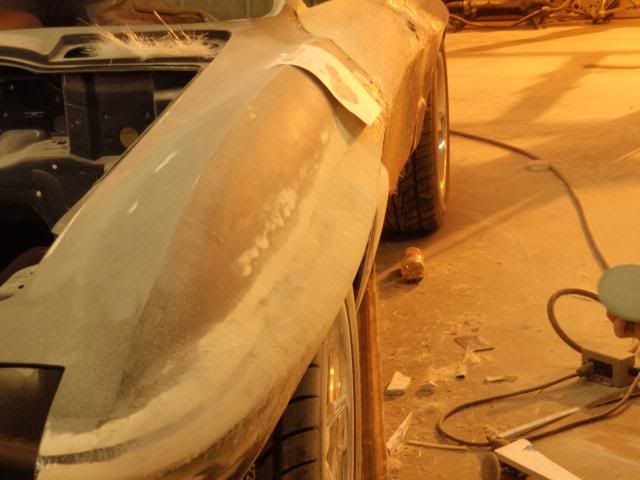
How we got there.
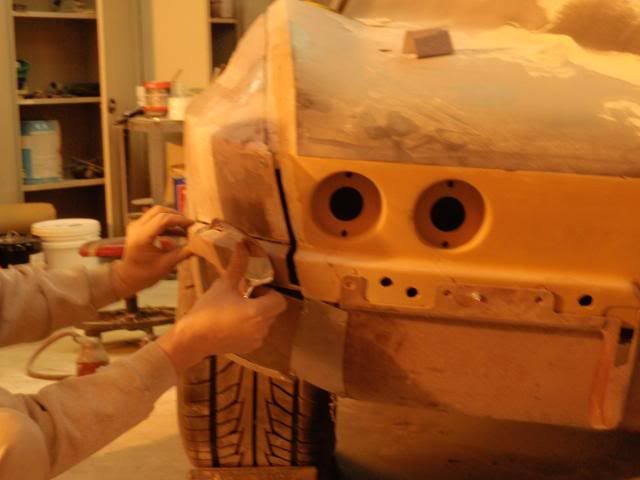
Vent will be using C1 Spears for bling and has been reshaped to remove some of it's bludge.
Another part of trip was to see if we could stretch rear of qtr panel to get the tire coverage I wanted.
Got there and shop also wanted to try see if we could come to a decision on final look an trim/bling of front fender vent so they could proceed with knowledge that what they were doing and what I wanted were one in the same so they could go all out on getting the left hand side of car done and then move to right side and duplicate them there.
When I got there one of the body men was working on door jam that needed to be changed due to moving the door skin outward along with the rear qtr panel to get tire coverage on forward end of qtr panel. Took a couple picture of that. Jam looks to be the most complicate change to body.
Door Jam.
Now the big if on project has been, can we stretch the rear quarter panel to provide better tire coverage on side, without causing a bubble effect to look of rear end. I hope we have achieved that goal.
It took about 30 mins to do what you see, with a little coaching of panel and body man to get the darn thing where I wanted it. In fact we got the front and rear of wheel well opening within 1/8 of each other so we have the same tire coverage on front and rear of wheel well opening. Oddly enough that extra 1/8 of and inch outwards is on the rear side.
View of Right Rear quarter panel from rear. Note that Tire & Wheel are canted inwards to get tire inside the 1.0" GTS stretched 1/4, so there would be even more tire exposed without that. Note also were the end point of 1/4 is at on rear tire.
Pre-stretched try by using 3" x 4 " block of wood.
As you can see we were able to stretch the 1/4 to get same tire coverage on front and rear of wheel well opening.
Front side of wheel well to compare tire exposure.
How we got there.
Vent will be using C1 Spears for bling and has been reshaped to remove some of it's bludge.
Last edited by Poorhousenext; 12-04-2009 at 12:12 AM.