
ST3(2) C5Z06 Build
 09-18-2013, 08:53 PM
#1
Drifting

Thread Starter

The cat is out of the bag for most of the Mafia and they have seen this already, so I will post up the progress pics. A little background:
- 2003 C5Z06
- Time Trialed with multiple organizations in 2009-2011; TTA in NASA
- Placed 6th at NASA Nationals in TTA in 2011
- Caged in 2011 for conversion to NASA PTA W2W (thread http://forums.corvetteforum.com/auto...-progress.html)
- Placed 3rd with a slipping clutch at NASA Nationals in PTA in 2012
- Then all h3!! broke loose in 2013 as NASA deleted the option of running a Corvette in any kind of budget-minded class
After calculating the modifications needed to take a national-podium car in PTA to ST3 (or 2), I knew the budget would be well over five digits for my car. My goals for 2013 were to run the car sparingly and not even entertain going back to Nationals. For every event I skipped, it would be treated as saving for necessary upgrades to the car over the winter and prepping for 2014.
During and after the June Road Atlanta event with NASA-SE, I had not one but THREE people telling me to just go ahead and upgrade the car this year. The loudest of those voices belonged to my wife. Gotta love someone who grew up racing and wants you to be a front runner. Sooo, we broke out the wallet to, ummm, break the wallet.
To date, we have the following parts on, or ready to go on, the car:
- Z06 grill foglight blockoff plates
- New updated front Pfadt swaybar
- Two SKF hubs and ARP studs for the right side (left already done)
- New balljoint and tie-rod boots
- 2010 Camaro CV boots from The Drive Shaft Shop
- GM halfshaft-to-diff seal
- Wilwood W6A front brakes with 14.25" rotors
- Wilwood W4A rear brakes with 14" rotors
- Pfadt spherical bearings
- Pfadt upgraded single-adjustable coilovers
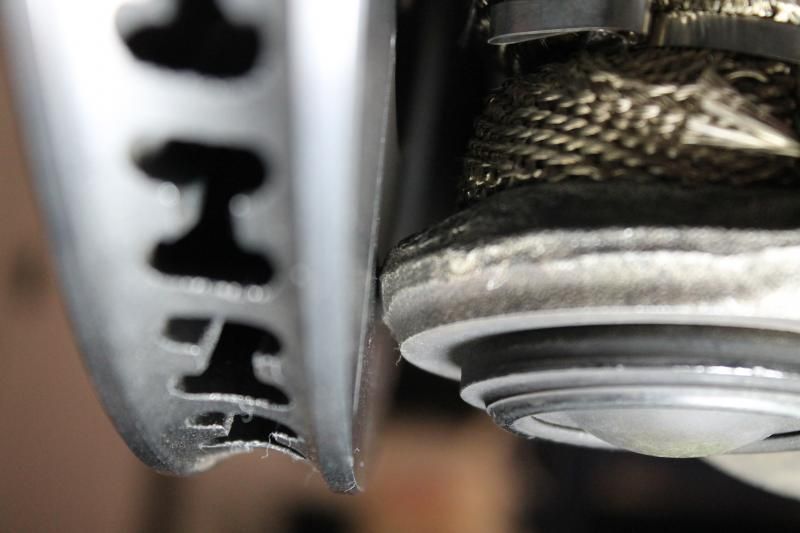
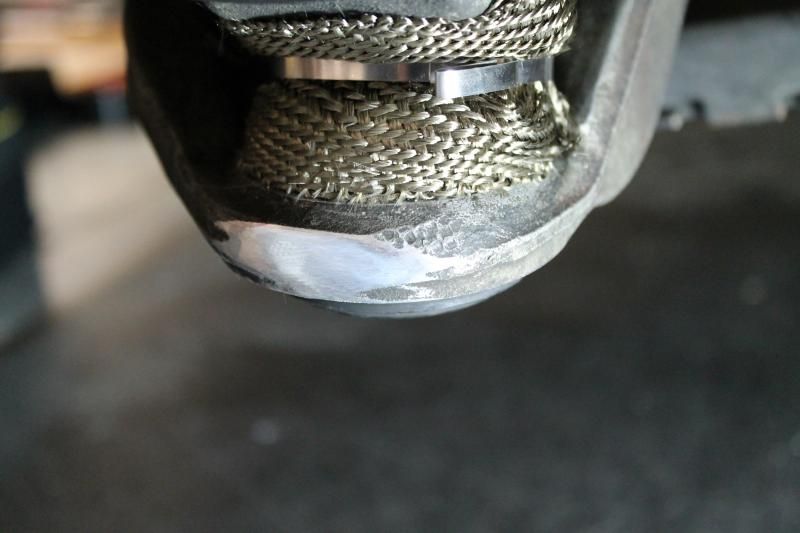
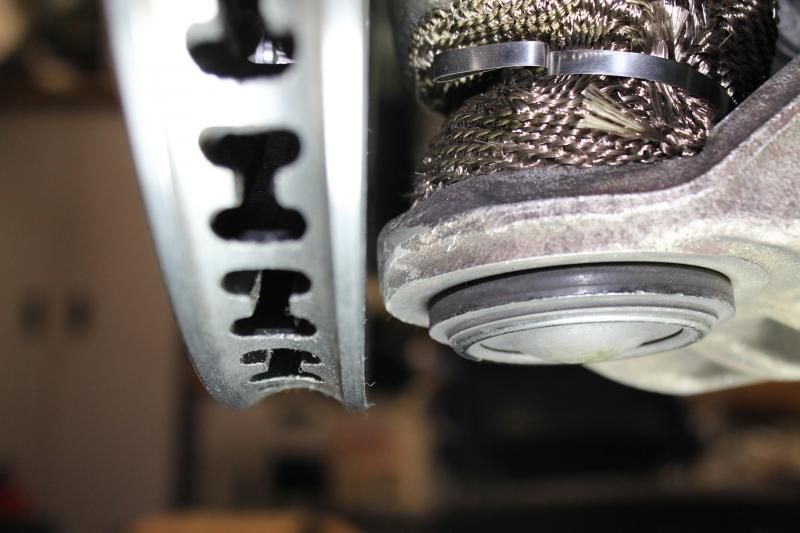
- Kooks longtube headers and catless midpipe
- COT wing (got it years ago for a deal)
- misc splitter parts
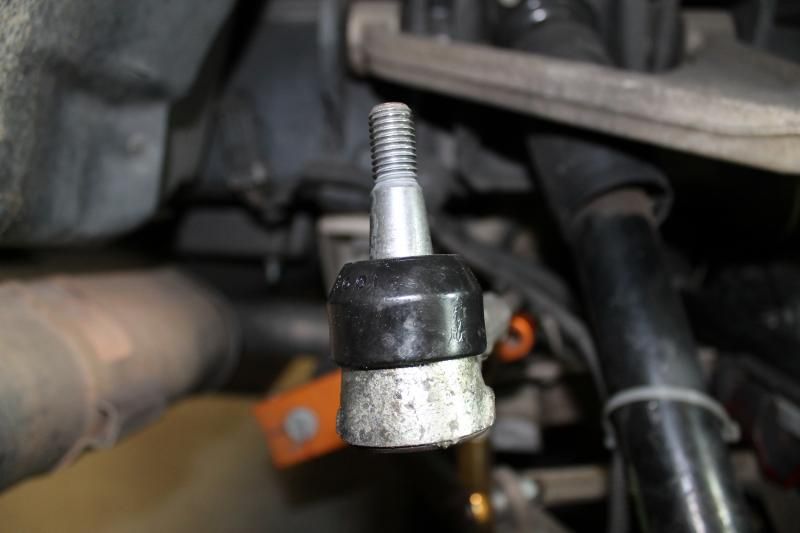
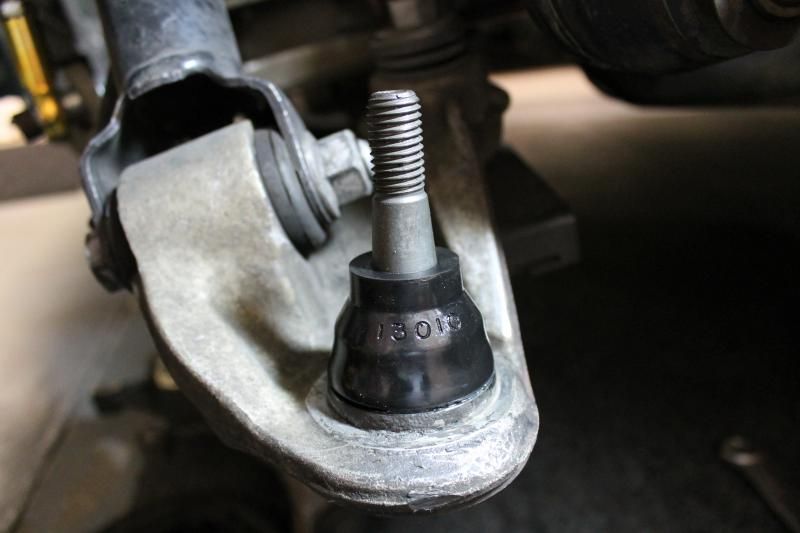
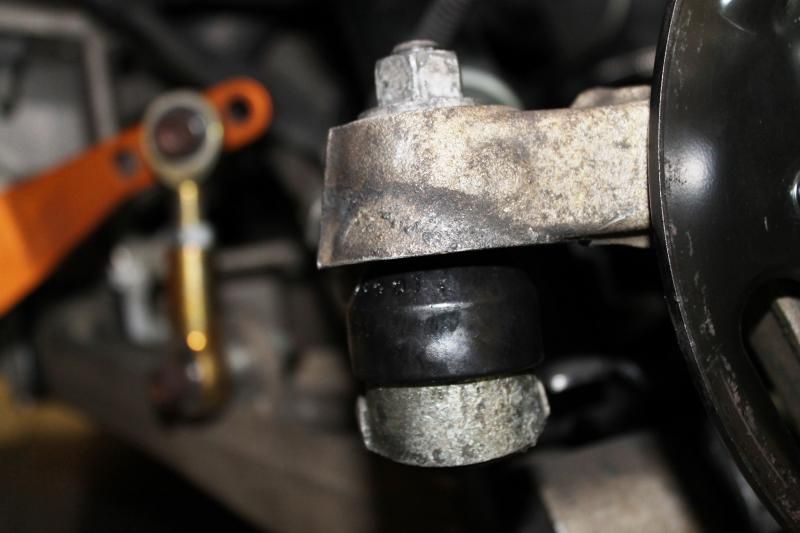
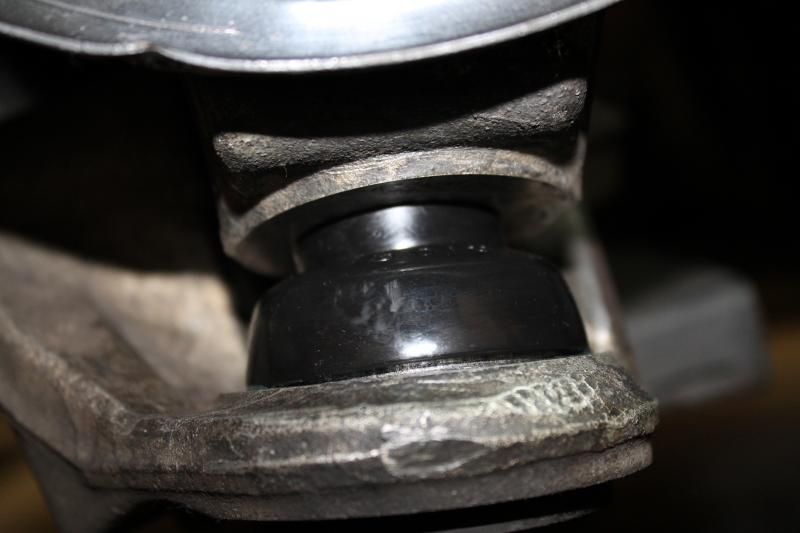
First on the list were the unsexy, maintenance stuff.
C4 balljoint and tie-rod boots. Energy Suspension parts from Jegs. They do not seal as nicely as the OEM C5 stuff, but you can't find those either. Several of my boots were melted after years of track use and lackluster heat tape I had originally used. These were later wrapped with DEI Cool Tape. Good job to a buddy of mine for pointing out this product. I like it and it is available at Advance Auto.
- 2003 C5Z06
- Time Trialed with multiple organizations in 2009-2011; TTA in NASA
- Placed 6th at NASA Nationals in TTA in 2011
- Caged in 2011 for conversion to NASA PTA W2W (thread http://forums.corvetteforum.com/auto...-progress.html)
- Placed 3rd with a slipping clutch at NASA Nationals in PTA in 2012
- Then all h3!! broke loose in 2013 as NASA deleted the option of running a Corvette in any kind of budget-minded class
After calculating the modifications needed to take a national-podium car in PTA to ST3 (or 2), I knew the budget would be well over five digits for my car. My goals for 2013 were to run the car sparingly and not even entertain going back to Nationals. For every event I skipped, it would be treated as saving for necessary upgrades to the car over the winter and prepping for 2014.
During and after the June Road Atlanta event with NASA-SE, I had not one but THREE people telling me to just go ahead and upgrade the car this year. The loudest of those voices belonged to my wife. Gotta love someone who grew up racing and wants you to be a front runner. Sooo, we broke out the wallet to, ummm, break the wallet.
To date, we have the following parts on, or ready to go on, the car:
- Z06 grill foglight blockoff plates
- New updated front Pfadt swaybar
- Two SKF hubs and ARP studs for the right side (left already done)
- New balljoint and tie-rod boots
- 2010 Camaro CV boots from The Drive Shaft Shop
- GM halfshaft-to-diff seal
- Wilwood W6A front brakes with 14.25" rotors
- Wilwood W4A rear brakes with 14" rotors
- Pfadt spherical bearings
- Pfadt upgraded single-adjustable coilovers
- Kooks longtube headers and catless midpipe
- COT wing (got it years ago for a deal)
- misc splitter parts
First on the list were the unsexy, maintenance stuff.
C4 balljoint and tie-rod boots. Energy Suspension parts from Jegs. They do not seal as nicely as the OEM C5 stuff, but you can't find those either. Several of my boots were melted after years of track use and lackluster heat tape I had originally used. These were later wrapped with DEI Cool Tape. Good job to a buddy of mine for pointing out this product. I like it and it is available at Advance Auto.


Last edited by brkntrxn; 09-18-2013 at 10:07 PM.


 09-18-2013, 09:00 PM
#3
Drifting
Thread Starter
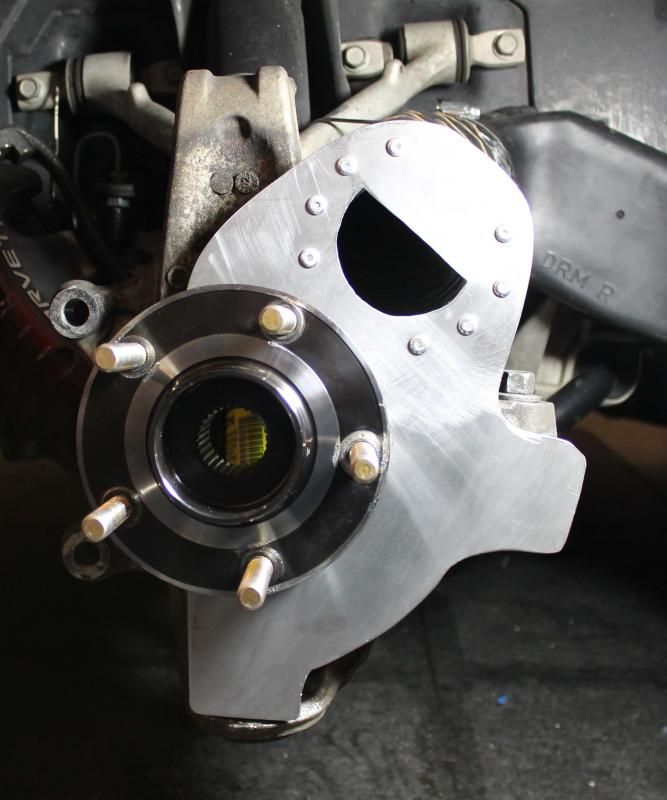
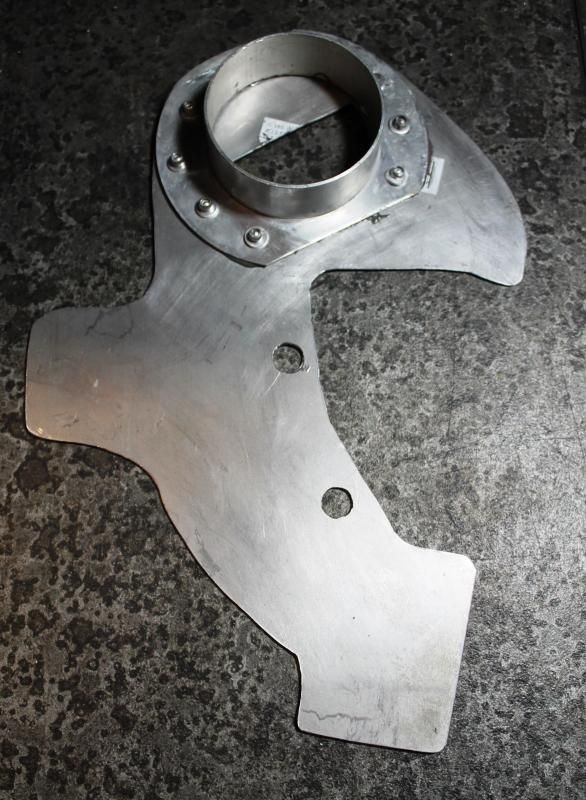
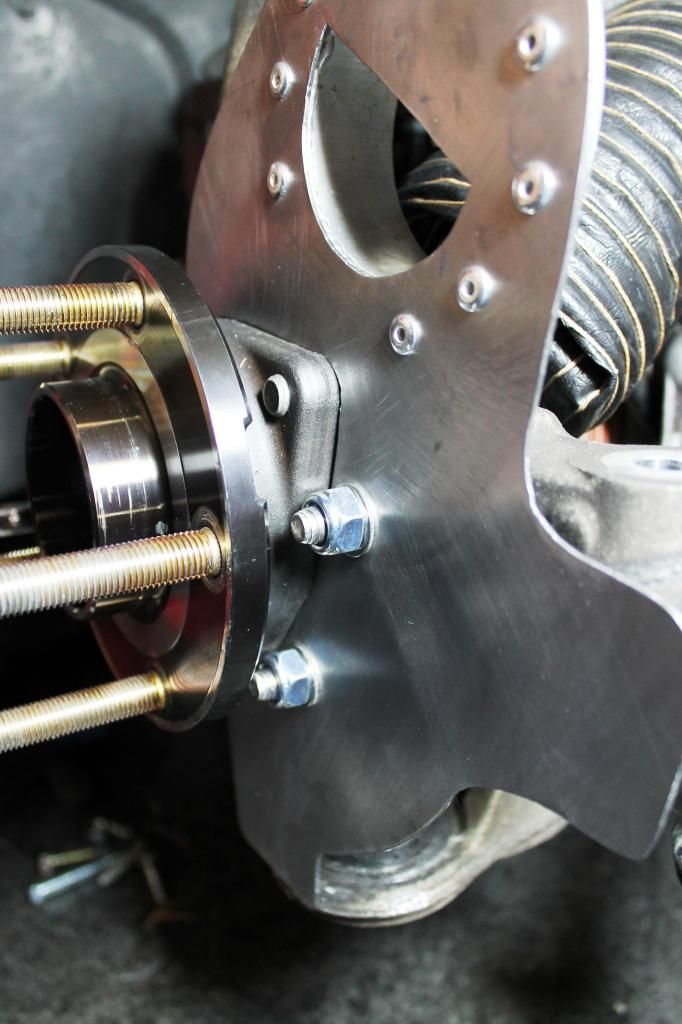
After trying for more than a week to get in contact with a known supplier (on this forum) of brake shields, I decided to make my own.
Mock up
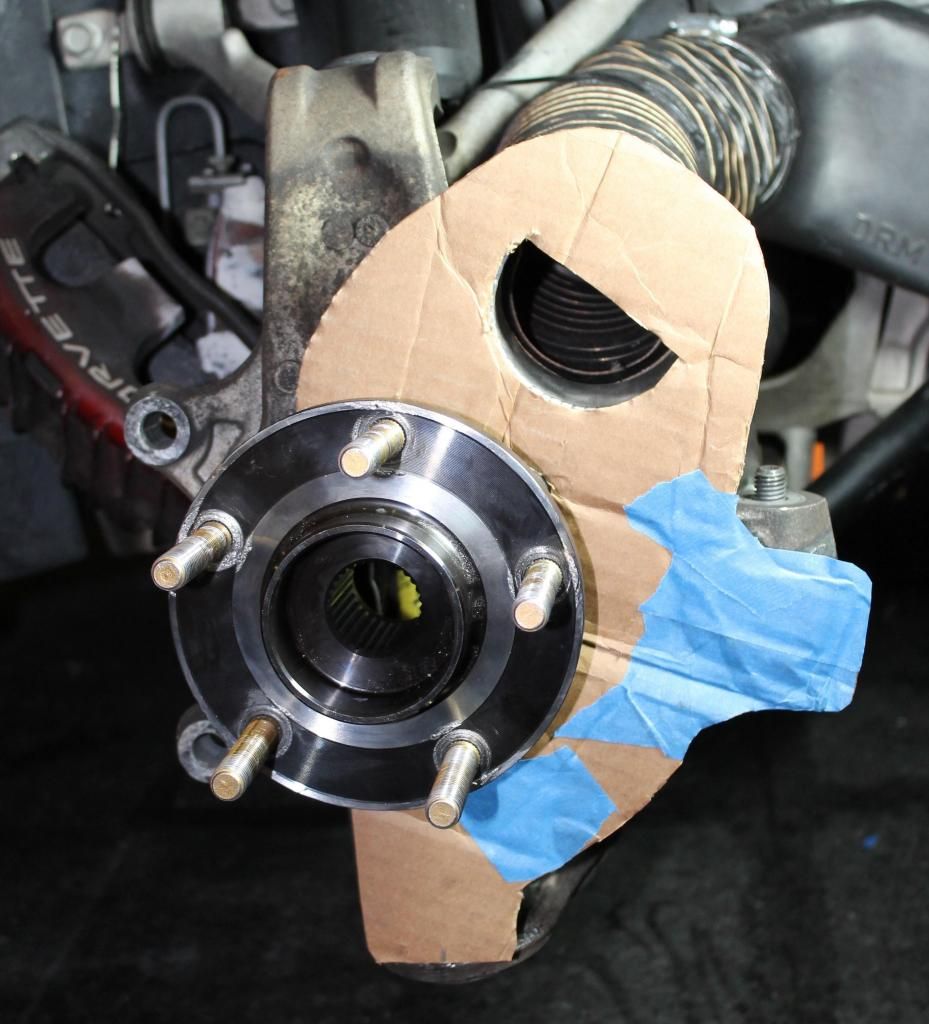
Hand cut, shaped, and riveted. I live in the middle of NASCAR country, so I went over to the second-hand NASCAR parts store and bought four aluminum brake duct rings for $10. The sheet steel was purchased at Lowe's.
Mock up

Hand cut, shaped, and riveted. I live in the middle of NASCAR country, so I went over to the second-hand NASCAR parts store and bought four aluminum brake duct rings for $10. The sheet steel was purchased at Lowe's.


 09-18-2013, 09:07 PM
#4
Drifting
Thread Starter
Next came the sexy parts that everyone always brags about and shows off.
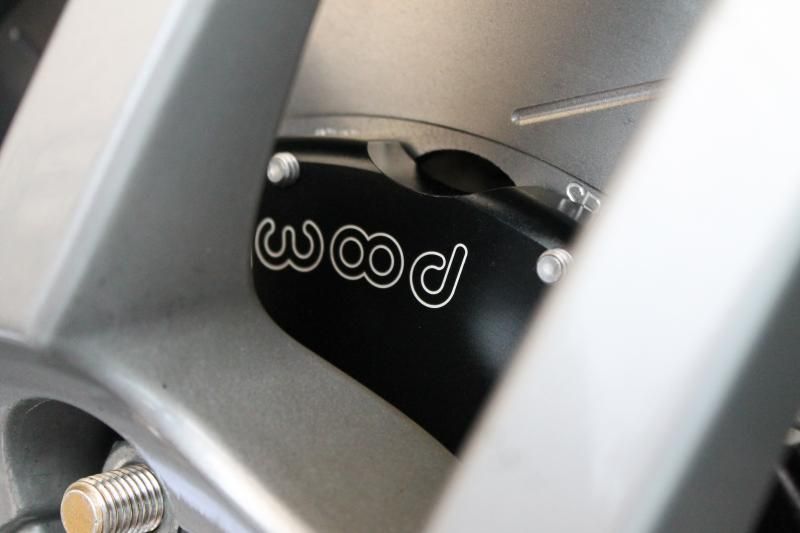
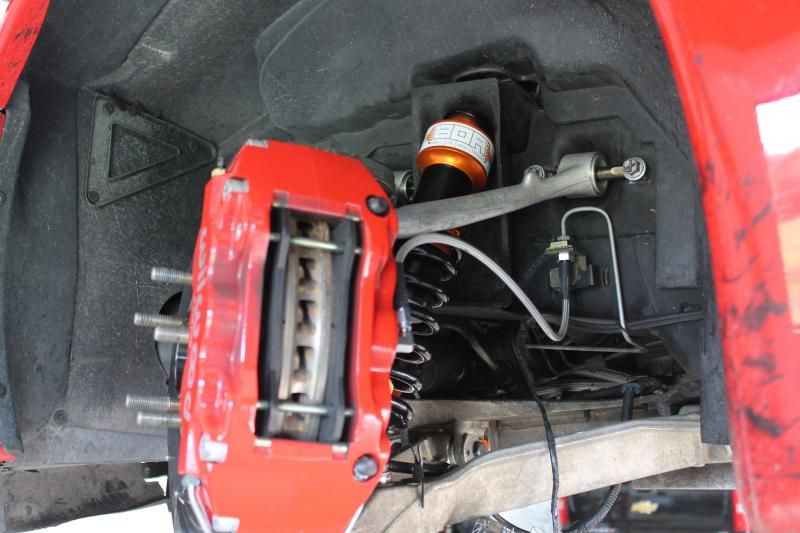
We went with the Wilwood kits because a buddy that owns a shop did the ordering through his suppliers and got us a deal. He also co-drives my car in enduros and we run all Wilwoods on our other enduro cars and never had any issues.
Front 6 piston 14.25" rotor W6A. The kit bolted on with zero issues and good clearance on everything. This is the reason why I sold all of my 17" wheels and started buying a ton of 18s.
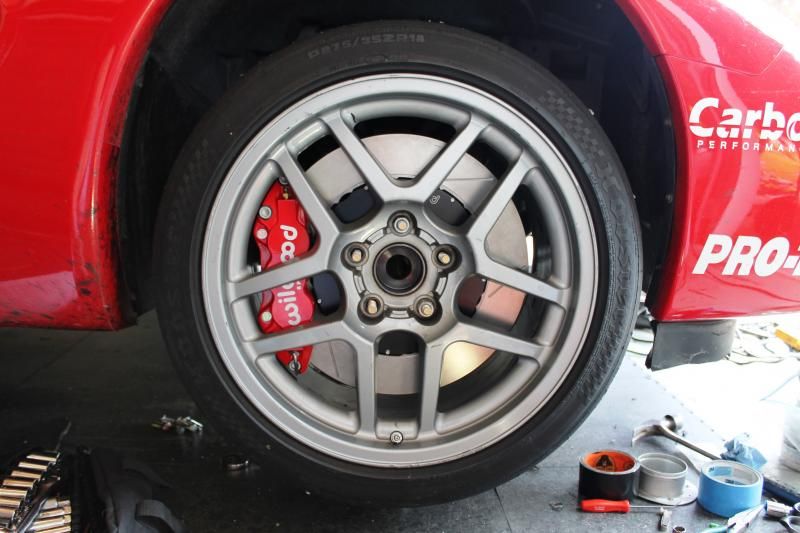
Couldn't help myself with these two shots. My inner twelve year old got a kick out of it.

We went with the Wilwood kits because a buddy that owns a shop did the ordering through his suppliers and got us a deal. He also co-drives my car in enduros and we run all Wilwoods on our other enduro cars and never had any issues.
Front 6 piston 14.25" rotor W6A. The kit bolted on with zero issues and good clearance on everything. This is the reason why I sold all of my 17" wheels and started buying a ton of 18s.


Couldn't help myself with these two shots. My inner twelve year old got a kick out of it.

 09-18-2013, 09:11 PM
#5
Drifting
Thread Starter
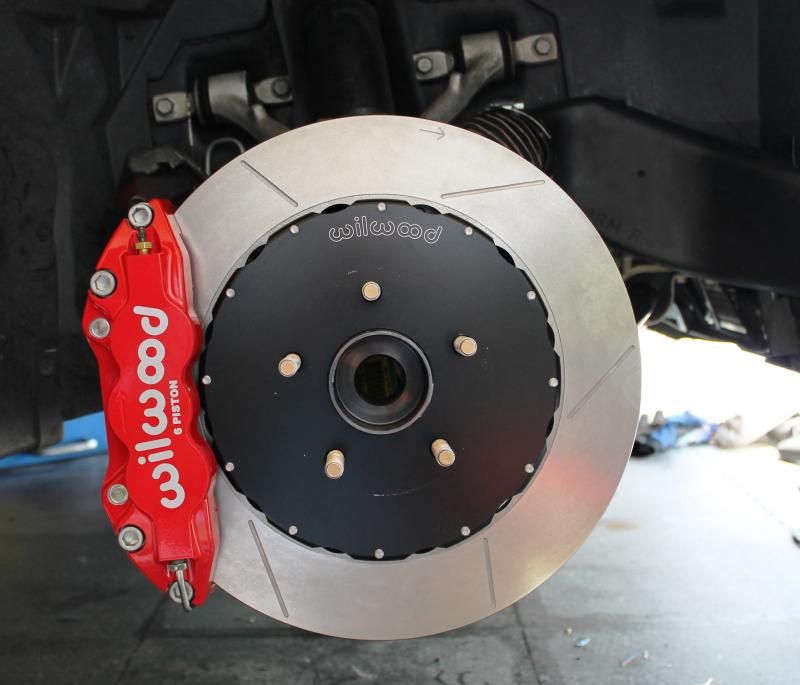
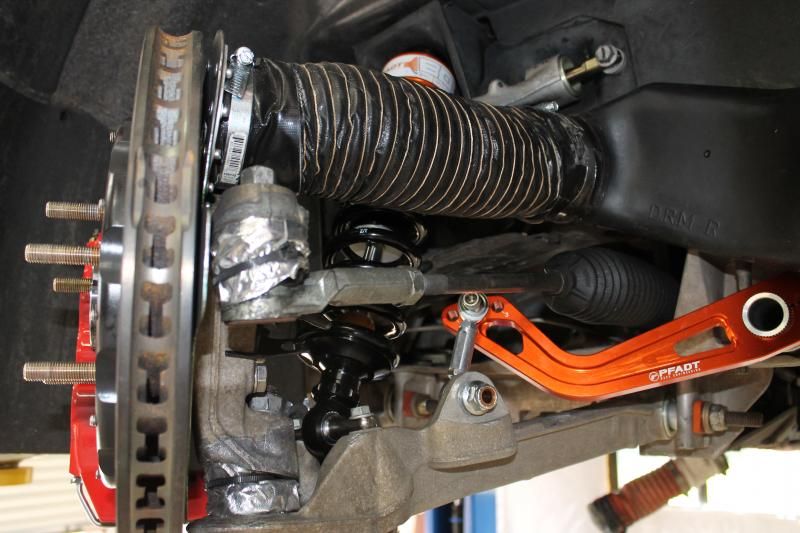
I actually had some clearance issues out of the rear W4A kit. The offset on the rear hats were more than as the offset in the OEM rear rotors. That allowed the rotor ring to contact the lower control arm. I searched the entire Google-World and did not find a single mention of this issue. I also could not find a single mention of anyone running this kit on the rear of their C5. Surely I am not the first?????
OEM Rear Rotor to lower control arm
Wilwood W4 Rear Rotor to lower control arm
OEM Rear Rotor to lower control arm

Wilwood W4 Rear Rotor to lower control arm


 09-18-2013, 09:14 PM
#7
Drifting

nice! good luck!
what size tire are you going to run? 275's for more power?
what size tire are you going to run? 275's for more power?
09-18-2013, 09:15 PM
#8
Drifting
Thread Starter
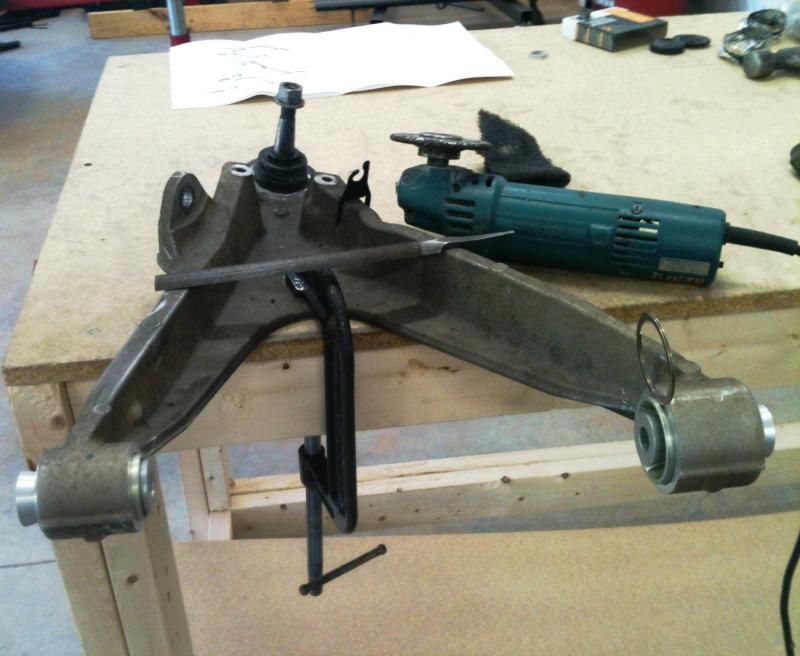
A little grinding and filing of the casting flash and it was good to go. And yes, that is an Eastwing 26 oz hammer mark on the lower control arm for you "gotta use the right balljoint separation tool fanboys". Don't bother saying anything, I won't change.

Wilwood Rear Rotor with clearance


Wilwood Rear Rotor with clearance


 09-18-2013, 09:22 PM
#10
Drifting
Thread Starter
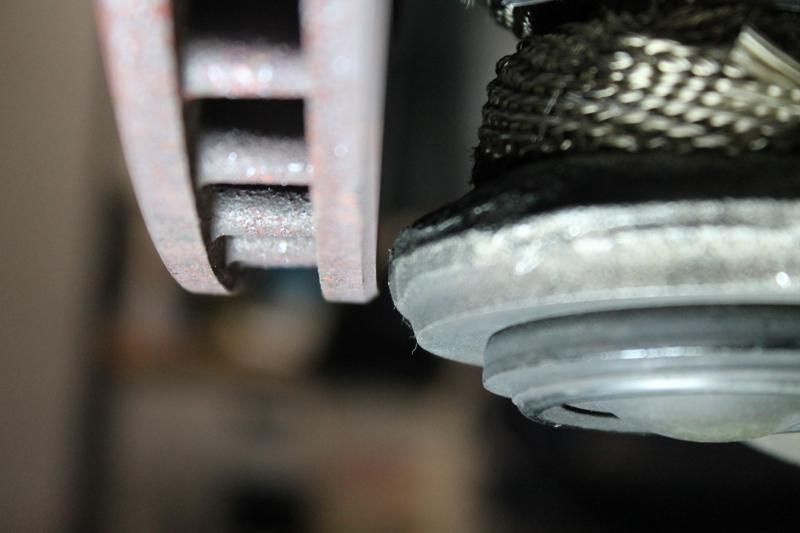
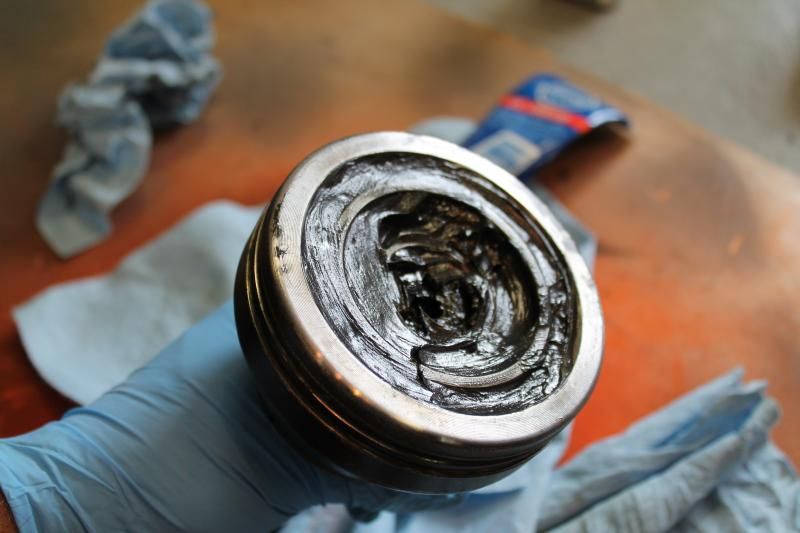
Next on the list was another maintenance item, but very necessary and I took the opportunity to upgrade/change while at it. This little 1/8th inch cut was slinging grease all over the left rear. I have taken out many halfshafts over the years (I used to own Mustang Cobras), but had never rebuilt a CV joint. After some research on here and helpful advice from geerookie and bumble-z, I dove in.
Greg had suggested that I purchase 2010 Camaro CV boots from The Drive Shaft Shop as the replacement. They are not prone to ballooning at speed like an aftermarket boot and he has been running them with success for a couple of years. The Drive Shaft Shop is about 30 miles from me, so I called them up and got a pair with clamps and grease shipped for about $55.
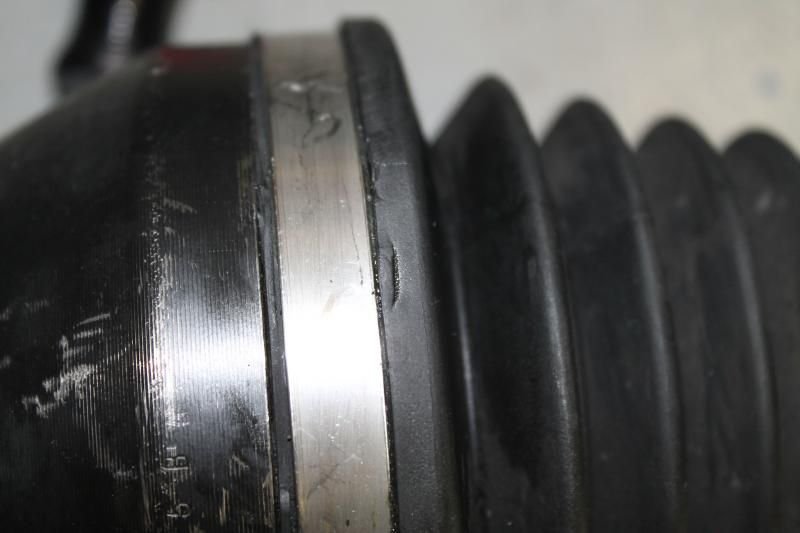
Greg had suggested that I purchase 2010 Camaro CV boots from The Drive Shaft Shop as the replacement. They are not prone to ballooning at speed like an aftermarket boot and he has been running them with success for a couple of years. The Drive Shaft Shop is about 30 miles from me, so I called them up and got a pair with clamps and grease shipped for about $55.

Last edited by brkntrxn; 09-19-2013 at 11:14 AM.
The following users liked this post:
Turbotalon1g (05-16-2021)
09-18-2013, 09:24 PM
#11
Drifting
Thread Starter
I did not take any pics of the halfshaft tear down, but when they tell you to hit it with a hammer, just hit it harder with a piece of 2x4 and ballpeen. LOL. You can search on Youtube for vids or search on here for bumble-z's how-to thread. Once you cut off the old boot, you really do use a hammer (and piece of wood) to literally knock the outer end of the halfshaft off the joint.
Here are the innards all cleaned up
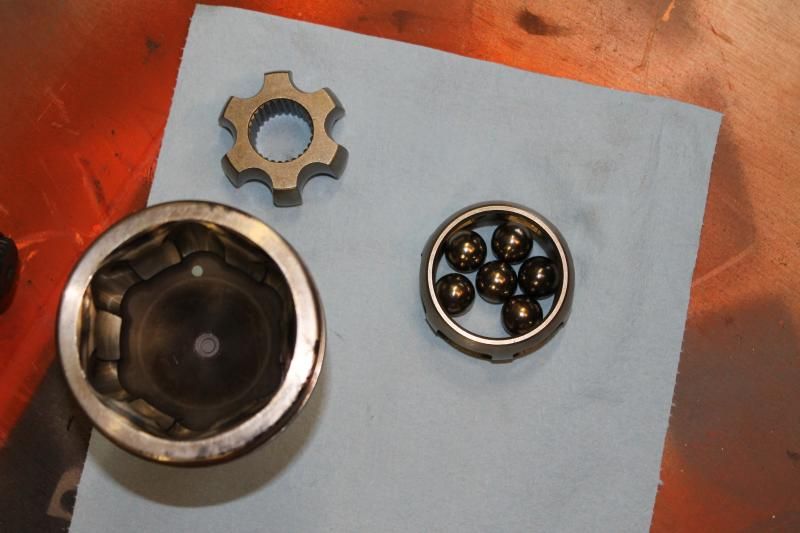
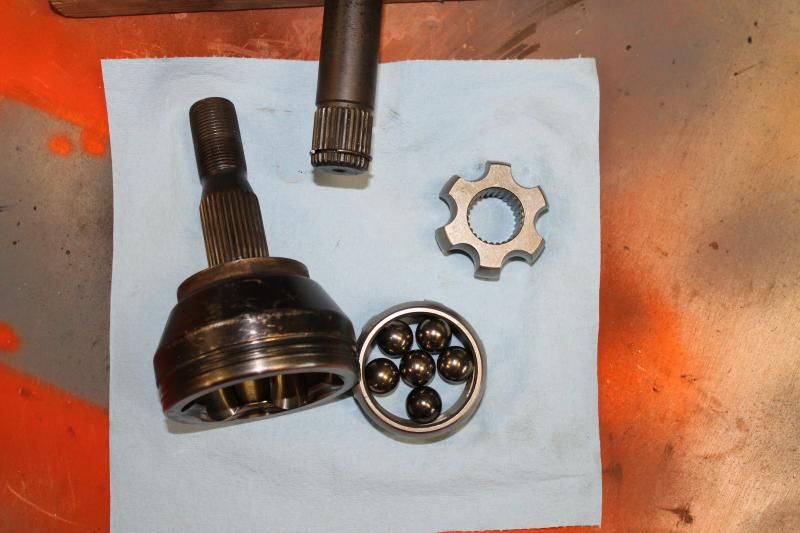
Here are the innards all cleaned up

 09-18-2013, 09:26 PM
#12
Drifting
Thread Starter
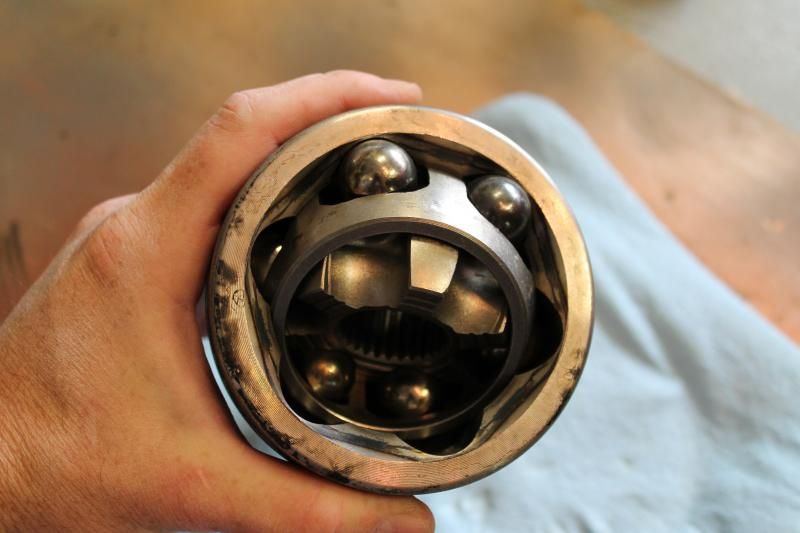
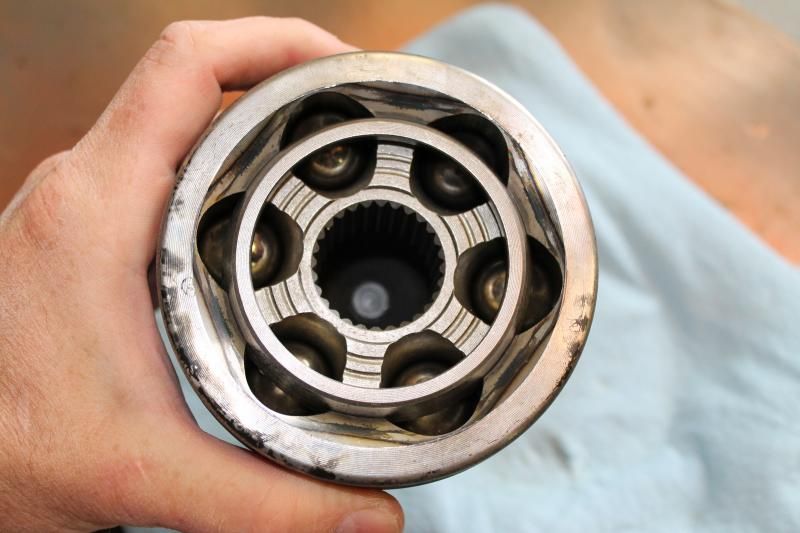
Once you get your ***** straight (like that? inner 12 year old again), the joint goes back together. It is a bit of a puzzle to get one cage tilted just right to pop in a bearing and then get it to sit correctly in the outer shell. Just keep working with it. The final step is to repack it with grease.


 09-18-2013, 09:30 PM
#13
Drifting
Thread Starter
I did not take any pics of putting the new boot back on. That was a ROYAL PITA and worse than taking apart the CV joint. I finally got the clamps to work (using the appropriate tool), but it was difficult. Greg stated that he simply uses big zip ties on the outer/big side of the boot and nothing on the inner/little side. I will do that in the future.
I also had to replace a leaking halfshaft-to-diff seal. This is the third driver side seal on this car in four years. Seems to be a common issue for the C5s. This is before using a can of BrakeClean.
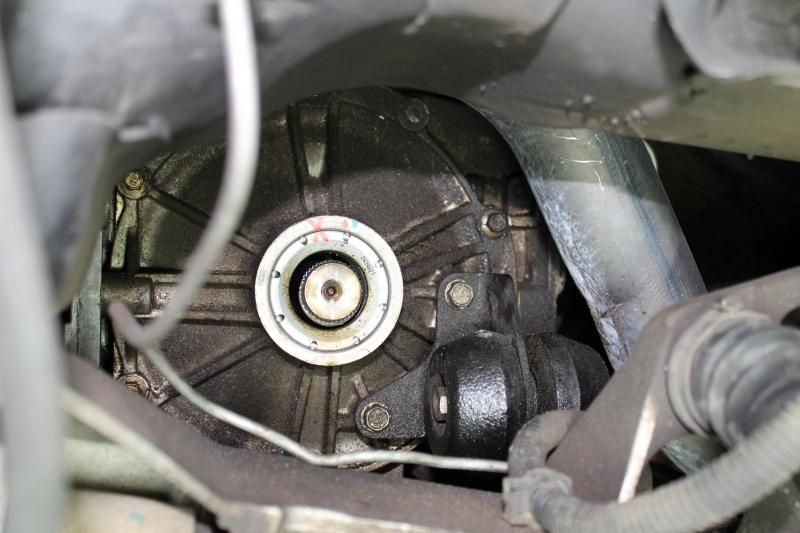
I also had to replace a leaking halfshaft-to-diff seal. This is the third driver side seal on this car in four years. Seems to be a common issue for the C5s. This is before using a can of BrakeClean.

Last edited by brkntrxn; 09-18-2013 at 11:07 PM.
09-18-2013, 09:35 PM
#14
Drifting
Thread Starter
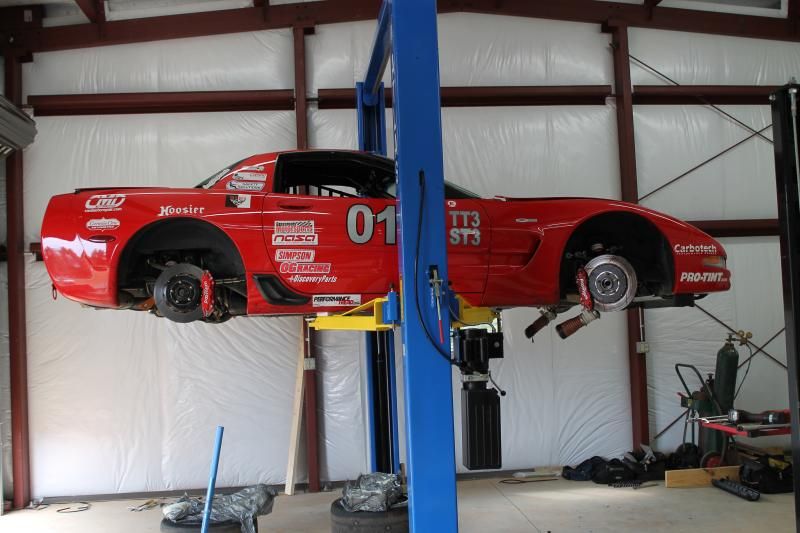
After shaking down the brakes at VIR, I headed over to the David Farmer Racing shop in Concord for the heavy work.
Last weekend, David and I installed the bearings and coilovers. I have to make certain to publicly thank David for all of his hard work on the car. Thanks!!! You guys cannot go wrong by having David work on your car.
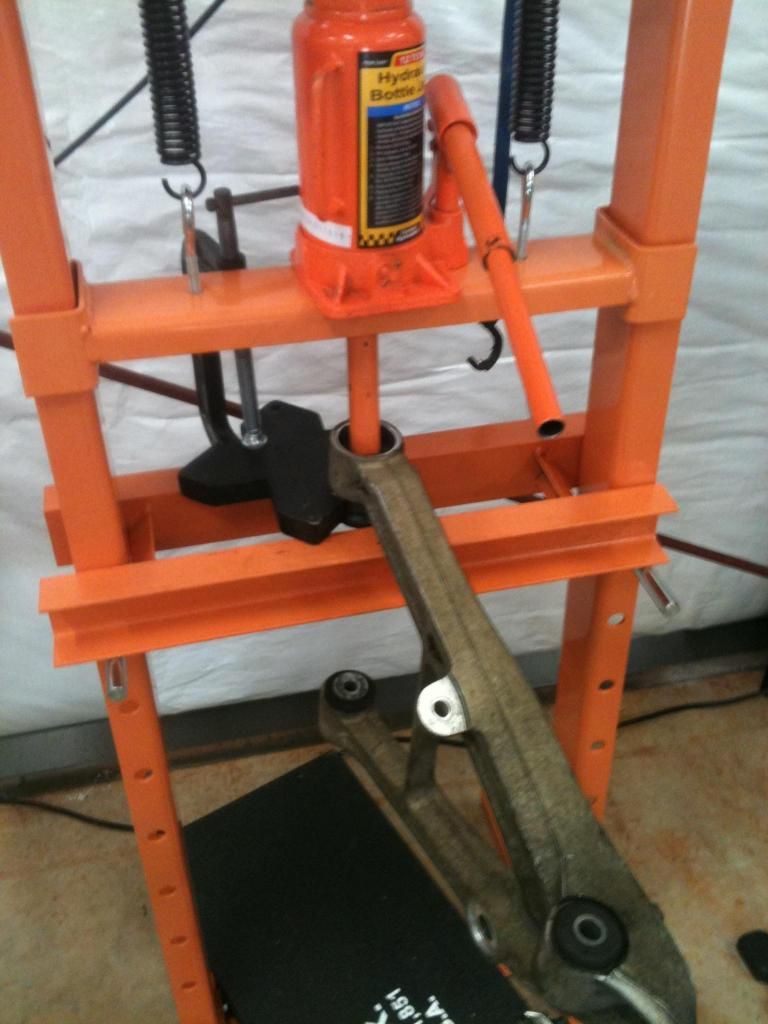
For the Pfadt spherical bearings, I can tell you that I will NEVER do it without using a press to press out the rubber bushings. This Harbor Freight tool is one of my new favorites tools after my hammer and grinder. Haha!


Last edited by brkntrxn; 09-18-2013 at 09:41 PM.
09-18-2013, 09:39 PM
#15
Drifting
Thread Starter
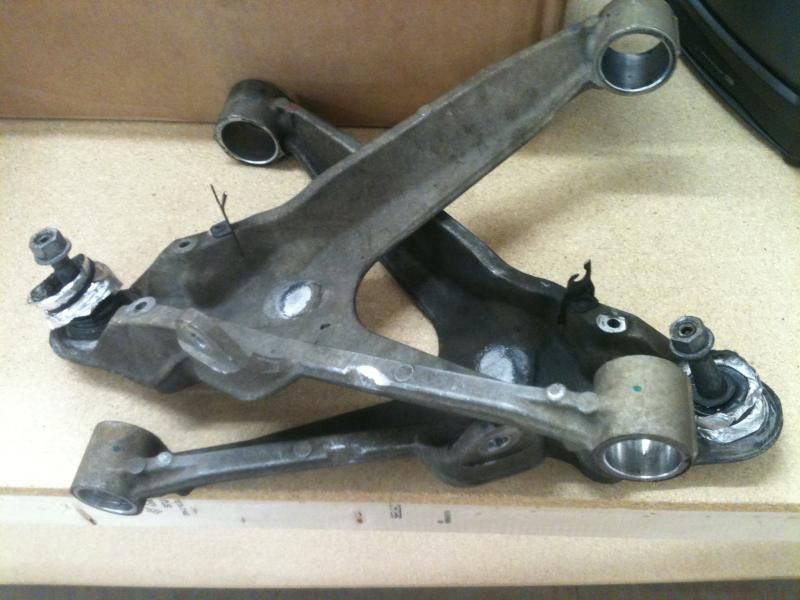
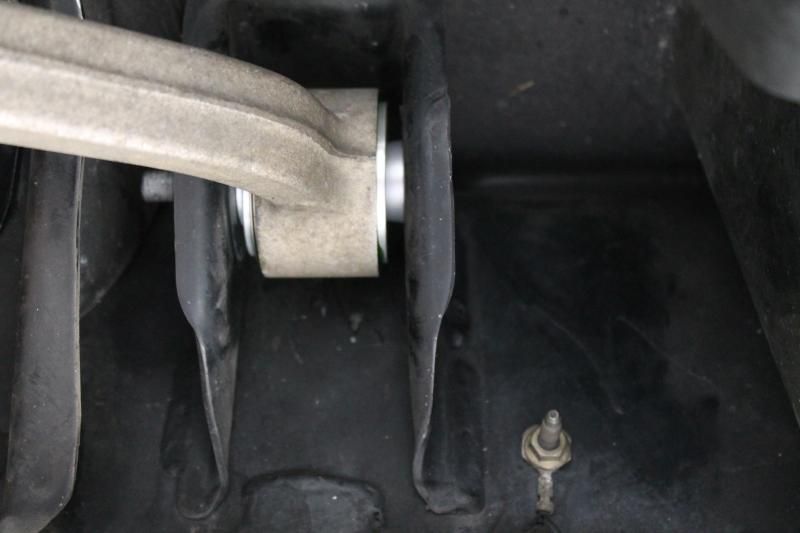
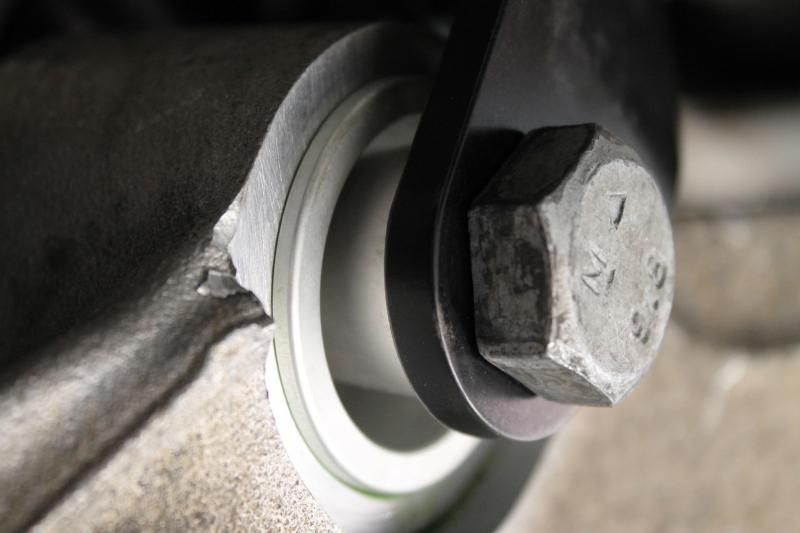
My tired stock rubber bushings were starting to walk in the upper control arms.
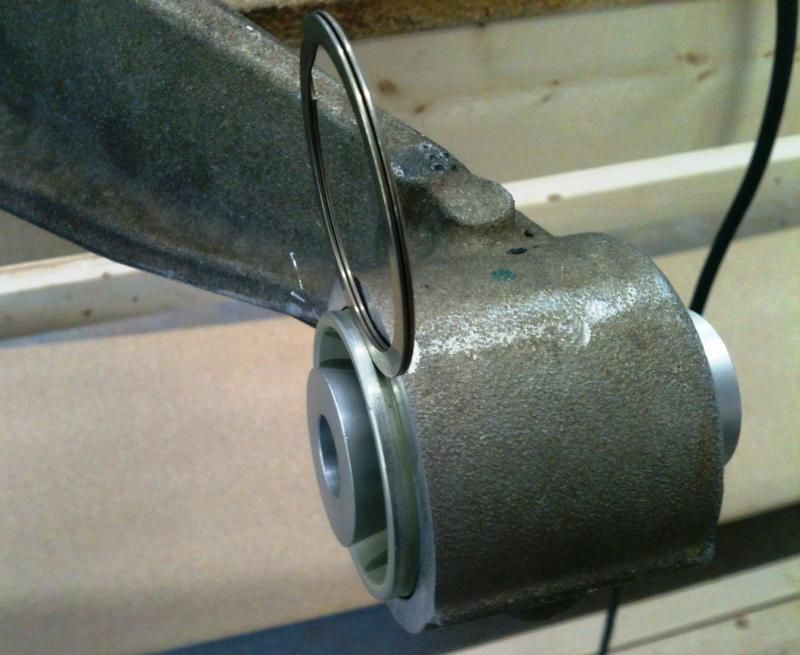
So it was nice to swap them out with the Pfadt spherical kit. For the most part, the bearing clearance was just right. However, the lower control arms had to be hogged out for proper clearance (a snug fit) when inserting them. Two arms also had to be clearance in order for the snap rings to properly seat in the grooves. If and when you do this, ensure that you test fit prior to installing and using the adhesive.

So it was nice to swap them out with the Pfadt spherical kit. For the most part, the bearing clearance was just right. However, the lower control arms had to be hogged out for proper clearance (a snug fit) when inserting them. Two arms also had to be clearance in order for the snap rings to properly seat in the grooves. If and when you do this, ensure that you test fit prior to installing and using the adhesive.


 09-18-2013, 09:47 PM
#17
Drifting
Thread Starter
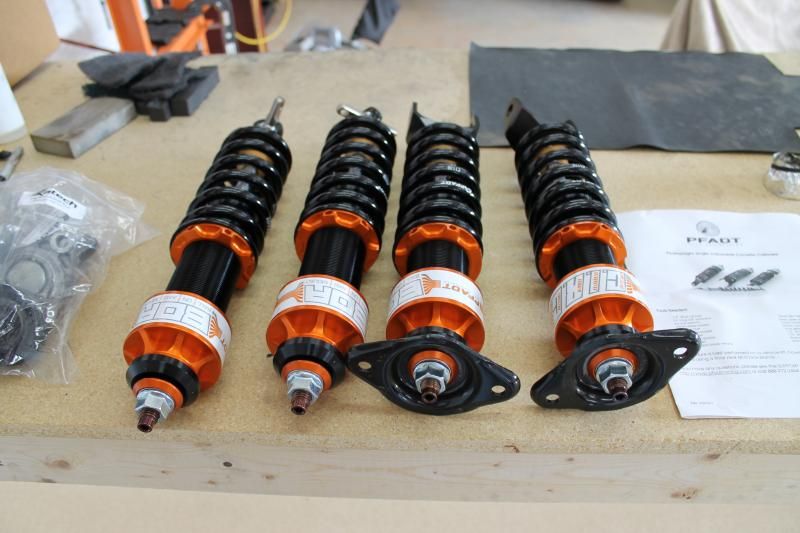
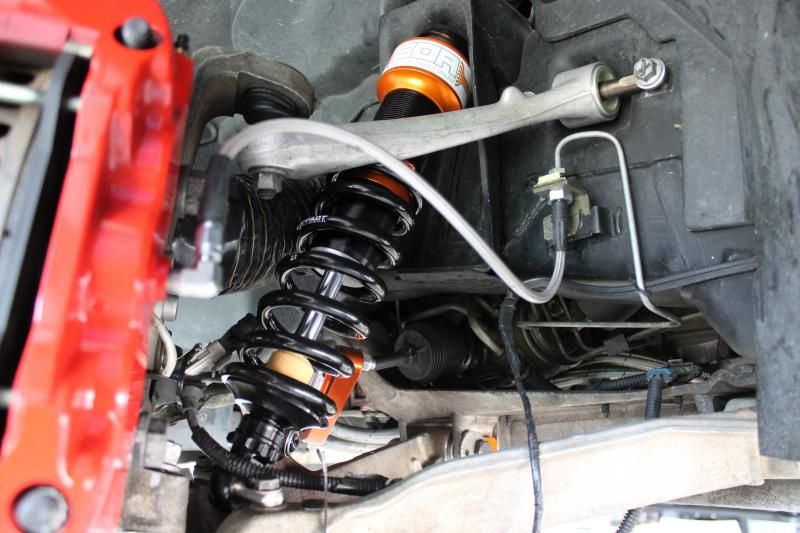
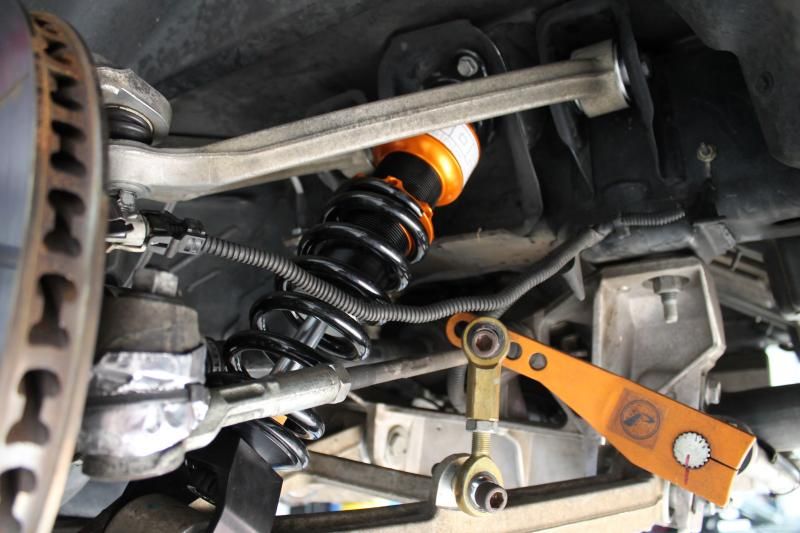
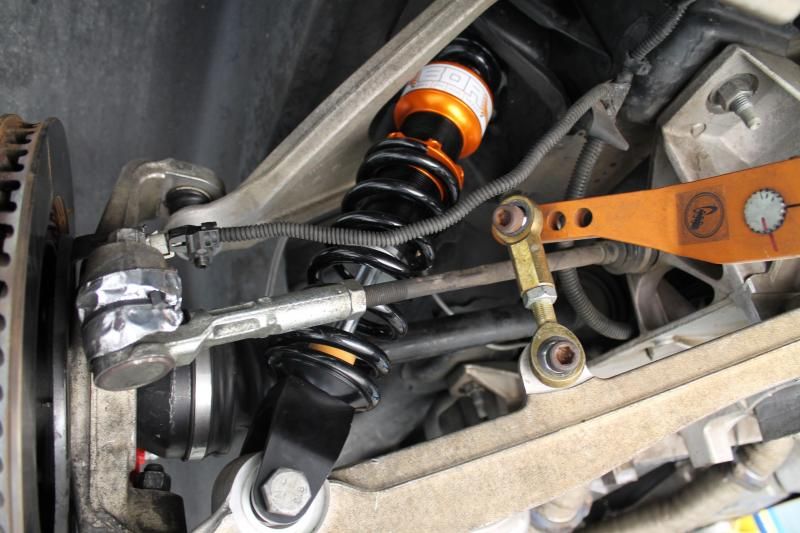
Now comes the parts that the street-wannabe's brag about: coilovers. We did not go with the all-out, double adjustables, but the Pfadt Single Adjustable Featherlights with upgraded springs (for aero later) will do just right.


 09-18-2013, 09:50 PM
#18
Drifting
Thread Starter
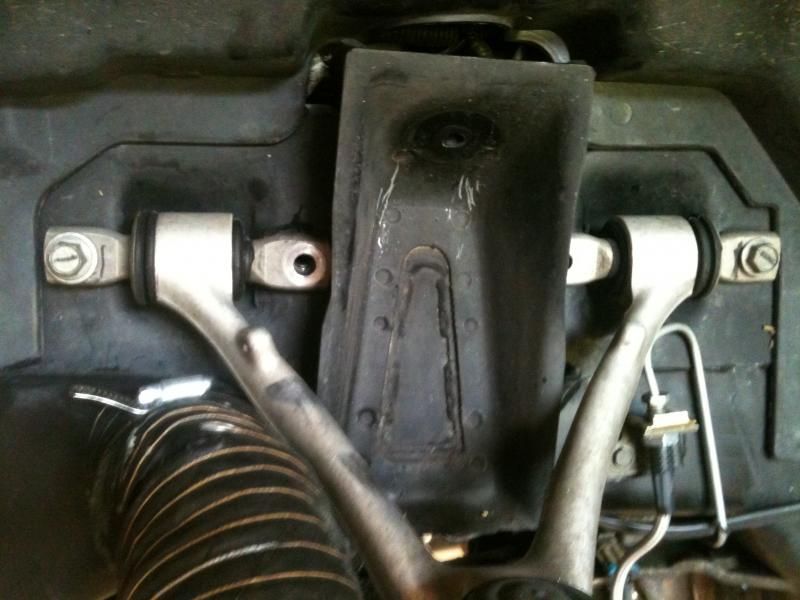
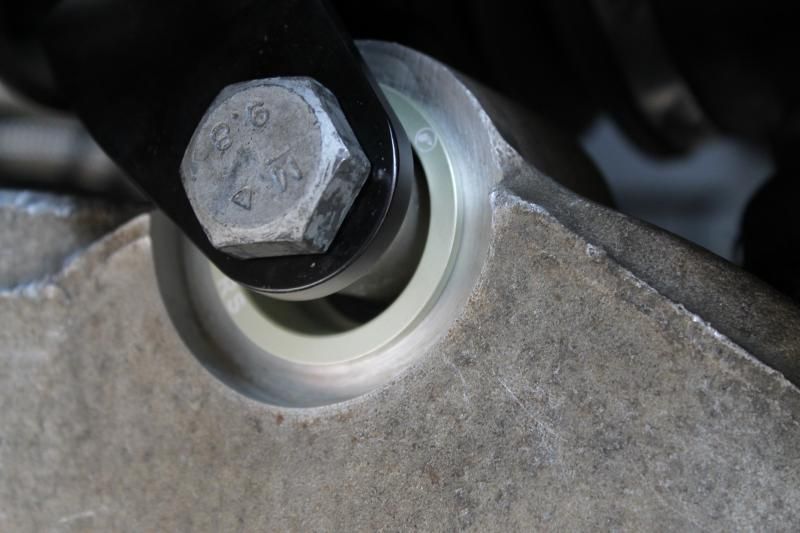
The sphericals fit in the frame brackets very nicely. All except one.. the upper right rear was very stubborn and we had to encourage it to go home.


 09-18-2013, 10:00 PM
#19
Drifting
Thread Starter
After getting every nut and bolt installed, we went around the car from corner to corner tightening everything to the proper torque value, whether GM or Pfadt. Time consuming, but necessary.
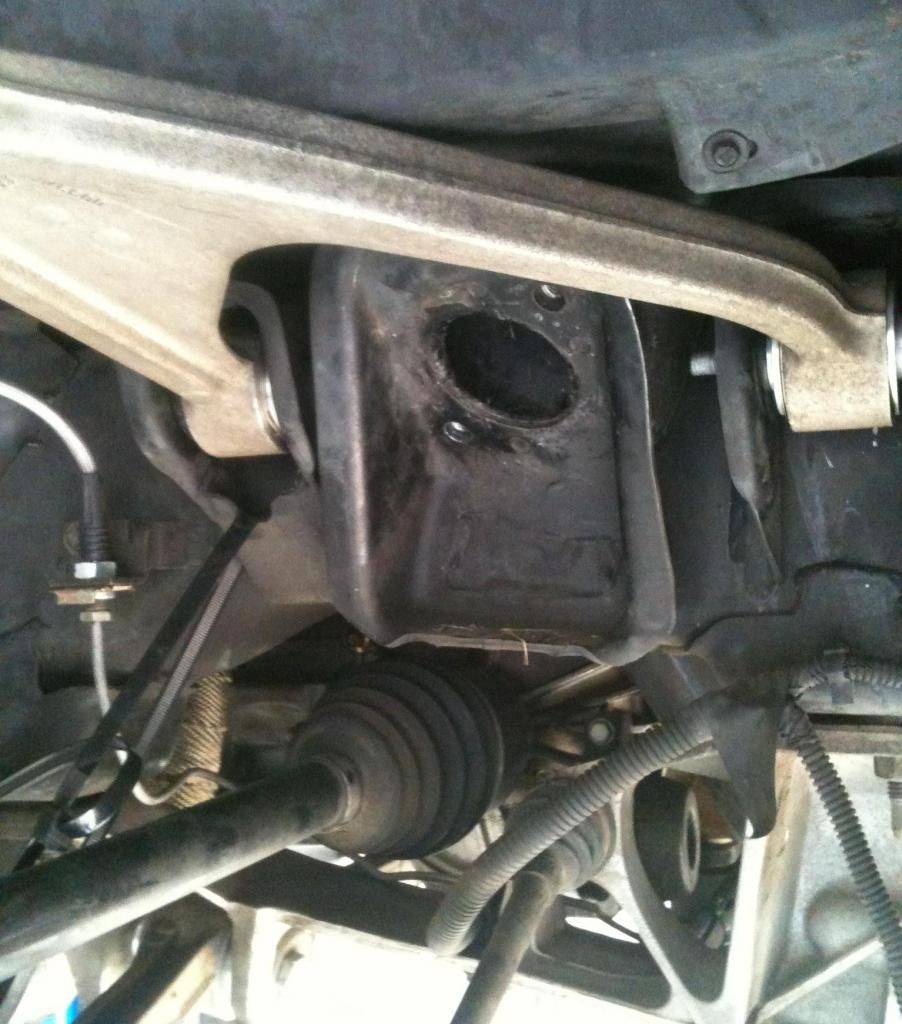
We were ALMOST finished when this little b@$t@rd decided to break. It is the left side, upper rear control arm to frame bolt. I was using the torque wrench to the proper setting and it just broke. I ALMOST threw my torque wrench on the ground. I have gotten much better at anger management as the gray hair have appeared. I am just glad it broke with me and not David. Or maybe that is why it broke, LOL.
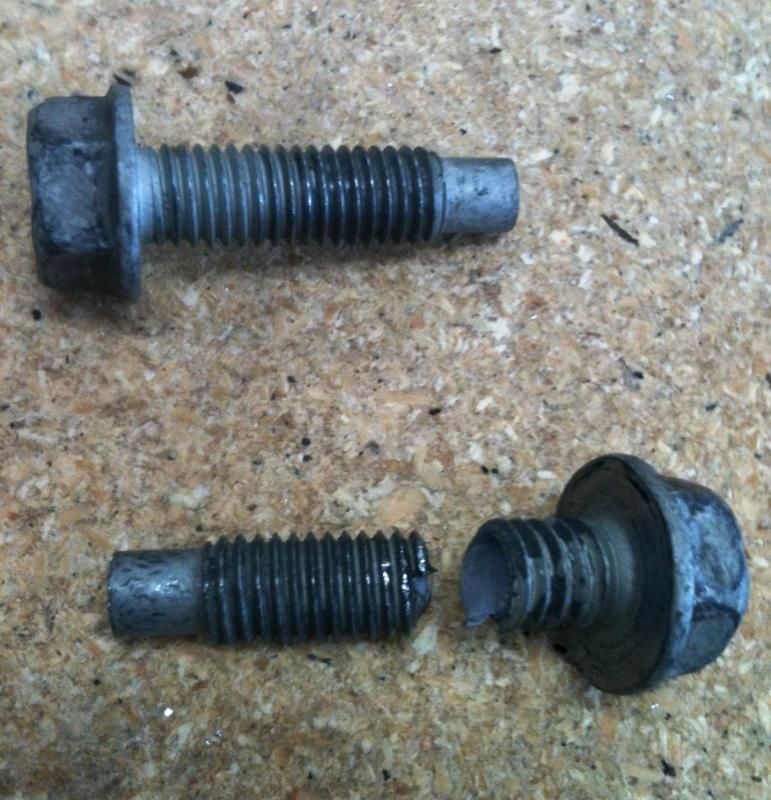
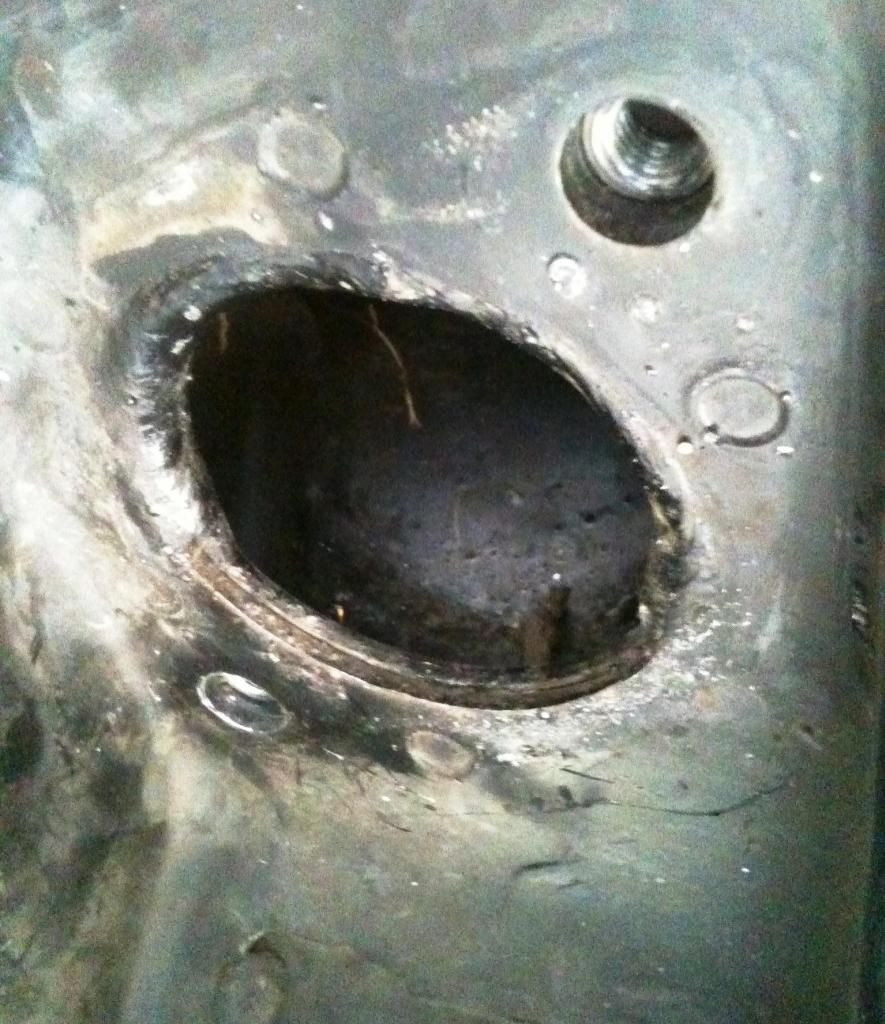
After taking EVERYTHING back off the left rear to see how much room I could make for a drill, removal tool, tap, etc., I could see the tip of the bolt inside the upper shock/coilover mount. Out of frustration and curiosity, I took a long pair of needle nose, grabbed the bit of bolt, and was able to turn it back out of the bolt hole. I got it far enough back out that I could then grab it with the pliers on the outside and unscrew it. A quick trip to Lowe's and a new metric bolt and we were back in business.
We were ALMOST finished when this little b@$t@rd decided to break. It is the left side, upper rear control arm to frame bolt. I was using the torque wrench to the proper setting and it just broke. I ALMOST threw my torque wrench on the ground. I have gotten much better at anger management as the gray hair have appeared. I am just glad it broke with me and not David. Or maybe that is why it broke, LOL.

After taking EVERYTHING back off the left rear to see how much room I could make for a drill, removal tool, tap, etc., I could see the tip of the bolt inside the upper shock/coilover mount. Out of frustration and curiosity, I took a long pair of needle nose, grabbed the bit of bolt, and was able to turn it back out of the bolt hole. I got it far enough back out that I could then grab it with the pliers on the outside and unscrew it. A quick trip to Lowe's and a new metric bolt and we were back in business.

 09-18-2013, 10:02 PM
#20
Drifting
Thread Starter
David corner balanced and aligned the car Monday and I had it back home by Monday evening. I have a few things to do and it will be ready for Watkins Glen the 27-29th.

Last edited by brkntrxn; 09-24-2013 at 07:34 PM.