Installation: Brake Ducts, Hoses, Spindle Ducts
 04-03-2009, 01:21 AM
#1
Pro

Thread Starter

I just received an estimate of 7 hours labor for installation of brake ducts, hoses and spindle ducts on a C6 Z51. That was way more than I expected. Is that ballpark, or should I be looking elsewhere?
 04-03-2009, 01:42 AM
#2
Safety Car


Ducts and hoses are simple and quick in the driveway on jackstands; couple hours, maybe? I've never done spindle ducts but I can't imagine they add 5 hours.
Where'd you go? The dealership?
Where'd you go? The dealership?
04-03-2009, 02:14 AM
#3
Pro
Thread Starter
Not many Corvette knowledgeable performance shops in the Seattle area. I got this quote from the performance shop that installed my parts last winter (LG Pros, Pfadt sways, Hardbar camber kit, DRM/Ron Davis radiator). I don't have the facilities or the aptitude for doing it myself. The LGM spindle ducts require disconnecting the front spindles.
04-03-2009, 02:42 AM
#4
Racer


It took me a long time to get the DRM brake ducts to where they would fit on the car without either rubbing the upper control arm, the tire or the wheel of my C5 on full-lock. On C5s you've also got to cut the stock ducts and bolt the DRMs to them, which takes some trial and error to get everything to fit well. I ended up using a screw in the front of the fascia to hold one end of the duct in, and shaving away the fiberglass so the duct would snug up closer to the frame. I put many hours into that; more than 7. But it may be easier on a C6 (and most shops won't care if their install ends up rubbing).
Spindle ducts were straightforward. Mine are LGs, and they required you seperate the hub from the upright. I already had everything off to do bushings, but if you don't I'd go for a spindle duct that didn't require this step (i.e. just a duct, not a shroud).
Spindle ducts were straightforward. Mine are LGs, and they required you seperate the hub from the upright. I already had everything off to do bushings, but if you don't I'd go for a spindle duct that didn't require this step (i.e. just a duct, not a shroud).
04-03-2009, 07:26 AM
#5
Le Mans Master

Member Since: Feb 2000
Location: Bedford NH
Posts: 5,708
Likes: 0
Received 1 Like
on
1 Post
Cruise-In II Veteran

It is really alot of work, that is maybe a little high, but not too outrageous (I would say 3-4 hours because I have done it a couple of times). I have made tools like a lower ball joint separator that does not mess up the rubber boot like a "pickle fork"), etc. On the ducts I have seen, some spindle massaging is necessary, and you need to relocate the wheel speed sensor connector bracket. I cut off the OE connector bracket and pop riveted it to the duct.
You really should get our bearing fastener kit, that are slightly longer so that you have adequate thread engagement with the spindle duct. The kit also uses 12 point heads (instead of those @#!%^$& Torx head stockers) and Nordlocks.
http://hardbarusa.com/hardbar/produc...roducts_id=115
You really should get our bearing fastener kit, that are slightly longer so that you have adequate thread engagement with the spindle duct. The kit also uses 12 point heads (instead of those @#!%^$& Torx head stockers) and Nordlocks.
http://hardbarusa.com/hardbar/produc...roducts_id=115
Last edited by ghoffman; 04-03-2009 at 07:33 AM.
04-03-2009, 07:41 AM
#6


I have the LG Spindle Ducts. Consider tossing the brake hose that comes with the ducts and going to 3" SCAT tubing from the outset. SCAT tubing is much stronger than the stuff that came with my ducts and it fits real nice over the LG spindle ducts.
To get the 3" hose attached to the duct, simply wrap the end with your favorite Race Tape to build up a plug that fits firmly into the duct opening. Then apply a little more tape around the outside to secure it to the duct. My SCAT tubing is going on its fourth year without the need to replace it. I retaped the connection to the duct last year only because the connection was two years old; it really did not need to be done.
While you have the hubs off, consider replacing the studs with AFRs or some other well known brand.
04-03-2009, 08:02 AM
#7

took me about 2 hours to install my DRM ducts, Quantium Motorsports spindle ducts & hose in my garage. with the quantium units, there is no need to disconnect the steering knuckle so installing them is a snap. Hardest part of the job was getting the car off the ground.
04-03-2009, 08:15 AM
#8
Safety Car
Member Since: Nov 2000
Location: Shenandoah Valley Virginia
Posts: 4,549
Likes: 0
Received 27 Likes
on
24 Posts

I installed the same combination of parts on my 03 Z06. A first time install will take 6-8 hours of your time. There are other spindle duct attachment types that do not require separating the spindle from the upright. They do not keep the air directed as well as the LG units. It may seem expensive, but it is a lot of work to get them installed correctly so that they fit right and do not rub during any point of suspension movement.
04-03-2009, 09:22 AM
#9

took me about 2 hours to install my DRM ducts, Quantium Motorsports spindle ducts & hose in my garage. with the quantium units, there is no need to disconnect the steering knuckle so installing them is a snap. Hardest part of the job was getting the car off the ground.
 30 minutes per side, 45 tops
04-03-2009, 10:00 AM
30 minutes per side, 45 tops
04-03-2009, 10:00 AM
#10
Former Vendor
This is one of those installs that either goes very easy and doesn't take much time. Or it takes a super long time. Isn't Jeff Flint up in that area. Or TJWONG here on the forum. Maybe those guys could do it also.
Randy
Randy
04-03-2009, 10:30 AM
#11
Race Director


I took 4 friday nights/saturday early mornings to do mine - it was a lot of dirty, knuckle busting fun.
Can't imagine paying someone else to enjoy my car for me
Can't imagine paying someone else to enjoy my car for me
04-03-2009, 02:46 PM
#12
Former Vendor

Member Since: Mar 2007
Location: Highland IN
Posts: 314
Likes: 0
Received 0 Likes
on
0 Posts
Our kits should NEVER take that long to install. No hub removal is necessary with any of our Corvette kits, and they all come with detailed instructions and even templates for cutting the inner fender well of the C6 to accommodate the Z06 inlets.
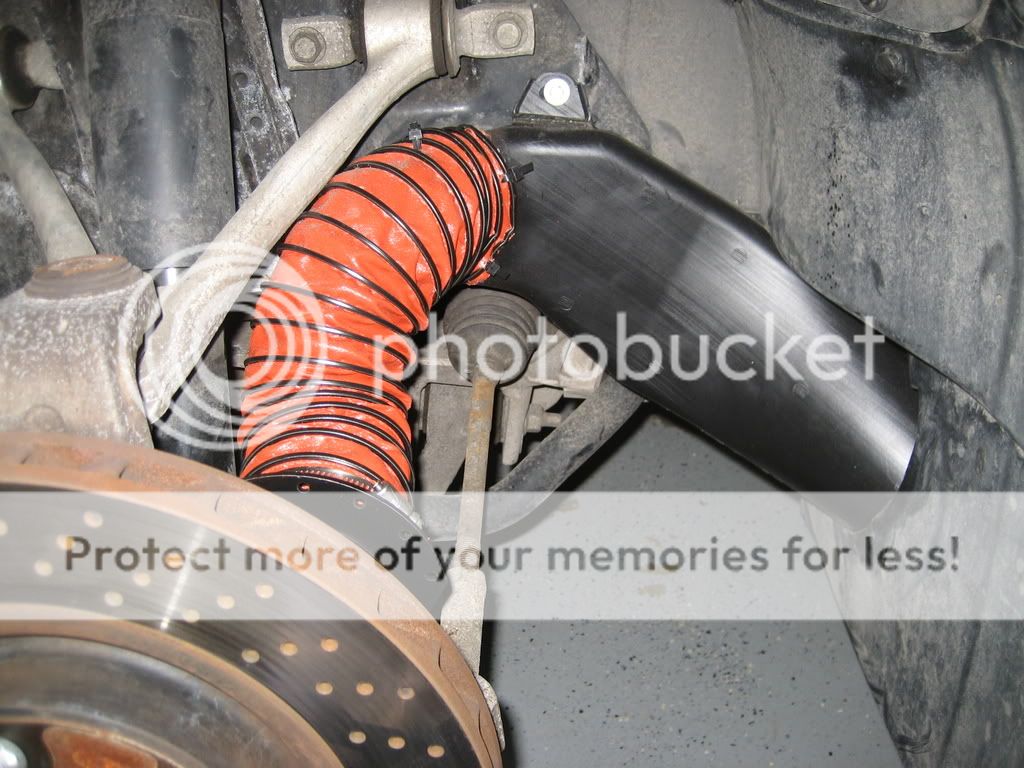
A complete bolt on installation as pictured below:

Give us a call if you have any questions. Even if you are not using our kit brake cooling is what we do and we would be happy to help.
Thanks,
Jon
04-03-2009, 03:15 PM
#13
Racer
If you sold a tool to easily seperate the lower ball joints, I'd buy it.
04-03-2009, 03:58 PM
#14
Safety Car
http://www.harborfreight.com/cpi/cta...emnumber=99849
I haven't tried this, but it looks a lot like the real GM tool...
I haven't tried this, but it looks a lot like the real GM tool...
04-03-2009, 04:25 PM
#15
Instructor

I went with the Phoenix ducts. Probably 1 hour per side including tapping the 2 threads for the bolts. I had more issue trying to keep the hose in place.
Best of luck.
Best of luck.
04-03-2009, 05:26 PM
#16
Drifting

 04-03-2009, 05:47 PM
#17
Team Owner


Corvettes of Auburn is only a 30-40 minute drive away and that is a reputable shop. He can also contact members of the Corvette Marque Club of Seattle and get some good recommendations. www.corvettemarqueclub.com
04-03-2009, 08:20 PM
#18
I've done this recently and that's probably about how long it took - in the garage with multiple trips to buy/find the right tools  . Shop with proper tools and minimal expertise should be able to wrap this up in 4 hours or less.
. Shop with proper tools and minimal expertise should be able to wrap this up in 4 hours or less.
04-03-2009, 08:26 PM
#19
Le Mans Master
Member Since: Feb 2000
Location: Bedford NH
Posts: 5,708
Likes: 0
Received 1 Like
on
1 Post
Cruise-In II Veteran
http://www.harborfreight.com/cpi/cta...emnumber=99849
I haven't tried this, but it looks a lot like the real GM tool...
I haven't tried this, but it looks a lot like the real GM tool...
I am going to make one more for Roy Benedetti, but it is not for sale. I can't make it for $18!
04-04-2009, 10:32 AM
#20
Racer
Member Since: Aug 2001
Location: Lindenhurst Illinois
Posts: 321
Likes: 0
Received 0 Likes
on
0 Posts
Steps.
1. Car on jackstands, wheel off. 15 minutes
2. Brake Caliper bracket and rotor off 15 minutes (rotor was rusted to hub)
3. Use a cutter to cut off the Break pad wear sensor connector bracket holder, relocate connector to other location. (5 minutes)
4. Remove Z51 duct pieces. (2 minutes)
5. Cut out holes for #4 pieces to fit the Z06 ducts (this was the longest step for me as it was a bit of trial and error for the 1st one, the 2nd one went very quickly). . Also drill some small holes to mount the Z06 duct to the chassis. (About 25 minutes 1st time, about 10 the second)
6. Remove the bolts on the back of the hub (2 of 3) with a T55 torx (had to go and buy this at NAPA, I had a T50 and T60, of course) 5 minutes
7. Install hub bracket. 5 minutes (A goose wandered into my garage and scared the crap out of me at this point...)
8. Test fit ducting and cut to size. 10 minutes
9. Tie-wrapping the ducting to the Z06 ducts was a bit of a pain but pretty easy overall. Other end is a hose clamp, very easy. 25 minutes
10. Put it all back together. (see David Farmer's torque specs for the Corvette! Thanks David!) 20 minutes.
Repeat for other side. If you do not count the trip to Napa or the beer to settle my nerves after the goose visit, this whole job took me about 4 hours, but I was not in a hurry. If you have the tools and no geese it should go pretty quickly for you