
Got my Ultrashield Seat installed
 06-01-2007, 10:26 PM
#1
Tech Contributor
Thread Starter
Member Since: Oct 1999
Location: Charlotte, NC (formerly Endicott, NY)
Posts: 40,126
Received 8,958 Likes
on
5,346 Posts

Everything showed up late yesterday. I went with the 17 inch Ultrashield 20 degree layback, Hardbar seat rails and a seat brace from Pegasus (which turned out to be an I/O Port brace--problem). After assembling one of Gary's rails and test fitting it on the seat I decided to put the uprights on the outside of the horizontal bar since I had to drill mounting holes in the side of the seat. At first I had the seat resting on the horizontal rail so the raile would take some of my weight but the seat was too low. Then I raised it an inch. This turned out to be all that I could raise it since the seat back hit the headliner (in 2003 GM changed the headliner in the Z and made it so it dropped down about an inch just above the drivers head). This is a slight problem since I would like the seat just a bit higher so the bottom of my legs would be held by the seat. I don't want to rotate the seat backwards since the seat back is just about right. I tried to address this by adding an inch of foam to the seat before I put the cover on.
Now for the fun part. The reason I went with the Pegasus seat brace is they told me it would fit a 2 inch roll bar. When I opened the box and saw that it was an I/O Port brace I knew I was going to have a problem since the I/O Port piece fits a max 1 3/4 inch bar. After getting my belts set I spent quite a bit of time filing the mounting bracket for the seat brace so it would fit my 2 inch bar. All told I spent about 4 hours last night and 7 hours today getting the seat in the car.
Here are some pictures:
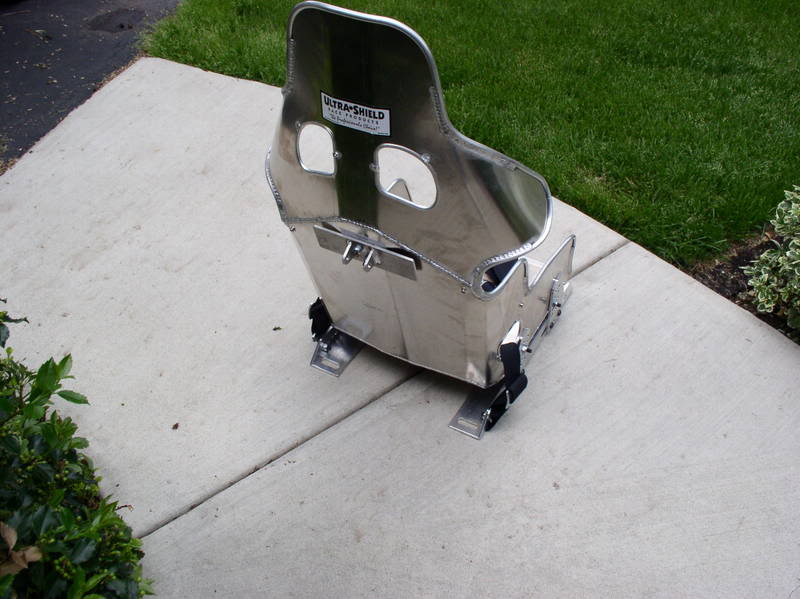
Finished Job!!!
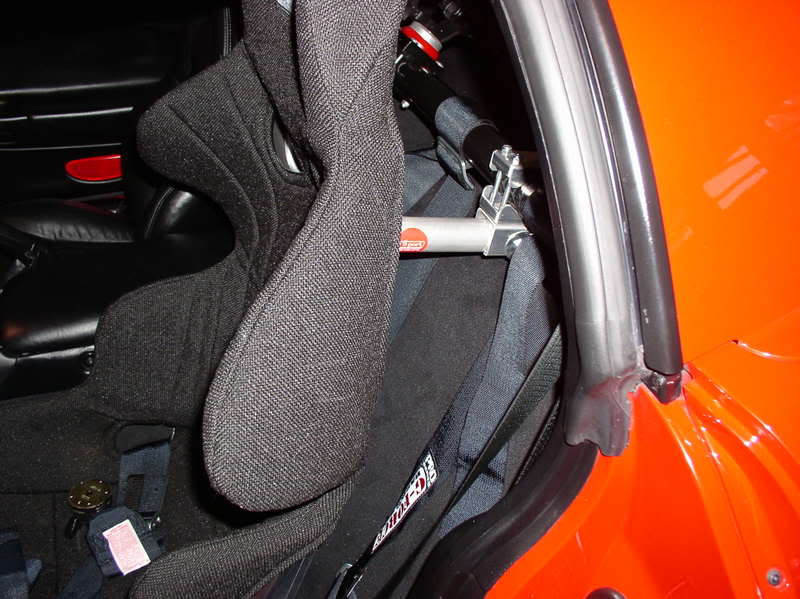
I/O Port Seat Brace fastened to roll bar. What fun!!

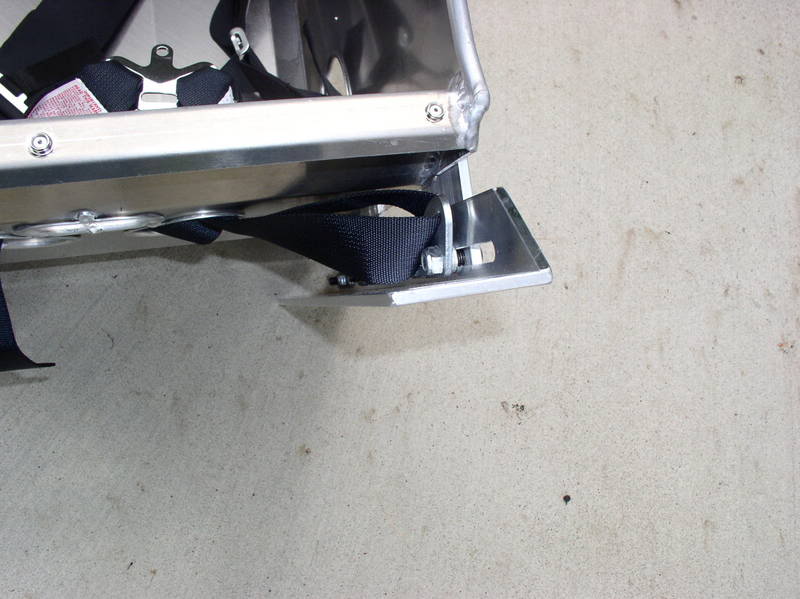
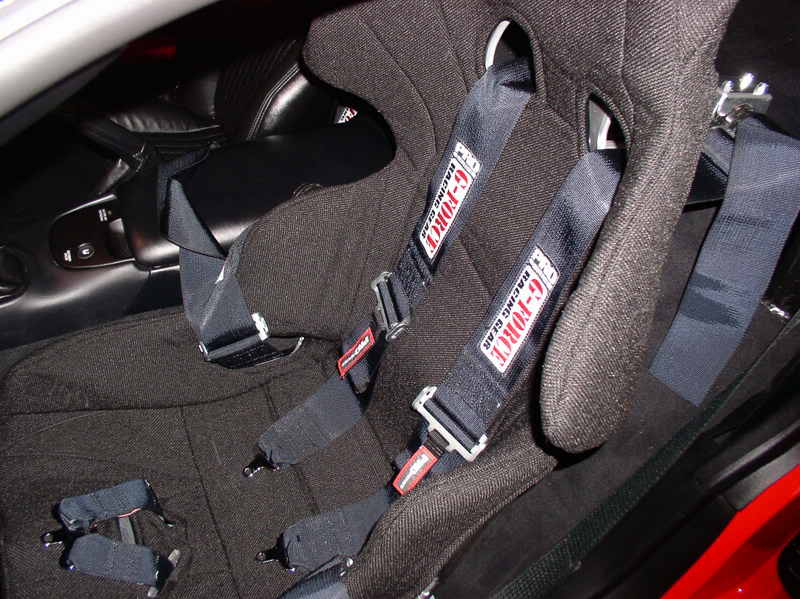
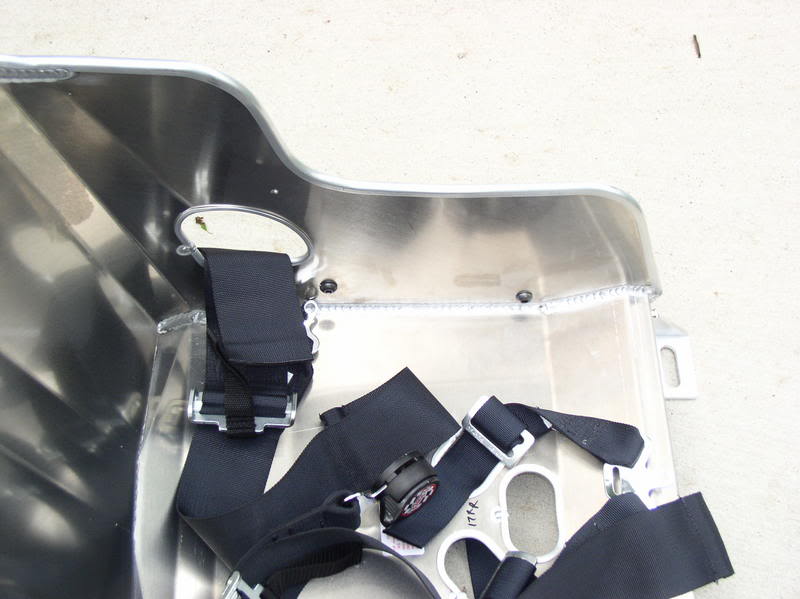
This picture shows the sub belt mounting for my 6 point G Force belts. I would have preferred to keep my clip in fastener but the eye bolts that I had were to big to fit to the seat. Thus I have a Simpson 2 inch bolt in mount with 2 washers between it and the seat mount. The washers allow the belt to move if I want to adjust it.
This picture shows the I/O Port seat brace mounted to the seat. I finally moved it several inches higher so it is just below the shoulder harness holes now. I also bent the flange so it fits the seat better.
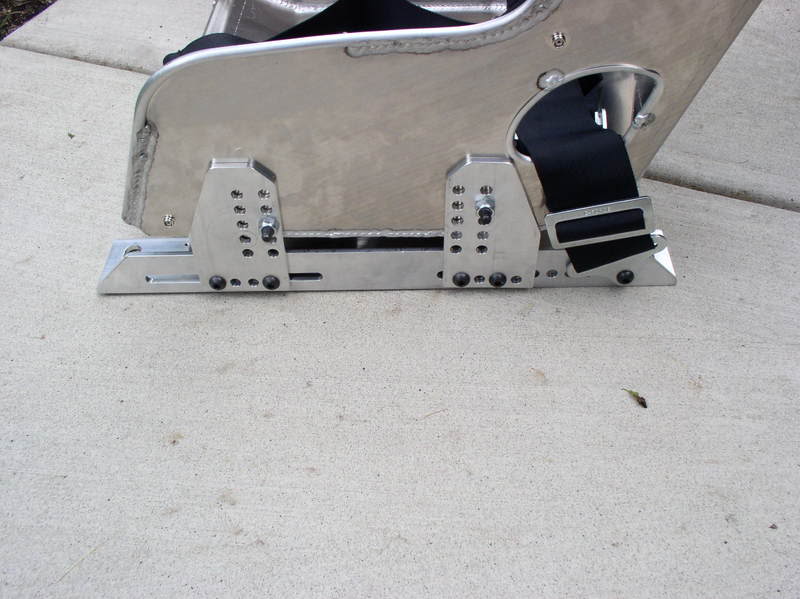
Thanks to Gary at Hardbar for the great seat mounts.
Bill
Now for the fun part. The reason I went with the Pegasus seat brace is they told me it would fit a 2 inch roll bar. When I opened the box and saw that it was an I/O Port brace I knew I was going to have a problem since the I/O Port piece fits a max 1 3/4 inch bar. After getting my belts set I spent quite a bit of time filing the mounting bracket for the seat brace so it would fit my 2 inch bar. All told I spent about 4 hours last night and 7 hours today getting the seat in the car.
Here are some pictures:
Finished Job!!!
I/O Port Seat Brace fastened to roll bar. What fun!!
This picture shows the sub belt mounting for my 6 point G Force belts. I would have preferred to keep my clip in fastener but the eye bolts that I had were to big to fit to the seat. Thus I have a Simpson 2 inch bolt in mount with 2 washers between it and the seat mount. The washers allow the belt to move if I want to adjust it.
This picture shows the I/O Port seat brace mounted to the seat. I finally moved it several inches higher so it is just below the shoulder harness holes now. I also bent the flange so it fits the seat better.
Thanks to Gary at Hardbar for the great seat mounts.
Bill
Last edited by Bill Dearborn; 06-01-2007 at 10:29 PM.
 06-02-2007, 03:23 AM
#2
Team Owner

Member Since: Mar 2001
Location: Virginia Beach
Posts: 25,889
Likes: 0
Received 5 Likes
on
5 Posts
CI 3-5-6-7-8 Veteran

Funny... I spent my evening installing the exact same seat w/ the harbar mounts too.
However, I installed my much lower as I'm 6'4". I have the uprigths laying down both front and rear. In the front I drilled my hole just behind the snap so I cout hae the bolt head on the outside for more clearance. On the rear I installed the bolt from the inside and after tightening it up I ground off the head for more clearance.
I like the idea of putting the uprigths on the outside as it moves the bottom parts in just enough for more clearance. I'll just ave to make sure my seat is up above the side rails as I have it mounted very low.

 06-03-2007, 12:04 AM
#5
Tech Contributor
Thread Starter
Member Since: Oct 1999
Location: Charlotte, NC (formerly Endicott, NY)
Posts: 40,126
Received 8,958 Likes
on
5,346 Posts
Funny... I spent my evening installing the exact same seat w/ the harbar mounts too.
However, I installed my much lower as I'm 6'4". I have the uprigths laying down both front and rear. In the front I drilled my hole just behind the snap so I cout hae the bolt head on the outside for more clearance. On the rear I installed the bolt from the inside and after tightening it up I ground off the head for more clearance.
I like the idea of putting the uprigths on the outside as it moves the bottom parts in just enough for more clearance. I'll just ave to make sure my seat is up above the side rails as I have it mounted very low.
Bill
Last edited by Bill Dearborn; 06-03-2007 at 12:06 AM.
06-03-2007, 03:22 AM
#6
Team Owner
Member Since: Mar 2001
Location: Virginia Beach
Posts: 25,889
Likes: 0
Received 5 Likes
on
5 Posts
CI 3-5-6-7-8 Veteran
Figured out tonght that I can't mount my uprights on the outside as I have the seat so low that it sits w/ in the side rails. Having the uprights on the outside would limit the min height of the bottom to the height of the side rails.
I have the seat a hair too upright for my liking, and I noticed that in the rear I have about 3/8" between the nuts on the inside and the seat bottom. SO... I'm going to put a socket on the nut and lower the back of the seat to hit the socket and then drill new holes.
Then I'll put the seat back in the car and drive around my neighborhood for a few days to tweak it in prep for Mazdadrivers in 2 weeks.
06-03-2007, 04:20 PM
#7
Tech Contributor
Thread Starter
Member Since: Oct 1999
Location: Charlotte, NC (formerly Endicott, NY)
Posts: 40,126
Received 8,958 Likes
on
5,346 Posts
Bill
06-03-2007, 04:41 PM
#8
Team Owner
Member Since: Mar 2001
Location: Virginia Beach
Posts: 25,889
Likes: 0
Received 5 Likes
on
5 Posts
CI 3-5-6-7-8 Veteran
Allready had the seat bolted in... and yes it's a very tight fit, but to have the uprights on the outside I'd have to raise the seat up which is not an option.
I'm considering taking my dremmel to the trim that covers the seat belt receptical anyway.
I'm considering taking my dremmel to the trim that covers the seat belt receptical anyway.

