
My $300 C6 Z06 sound system upgrade
 03-12-2010, 10:52 AM
#1
Racer

Thread Starter
I could finally not stand my poor excuse for a premium sound system in the Z06, so here we are. My stock '05 sunfire's monsoon sound system no longer sounds better than the Z 
Making 30k/year doesn't quite qualify me for throwing down $2,500+ on a good sound system (or owning a Z06 for that matter), so my goal was to get this done cheaply.
About 10 years ago, I was very big into car audio and bought myself a kenwood excelon z919 (first kenwood mp3 unit, $900) hifonics goliath amp ($800), mmats mono d-class amp ($1000), magnat xtrema 216 components ($300), 3 kicker 12" subs ($300) which were quickly replaced with 1 audiomobile mass 12" sub ($300) to get better SQ and to save my hearing..
Over time, I got rid of most of that (and sold the car most of them were in), but still have the magnat components, so they'll be in my new system.
Costs
$0 magnat xtrema 216 components from my old car
$0 4 gauge wire from my old car
$0 some old plywood and particle board
$130 Vibe Slick A4 1000w amp (on sale at frys)
$67 Polk audio db1040 10" sub (on sale at frys)
$44 2 rolls of frostking duct insulation (lowes)
$15 1 roll of dynamat hood insulation (frys)
$13 Speaker wire from walmart
$31 bandaids for the cuts that the frost king gave me
----
$300 total
Insulation/deadening:
The dynamat hood insulator is foil covered foam (that won't cut you) that is about 3/4 - 1 inch thick. I wish I could find more as it really cuts down on road noise. It doesn't do much deadening though as it is a very light and compressible foam. I covered most of my rear hatch area with this (under the carpet). With only this installed, there was a noticeable difference in the amount of exhaust/road noise that entered the cabin.
Frost king duct insulation has been the poor man's dynamat for as long as I can remember. It's a dense gooey foam about 1/4" thick covered with very sharp foil. I found it in the pipe insulation section of lowes.
The drawbacks to this stuff is that your hands will get cut up if you're not careful and it doesn't really stick that well.
With two rolls, I was able to cover both my doors, behind the driver's seat, the rest of the hatch area (that the hood insulator didn't cover), the rear speaker panels, and still have about 6 square feet left.
Here's a few pictures:
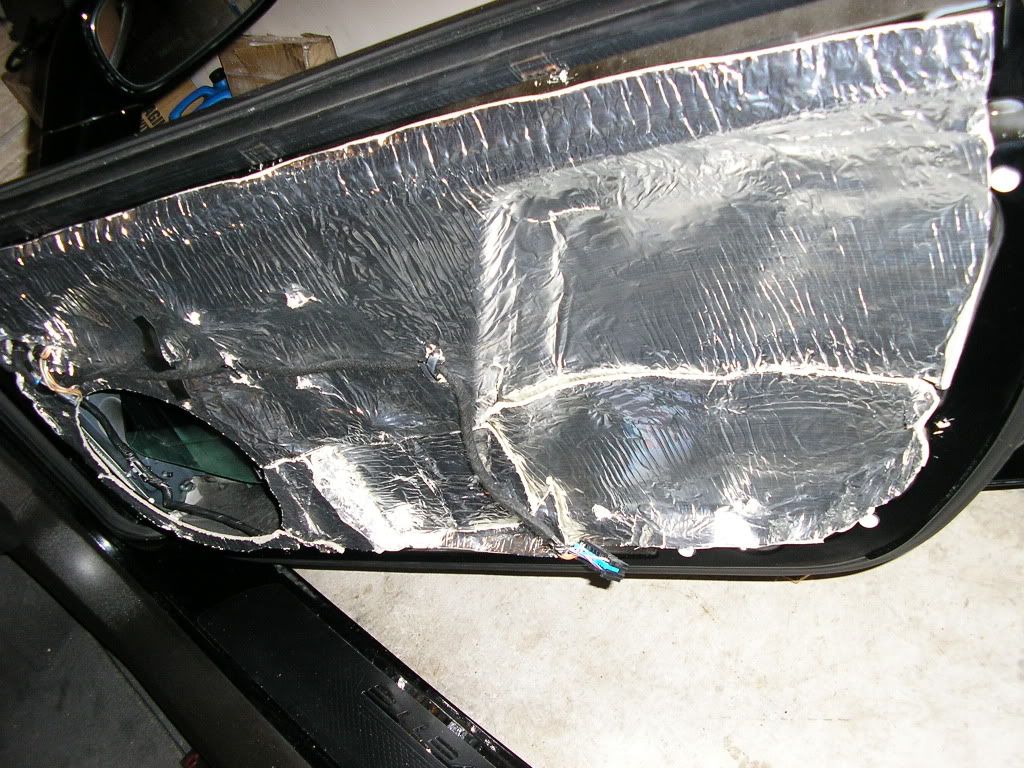
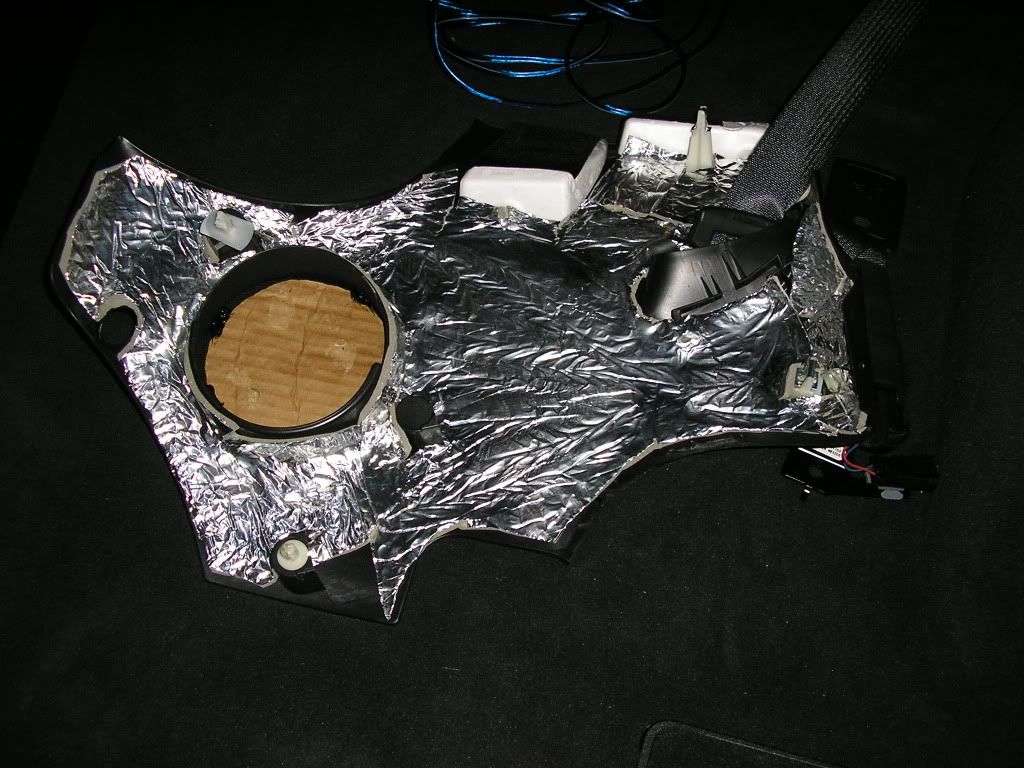
As you can see, I applied frost king to the backs of the rear panels. I did this simply because it was too difficult to shove that stuff behind the rear speaker mounts. I also painted pieces of cardboard black and put them in the speaker grills (using black silicone) to cut out a bit more noise as I'll not be using rear speakers.
Tapping into the Bose stereo
For the remote wire for the amp, I used the Wiper/Washer fuse. This isn't on the delay circuit, so it is only on when the car is on or in accessory mode.
To get audio, I could have used an adapter harness (http://forums.corvetteforum.com/audi...r-harness.html), but since I am planning on upgrading my head unit eventually, I decided connect wires directly to the harness that feeds the signals to the bose amp.
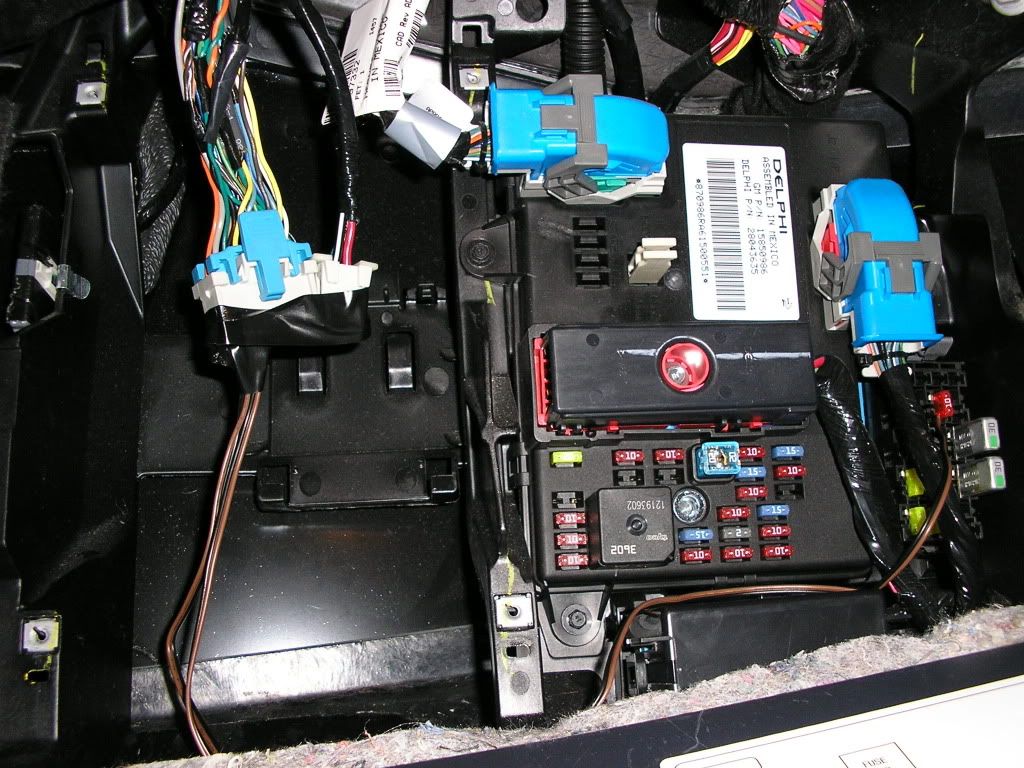
And doing it like this, I don't need to take the center console or stereo out. If you plan on doing this yourself, the inputs are all on one side of the harness while the outputs are on the other. The color for the inputs (that provide your audio signal), in the order they appear on the harness are:
Rear Right (-): Tan
Rear Right (+): Blue
Rear Left (-): Brown
Rear Left (+): Brown/White
Front Right (+): Green
Front Right (-): Light Teal blue
Front Left (+): Dark Teal blue
Front Left (-):Tan
I simply took some long thin speaker wire, soldered them onto some cheap dollar store RCA's and plugged this into my amp. I pushed the ends of the wires into the proper place in the harness and taped them up so they wouldn't fall out. No, it doesn't get much cheaper than that (until you see my speaker box).
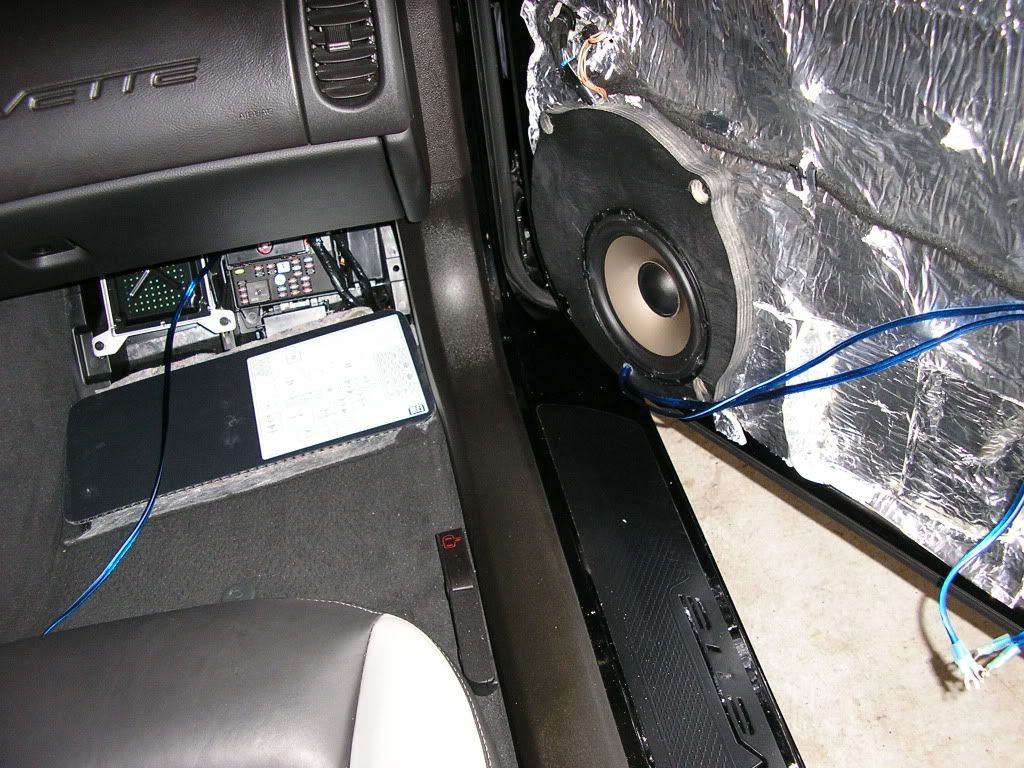
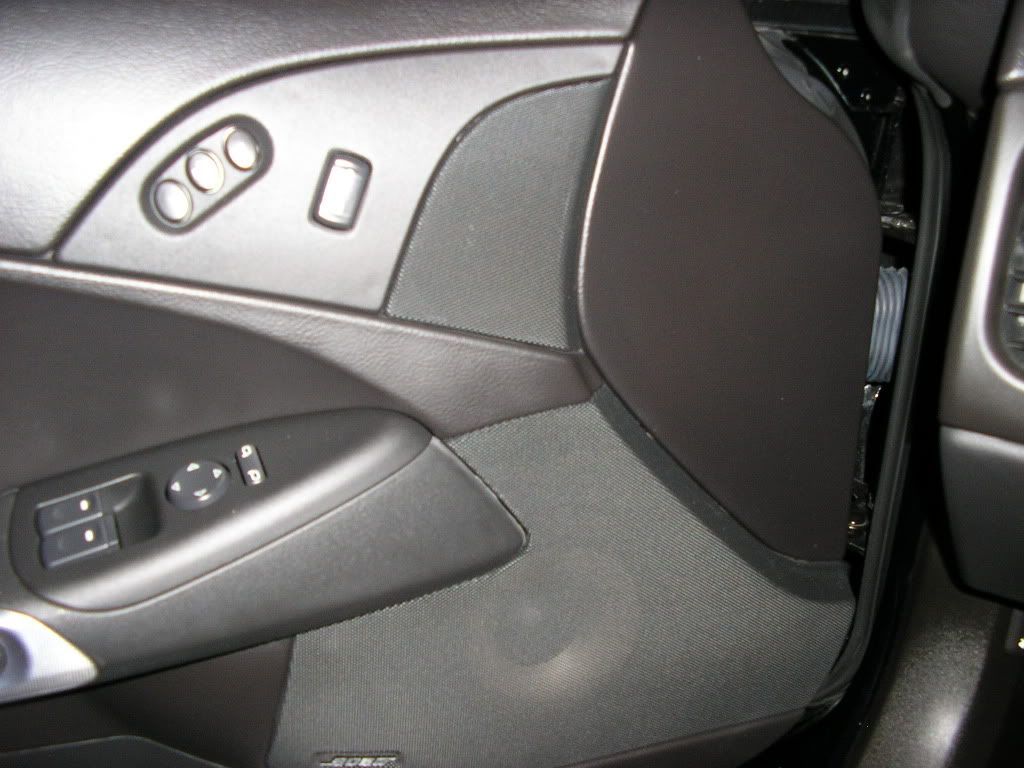
Front speaker install
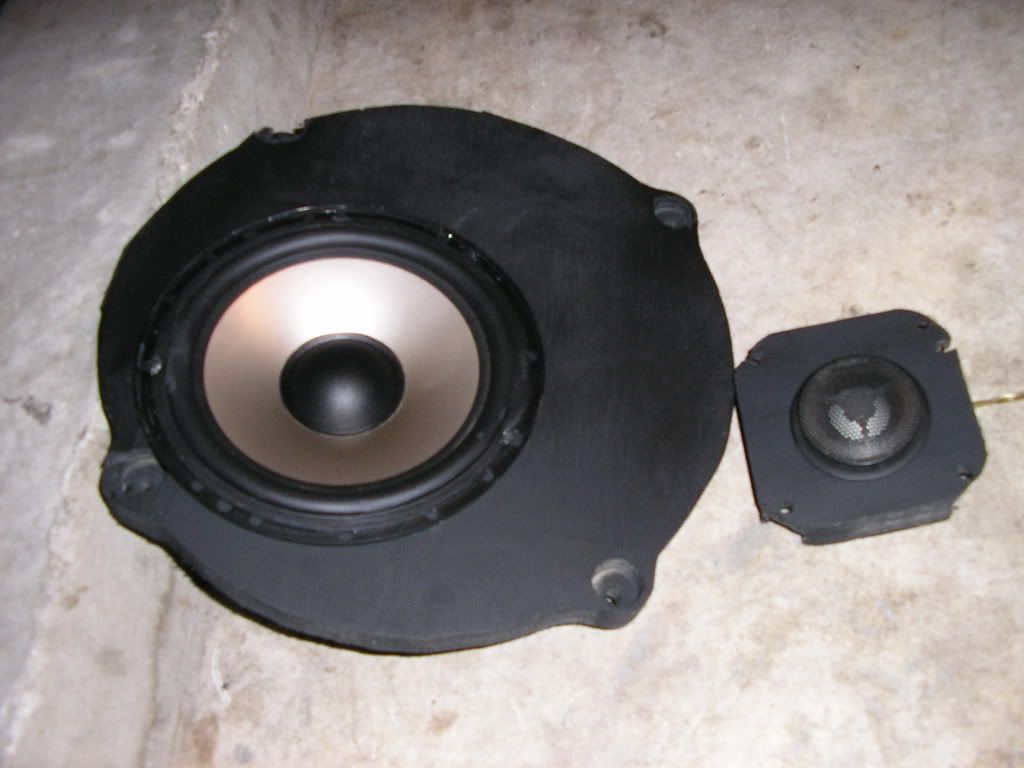
The Magnat components, the only good part of my system, are some amazing speakers. I'm glad I spent the time cracking them out of their old fiberglass enclosures before I got rid of my old car.
I had some old plywood laying around and made some speaker adapters:
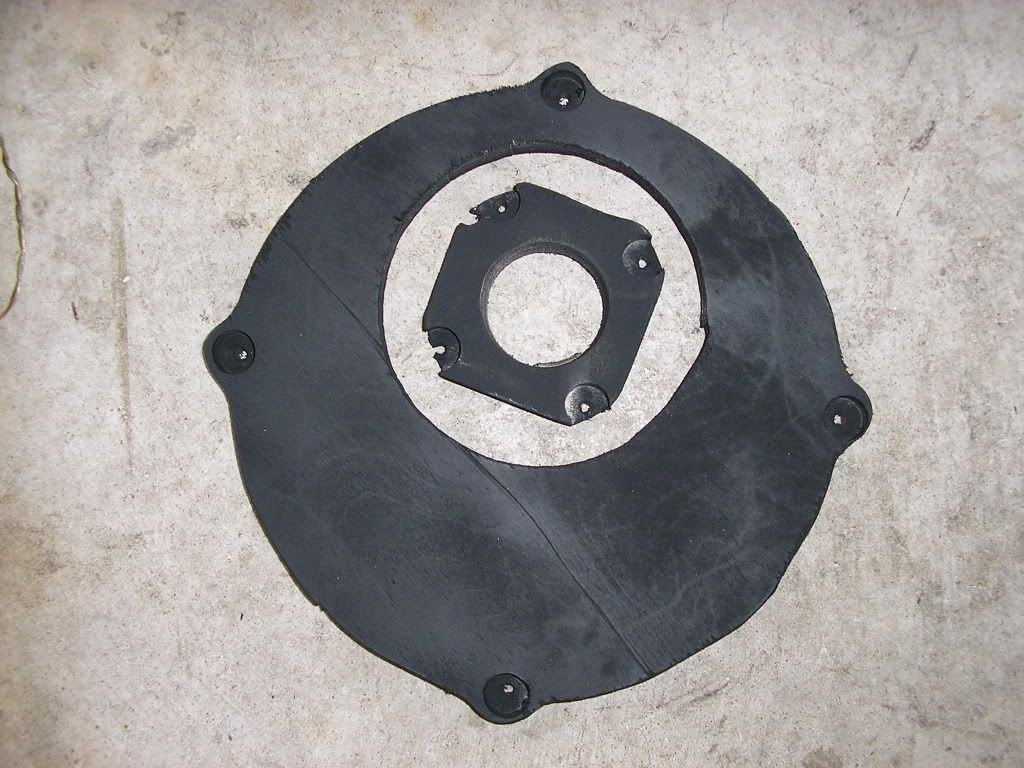
3/4" plywood is definitely not the material you want to use when making these (if you have money). It's too thick and can cause clearance issues with the door panel and of course plywood shatters into flakes if you cut it the wrong way. I had to do some additional cutting of the big adapters around the screw holes to get the door panels to fit flush.
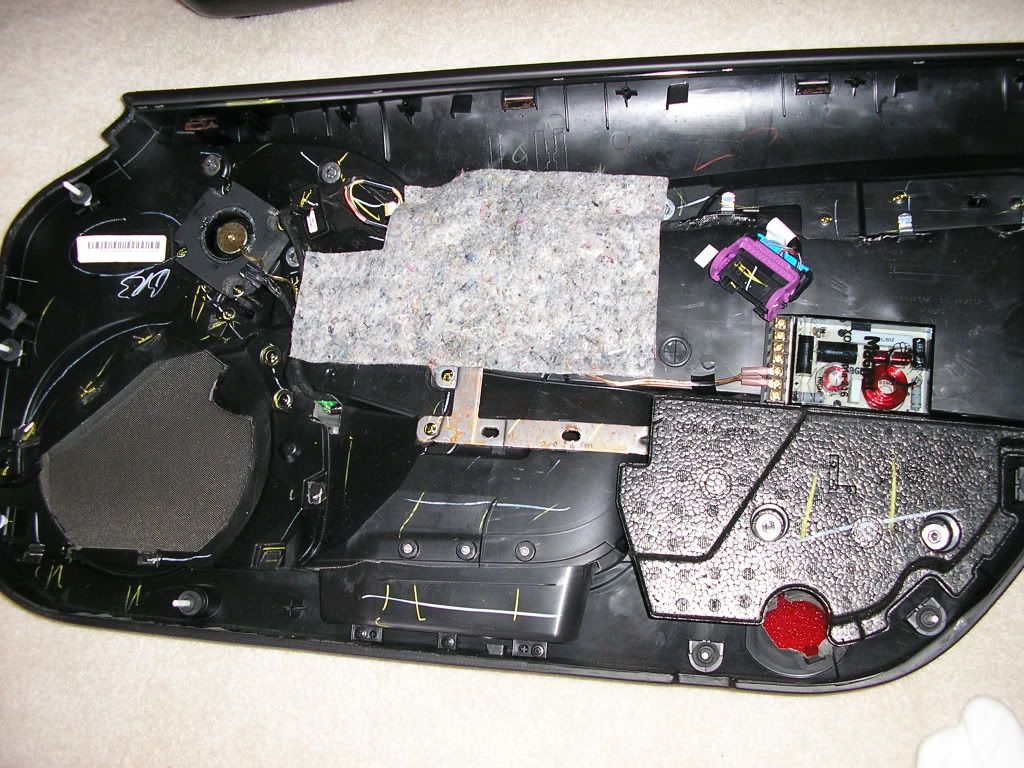
Crossover and tweeter mounted on door panel:
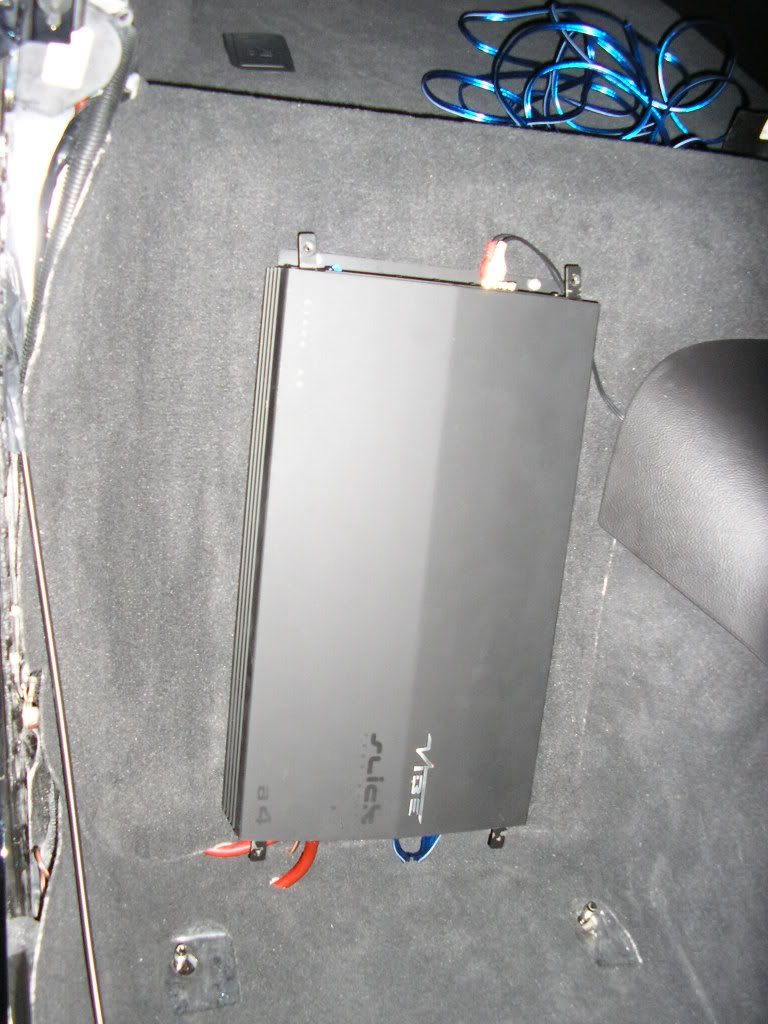
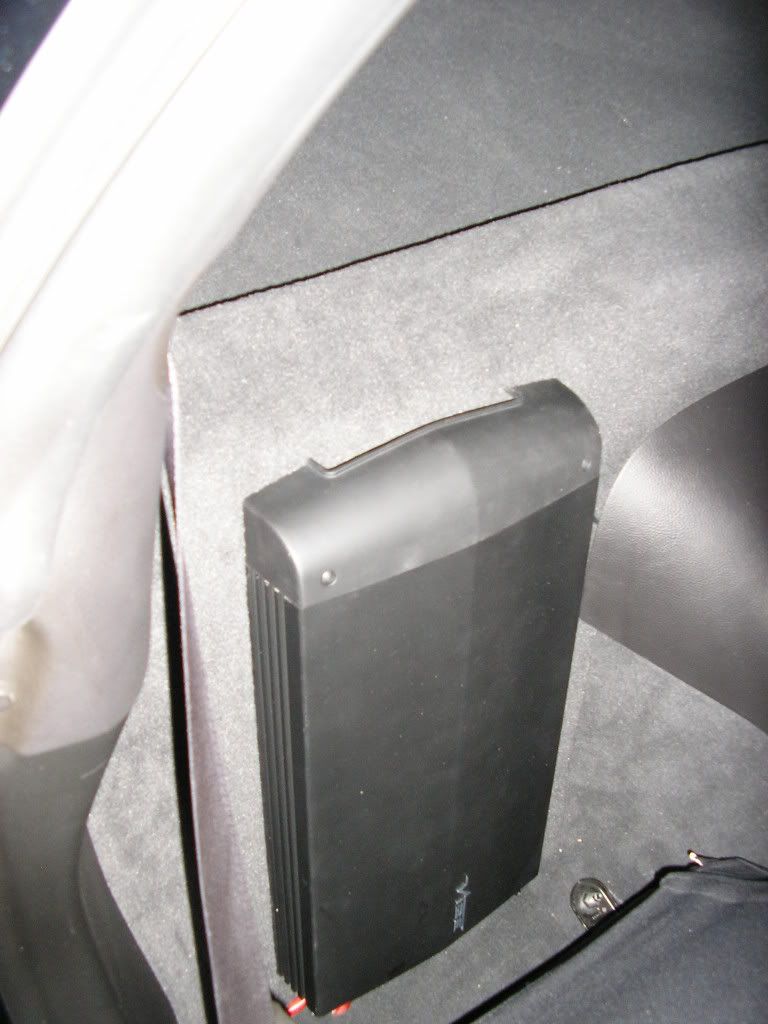
Amp install
The Vibe Slick A4 4-channel amp has some pretty impressive specs at 1000w RMS and 2000W max power (250w x 4 at 2 ohms, 150w x 4 at 4 ohms, 250w x 2 at 4 ohms bridged), but then again, so does Jensen and Diesel audio amps (which are crap). They're primarily sold in England and I couldn't find any reviews. But it looked nice, so I decided to take a chance. MSRP is $300, they typically sell for $180, but Frys had an open-box A4 for $130. Frys currently also has the A3 new for $110 that does 650w RMS.
I had some particle board from some old shelving that I used to make my amp board. I inserted bolts from the back side, glued them in, then glued the board to the area behind the passenger's seat.
I decided to use the bolts since screwing into cheap particle board isn't a good idea. If I had to do it again, I'd use two strips of board instead of using one large board as it was tough to attach the amp with the carpet's foam pressing in between the board and bottom of the amp.
Amp installed using 4GA wire going to the battery in the back. There's a bolt, right to the left of the amp that I used for its ground. There were two other wires grounded there already. The area under the bolt is painted, so I sanded it.
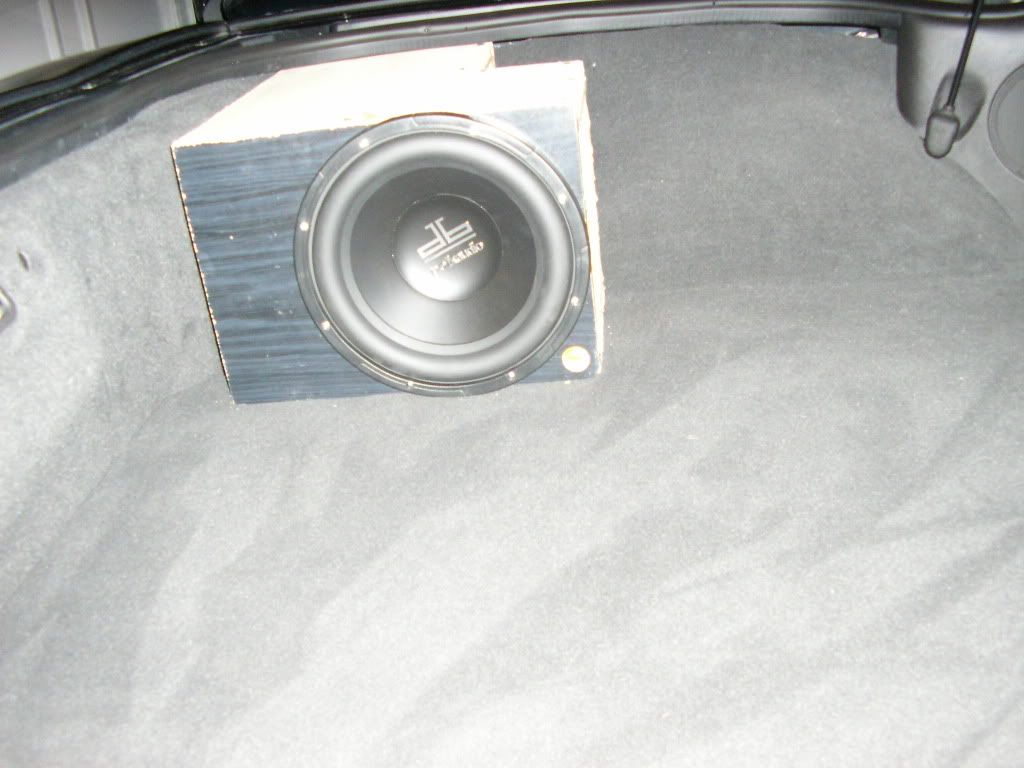
Sub install
The Polk db1040 is basically the bottom-of-the-line sub. Though since normal price was ~$90 and I got mine for $67, I don't feel so bad if I blow it.
You can't just throw this in the back though. I actually ordered one of the madvette stealth sub boxes for $225, but as you've probably heard, it may take a few months to get to me.
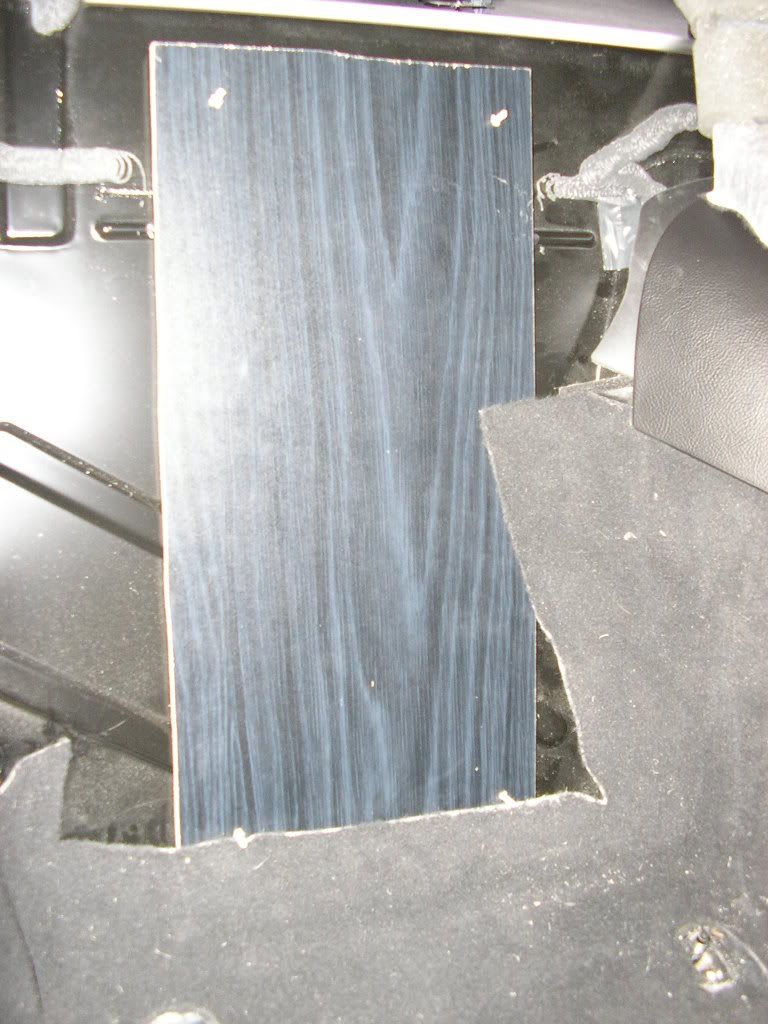
So I decided to use the rest of my plywood and particle board to build a box. I was planning on building a temporary 12"x12"x12" box, but this wouldn't fit well in the back of a vette as you've only got about 10" between the carpet and hatch. I ended up designing a 10" box that would fit back into the area over the driver's cubby.
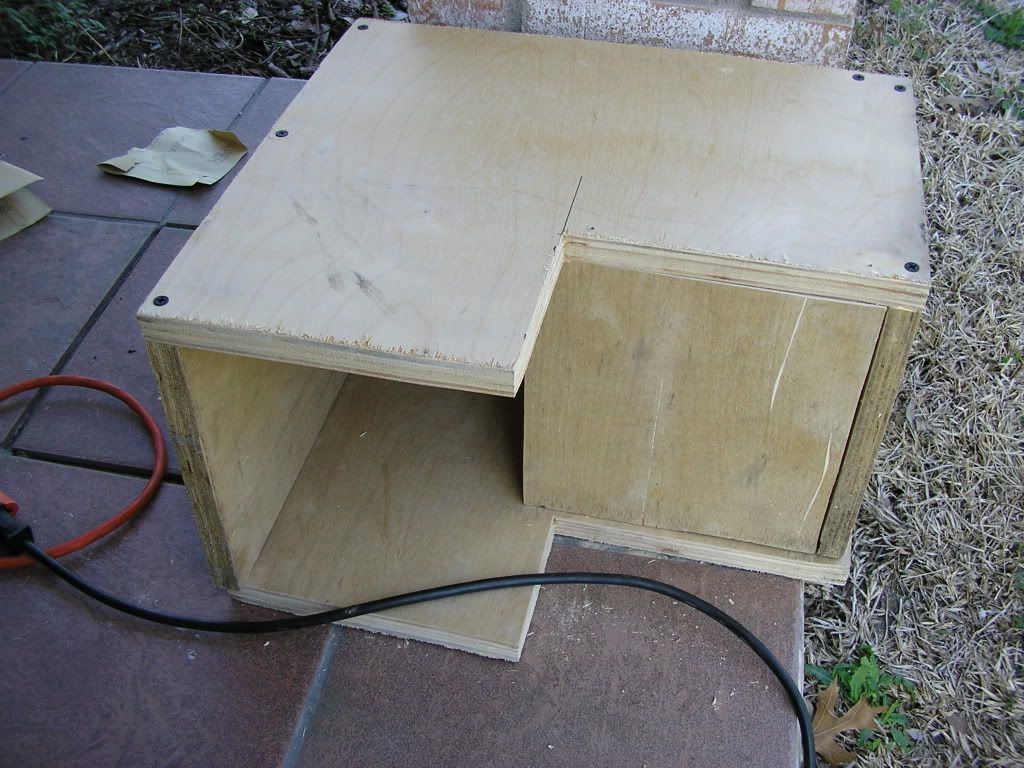
I seem to have lost my circular saw, so I used a jigsaw to make these cuts. That's not a good thing if you want to cut in a straight line, so I ended up with some gaps in my box that needed a lot of glue/silicone to fix.
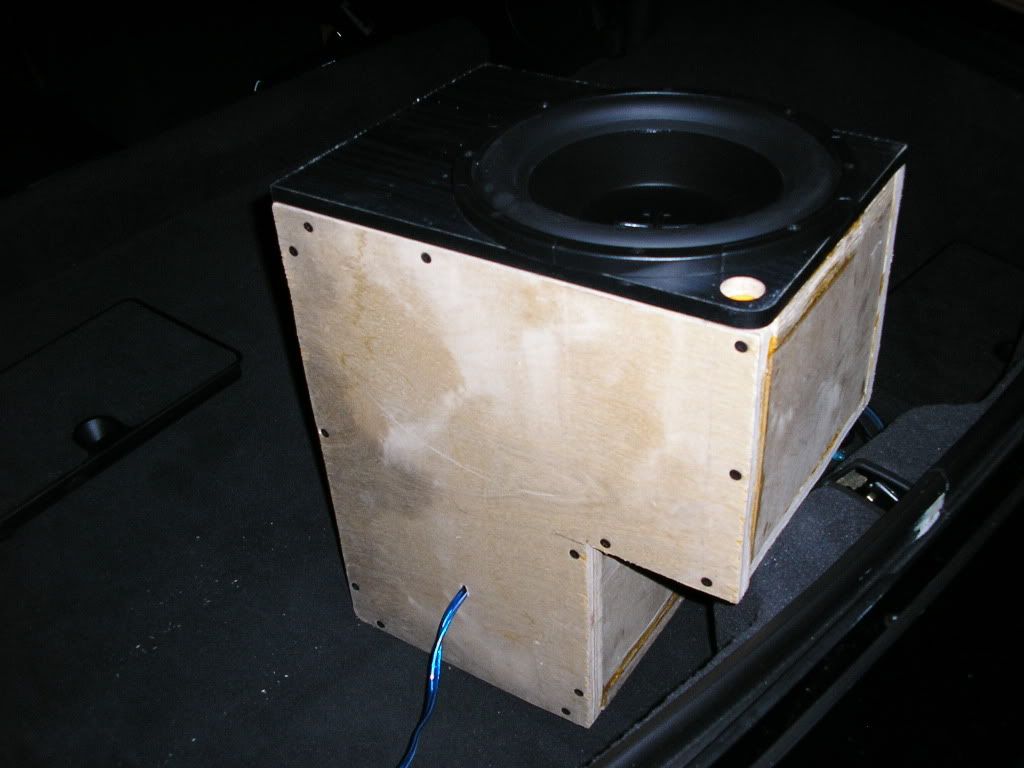
My 10" sub would barely fit into my 10" wide box, so I cut an additional piece of black particle board and glued this to the box to mount the sub to.
All done!
I actually had the components and amp installed and running for the last few days. There was an impressive difference in sound quality and midbass between this system and the stock bose. Low-end bass wasn't quite there at high volumes, but if I had the choice of having the 7-speaker bose system or my 6.5"'s and tweets and amp, I'd have to pass on the bose.
I let my box glue/silicone dry over night and fired up the sub this morning. Now I've got a nice sounding system
The polk sub doesn't seem to be able to keep up with the components and starts distorting from too much volume a bit earlier than I'd like. Though this could be because my box may have some leaks (very likely) or I'm just too used to 800W 12" subs.
So It will be going on reduced volume until I get my madvette box.
As for a comparison between my new $300 system and the stock bose (even with my half-assed box): There is no comparison. Mine is so much better that it makes me wonder why GM is still installing bose stereos in corvettes.
Final install pictures
This is basically what you'd see if you looked in my car now. If it takes too long to get my madvette box, I may paint or carpet my box which will definitely help reduce its ghetto look
Making 30k/year doesn't quite qualify me for throwing down $2,500+ on a good sound system (or owning a Z06 for that matter), so my goal was to get this done cheaply.
About 10 years ago, I was very big into car audio and bought myself a kenwood excelon z919 (first kenwood mp3 unit, $900) hifonics goliath amp ($800), mmats mono d-class amp ($1000), magnat xtrema 216 components ($300), 3 kicker 12" subs ($300) which were quickly replaced with 1 audiomobile mass 12" sub ($300) to get better SQ and to save my hearing..
Over time, I got rid of most of that (and sold the car most of them were in), but still have the magnat components, so they'll be in my new system.
Costs
$0 magnat xtrema 216 components from my old car
$0 4 gauge wire from my old car
$0 some old plywood and particle board
$130 Vibe Slick A4 1000w amp (on sale at frys)
$67 Polk audio db1040 10" sub (on sale at frys)
$44 2 rolls of frostking duct insulation (lowes)
$15 1 roll of dynamat hood insulation (frys)
$13 Speaker wire from walmart
$31 bandaids for the cuts that the frost king gave me
----
$300 total
Insulation/deadening:
The dynamat hood insulator is foil covered foam (that won't cut you) that is about 3/4 - 1 inch thick. I wish I could find more as it really cuts down on road noise. It doesn't do much deadening though as it is a very light and compressible foam. I covered most of my rear hatch area with this (under the carpet). With only this installed, there was a noticeable difference in the amount of exhaust/road noise that entered the cabin.
Frost king duct insulation has been the poor man's dynamat for as long as I can remember. It's a dense gooey foam about 1/4" thick covered with very sharp foil. I found it in the pipe insulation section of lowes.
The drawbacks to this stuff is that your hands will get cut up if you're not careful and it doesn't really stick that well.
With two rolls, I was able to cover both my doors, behind the driver's seat, the rest of the hatch area (that the hood insulator didn't cover), the rear speaker panels, and still have about 6 square feet left.
Here's a few pictures:
As you can see, I applied frost king to the backs of the rear panels. I did this simply because it was too difficult to shove that stuff behind the rear speaker mounts. I also painted pieces of cardboard black and put them in the speaker grills (using black silicone) to cut out a bit more noise as I'll not be using rear speakers.
Tapping into the Bose stereo
For the remote wire for the amp, I used the Wiper/Washer fuse. This isn't on the delay circuit, so it is only on when the car is on or in accessory mode.
To get audio, I could have used an adapter harness (http://forums.corvetteforum.com/audi...r-harness.html), but since I am planning on upgrading my head unit eventually, I decided connect wires directly to the harness that feeds the signals to the bose amp.
And doing it like this, I don't need to take the center console or stereo out. If you plan on doing this yourself, the inputs are all on one side of the harness while the outputs are on the other. The color for the inputs (that provide your audio signal), in the order they appear on the harness are:
Rear Right (-): Tan
Rear Right (+): Blue
Rear Left (-): Brown
Rear Left (+): Brown/White
Front Right (+): Green
Front Right (-): Light Teal blue
Front Left (+): Dark Teal blue
Front Left (-):Tan
I simply took some long thin speaker wire, soldered them onto some cheap dollar store RCA's and plugged this into my amp. I pushed the ends of the wires into the proper place in the harness and taped them up so they wouldn't fall out. No, it doesn't get much cheaper than that (until you see my speaker box).
Front speaker install
The Magnat components, the only good part of my system, are some amazing speakers. I'm glad I spent the time cracking them out of their old fiberglass enclosures before I got rid of my old car.
I had some old plywood laying around and made some speaker adapters:
3/4" plywood is definitely not the material you want to use when making these (if you have money). It's too thick and can cause clearance issues with the door panel and of course plywood shatters into flakes if you cut it the wrong way. I had to do some additional cutting of the big adapters around the screw holes to get the door panels to fit flush.
Crossover and tweeter mounted on door panel:
Amp install
The Vibe Slick A4 4-channel amp has some pretty impressive specs at 1000w RMS and 2000W max power (250w x 4 at 2 ohms, 150w x 4 at 4 ohms, 250w x 2 at 4 ohms bridged), but then again, so does Jensen and Diesel audio amps (which are crap). They're primarily sold in England and I couldn't find any reviews. But it looked nice, so I decided to take a chance. MSRP is $300, they typically sell for $180, but Frys had an open-box A4 for $130. Frys currently also has the A3 new for $110 that does 650w RMS.
I had some particle board from some old shelving that I used to make my amp board. I inserted bolts from the back side, glued them in, then glued the board to the area behind the passenger's seat.
I decided to use the bolts since screwing into cheap particle board isn't a good idea. If I had to do it again, I'd use two strips of board instead of using one large board as it was tough to attach the amp with the carpet's foam pressing in between the board and bottom of the amp.
Amp installed using 4GA wire going to the battery in the back. There's a bolt, right to the left of the amp that I used for its ground. There were two other wires grounded there already. The area under the bolt is painted, so I sanded it.
Sub install
The Polk db1040 is basically the bottom-of-the-line sub. Though since normal price was ~$90 and I got mine for $67, I don't feel so bad if I blow it.
You can't just throw this in the back though. I actually ordered one of the madvette stealth sub boxes for $225, but as you've probably heard, it may take a few months to get to me.
So I decided to use the rest of my plywood and particle board to build a box. I was planning on building a temporary 12"x12"x12" box, but this wouldn't fit well in the back of a vette as you've only got about 10" between the carpet and hatch. I ended up designing a 10" box that would fit back into the area over the driver's cubby.
I seem to have lost my circular saw, so I used a jigsaw to make these cuts. That's not a good thing if you want to cut in a straight line, so I ended up with some gaps in my box that needed a lot of glue/silicone to fix.
My 10" sub would barely fit into my 10" wide box, so I cut an additional piece of black particle board and glued this to the box to mount the sub to.
All done!
I actually had the components and amp installed and running for the last few days. There was an impressive difference in sound quality and midbass between this system and the stock bose. Low-end bass wasn't quite there at high volumes, but if I had the choice of having the 7-speaker bose system or my 6.5"'s and tweets and amp, I'd have to pass on the bose.
I let my box glue/silicone dry over night and fired up the sub this morning. Now I've got a nice sounding system
The polk sub doesn't seem to be able to keep up with the components and starts distorting from too much volume a bit earlier than I'd like. Though this could be because my box may have some leaks (very likely) or I'm just too used to 800W 12" subs.
So It will be going on reduced volume until I get my madvette box.
As for a comparison between my new $300 system and the stock bose (even with my half-assed box): There is no comparison. Mine is so much better that it makes me wonder why GM is still installing bose stereos in corvettes.
Final install pictures
This is basically what you'd see if you looked in my car now. If it takes too long to get my madvette box, I may paint or carpet my box which will definitely help reduce its ghetto look
Last edited by LMBTom; 03-12-2010 at 11:20 AM.


 03-13-2010, 08:45 AM
#3
Racer
Thread Starter
It sounds very good. I'm currently re-sealing my box and will probably take this time to make it look a bit better
I've tuned it as much as I can with the amp and stock unit and doesn't quite sound perfect yet with all songs. I wish I had more than the options for treble/midrange/bass on the head unit. I plan on getting a kenwood dnx 6960 or something similar which should help out.
I also had my 6.5's sealed in fiberglass enclosures in my previous car which really brought out the mids. I'm thinking about doing something like this here, but it's going to be hard unless I take the entire door apart..
03-13-2010, 10:20 AM
#4
Safety Car


Tom,
Awesome DIY!!! I am even more impressed by your resourcefulness and income!!! OMG, I want that too!! Sounds like you have a great positive attitude on life and the pursuit of happiness.
Peace.
Awesome DIY!!! I am even more impressed by your resourcefulness and income!!! OMG, I want that too!! Sounds like you have a great positive attitude on life and the pursuit of happiness.
Peace.
03-15-2010, 01:41 PM
#5
Racer
Thread Starter
Oh yeah, being cheap pays off occasionally
As for an update on my sound system... My sub box wasn't completely sealed, so now does sound much better. The polk sub is a bit boomy-sounding though and sound reproduction isn't that great. It's good for rap, but not so great for pop/rock. But if you're not used to very high quality subs, you will likely not notice an issue.
The vibe slick amp is amazing so far. It sounds like it is obviously too powerful for the sub when giving it 500w rms, and sounds just perfect on the components getting 150w each. I think I would have been fine with an A3, but of course, more power is always better.
I'd say if anyone's looking for a good deal on a nice sounding amp that doesn't cost a lot, look into these vibe 4-channel amps.