C4 '96 Full install (lotsa pics!) Part I
 08-05-2008, 05:24 AM
#1
Safety Car

Thread Starter
I finally finished and got time to do a write-up - give something back to the forum that's helped me so much.
This is my first real install. At the start of this project I would say I knew a small amount about car audio - just the basics. After doing this project, which included plenty of research and late night internet sessions I now know how much I really didn't know! This is a science and an art. The science is understanding the mechanics of amplified acoustics and the art is making your gear fit nicely in your car!
I started with the C4 audio FAQ and then studied mainly these threads:
http://forums.corvetteforum.com/show....php?t=1275974
http://forums.corvetteforum.com/show....php?t=1888826
http://forums.corvetteforum.com/show...ghlight=tunnel
http://forums.corvetteforum.com/show...p?p=1562992573
http://forums.corvetteforum.com/show....php?t=2058190
I'm in no way flush at the moment, with a baby and stay at home mom, I have 'other priorities' but with the forum's help I got a pretty decent system together for just a few hundred bucks. Total budget was around 500 and around 300 for the main gear - the amp and components. What I ended up with was the solid basis for a system that can be easily improved in the future. I estimate I saved at least the same amount again by doing it myself, probably more. Plus I have the assurance that the job was done properly and if something breaks I should know how to fix it.
Fronts - Polk Momo 6.5" components (250w RMS recommended)
Amp - Kenwood KAC-8403 4-channel (60w/90w RMS x 4)
HU - Kenwood DPX-301 Double-din
Rears - Infinity Reference 6x9 (100w RMS)
Wires - DHD 1000w amp hookup kit
I shopped at SonicElectronix.com, Installer.com, Home Depot, OSH, and, er, Best Buy.
The general idea was to build something to sound at least as good as the Mach system in our Ford Escape if not better, and to do away with every part of the original Delco.
I planned what I wanted to do as I was choosing the rest of the equipment. The HU was a Christmas gift from over 2 years ago. It's already obsolete, but at the time I wanted something not too flash that would compliment the interior and lighting of the car.
The rears were an impulse purchase before I did any real research.
The amp is temporary with the rears - I plan to replace the amp with another more powerful 4 channel and put twin 8-inch subs in the rear holes later on down the line.
I generally wanted a stealth install with as little added weight as possible.
Useful things I learned along the way:
I wanted to record a few things that I didn't see in previous posts that another C4 installer might find useful. Also wanted to show what I did slightly differently.
The whole job took a loooong time, mainly because I took things slow and gave myself very flexible deadlines haha. I worked in 1-3 hour sessions and often at night. It took me 3-4 weeks working in this way.
FRONT SPEAKERS
First the speaker boxes. This was the most difficult choice to make. I soon learned there is no perfect solution in the C4 - you are going to be compromising all the way. SQ versus how much time/ effort you have, versus the inherent design of the C4 interior. My ideal was Spkrboy's solution (see link above - woofers in sill box, mids in door and tweets on dashpad) and the most basic solution was the mid/ tweeter in a sill box, like many C4 owners have done. I attempted something in between which was the mids/woofers in sill speaker boxes, but with a slight angle so they point more towards the driver, and tweets in the doors, but in a slightly lower position than usual.
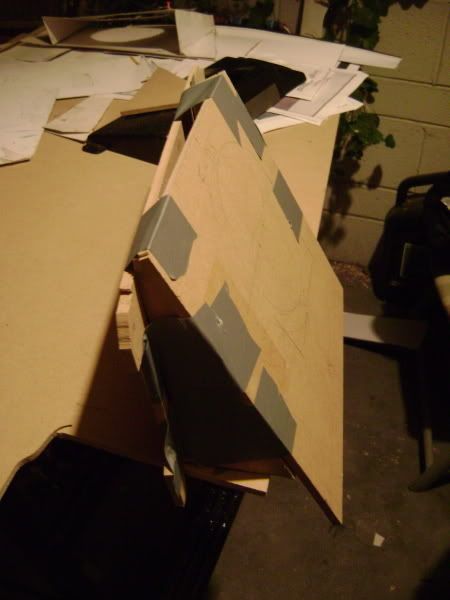
I first mocked up the speaker boxes in cardboard, using Vettenet's build as a guide. I ended up with a more complex design, including the angle I guestimated would work.
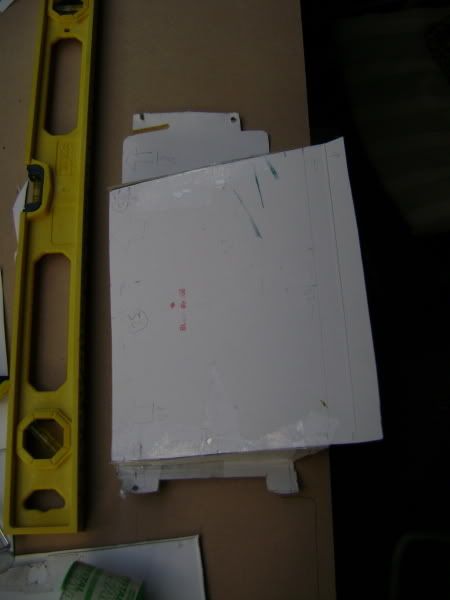
Driver's side mockup
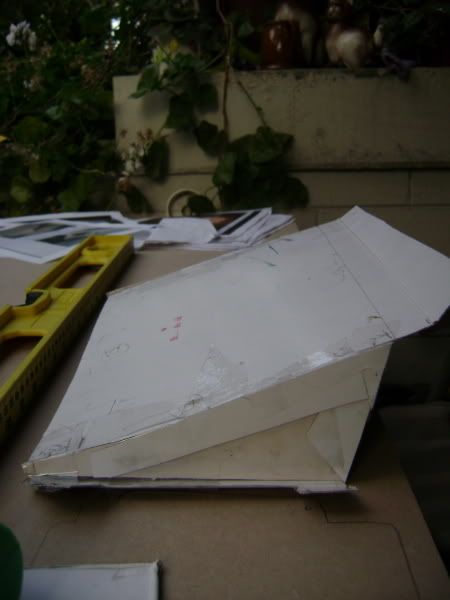
Side view shows modifications as I went along
Top view showing angle of faceplate. Also my son's toes.
I took out the original front boxes and used them as a template. It was interesting to see that a couple of the attachment points on the original ABS pieces had snapped off. I put this down to the classic C4 chassis twist I put the drivers side mockup box in the car, under the sill to test for fit.
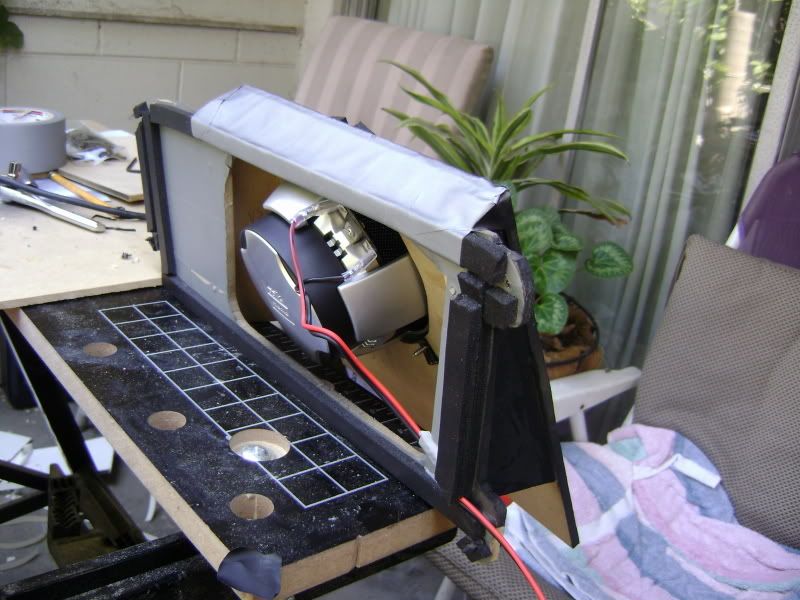
The actual boxes were made using 1/4" MDF. Got a basic jigsaw on Father's Day just for the job (every man should have one of these, right?)
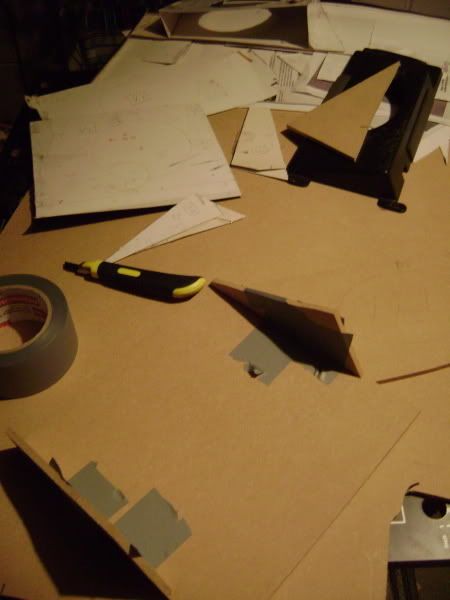
MDF pieces were at first taped together
Checking alignment
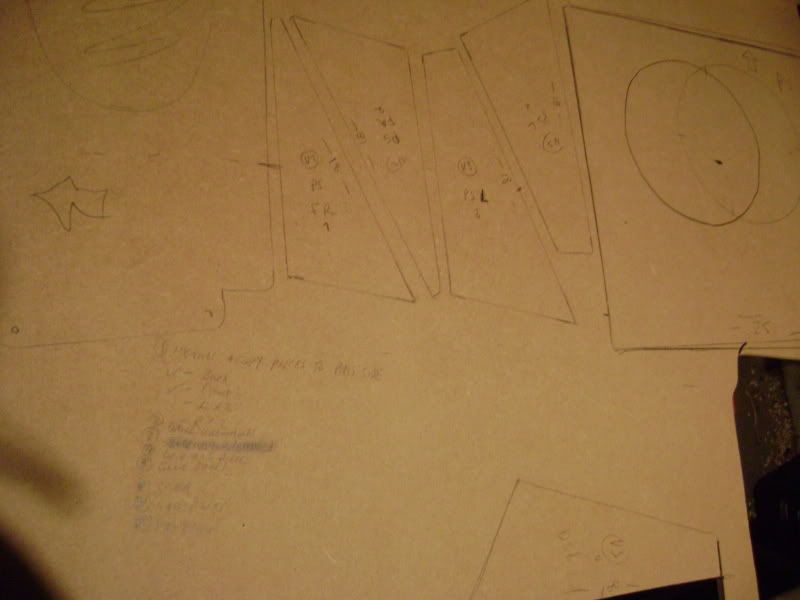
Showing my working!
A major point to note here - if you make your mockup out of thin card then your actual box will be out as much as 1/2 inch in some areas due to the added thickness of the wood - take that into account.
I did a lot of trial and error and guestimation to figure out the triangular end pieces, the angle of the faceplate that would work and still make the sill cover useable, and also the gap behind the speaker when fitted. You also have to take into account thickness of the carpet, and size of your own feet!
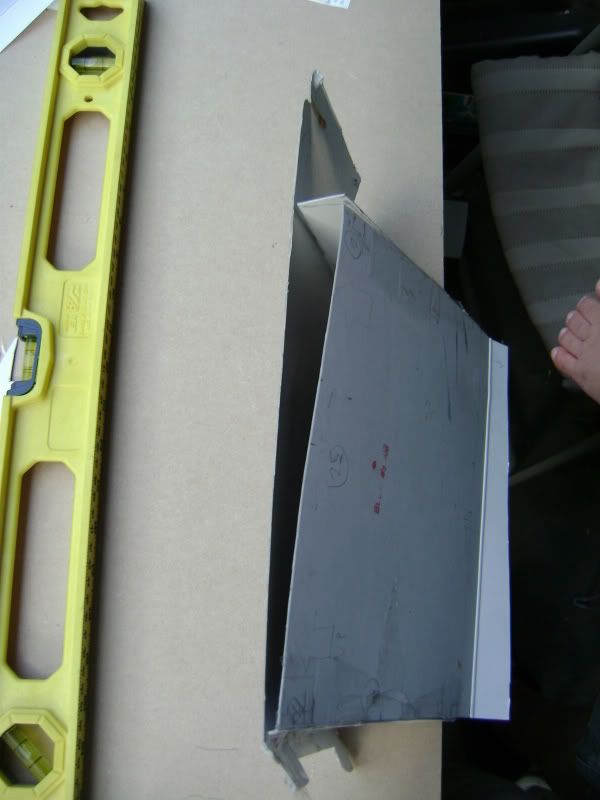
I cut a hole in the back plate of each box to correspond with the cutout in the metal sill
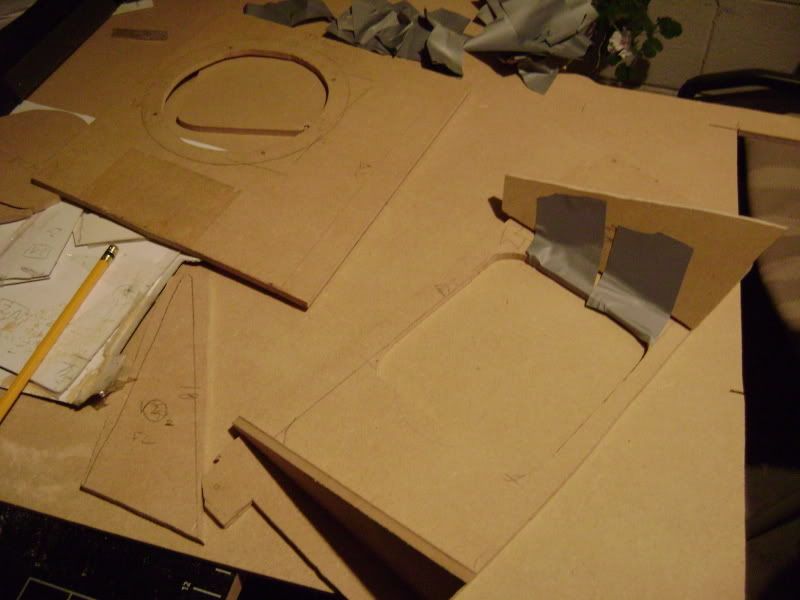
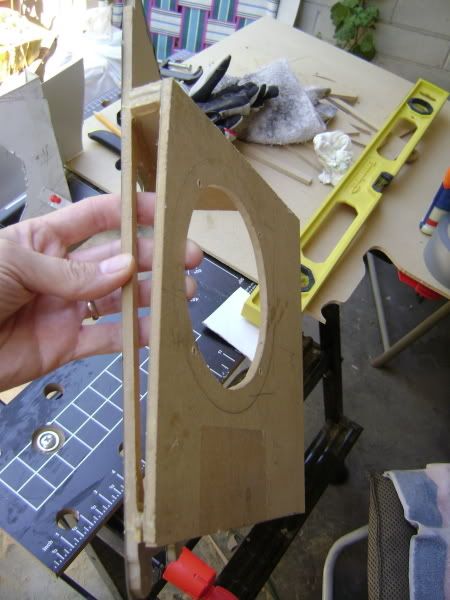
Top view driver's side showing angle
Once I'd got the dimensions pretty much sorted I glued the boxes with wood glue, then allowed to dry. I decided I wanted to try making sealed units - as sealed as you can get anyway. Once dried I used more glue to seal all the joints. I then used tape to cover the gap in the top (I was done with woodworking at this point) - the sill cover would do the rest, I figured, with the floor carpet acting as the bottom of the box. I got some foam window seal to line the box where it contacts the sill. I used this same stuff on the woofers themselves.
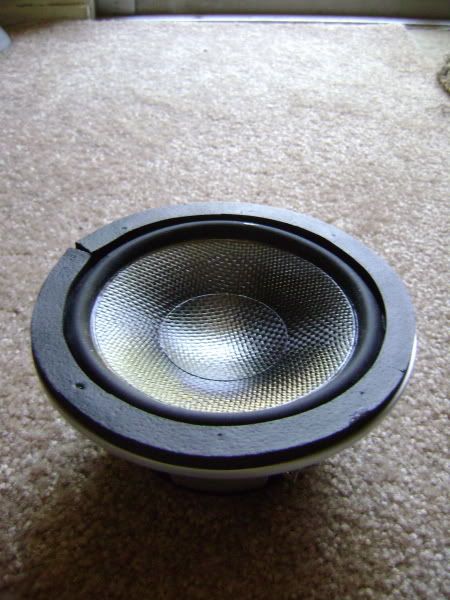
Woofer with window seal.
This was inspired by the Infinity 6x9's I had got from Best Buy which came with this rubber foam stripping to seal the speakers against the mounting surface. I thought these nice carbon-fiber units wouldn't hurt to get a similar treatment.
Once dry again I banged some panel pins in for added structural support and then went to work one more time sealing up gaps and cracks. I had bought some aquarium sealant but didn't need it in the end - Elmer's Wood Glue FTW!

One box done, one on the way...

Close up
There is one part of the box that, if you are going for a sealed job, requires double thickness of the foam - I'll show what I mean later.
I wanted to paint the boxes- you'll never see it, but I felt happier knowing it looked stealth under that sill. At this point I was getting a bit obsessive and starting to wonder if I'm a closet perfectionist. I found some Rustoleum in flat black in a spray can that I guessed would do the job. And I'd be sure my wood and plastic would never get rusty ... I managed to not spray it on everything. I also realised this stuff was a possible solution to the dashboard glare problem my car has. Anyway..
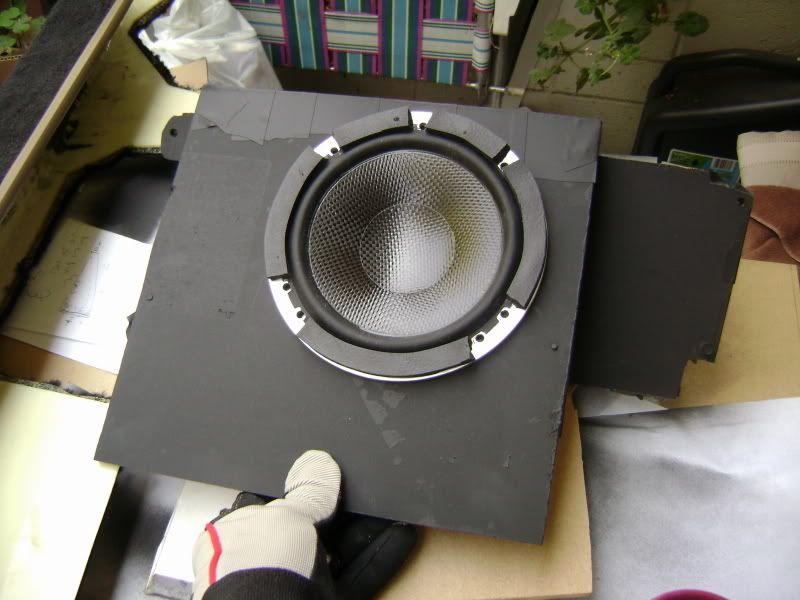
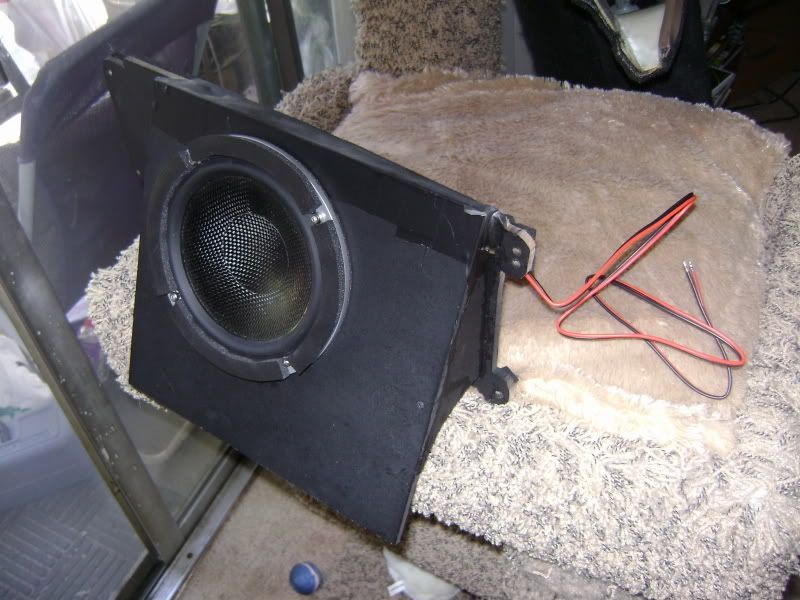
Painted and mounted
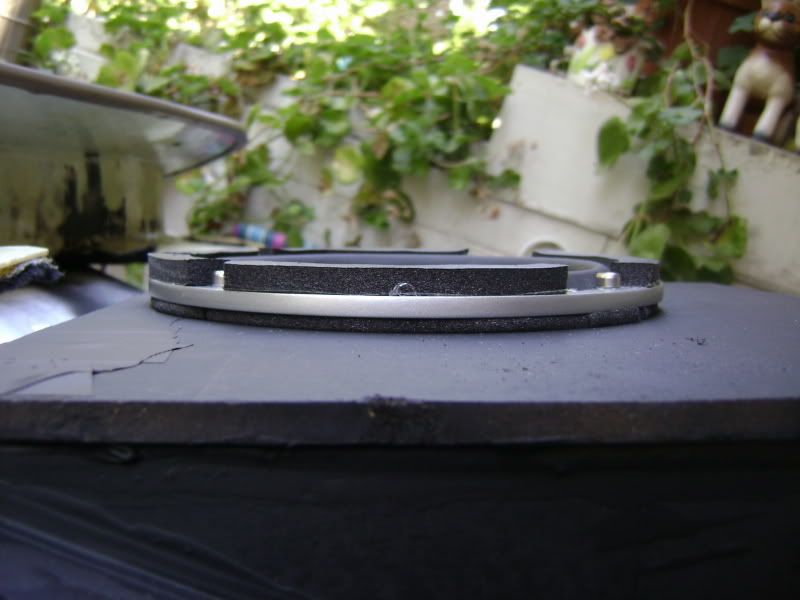
Edge view showing how the foam window stripping works. The inner side is compressed once screwed down. The outer side was designed to keep the rubber cone surround from making contact with the sill cover. Again, a guestimaton
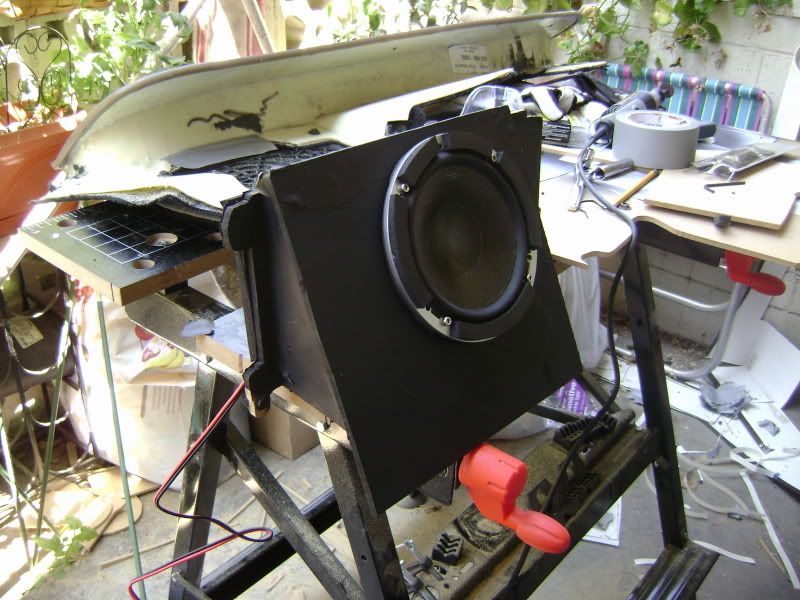
Lookin good
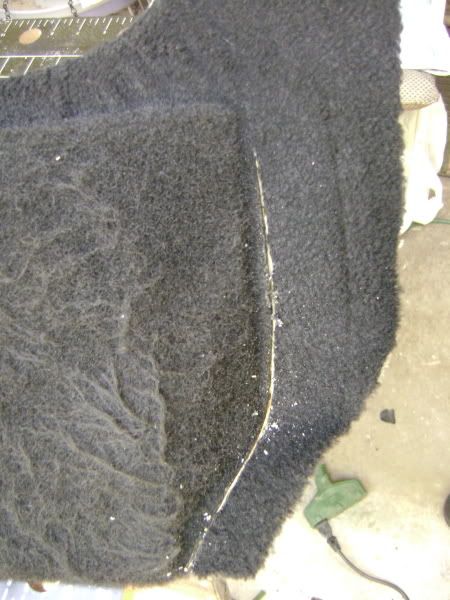
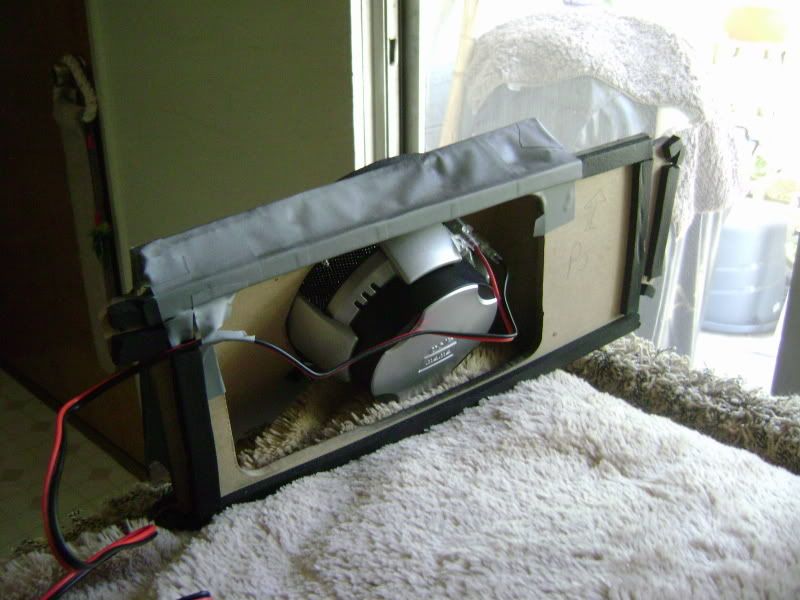
I had the sills out and nearby so that I could test-fit at the work area (I have unsecured basement parking which sucks sometimes). I ended up having to cut out part of the inside of the sill cover, plus some of the carpet. I was expecting to have to trash the whole inner plastic speaker grill as the opening is too small for 6.5's and would probably be making contact with the woofer cone. So I used the Dremel to shave off the plastic bolts that project inwards. It ended up being not a perfect job. Would need some more modification later, and possibly a whole new custom sill cover, but for the moment it serves its purpose - to hide the speaker while allowing it to function.
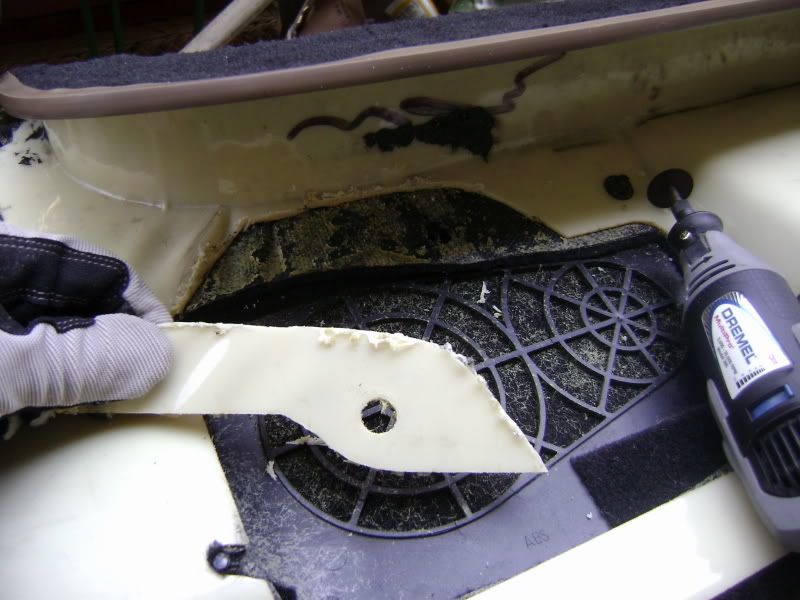
Modifying the sill cover
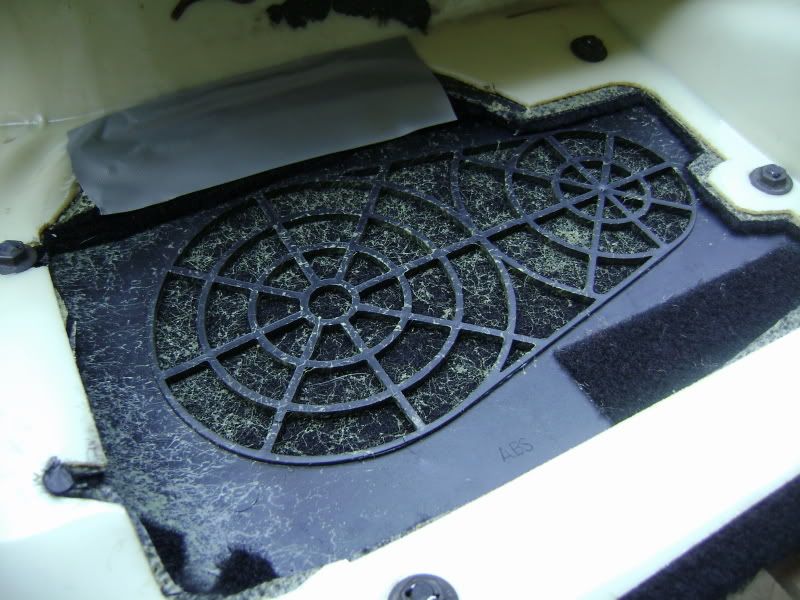
Bolts shaved, and more of the plastic tape
At this point I'm thinking the Dremel is the best invention ever.
Driver's side woofer mounted.
Drivers sill needed a bit more cutting
I really cringed every time I had to cut the original interior. It's something I intended to do as little of as possible. The sill plastic is very weird - it's a lot like cutting butter with a hot knife.
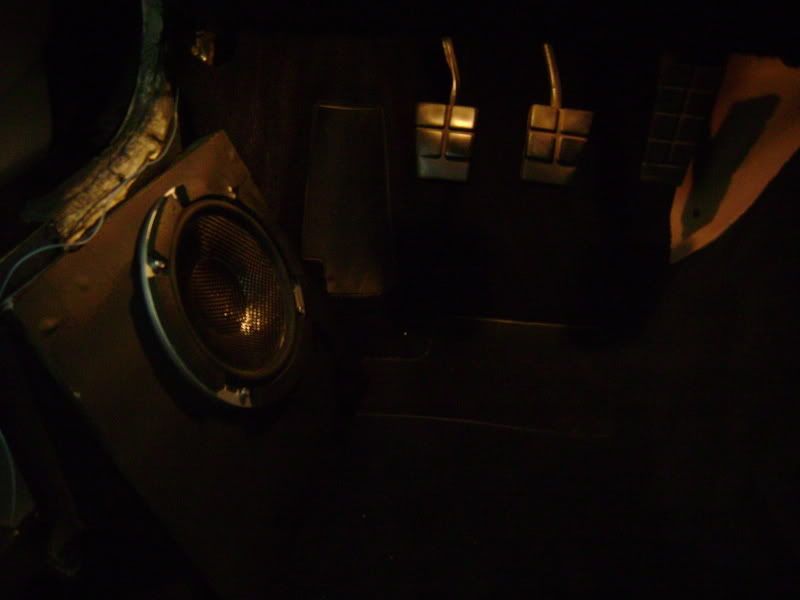
Drivers side box installed
You can see what I mean about working at night in a black interior!
Looks like there isn't much room between the end of the box and the foot rest. Well it's not as bad as it looks here, but I definitely lost some room down there with the angle I attempted, but its liveable. I would like to come back to it later and modify it some more for better comfort. Passenger side didn't have the same problem.
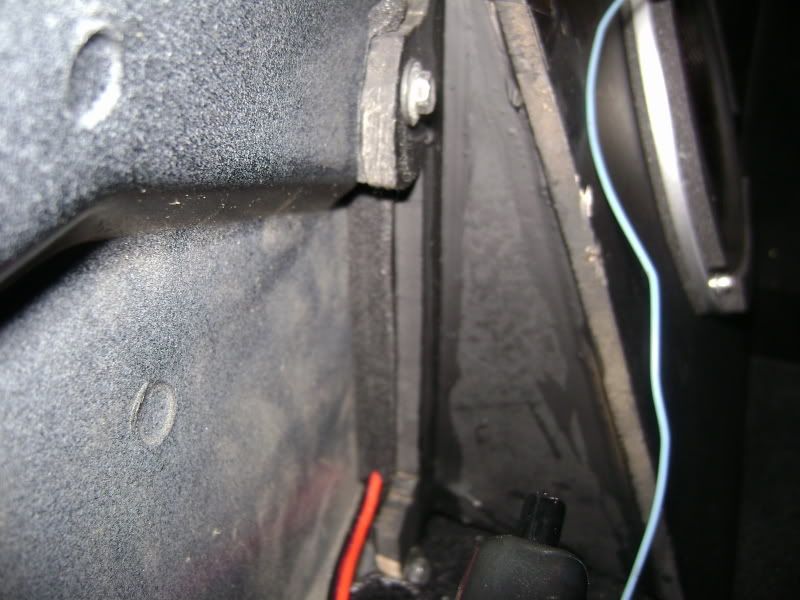
This is the gap mentioned before that needed double thickness foam sealer.
Passenger side box
Rear view

This angle shows the weird curve that needs to be cut out on the passenger side box. As you may have read already, there is very little symmetry between the driver and passenger side on these cars.
Part II to come!
cheers!
This is my first real install. At the start of this project I would say I knew a small amount about car audio - just the basics. After doing this project, which included plenty of research and late night internet sessions I now know how much I really didn't know! This is a science and an art. The science is understanding the mechanics of amplified acoustics and the art is making your gear fit nicely in your car!
I started with the C4 audio FAQ and then studied mainly these threads:
http://forums.corvetteforum.com/show....php?t=1275974
http://forums.corvetteforum.com/show....php?t=1888826
http://forums.corvetteforum.com/show...ghlight=tunnel
http://forums.corvetteforum.com/show...p?p=1562992573
http://forums.corvetteforum.com/show....php?t=2058190
I'm in no way flush at the moment, with a baby and stay at home mom, I have 'other priorities' but with the forum's help I got a pretty decent system together for just a few hundred bucks. Total budget was around 500 and around 300 for the main gear - the amp and components. What I ended up with was the solid basis for a system that can be easily improved in the future. I estimate I saved at least the same amount again by doing it myself, probably more. Plus I have the assurance that the job was done properly and if something breaks I should know how to fix it.
Fronts - Polk Momo 6.5" components (250w RMS recommended)
Amp - Kenwood KAC-8403 4-channel (60w/90w RMS x 4)
HU - Kenwood DPX-301 Double-din
Rears - Infinity Reference 6x9 (100w RMS)
Wires - DHD 1000w amp hookup kit
I shopped at SonicElectronix.com, Installer.com, Home Depot, OSH, and, er, Best Buy.
The general idea was to build something to sound at least as good as the Mach system in our Ford Escape if not better, and to do away with every part of the original Delco.
I planned what I wanted to do as I was choosing the rest of the equipment. The HU was a Christmas gift from over 2 years ago. It's already obsolete, but at the time I wanted something not too flash that would compliment the interior and lighting of the car.
The rears were an impulse purchase before I did any real research.
The amp is temporary with the rears - I plan to replace the amp with another more powerful 4 channel and put twin 8-inch subs in the rear holes later on down the line.
I generally wanted a stealth install with as little added weight as possible.
Useful things I learned along the way:
- A headlight is very very useful, especially when working at night in a black car with black interior - get a nice one with LEDs that give a broad light spread.
- Get a decent pair of wirestrippers/ crimpers - you will be using them A LOT (I battled with cheapo strippers and some pliers)
- Find a decent car audio or hardware store locally - you'll be visiting it quite a bit
- A beer placed on the passenger floor *will* get spilled and smells lovely after a week.
- Soldering is well worth the effort - you will start out as incompetent but finish as very efficient
- Take your time - doing things twice gets really boring.
I wanted to record a few things that I didn't see in previous posts that another C4 installer might find useful. Also wanted to show what I did slightly differently.
The whole job took a loooong time, mainly because I took things slow and gave myself very flexible deadlines haha. I worked in 1-3 hour sessions and often at night. It took me 3-4 weeks working in this way.
FRONT SPEAKERS
First the speaker boxes. This was the most difficult choice to make. I soon learned there is no perfect solution in the C4 - you are going to be compromising all the way. SQ versus how much time/ effort you have, versus the inherent design of the C4 interior. My ideal was Spkrboy's solution (see link above - woofers in sill box, mids in door and tweets on dashpad) and the most basic solution was the mid/ tweeter in a sill box, like many C4 owners have done. I attempted something in between which was the mids/woofers in sill speaker boxes, but with a slight angle so they point more towards the driver, and tweets in the doors, but in a slightly lower position than usual.
I first mocked up the speaker boxes in cardboard, using Vettenet's build as a guide. I ended up with a more complex design, including the angle I guestimated would work.
Driver's side mockup
Side view shows modifications as I went along
Top view showing angle of faceplate. Also my son's toes.
I took out the original front boxes and used them as a template. It was interesting to see that a couple of the attachment points on the original ABS pieces had snapped off. I put this down to the classic C4 chassis twist
I put the drivers side mockup box in the car, under the sill to test for fit. The actual boxes were made using 1/4" MDF. Got a basic jigsaw on Father's Day just for the job (every man should have one of these, right?)
MDF pieces were at first taped together
Checking alignment
Showing my working!
A major point to note here - if you make your mockup out of thin card then your actual box will be out as much as 1/2 inch in some areas due to the added thickness of the wood - take that into account.
I did a lot of trial and error and guestimation to figure out the triangular end pieces, the angle of the faceplate that would work and still make the sill cover useable, and also the gap behind the speaker when fitted. You also have to take into account thickness of the carpet, and size of your own feet!
I cut a hole in the back plate of each box to correspond with the cutout in the metal sill
Top view driver's side showing angle
Once I'd got the dimensions pretty much sorted I glued the boxes with wood glue, then allowed to dry. I decided I wanted to try making sealed units - as sealed as you can get anyway. Once dried I used more glue to seal all the joints. I then used tape to cover the gap in the top (I was done with woodworking at this point) - the sill cover would do the rest, I figured, with the floor carpet acting as the bottom of the box. I got some foam window seal to line the box where it contacts the sill. I used this same stuff on the woofers themselves.
Woofer with window seal.
This was inspired by the Infinity 6x9's I had got from Best Buy which came with this rubber foam stripping to seal the speakers against the mounting surface. I thought these nice carbon-fiber units wouldn't hurt to get a similar treatment.
Once dry again I banged some panel pins in for added structural support and then went to work one more time sealing up gaps and cracks. I had bought some aquarium sealant but didn't need it in the end - Elmer's Wood Glue FTW!
One box done, one on the way...
Close up
There is one part of the box that, if you are going for a sealed job, requires double thickness of the foam - I'll show what I mean later.
I wanted to paint the boxes- you'll never see it, but I felt happier knowing it looked stealth under that sill. At this point I was getting a bit obsessive and starting to wonder if I'm a closet perfectionist. I found some Rustoleum in flat black in a spray can that I guessed would do the job. And I'd be sure my wood and plastic would never get rusty ... I managed to not spray it on everything. I also realised this stuff was a possible solution to the dashboard glare problem my car has. Anyway..
Painted and mounted
Edge view showing how the foam window stripping works. The inner side is compressed once screwed down. The outer side was designed to keep the rubber cone surround from making contact with the sill cover. Again, a guestimaton
Lookin good
I had the sills out and nearby so that I could test-fit at the work area (I have unsecured basement parking which sucks sometimes). I ended up having to cut out part of the inside of the sill cover, plus some of the carpet. I was expecting to have to trash the whole inner plastic speaker grill as the opening is too small for 6.5's and would probably be making contact with the woofer cone. So I used the Dremel to shave off the plastic bolts that project inwards. It ended up being not a perfect job. Would need some more modification later, and possibly a whole new custom sill cover, but for the moment it serves its purpose - to hide the speaker while allowing it to function.
Modifying the sill cover
Bolts shaved, and more of the plastic tape
At this point I'm thinking the Dremel is the best invention ever.
Driver's side woofer mounted.
Drivers sill needed a bit more cutting
I really cringed every time I had to cut the original interior. It's something I intended to do as little of as possible. The sill plastic is very weird - it's a lot like cutting butter with a hot knife.
Drivers side box installed
You can see what I mean about working at night in a black interior!
Looks like there isn't much room between the end of the box and the foot rest. Well it's not as bad as it looks here, but I definitely lost some room down there with the angle I attempted, but its liveable. I would like to come back to it later and modify it some more for better comfort. Passenger side didn't have the same problem.
This is the gap mentioned before that needed double thickness foam sealer.
Passenger side box
Rear view
This angle shows the weird curve that needs to be cut out on the passenger side box. As you may have read already, there is very little symmetry between the driver and passenger side on these cars.
Part II to come!
cheers!
 08-05-2008, 08:19 AM
#2
Race Director


I did the same thing for my front speakers, it will definitely help with sound the way you angled them.. I need to get to installing my system in my car now.. LOL
08-05-2008, 04:52 PM
#4
Melting Slicks

Nice write up..makes my thread look like pooo
I'm using the infinity ref. 6x9's in the rear of mine also.
I'm using the infinity ref. 6x9's in the rear of mine also.
08-05-2008, 05:23 PM
#6
Safety Car
Thread Starter
I'm quite amazed actually at the bass you get out of them - and they have decent power too @2 ohms
The Polks don't have nearly as much low end but I've read they can take up to 50 hrs to break in. More on that later
 08-05-2008, 05:24 PM
#7
Instructor


Member Since: Jul 2008
Location: Utah County Utah
Posts: 218
Likes: 0
Received 0 Likes
on
0 Posts
I plan on doing an install in my 90 soon, but going with fiberglass the whole way. Thanks for those links, I have half heartedly looked for some c4 corvette stereo installs, but there wasint too much custom stuff that I found. I am thinking of putting in a 21" sub in the back, mainly for the shock and awe factor.