Blending repair for Single Stage touch-up?
 12-04-2011, 07:18 AM
#1
Race Director


Thread Starter

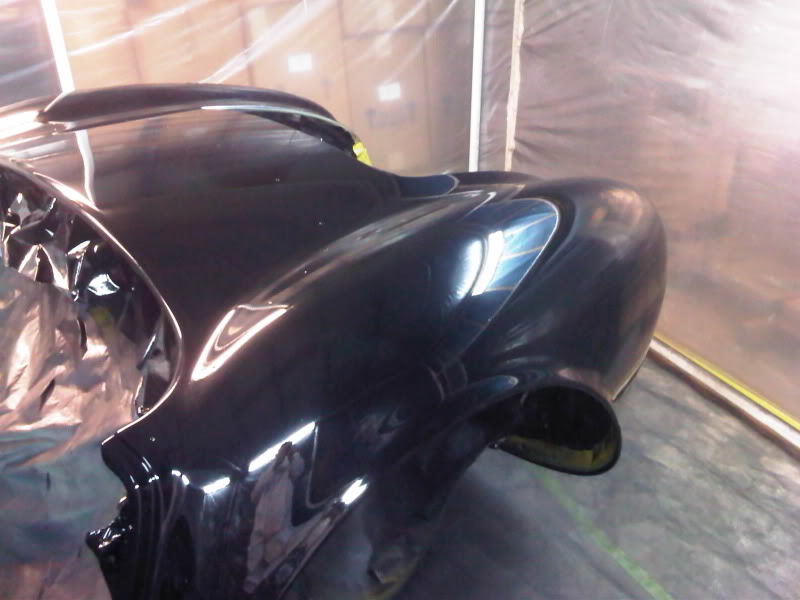
All was good in sanding out my painting project using PPG single stage black until I uncovered a thin area on my lower fender lip that it appears I failed to turn the gun around on each pass and hit, and I uncovered the sealer in color sanding.
It's not a big deal as far as using a detail gun or air brush to put 3 or 4 coats on but I've read about both DX840 Blending Solvent and D855 Fade Out Thinner for blending in and melting dry spray into the surface.
DX 840 is covered on the PPG Concept P sheet so I'll probably pick a pint of it up. The P sheet says to just lightly spray the blend in/overspray areas. I'm wondering if a light dusting on the thin coverage area first would help adhesion and blending???
Anyone with experience with this?
Thanks
Sanding away with finer and finer sandpaper in Arkansas
Dan
 12-04-2011, 08:27 AM
#2
Safety Car

Member Since: Sep 2004
Location: Colo. Spgs. Colo.
Posts: 3,764
Likes: 0
Received 0 Likes
on
0 Posts
St. Jude Donor '10-'11

If you can clear the entire panel, do that instead of making the 'solvent blend' cause over time the blend edge will break down and then it will look like fido's butt.
But if you have to use the 840, such as on a sail panel and you have never done this before, run you a piece of tape across the panel, and use 1000g paper and lightly sand up to the piece of tape. You basically need a place to stop. Your first coat of clear will be on the repaired area staying away from the blend area, but on the second and last coat as your coming to that blend edge, you dont need a ton of clear on that edge, instead, your going to mix a little of your catalyzed clear with the 840 and melt it into that edge you created with the sand paper, blowing air on it will help it melt in and keep in mind, you cannot have any problems in that area. After its all cured run a buffer over it lightly and if you have done everything right, you wont be able to see the blend edge.
I am sure somebody else may chime in, and hopefully you can get it all fixed.
12-04-2011, 01:22 PM
#3
Race Director
Thread Starter
It's single stage Black - no clear
12-04-2011, 01:40 PM
#4
Safety Car
Member Since: Sep 2004
Location: Colo. Spgs. Colo.
Posts: 3,764
Likes: 0
Received 0 Likes
on
0 Posts
St. Jude Donor '10-'11
same way, I have done solvent blends in the middle of doors and length's of hoods with single stage, I would definatly practice first making some blends before you try it on your project if this is new to you. Just remember, that blend edge is very delicate both in the buffing of the edge and what the UV rays will do to it.
12-04-2011, 04:32 PM
#5
Race Director
Thread Starter
Fortunately it's down low on the side at the wheel lip. Can't believe I missed that area going around the car. I hope this 840 stuff works - I had to buy a gallon of it.
So, I can mix a little SS black with the DX 840 to spray around the edges?
So, I can mix a little SS black with the DX 840 to spray around the edges?
12-04-2011, 09:41 PM
#6
Melting Slicks


Try what you want but I'd paint the entire section again... I know you had some issues with particulate matter in the surface, and it is still easily (sort of... you know what I mean) dealt with because there is nothing but the bare body to contend with. If you even think there is a weather window day, prep the entire nose, mask off the rest and lay a couple good wet coats on it. You'll be happier knowing there is a continuous, "monolithic" paint film as you continue the build.
12-05-2011, 08:12 AM
#7
Race Director
Thread Starter
I'll try the blend first as I need to build up some paint film on the area anyway. If I'm not satisfied that will cut and buff out OK then I'll shoot another coat over the front from the rear of the door opening forward.
12-07-2011, 01:38 PM
#8
Race Director
Thread Starter
Well, after further thought I decided this touch up and blend effort was about as much work and expense as putting another entire coat of black on the whole front end of the car. The paint store rep suggested forgetting the blending thinner (turned it in for more paint) and just do a good initial tack coat over the thin areas and look for any signs of lifting or wrinkling as it flashs off and if it flashed off OK, then apply another coat over the area and then come back over the entire front with a full coat of paint.
So, Markids77 - this plan should put me back in good standing again.
So, Markids77 - this plan should put me back in good standing again.
12-08-2011, 09:06 PM
#9
Melting Slicks
No insult intended I assure you! Blends have a tendency to "telegraph" over time and knowing how much time and effort you have in this so far I think you have made a better choice to recoat vs repair. Having re-read my reply I do wish I had been less "direct". My apology to you, Sir!
12-10-2011, 08:04 AM
#10
Race Director
Thread Starter
No insult intended I assure you! Blends have a tendency to "telegraph" over time and knowing how much time and effort you have in this so far I think you have made a better choice to recoat vs repair. Having re-read my reply I do wish I had been less "direct". My apology to you, Sir!
12-12-2011, 12:29 AM
#11
Tech Contributor

Member Since: Sep 2011
Location: In the booth Maryland
Posts: 109
Likes: 0
Received 1 Like
on
1 Post
Blending DCC is possible, I read using 840 ( blender ) and clearing the whole panel. Both will work, but I've had good luck mixing the two.
Blender is a reducer with a bit of UV protection, melts an edge but will chalk out eventually, clear has lots of UV protection but doesn't melt in real good. Before PPG came out with 840 we were taking RTC clear and mixing it 1 part to 6 parts reducer. Blends looked good but down the road they chalked. I will take RTS clear over reduced ( 10%ish) and mix it 50/50 with 840 to get the best of both worlds.
There are as many ways to melt in a single stage blend as there are painters, I came up with this mix repairing 40 foot buses with DCC and melting 4' wide blends.
S
12-14-2011, 09:14 PM
#12
Race Director
Thread Starter
I gave up and went ahead and spot sealed the thin area and sprayed two more coats of black on the whole body. I don't have much paint left so I hope this is the end of it. I slightly over-reduced the last coat this time and it did come out looking nice and smooth and slicker this time.

Last edited by DansYellow66; 12-15-2011 at 12:06 PM.
02-05-2012, 06:37 PM
#13
Race Director
Thread Starter
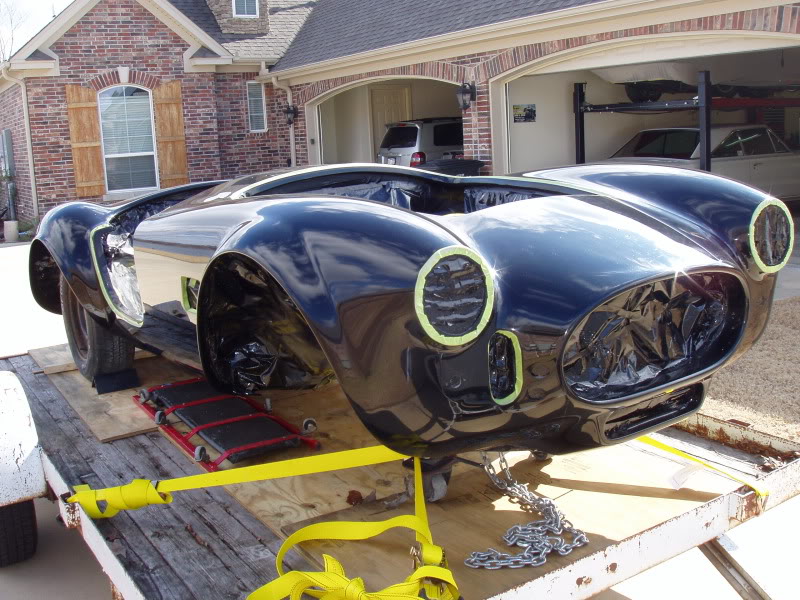
I finally moved the Cobra home from the warehouse paint booth where I painted it. It was great to finally get it out into some natural sunlight. It helped me see one small ripple and a couple areas of still light orange peel that I need to go back over and block a little more, but I'm pretty happy with it. I've only compounded it with a wool bonnet since color sanding. I still have a lot of buffing to do and I still have the door, trunk and hood jambs to buff out. I'm finally about to the point I can actually start assembling it.
Thanks for all the help and recommendations.
Thanks for all the help and recommendations.
02-05-2012, 08:22 PM
#14
Melting Slicks
That looks truly excellent. If I might make a suggestion; I would wait to do the final polish until after you at least have it back on the frame, and all panels reattached and adjusted for gaps/fit. It is quite likely you will make some small blemishes/scratches guring panel fitment, and it hurts less if the finish is still "roughed in" versus mirror bright. Is that a MOPAR I see under the Vette in that garage?
02-06-2012, 08:18 AM
#15
Race Director
Thread Starter
That looks truly excellent. If I might make a suggestion; I would wait to do the final polish until after you at least have it back on the frame, and all panels reattached and adjusted for gaps/fit. It is quite likely you will make some small blemishes/scratches guring panel fitment, and it hurts less if the finish is still "roughed in" versus mirror bright. Is that a MOPAR I see under the Vette in that garage?
Yes - that's my 67 GTX. It has a pretty pedestrian paint job on it. Good for cruise night. But when I get done with this I may go to work on it.


