

 02-19-2015, 02:08 PM
Last edit by: IB Advertising
See related guides and technical advice from our community experts:
Browse all: Brake How-Tos
- How to Remove/Replace Front Brake Pads
Step by step instructions for do-it-yourselfers.
- How to Replace Rear Brake Pads
Step by step instructions for do-it-yourselfers.
- How to Replace Front Brake Calipers
Step by step instructions for do-it-yourselfers.
- How to Replace Rear Brake Calipers
Step by step instructions for do-it-yourselfers.
- How to Replace Brake Disc
Step by step instructions for do-it-yourselfers.
Browse all: Brake How-Tos

[Z06] DIY: Changing brake pads on stock calipers + Removing rotors
05-24-2010, 07:40 PM
#1
Racer

Thread Starter
Tools Needed:
- Jack and jack stands
- Lug wrench to take off the wheels
- 21mm socket for the caliper bolts (I used a 13/16")
- Clamp to compress pistons
- Flat head screwdriver
- Allen wrench/sockets for caliper pins (only if your one-piece pads don't need them)
- Mallet, prybar, or hammer to assist with rotor removal
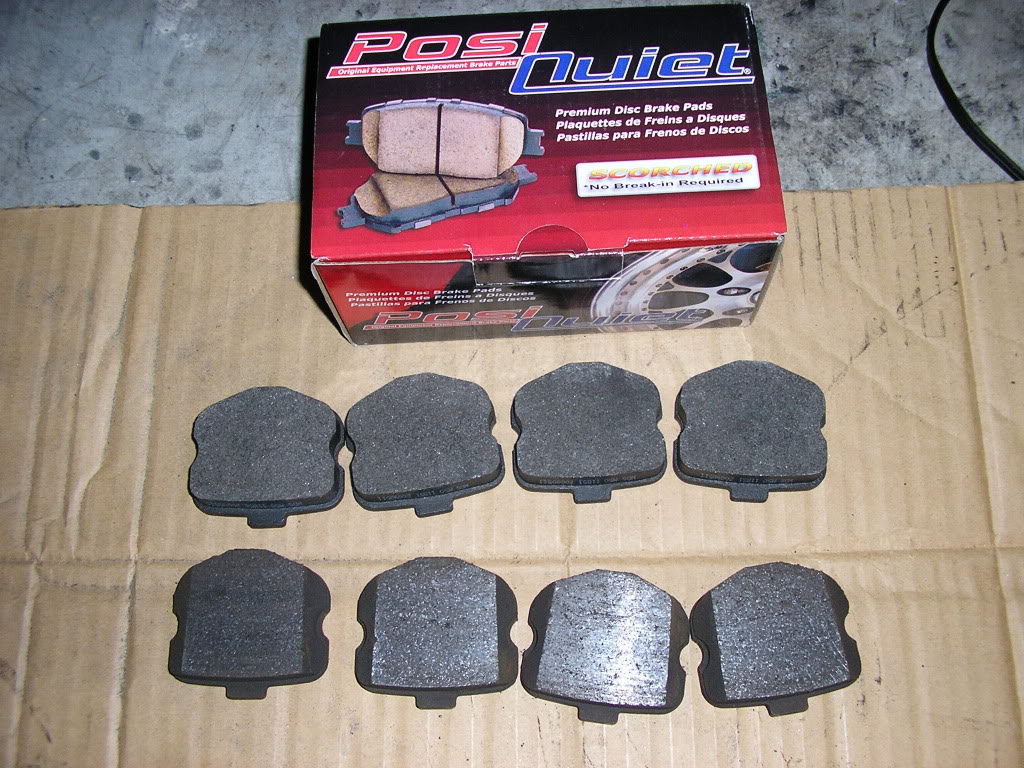
Brake pads:
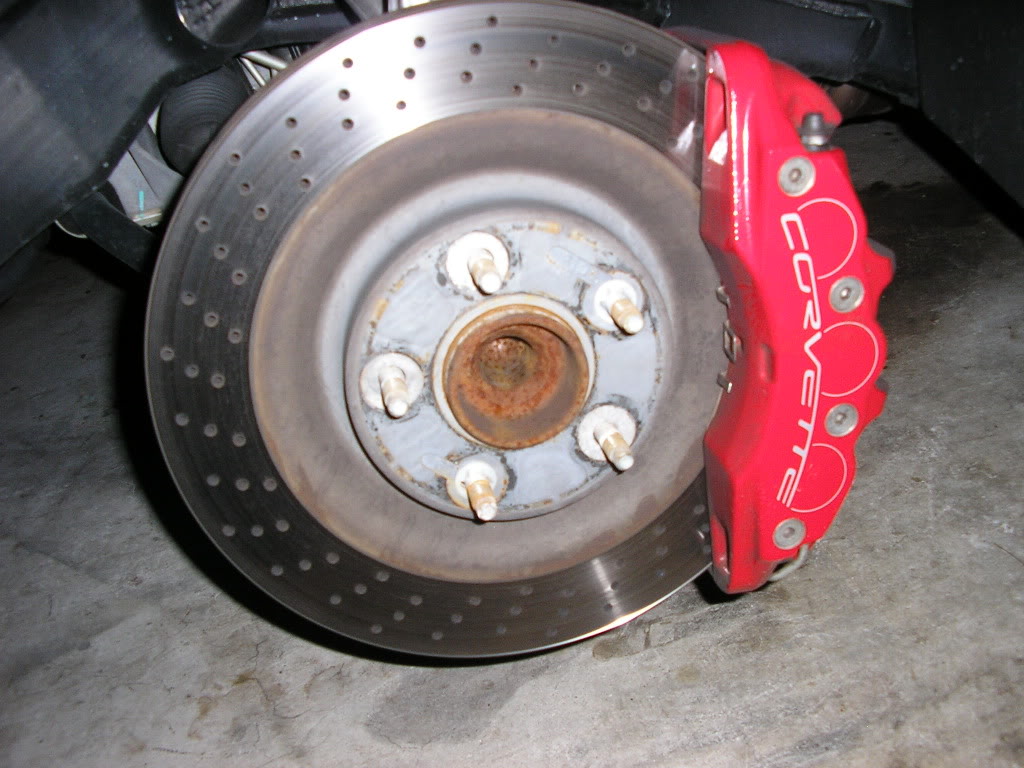
Step 1: Jack up your car and take off the wheels.
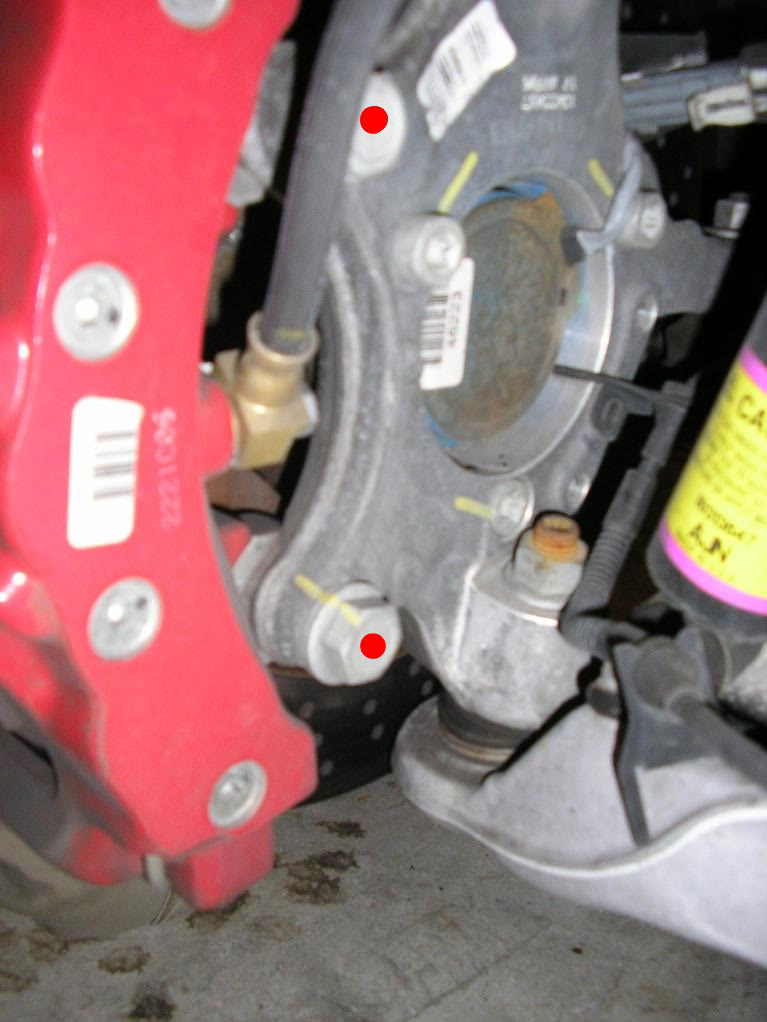
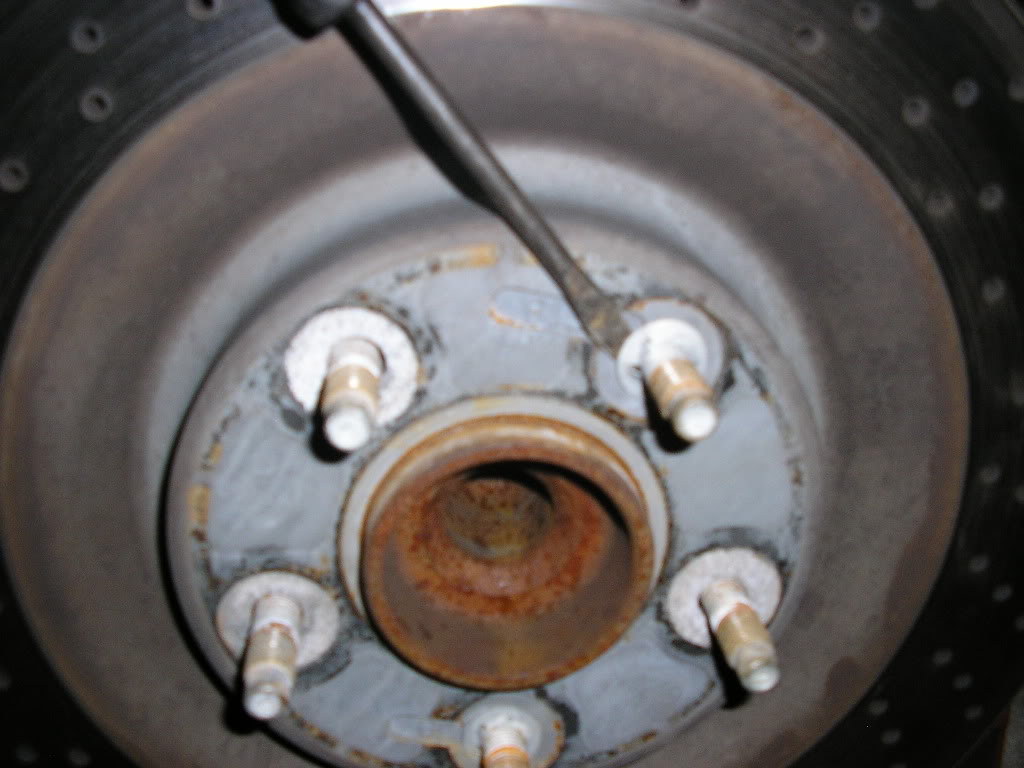
Step 2: Locate the two big caliper bolts and unbolt them. They're on tight, so it will take some effort. The bolts are marked with red dots in the picture:
Step 3: Pry off the caliper. The pads are still pressing against the rotor somewhat, so this also takes a bit of force, but you should have no problem doing it by hand.
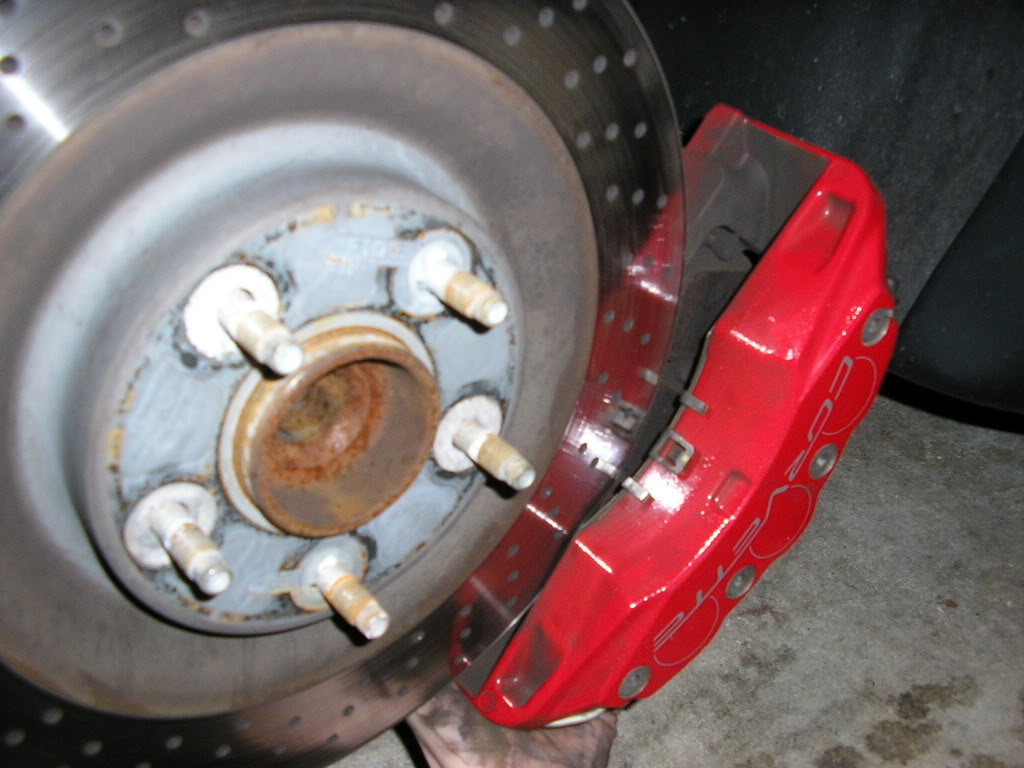
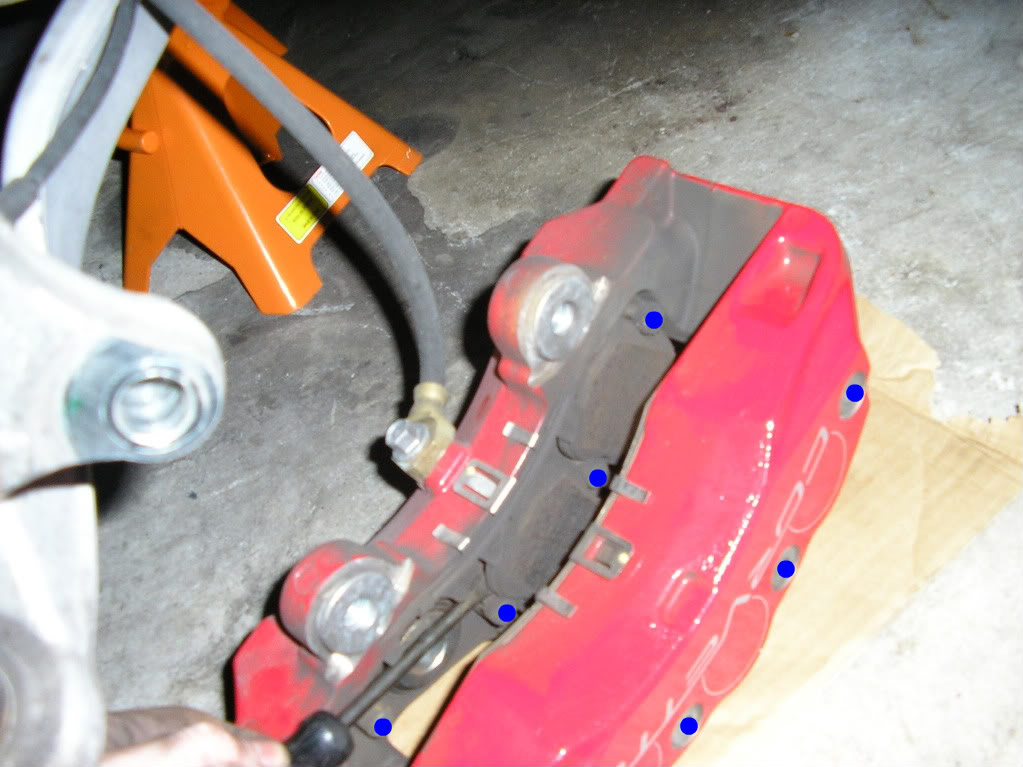
Step 4: Make sure the caliper is supported by something (box/brick/etc) so it's not hanging by the brake line. Pry out the padlettes. There are 6 total in each front caliper and 4 total in each rear.
If you're installing one-piece pads that don't have holes for the pins, you will need to remove the pins marked in blue. Carbotechs pads do have holes, so leave the pins in place - Thanks Joe_Planet!
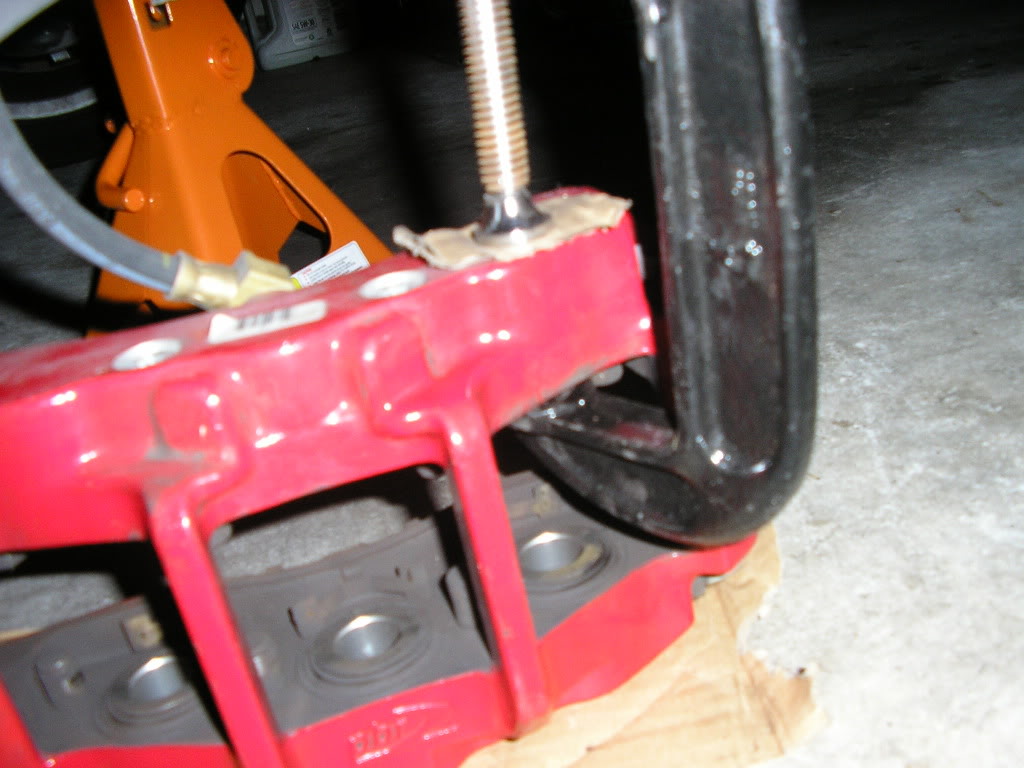
Step 5: Compress the pistons (push them into the caliper) so the new pads will have room to clear the rotor.
NOTES:
- Cleaning around the pistons first will help you prevent scratching the bores.
- You can leave your pads in which can make this step easier.
- Be careful when doing this as you can easily damage your caliper paint if using a metal clamp.
- This pushes fluid back into the brake system. The brake fluid reservoir may overflow, so watch out.
- You can also open a bleeder valve which pushes the old fluid out instead of back into the system, just be careful and don't get any fluid on your caliper paint.
Step 6: Put your new pads in, put the caliper back on, and tighten the caliper bolts to 175Nm / 129lb ft. If you removed the pad pins and need to re-install them, torque them to 40Nm / 30lb ft. I went with posiquiets as I'm a cheap bastard (old pads on the bottom):
Before you start driving, be sure to pump your brakes until you have a firm pedal. This pushes the pads back into contact with the rotors and prevents you from having a possible accident.
Note about brake fluid: You don't need to bleed your brakes when you change your pads. For a non-tracked car, I recommend bleeding the brakes every 1-2 years. For a track car, this should be done as often as possible since fresh fluid will always help you brake better.
Rotors:
Step 1: Follow Steps 1-3 above in the Brake Pad section.
Step 2: If this is your first time taking off your rotors, there's a clip that you'll need to cut/pry off:
Step 3: Smack the back of the rotor until it comes loose, preferably with something that won't scratch it. You can also use a hammer or something similar to pry them off as shown in the picture. If removing the rear rotors, make sure the parking brake is off.
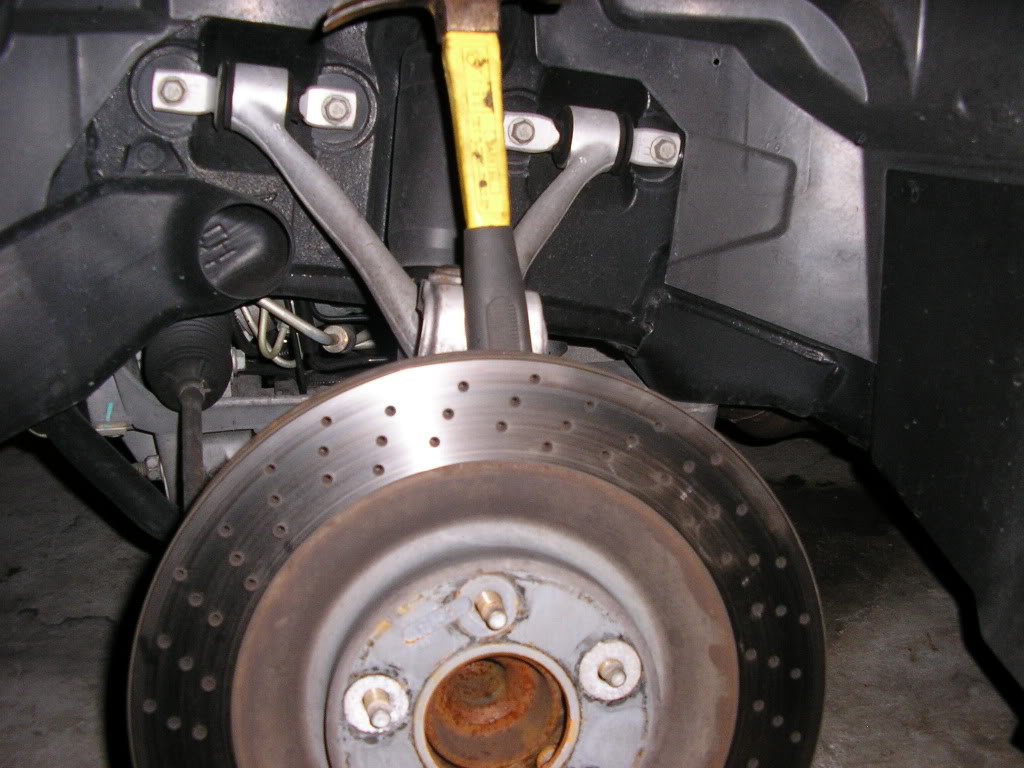
Step 4: You're done! When you put a rotor back on, you don't need the clip to hold it on. This is only used to assist in assembly at the factory. The wheels will hold the rotor for you.
- Jack and jack stands
- Lug wrench to take off the wheels
- 21mm socket for the caliper bolts (I used a 13/16")
- Clamp to compress pistons
- Flat head screwdriver
- Allen wrench/sockets for caliper pins (only if your one-piece pads don't need them)
- Mallet, prybar, or hammer to assist with rotor removal
Brake pads:
Step 1: Jack up your car and take off the wheels.
Step 2: Locate the two big caliper bolts and unbolt them. They're on tight, so it will take some effort. The bolts are marked with red dots in the picture:
Step 3: Pry off the caliper. The pads are still pressing against the rotor somewhat, so this also takes a bit of force, but you should have no problem doing it by hand.
Step 4: Make sure the caliper is supported by something (box/brick/etc) so it's not hanging by the brake line. Pry out the padlettes. There are 6 total in each front caliper and 4 total in each rear.
If you're installing one-piece pads that don't have holes for the pins, you will need to remove the pins marked in blue. Carbotechs pads do have holes, so leave the pins in place - Thanks Joe_Planet!
Step 5: Compress the pistons (push them into the caliper) so the new pads will have room to clear the rotor.
NOTES:
- Cleaning around the pistons first will help you prevent scratching the bores.
- You can leave your pads in which can make this step easier.
- Be careful when doing this as you can easily damage your caliper paint if using a metal clamp.
- This pushes fluid back into the brake system. The brake fluid reservoir may overflow, so watch out.
- You can also open a bleeder valve which pushes the old fluid out instead of back into the system, just be careful and don't get any fluid on your caliper paint.
Step 6: Put your new pads in, put the caliper back on, and tighten the caliper bolts to 175Nm / 129lb ft. If you removed the pad pins and need to re-install them, torque them to 40Nm / 30lb ft. I went with posiquiets as I'm a cheap bastard (old pads on the bottom):
Before you start driving, be sure to pump your brakes until you have a firm pedal. This pushes the pads back into contact with the rotors and prevents you from having a possible accident.
Note about brake fluid: You don't need to bleed your brakes when you change your pads. For a non-tracked car, I recommend bleeding the brakes every 1-2 years. For a track car, this should be done as often as possible since fresh fluid will always help you brake better.
Rotors:
Step 1: Follow Steps 1-3 above in the Brake Pad section.
Step 2: If this is your first time taking off your rotors, there's a clip that you'll need to cut/pry off:
Step 3: Smack the back of the rotor until it comes loose, preferably with something that won't scratch it. You can also use a hammer or something similar to pry them off as shown in the picture. If removing the rear rotors, make sure the parking brake is off.
Step 4: You're done! When you put a rotor back on, you don't need the clip to hold it on. This is only used to assist in assembly at the factory. The wheels will hold the rotor for you.
Last edited by LMBTom; 12-30-2013 at 06:32 PM. Reason: fixed socket size needed

The following 2 users liked this post by LMBTom:
luv2sail21 (05-18-2018),
Never-Enough (12-29-2015)


 05-25-2010, 07:36 AM
#8


Just a suggestion:
When pushing the caliper pistons back into the bore crack the bleeder screw and let the brake fluid drain into a pan rather than pushing the old dirty fluid back into the ABS pump(s).
Use a turkey baster or your clutch fluid syringe, to pull the old brake fluid from the master cylinder reservoir and refill with new fluid before pumping up the brakes. That way even if you don't flush the brake system, which you should do every couple of years as is suggested, you will have fresh fluid in part of the system.
05-25-2010, 08:00 AM
#9
Team Owner


 I was looking in our DIY section yesterday and noticed we didn't have a DIY Brake stickie.
05-25-2010, 08:03 AM
I was looking in our DIY section yesterday and noticed we didn't have a DIY Brake stickie.
05-25-2010, 08:03 AM
#10
Team Owner
To the OP for future ref could you add a TOOLS NEEDED section and caliper bolt TORQUE specs?
If this becomes the DIY stickie that question will be asked over and over again.
BTW great tutorial.
Tom
If this becomes the DIY stickie that question will be asked over and over again.
BTW great tutorial.
Tom
05-25-2010, 08:49 AM
#11
Instructor

Member Since: Dec 2007
Posts: 187
Likes: 0
Received 0 Likes
on
0 Posts

another thing OP, you can leave the stock pads in and is them as a barrier between the piston and your c-clamp. this will ensure there is no damage/scratches/scuffs to the pistons from the c-clamp
05-25-2010, 08:57 AM
#12
Team Owner
05-25-2010, 11:02 AM
#13
Melting Slicks

06-06-2010, 09:19 PM
#15
Le Mans Master

This was very helpful to me today. I would add a couple of things.
First, take the car up high. Working with the brake bolts torqued at 129# in tight quarters is not fun.
Second, I found it much easier to put the new pads in, THEN use the C-Clamp to compress the pistons. Less difficult to get the C-Clamp in place that way.
Third and finally, I about drove my car through my garage wall because I forgot to pump the brakes up! SO DON'T FORGET TO PUMP YOUR BRAKES LIKE I DID!!!!
Excellent tutorial and made a job I hadn't done before very easy. Now I have 4.5# per wheel lighter front rotors (dba 5000), yellow stuff pads and a fresh oil change all in one day!

First, take the car up high. Working with the brake bolts torqued at 129# in tight quarters is not fun.
Second, I found it much easier to put the new pads in, THEN use the C-Clamp to compress the pistons. Less difficult to get the C-Clamp in place that way.
Third and finally, I about drove my car through my garage wall because I forgot to pump the brakes up!
SO DON'T FORGET TO PUMP YOUR BRAKES LIKE I DID!!!! Excellent tutorial and made a job I hadn't done before very easy. Now I have 4.5# per wheel lighter front rotors (dba 5000), yellow stuff pads and a fresh oil change all in one day!
06-07-2010, 11:50 PM
#17
Race Director

I would add:
Be sure to clean around the OD of the pistons prior to pushing them back into their bores. This will minimize scratching the soft bores with brake dust/corrosion and reduce the likelyhood of sticking piston(s.)
Also, it's a great time to inspect the rubber dust seals.
As the OP stated: Be sure to suspend the caliper NOT by the brakeline!
07-07-2010, 10:56 AM
#19
Burning Brakes

Yes, we installed a set a few weeks ago install was very simple. Only problem we had was the holes for the pins in the Carbotech pads was not big enough we had to ream them out a bit. Talked to Carbotech about this thought maybe tooling was worn a bit.
07-07-2010, 11:17 AM
#20
Burning Brakes
Member Since: Feb 2006
Location: Ex BX... Ex NJ... Hello CT!!! CT
Posts: 899
Likes: 0
Received 2 Likes
on
2 Posts
Great write up.... Few more additions:
1. Use a tie-wrap to hang the rotors from the wheel struts, this way the brake lines are protected. Inspect the brake line couplings for rust... Replace if they are. (Think "Stainless Steel")
2. Use one of the old pads to compress the calipers. A pair of channel lock pliers work great, as you don't need much pressure to compress them.... Only bring them down flush, don't over do it, you'll get brake fluid all over the place if you do.
3. Buy some brake cleaner spray and use it on the caliper housing and rotors.
4. Make sure to use plenty of pad lube that (should) come with the pads.... It will help keep them from squeaking. If it didn't come with the pads, then get some from the parts store.
5. If you're changing from OEM to ceramic pads, you may want to change the rotors too. You don't need to, but it takes a good while to bed down ceramic pads to old rotors... You'll avoid excessive squeaking, if you do.
6. Make sure you bed down the pads, according to the manufacturer's instructions. Take your time and let them cool sufficiently between braking and don't immediately park the car while the pads are hot or you'll warp the rotors.
Good luck.....
Few more additions:1. Use a tie-wrap to hang the rotors from the wheel struts, this way the brake lines are protected. Inspect the brake line couplings for rust... Replace if they are. (Think "Stainless Steel"
)2. Use one of the old pads to compress the calipers. A pair of channel lock pliers work great, as you don't need much pressure to compress them.... Only bring them down flush, don't over do it, you'll get brake fluid all over the place if you do.
3. Buy some brake cleaner spray and use it on the caliper housing and rotors.
4. Make sure to use plenty of pad lube that (should) come with the pads.... It will help keep them from squeaking. If it didn't come with the pads, then get some from the parts store.
5. If you're changing from OEM to ceramic pads, you may want to change the rotors too. You don't need to, but it takes a good while to bed down ceramic pads to old rotors... You'll avoid excessive squeaking, if you do.
6. Make sure you bed down the pads, according to the manufacturer's instructions. Take your time and let them cool sufficiently between braking and don't immediately park the car while the pads are hot or you'll warp the rotors.
Good luck.....