Projector Fog Light HOW-TO
 03-16-2010, 01:18 PM
#1
Safety Car

Thread Starter

Member Since: Sep 2007
Location: RIP Lotus
Posts: 3,902
Likes: 0
Received 2 Likes
on
2 Posts
St. Jude Donor '09
***DISLAIMER: I do not recommend or condone replacing factory lighting equipment. You may be violating state or federal laws by doing so. You may cause damage to yourself and personal property including but not limited to personal injury or death. By using this resource you are assuming all risk.***
Tools/ Parts:
Adjustable wrench
Socket set with tiny sockets
Needle Nose Pliers
TSX PROJECTORS
8, 3/16” x 3” bolts with nuts
Many 3/16” nuts
Washers to fit 3/16” bolts
100% Silicone sealant
Metallic chimney tape!
Fog Lamps:
Ok, first you have to take them out of the front bumper.
Go in through the brake cooling ducts, then you don't have to take the wheels off.
Unscrew the 3 bolts and remove the lamp as you see fit.
You'll need to map the beam pattern on a wall with the housing laying however it will lay top up. Use painters tape to map the pattern on the wall as well as the position of the lamp on the floor. Figure 10' away from the wall.
This will come into play later.
you'll need to put the housing in the oven. Back out now if you can't bare to do this. They are about $126 each...
Put the lamp in the oven ***ON 2x4s*** between 300* and 350* until the sealant becomes soft and malleable so that you can remove the lens. This could take 10 minutes or more... just check it intermittently.
IT WILL BE HOT! USE GLOVES
Pry off the lens !!!
You'll need to guess where the 2 screws that hold the reflector are from the back of the housing and drill holes there so you can remove the reflector.
Projectors:
You have your TSX projectors!
Now you’ll need to clean up the projection lines. Keep in mind the shield will be on the bottom of the projector because the lens flips the light. This will get you that sweet purple blue color at the top of the light. Skip the spacer nuts if you don’t want that.

Take apart your projector
Take the 3” bolt and put it through the projector screw hole on the top left of the front of the projector housing. Screw the bolt on until it meets the projector housing. Repeat this with 3” screws in all the holes.
Map the pattern of the bolts on the back of the fog lamp.
Drill holes and position the projector in the lamp housing!!!
Bolt the projector into the lamp housing. Use small washers in between the bolts and the housing if you can find them. FIRM, not tight. You will be adjusting the beam pattern.

Remember that beam pattern you drew on the wall?
Put an HID bulb into the projector and power it by some means, I suggest a jump box. Place the housing in the area you marked on the floor and using the bolts in the back of the housing adjust the beam pattern until it closely matches the one on the wall.
Silicone the lens back onto the housing and then silicone EVERYTHING on the rear of the housing. You can’t allow any moisture into the housing. One drip of water will fog your lens and cause you many countless hours of redoing your work.
Put It back into the car, connect wiring and mount your ballast on the removable panel by screwing it into it and gluing the screws. Replace the brake cooling ducts and removable panels.
Repeat for the other side.
You’re done!

Tools/ Parts:
Adjustable wrench
Socket set with tiny sockets
Needle Nose Pliers
TSX PROJECTORS
8, 3/16” x 3” bolts with nuts
Many 3/16” nuts
Washers to fit 3/16” bolts
100% Silicone sealant
Metallic chimney tape!
Fog Lamps:
Ok, first you have to take them out of the front bumper.
Go in through the brake cooling ducts, then you don't have to take the wheels off.
Unscrew the 3 bolts and remove the lamp as you see fit.
You'll need to map the beam pattern on a wall with the housing laying however it will lay top up. Use painters tape to map the pattern on the wall as well as the position of the lamp on the floor. Figure 10' away from the wall.
This will come into play later.
you'll need to put the housing in the oven. Back out now if you can't bare to do this. They are about $126 each...
Put the lamp in the oven ***ON 2x4s*** between 300* and 350* until the sealant becomes soft and malleable so that you can remove the lens. This could take 10 minutes or more... just check it intermittently.
IT WILL BE HOT! USE GLOVES
Pry off the lens !!!
You'll need to guess where the 2 screws that hold the reflector are from the back of the housing and drill holes there so you can remove the reflector.
Projectors:
You have your TSX projectors!
Now you’ll need to clean up the projection lines. Keep in mind the shield will be on the bottom of the projector because the lens flips the light. This will get you that sweet purple blue color at the top of the light. Skip the spacer nuts if you don’t want that.
Take apart your projector
Take the 3” bolt and put it through the projector screw hole on the top left of the front of the projector housing. Screw the bolt on until it meets the projector housing. Repeat this with 3” screws in all the holes.
Map the pattern of the bolts on the back of the fog lamp.
Drill holes and position the projector in the lamp housing!!!
Bolt the projector into the lamp housing. Use small washers in between the bolts and the housing if you can find them. FIRM, not tight. You will be adjusting the beam pattern.
Remember that beam pattern you drew on the wall?
Put an HID bulb into the projector and power it by some means, I suggest a jump box. Place the housing in the area you marked on the floor and using the bolts in the back of the housing adjust the beam pattern until it closely matches the one on the wall.
Silicone the lens back onto the housing and then silicone EVERYTHING on the rear of the housing. You can’t allow any moisture into the housing. One drip of water will fog your lens and cause you many countless hours of redoing your work.
Put It back into the car, connect wiring and mount your ballast on the removable panel by screwing it into it and gluing the screws. Replace the brake cooling ducts and removable panels.
Repeat for the other side.
You’re done!
Last edited by NavyC4S; 03-16-2010 at 03:55 PM.


 03-16-2010, 07:13 PM
#6
Safety Car
Thread Starter
Member Since: Sep 2007
Location: RIP Lotus
Posts: 3,902
Likes: 0
Received 2 Likes
on
2 Posts
St. Jude Donor '09
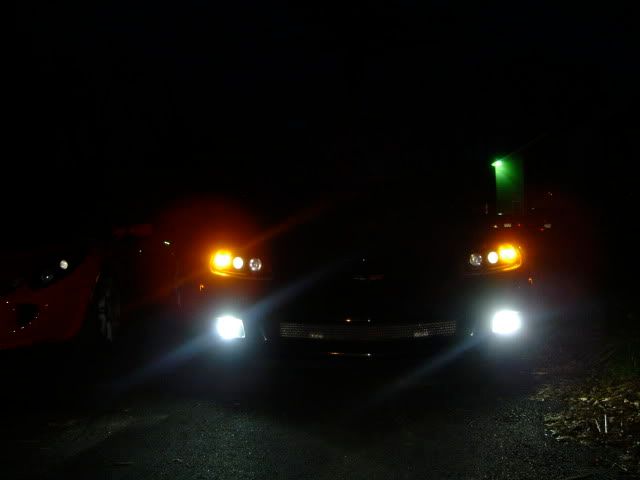
I had both of them up, but I got rid of the distraction 
Due to being patient and actually letting the silicone dry for at least 24 hours...bout 2 days
I'll get a pic
Originally Posted by Varcix
Turn 'em on and take a pic!!! looks awesome!!! how long did this all take?
I'll get a pic
Last edited by NavyC4S; 03-16-2010 at 07:22 PM.

 03-17-2010, 01:28 AM
#8
Team Owner


***DISLAIMER: I do not recommend or condone replacing factory lighting equipment. You may be violating state or federal laws by doing so. You may cause damage to yourself and personal property including but not limited to personal injury or death. By using this resource you are assuming all risk.***
Tools/ Parts:
Adjustable wrench
Socket set with tiny sockets
Needle Nose Pliers
TSX PROJECTORS
8, 3/16� x 3� bolts with nuts
Many 3/16� nuts
Washers to fit 3/16� bolts
100% Silicone sealant
Metallic chimney tape!
Fog Lamps:
Ok, first you have to take them out of the front bumper.
Go in through the brake cooling ducts, then you don't have to take the wheels off.
Unscrew the 3 bolts and remove the lamp as you see fit.
You'll need to map the beam pattern on a wall with the housing laying however it will lay top up. Use painters tape to map the pattern on the wall as well as the position of the lamp on the floor. Figure 10' away from the wall.
This will come into play later.
you'll need to put the housing in the oven. Back out now if you can't bare to do this. They are about $126 each...
Put the lamp in the oven ***ON 2x4s*** between 300* and 350* until the sealant becomes soft and malleable so that you can remove the lens. This could take 10 minutes or more... just check it intermittently.
IT WILL BE HOT! USE GLOVES
Pry off the lens !!!
You'll need to guess where the 2 screws that hold the reflector are from the back of the housing and drill holes there so you can remove the reflector.
Projectors:
You have your TSX projectors!
Now you�ll need to clean up the projection lines. Keep in mind the shield will be on the bottom of the projector because the lens flips the light. This will get you that sweet purple blue color at the top of the light. Skip the spacer nuts if you don�t want that.
Take apart your projector
Take the 3� bolt and put it through the projector screw hole on the top left of the front of the projector housing. Screw the bolt on until it meets the projector housing. Repeat this with 3� screws in all the holes.
Map the pattern of the bolts on the back of the fog lamp.
Drill holes and position the projector in the lamp housing!!!
Bolt the projector into the lamp housing. Use small washers in between the bolts and the housing if you can find them. FIRM, not tight. You will be adjusting the beam pattern.
Remember that beam pattern you drew on the wall?
Put an HID bulb into the projector and power it by some means, I suggest a jump box. Place the housing in the area you marked on the floor and using the bolts in the back of the housing adjust the beam pattern until it closely matches the one on the wall.
Silicone the lens back onto the housing and then silicone EVERYTHING on the rear of the housing. You can�t allow any moisture into the housing. One drip of water will fog your lens and cause you many countless hours of redoing your work.
Put It back into the car, connect wiring and mount your ballast on the removable panel by screwing it into it and gluing the screws. Replace the brake cooling ducts and removable panels.
Repeat for the other side.
You�re done!