My 64 Coupe Coke Bottle look Restomod build
 11-20-2009, 01:08 AM
#1
Melting Slicks

Thread Starter

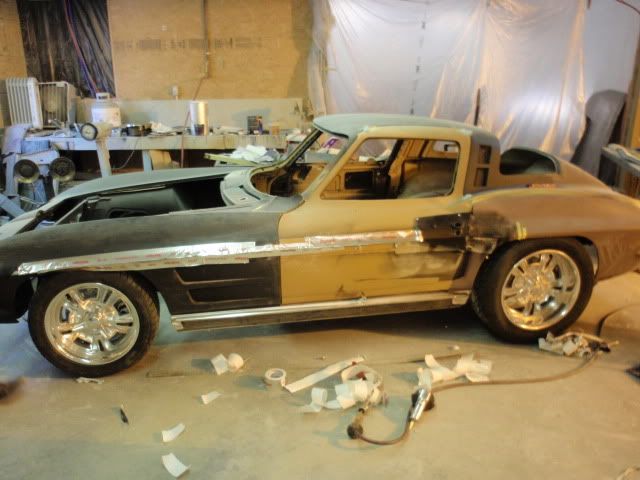
Project has an is still suffering from PSC (Project scope Creep).
What started out as leaving body stock and mounting it on StreetShop Frame with LS3 480HP crate engine and A4 trans, has moved to rear body customizing and now to front fender customizing also due to need for wider rear qtrs.
Question is will we able to to obtain the final project rendering look are not. The changes to lwr front fenders may not be achievable so we have been playing with a couple of other looks.
C2 Vette's positive wheel offset has caused the rear quarters to have to be stretched more than 1.0" to fit the amount of wheel hoop showing on rear wheels in rendering, rather than because of 295/45/18 tire size. Tires would have fit 1.0" stretch fender without a problem.
Guess you could say the car is being customized/built around the wheels as most of the body changes will be done so we could get a lot of wheel hoop showing on rear wheels and to lessen the amount of rear tire exposed to view on both front and rear of rear Qrts, to try and prevent tires from slinging up debris on qtrs and ruining paint, yet while still trying to maintain a semblance of stock look on rear, more so than fat/broad look I've run across researching project using wide tires.
Car will have a coke bottle look to it looking down from above, rather than the typical step seen in GTS and other aftermarket stretch fenders to get them to match up with stock door edge location.
First rendering stock body with knockoffs of Halibrand 46-50s kidney bean style wheels.
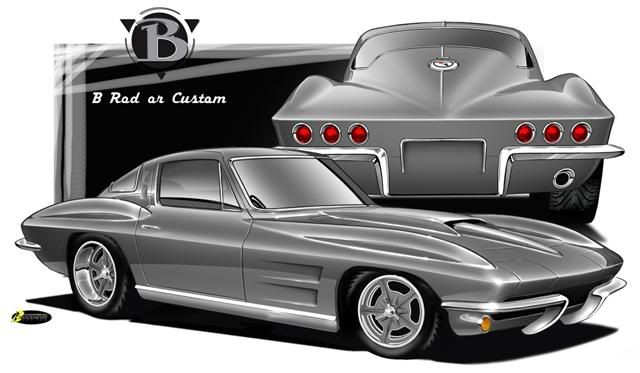
Forth and final Rendering customized body and knockoffs of Hailbrand 60s Sprint style wheels and front fender styling used on C6 Zo6.

Project pic with loaner wheels from Camaro with same size wheels and tires as I'm using on it and try at different lwr front fender look.

Wheel shown in final rendering finally came in back around 1st of September, but beause Body Shop doing the work had 3 cars being built for SEMA, they were not able to work on car until again until this week.
Project pics with tires and wheels on it that car is being built around.

First thing was to try and nail down the final direction body changes where to take. Think you will be able see we are going to try and hold ture to rendering.
Hope now is that they will be able to do the C6 Z06 fender vent shown in rendering. This has been a big question, that we hope to have cleared up by Monday.
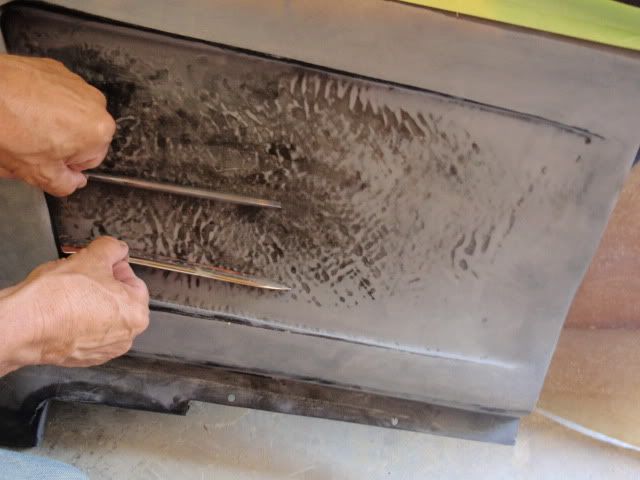
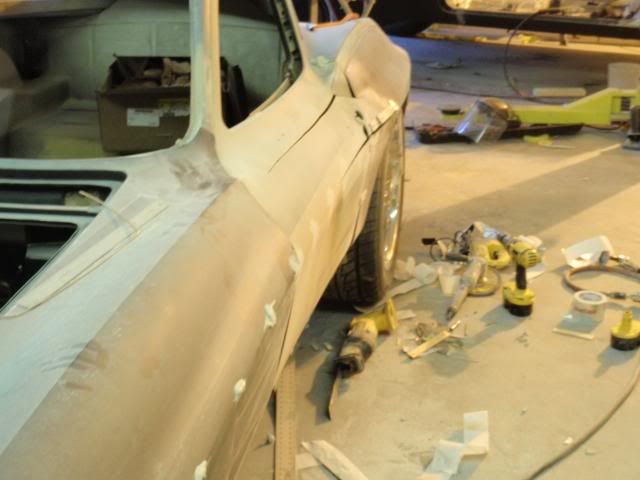
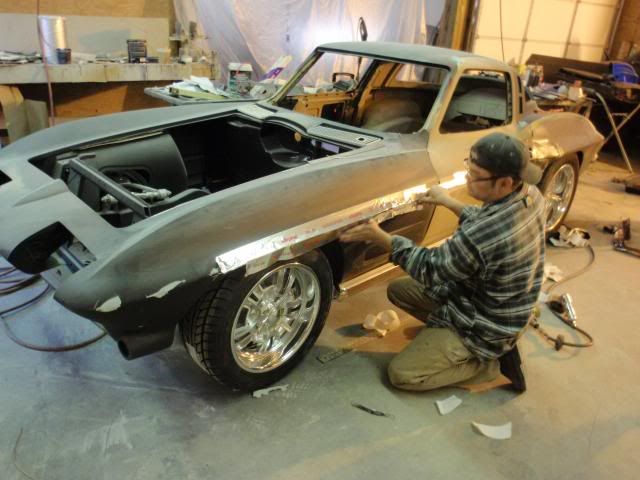
Since I had been thinking about adding a rear brake cooling vent for more of a racing look plus use it to also try and cover some of the exposed rear tire and lessen the pronounced dip in body line of the GTS 1.0" stretched rear qtrs where they had to get qtr panel's body line back inline with that of door. You should be able to see both conditions in picture below. You can also see cuts in rear door to allow door sking to be moved outward around 1/2"+ to smooth the contour of body line out. Doing that has a ripple effect that will require need for more body changes.
Shop did a down and dirty mockup of what it would look like using bonded on studs, tape, and fiberglass vent opening. They did this in such a manner as to make it look like they had scooped out door to match the forward depth of the front fender vent and made it mate with the brake vent. Hope you can picture that in your mind as I forgot to take a picture of it before we tore mockup down because it changed the stock looks of the car to much.
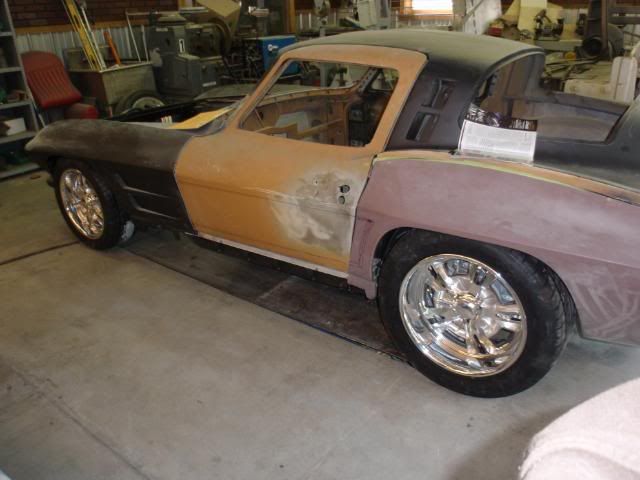
You can still see some of tape and paint on car in picture below as he started doing tape mockup of what the front fender would look like stretched 3/4"- 1.0" to keep front and rear fender widths in proportion.
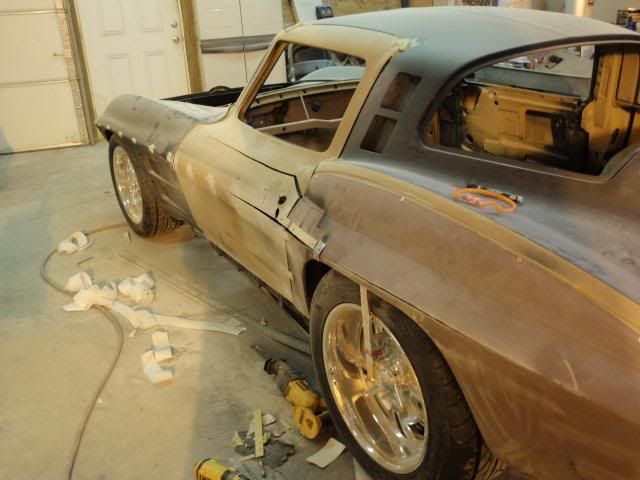
Next came the Sawsall, dreaded wooded paint stirrers, masking tape, screws, and a piece of a 2"X4" under rear of qtr panel bonding strip to push out rear of qtr panel this time to see if we can curve it to show about the same amount of tire exposed, as that exposed on a stock body and tire car, yet maintain the stock qtr's look on rear. The rear of qtr has not had any cuts made to allow it to curve back in and mate up with rear valance panel.
As you see in from pictures, we moved on to the Coke bottle curve look shown in the rendering, but with change that make the transition between the rear qtr panel and door even less dramatic and more flowing than that in rendering by extending point out on door conture matched back up with that of stock body.
You should be able to see how much that change reduced the amount of exposed tire and dramatic drop of body line in picture below. Odds are when he gets through contouring fender to fit tire, even less of tire will show.[/B]
Picture of rear showing amount of tire exposed we hope to achieve and still have about the same body width as stock by maintaining stock qtr panel angle where it bonds to rear valance.
No cuts made yet to qtr to allow it to curve back in to rear valance/tailight panel.
Once he starts contouring rear qtr, he hopes to be able to get a little more of exposed tire covered up yet have it curve back and mate up with rear valance/tail light panel with out having to splice it in.
Shop is trying hard not to have it take on a wide rear end bubble look.
Rear bumpers will still have to be cut and sectioned an are pie cut to fit.


Just hoping it works out as planned.
What started out as leaving body stock and mounting it on StreetShop Frame with LS3 480HP crate engine and A4 trans, has moved to rear body customizing and now to front fender customizing also due to need for wider rear qtrs.
Question is will we able to to obtain the final project rendering look are not. The changes to lwr front fenders may not be achievable so we have been playing with a couple of other looks.
C2 Vette's positive wheel offset has caused the rear quarters to have to be stretched more than 1.0" to fit the amount of wheel hoop showing on rear wheels in rendering, rather than because of 295/45/18 tire size. Tires would have fit 1.0" stretch fender without a problem.
Guess you could say the car is being customized/built around the wheels as most of the body changes will be done so we could get a lot of wheel hoop showing on rear wheels and to lessen the amount of rear tire exposed to view on both front and rear of rear Qrts, to try and prevent tires from slinging up debris on qtrs and ruining paint, yet while still trying to maintain a semblance of stock look on rear, more so than fat/broad look I've run across researching project using wide tires.
Car will have a coke bottle look to it looking down from above, rather than the typical step seen in GTS and other aftermarket stretch fenders to get them to match up with stock door edge location.
First rendering stock body with knockoffs of Halibrand 46-50s kidney bean style wheels.
Forth and final Rendering customized body and knockoffs of Hailbrand 60s Sprint style wheels and front fender styling used on C6 Zo6.
Project pic with loaner wheels from Camaro with same size wheels and tires as I'm using on it and try at different lwr front fender look.
Wheel shown in final rendering finally came in back around 1st of September, but beause Body Shop doing the work had 3 cars being built for SEMA, they were not able to work on car until again until this week.
Project pics with tires and wheels on it that car is being built around.
First thing was to try and nail down the final direction body changes where to take. Think you will be able see we are going to try and hold ture to rendering.
Hope now is that they will be able to do the C6 Z06 fender vent shown in rendering. This has been a big question, that we hope to have cleared up by Monday.
Since I had been thinking about adding a rear brake cooling vent for more of a racing look plus use it to also try and cover some of the exposed rear tire and lessen the pronounced dip in body line of the GTS 1.0" stretched rear qtrs where they had to get qtr panel's body line back inline with that of door. You should be able to see both conditions in picture below. You can also see cuts in rear door to allow door sking to be moved outward around 1/2"+ to smooth the contour of body line out. Doing that has a ripple effect that will require need for more body changes.
Shop did a down and dirty mockup of what it would look like using bonded on studs, tape, and fiberglass vent opening. They did this in such a manner as to make it look like they had scooped out door to match the forward depth of the front fender vent and made it mate with the brake vent. Hope you can picture that in your mind as I forgot to take a picture of it before we tore mockup down because it changed the stock looks of the car to much.
You can still see some of tape and paint on car in picture below as he started doing tape mockup of what the front fender would look like stretched 3/4"- 1.0" to keep front and rear fender widths in proportion.
Next came the Sawsall, dreaded wooded paint stirrers, masking tape, screws, and a piece of a 2"X4" under rear of qtr panel bonding strip to push out rear of qtr panel this time to see if we can curve it to show about the same amount of tire exposed, as that exposed on a stock body and tire car, yet maintain the stock qtr's look on rear. The rear of qtr has not had any cuts made to allow it to curve back in and mate up with rear valance panel.
As you see in from pictures, we moved on to the Coke bottle curve look shown in the rendering, but with change that make the transition between the rear qtr panel and door even less dramatic and more flowing than that in rendering by extending point out on door conture matched back up with that of stock body.
You should be able to see how much that change reduced the amount of exposed tire and dramatic drop of body line in picture below. Odds are when he gets through contouring fender to fit tire, even less of tire will show.[/B]
Picture of rear showing amount of tire exposed we hope to achieve and still have about the same body width as stock by maintaining stock qtr panel angle where it bonds to rear valance.
No cuts made yet to qtr to allow it to curve back in to rear valance/tailight panel.
Once he starts contouring rear qtr, he hopes to be able to get a little more of exposed tire covered up yet have it curve back and mate up with rear valance/tail light panel with out having to splice it in.
Shop is trying hard not to have it take on a wide rear end bubble look.
Rear bumpers will still have to be cut and sectioned an are pie cut to fit.
Just hoping it works out as planned.
Last edited by Poorhousenext; 08-24-2011 at 02:47 PM.
 11-20-2009, 06:13 AM
#2
Burning Brakes


Looking good, Following your thread on another forum, looks like it's going to be a little tight for tire clearance to the 1/4? Do you have the offset trailing arms?
Never mind, went to the other post to re read and answered my own question.
keep posting update's, I like following other people's money pit's, let's me know I am not the only one trying to stimulate the economy.
Any chance of pic's of your 66 LS conversion as well?
Never mind, went to the other post to re read and answered my own question.
keep posting update's, I like following other people's money pit's, let's me know I am not the only one trying to stimulate the economy.
Any chance of pic's of your 66 LS conversion as well?
Last edited by Beach Dude; 11-20-2009 at 06:31 AM.


 11-20-2009, 03:26 PM
#4
Le Mans Master

I admire your williningness to do cutting and fitting of panels. Not many people are this bold. It will be worth the effort, in the end.
Really nice work....

Really nice work....
Last edited by Vette Daddy; 11-21-2009 at 12:54 PM.

 11-20-2009, 10:19 PM
#7
Melting Slicks
Thread Starter
To get what Shop calls "The Look", lot of rear wheel's hoop showing, the outward edge of the wheel must move outwards, away from the wheel hub, or hub inwards so you go from positive offset to negative offset wheel.
Something has to move, either the body panel outwards, or the frame, inner body, and suspension components inwards enough to fit tires & wheels inside stock body. Even with all that inward movement, the qtr panel will probably still need to moved outwards to have any semblance of correct suspension geometry.

I took the route the factory took with the cars they raced, and by doing so get the benefit of the old Pontiac's hyped "Wide Track" stability effect, Vs narrower Stock Track.
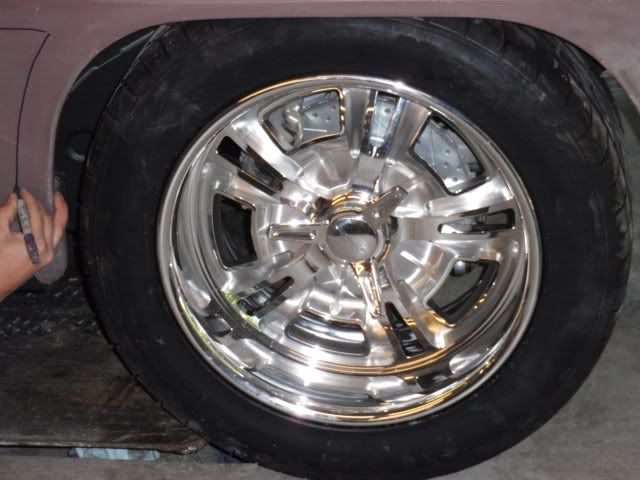
This also allows me to go from Pro Touring look to Pro Street look, by just removing the rear 18"x10" wheels with 285/40/18 or 295/45/18 tires and replacing them with 11" rims with 315x35x17 tires, to get the 1.0" wider fat tire patch look.
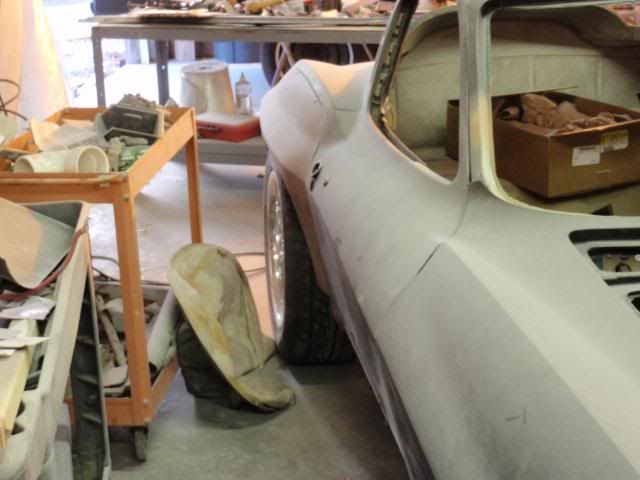
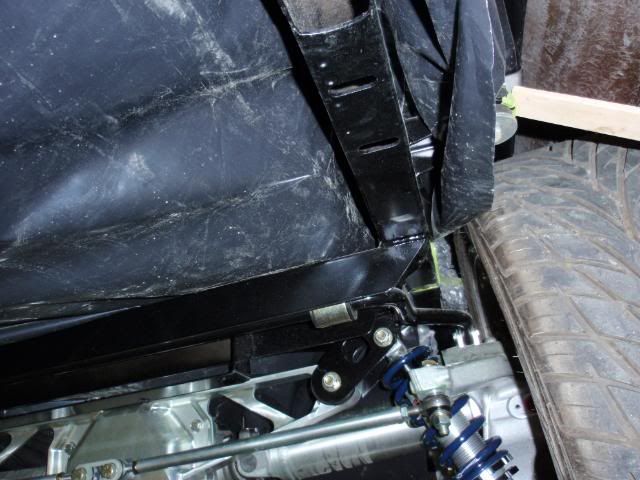
Here is what we had to do just to get the wheels & tires to fit inside 1.0" aftermarket stretched rear qtr panels. In at top and out at bottom and you can see from second photo, there is plenty of room to fit a 1.0" wider tire.
 Final qtr contouring should have min of 1/2 inch clearance between tire and qtr panel's inner wheel well lip.
 You should be able to tell there will be more than 1 1/2" of space between existing 10" rim and tire between it and frame to fit an 11" rim with tire.
Any chance of pic's of your 66 LS conversion as well?
Probably be mid December - January before there is any changes you can see.
I'm hoping to have a working paddle shift setup in hand to go along with Tiptronic floor shifter in the next couple of weeks.
Found a company that is willing to work with me on it. We are trying for no batteries, RF switching or using one existing wire inside steering column for both power for paddles switches and send shift signal to trans controller so it's a no brainer, easy for anyone to install setup.
11-20-2009, 10:47 PM
#8
Melting Slicks
Thread Starter
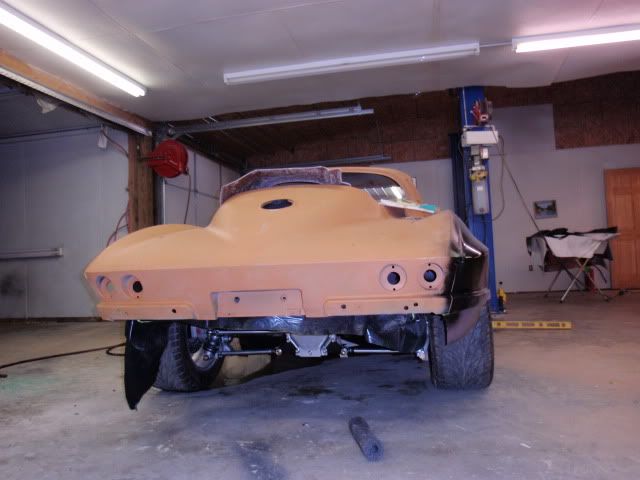
I had confidence in the years of experience of Bodyman that he could handle it.

He took one long look at picture of Rendering on my computer, told the Shop owner, I can do that, walked out into shop, we heard a sawsall and thought he had gone back to work on project he was working on prior to when I got there.
In about 30 mins he came back into office an told us to come out and look at car to see if he had achievd what we wanted.
So guts is not what it takes with an old body man, but for a young one, shown in picture below, it takes ignorance that it's your car that getting cut up with a SAWSALL by a young KID.

How many kids his age, can look at a picture, then go make cuts on a door and fender where they need to be made.
I'm going to nickname him AllState cause I know car is in good hands.....LOL
Last edited by Poorhousenext; 11-20-2009 at 10:50 PM.

 11-21-2009, 04:52 PM
#13
Melting Slicks
Thread Starter
One of the things he commented on when he first saw car was he liked the raised pad door over the later models without them. He thinks it adds to the car looks.
Anyway, I don't think anybody would give an ugly penny for the drivers door now that we have cut it across the skin and where skins on back side joins door frame. We're raising skin 1/2" plus so we can smooth out contour between rear qtr and door.
That change means door jams will need to be widened so stock rocker molding can not be used, unless we try to re-contour them. We will probably make some that look like ones in Final Rendering as that would make that area look more like todays Vette.
Shemshin sells a patch panel so you can either repair cracked ones are add them to a door without them.
11-21-2009, 07:16 PM
#14
That is quite the project. One cannot believe the hours that can be put into this creation. Love the wheels and the body mods. Killer road machine. Can't wait for the final paint !!! One has to be some kind of artist to achieve your goals.
11-21-2009, 08:02 PM
#15
Le Mans Master
 11-22-2009, 04:58 PM
#16
Le Mans Master

I just love this car! Keep the pics come on rolling
Ah those great lines
What kind of coil over kit do you have?
Ah those great lines
What kind of coil over kit do you have?
Last edited by TheSaint; 11-22-2009 at 05:02 PM.
11-22-2009, 09:32 PM
#17
Melting Slicks
Thread Starter
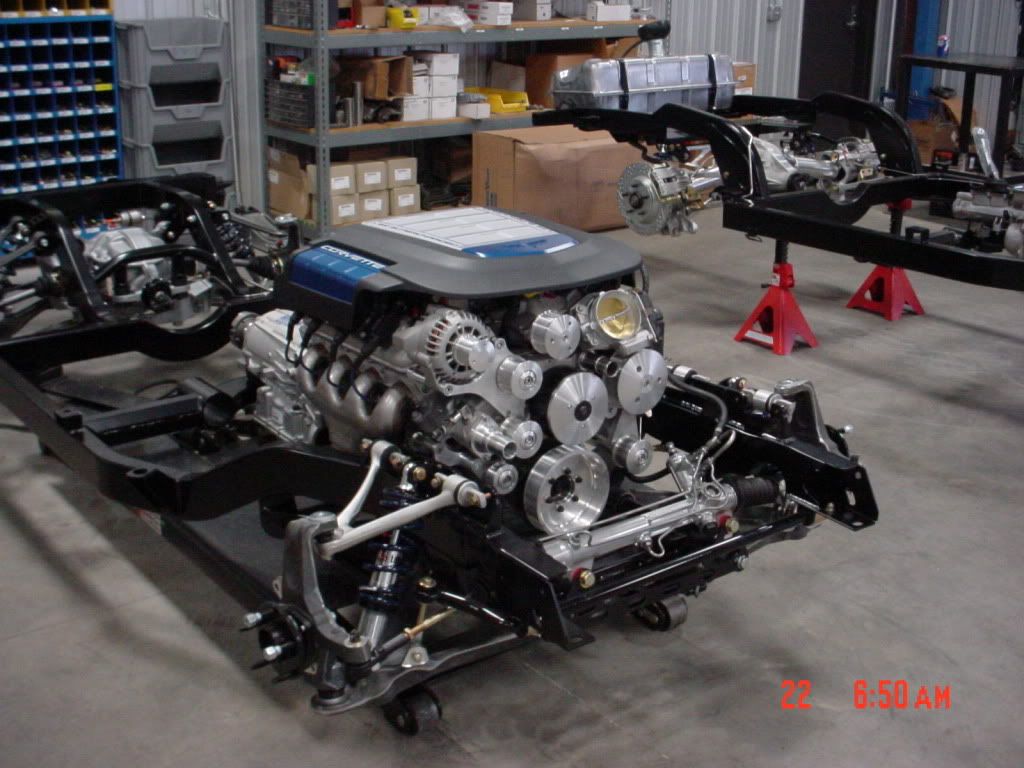
http://www.streetshopinc.com/c4midyear.html
Here is a nice package from them I'd love to have under my 64's body.

 11-27-2009, 12:03 AM
#20
Melting Slicks


I'm using a frame/chassis from Street Shop Inc. with C4 suspension components. Shop also has C5 & C6 suspension chassis/frame packages.
http://www.streetshopinc.com/c4midyear.html
Here is a nice package from them I'd love to have under my 64's body.
http://www.streetshopinc.com/c4midyear.html
Here is a nice package from them I'd love to have under my 64's body.

