700R4 Transmission Rebuild (Lots of Pics Inside, Maybe Too Many for Dial-Up)
 05-09-2008, 03:27 PM
#1
Burning Brakes

Thread Starter

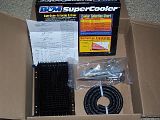
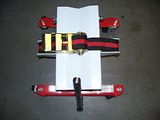
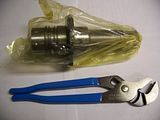
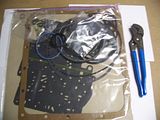
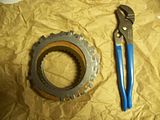
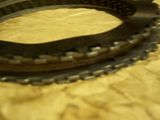
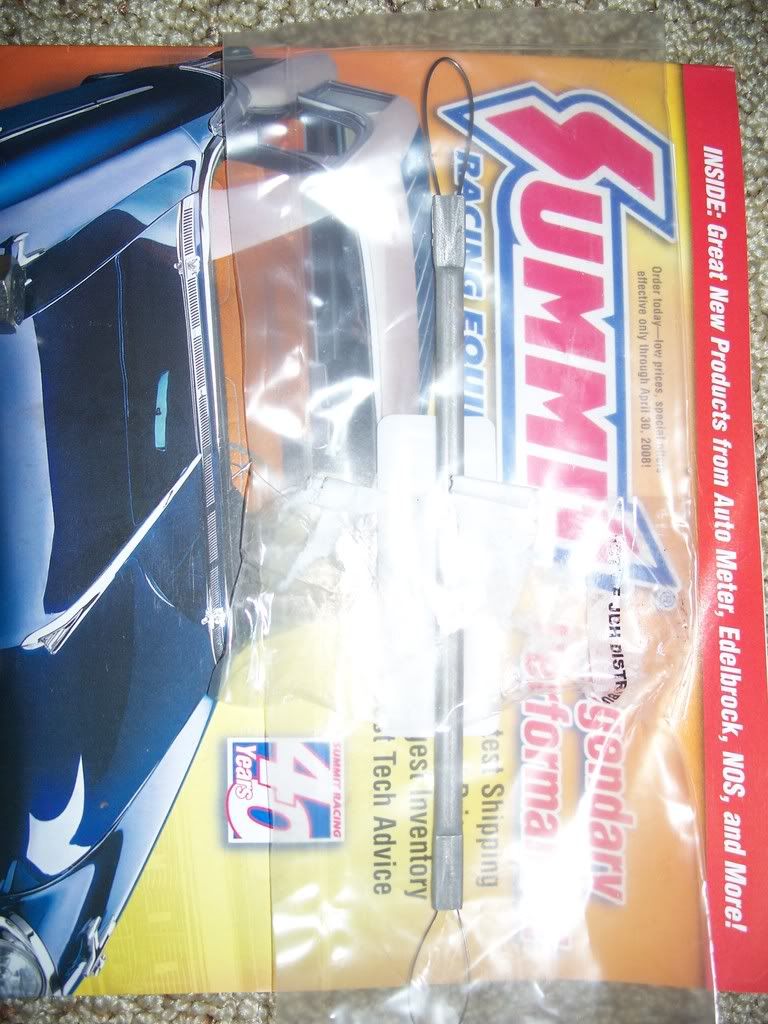
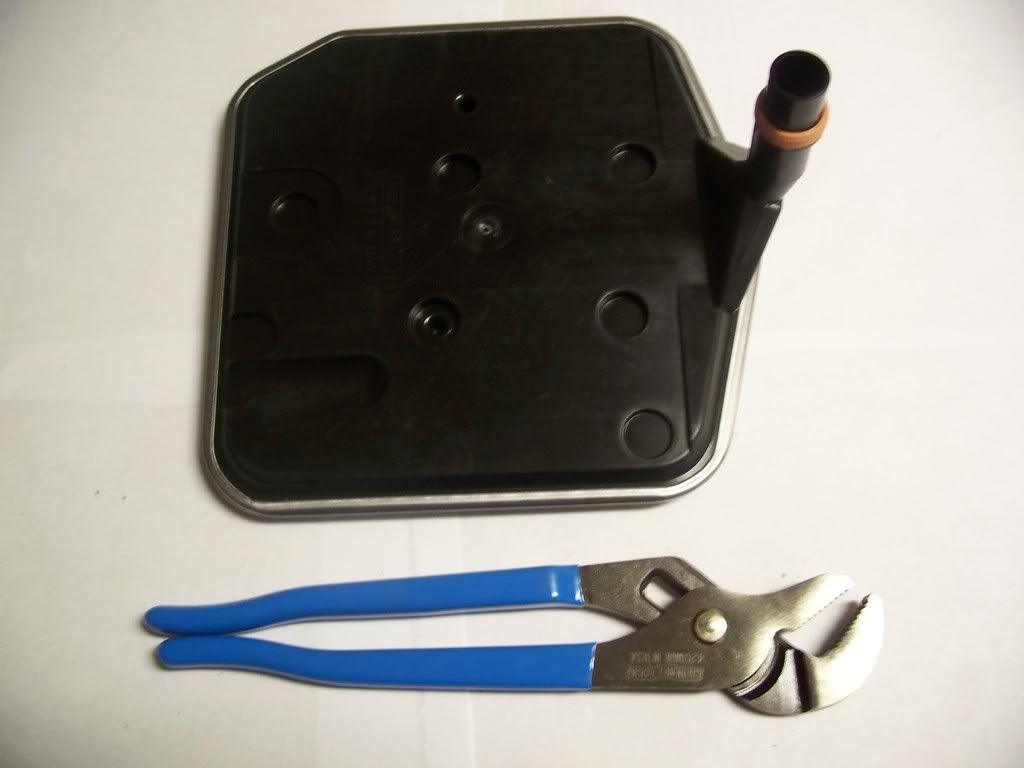
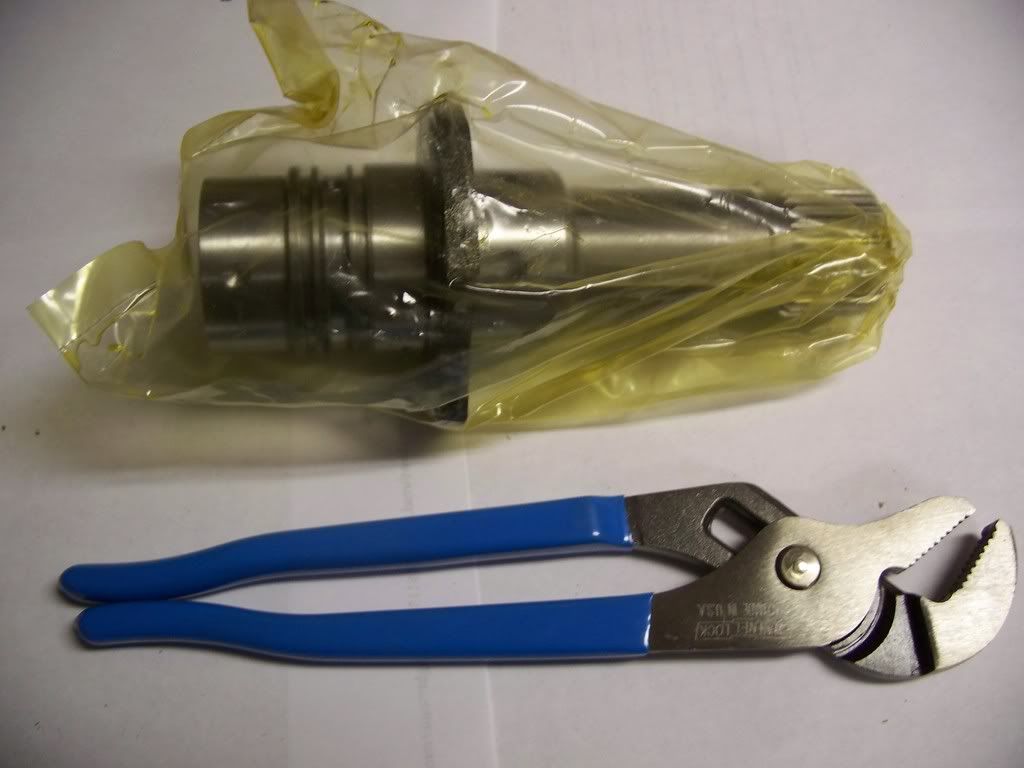
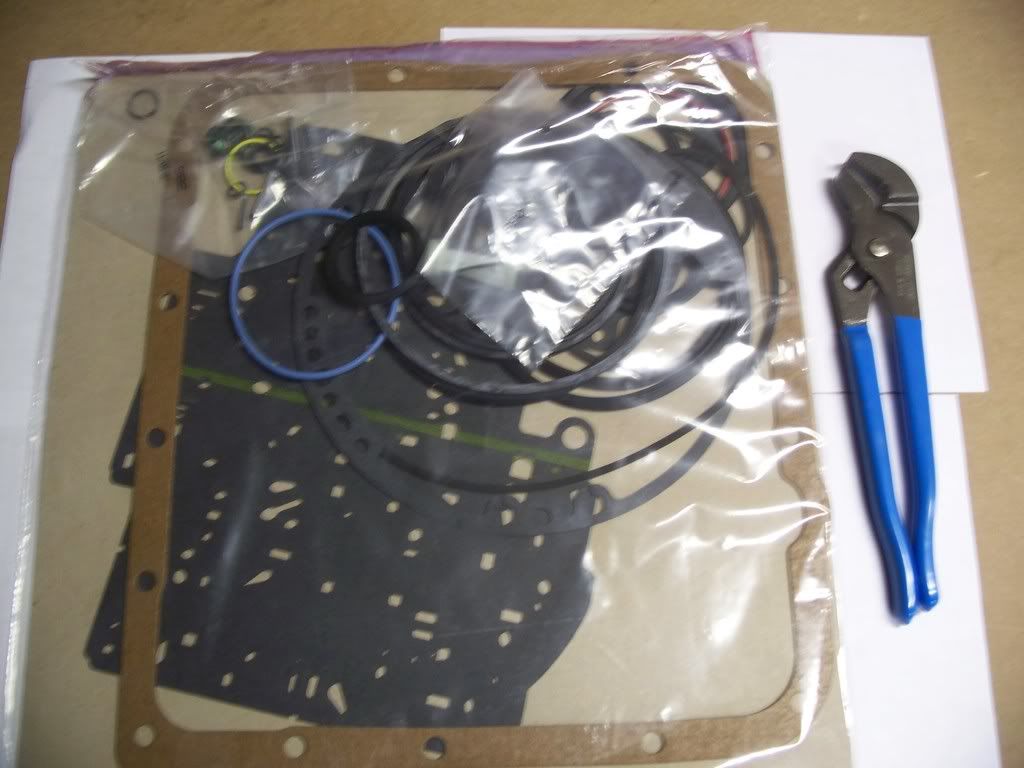
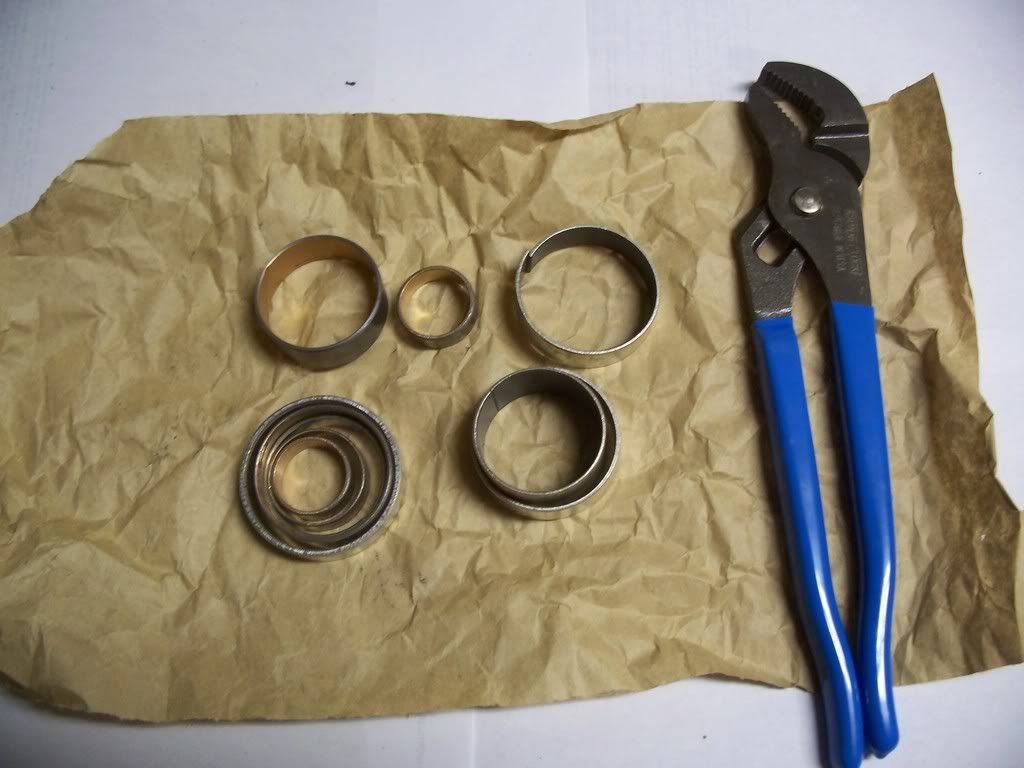
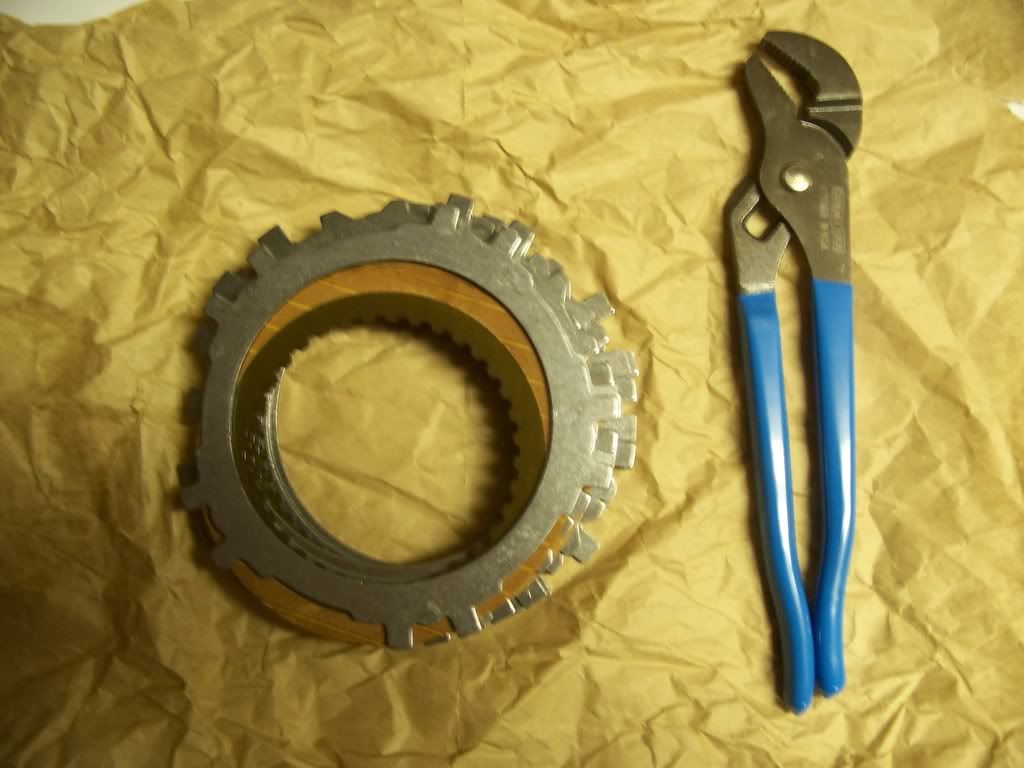
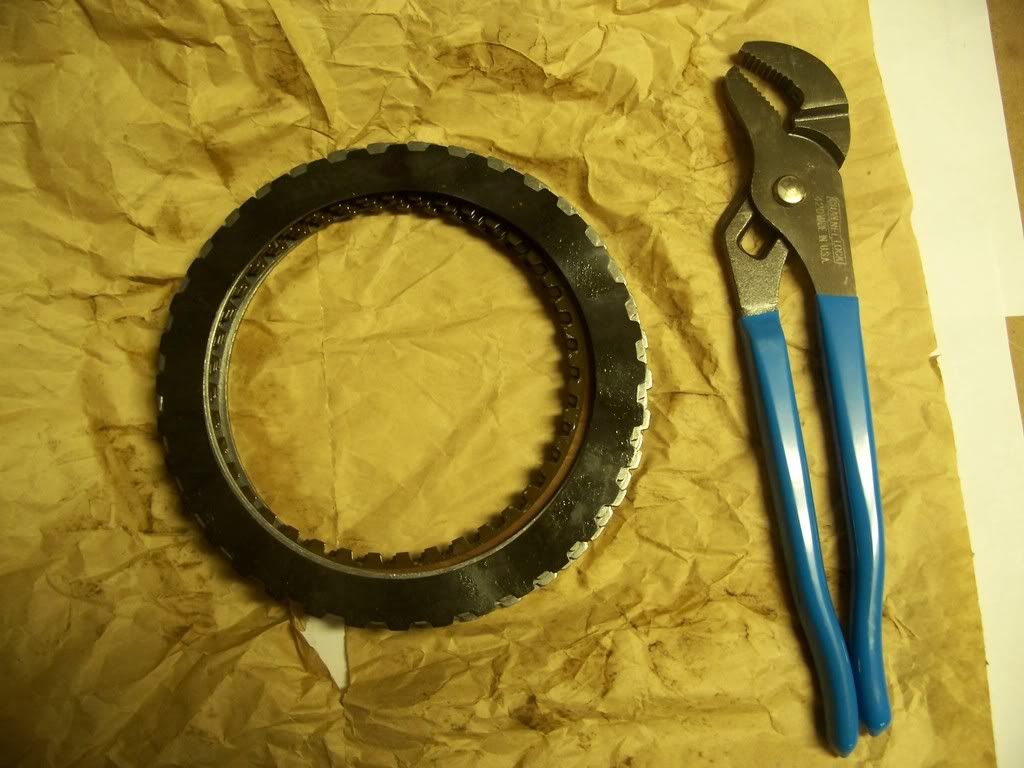
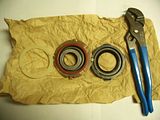
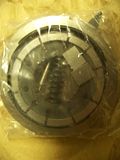
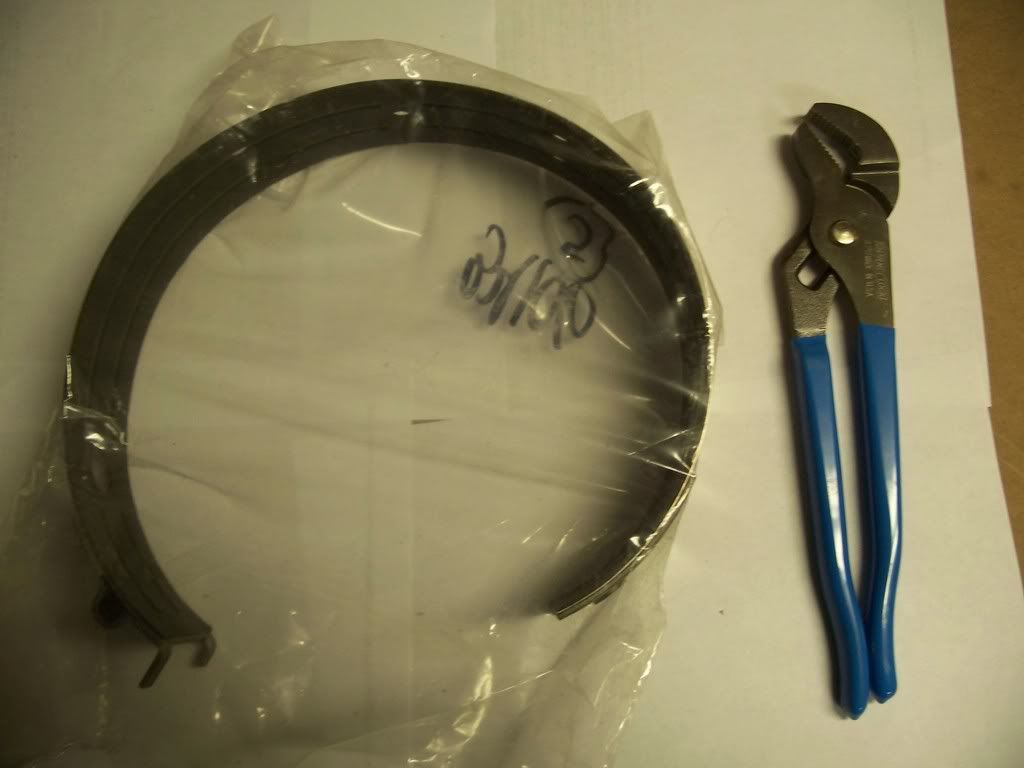
So I've got everything ready to rebuild the 700R4 in my 91. Here are some pics of the parts, tools, etc. I will shortly be taking out the transmission itself. I hope you're ready for some questions, although I don't think I'll be too lost as I've watched the complete disassembly and reassembly DVD 4 or 5 times and have read the book once. The rebuild kit I'm using is the Street/Strip kit from Dana at ProBuilt (who's been very helpful by the way). I went with a 2400 stall Vigilante 9.5 inch lock-up TC, Borg Warner Hi-Energy, 8 clutch setup for the 3-4 pack, and the Raybestos SKF single cage 29 element design input sprag.
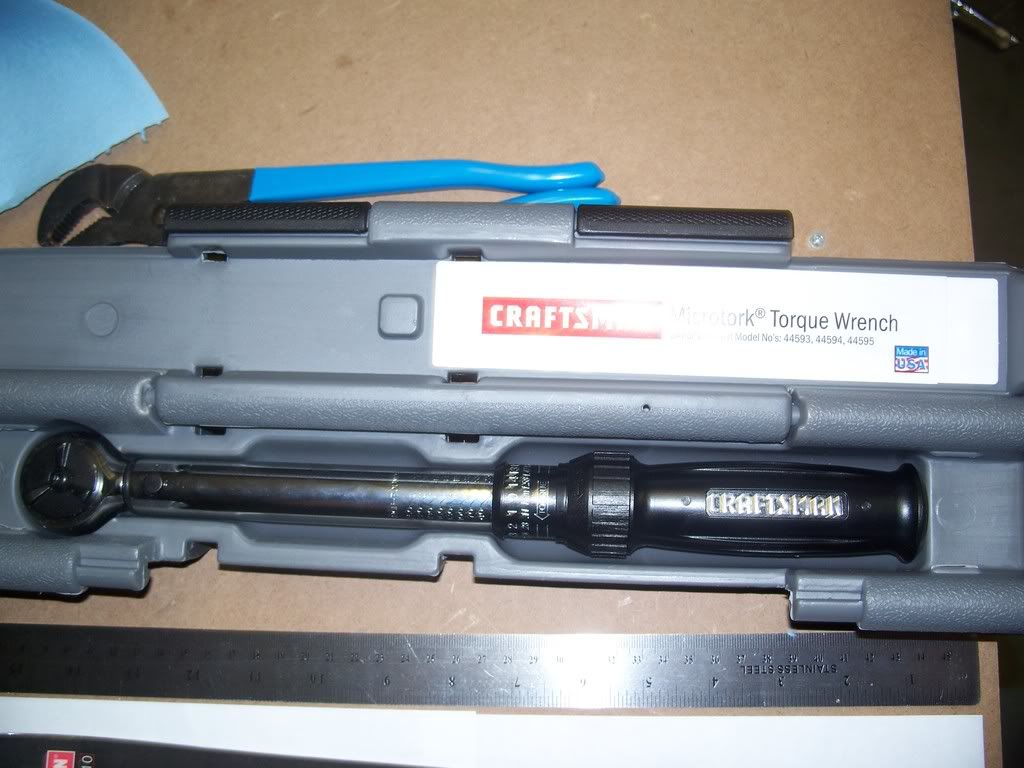
I also want to note that the FSM is not as helpful as expected in removing the trans, it only really tells you how to service it on the car. No big deal though, there were plenty of write-ups on the forum. Also, whats the best way to drain all the fluid out of the trans before I take it off? I plan to stick some tubing down the filler tube and pump out the fluid in the pan, but how should I drain the majority of the fluid the quickest without any compressed air? And if I identified any part incorrectly, please advise me. The wrench is to give you an idea of size.
Thanks in advance,
Jonathan
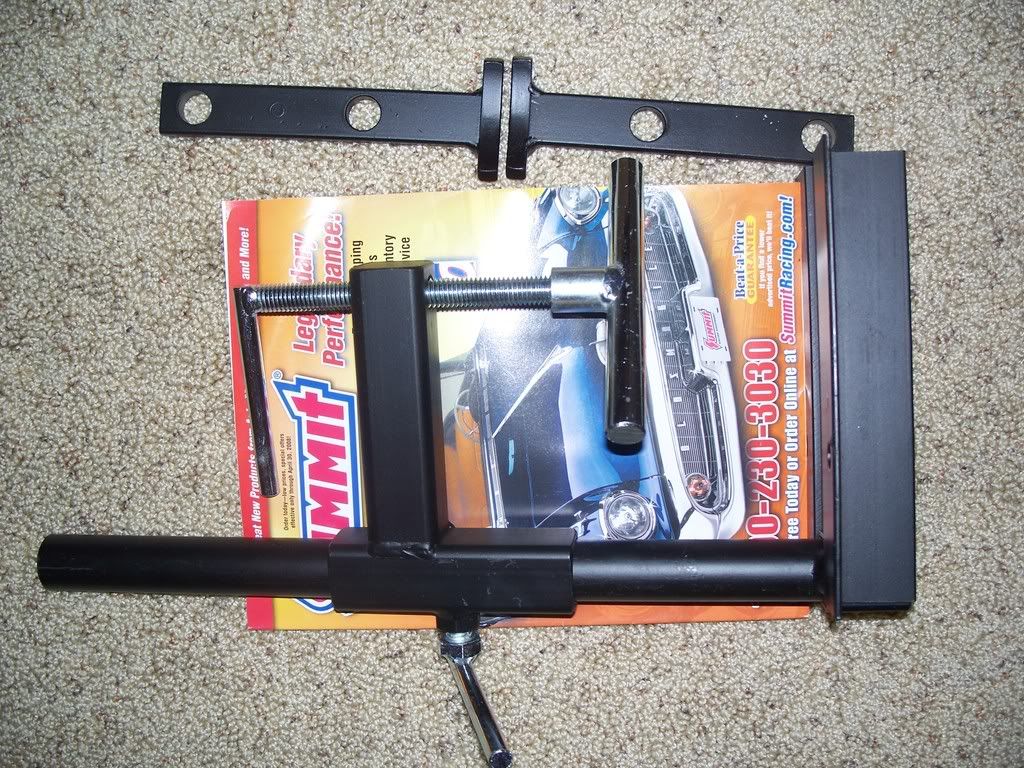
1. B&M External Trans Cooler, 24,000 GVW, 7.25 in. x 11 in. x 1 1/2 in.
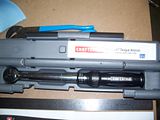
2. Torque Wrench
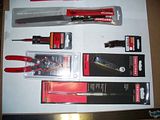
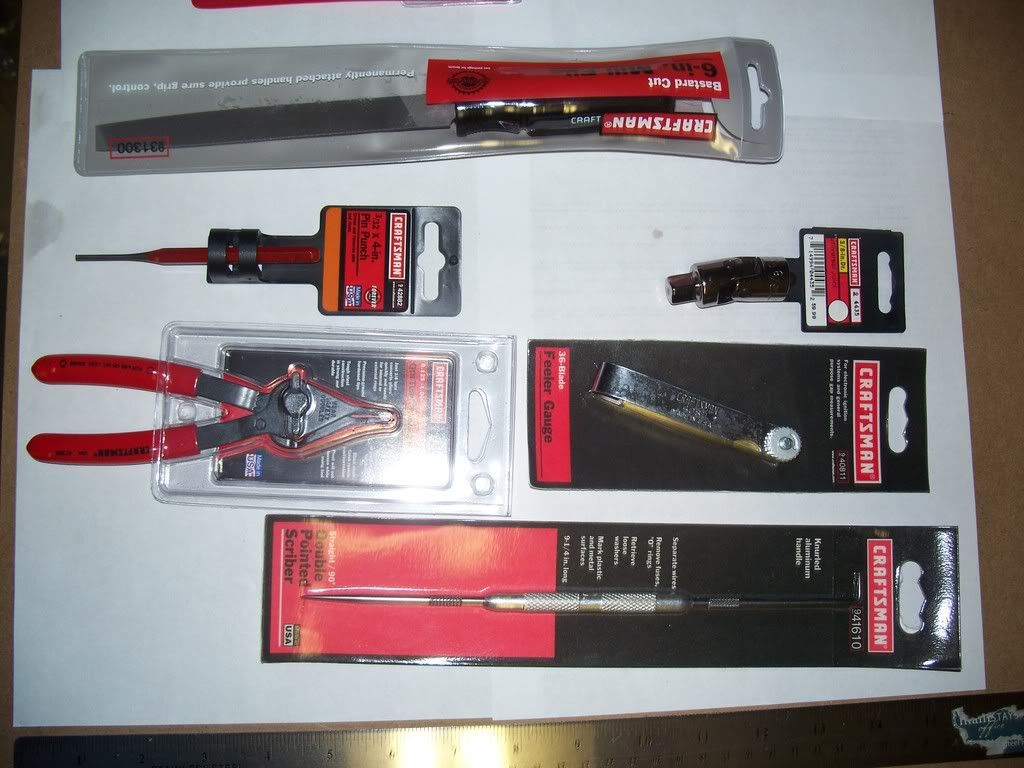
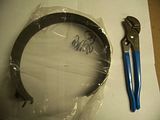
3. 3/32 Pin Punch, 6 in Bastard Mill File, Scribe with 90* End, Feeler Gauge, Snap Ring Pliers for small snap ring, universal joint
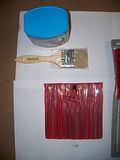
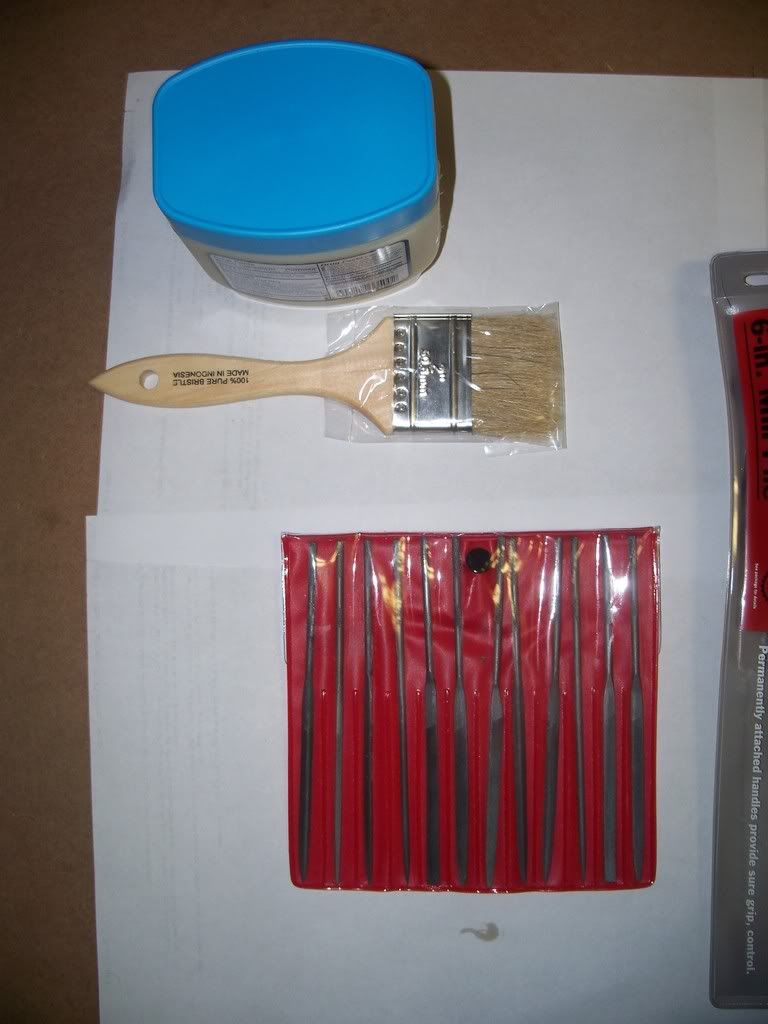
4. Petroleum Jelly with Paint Brush Applicator, Small Files
5. 450 lb transmission jack with � drive breaker bar
6. Shift Lever Seal remover & installer
7. Lip Seal installer tool
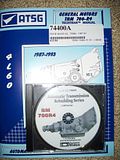
8. ATSG Manual and Paul Zank DVD
9. Rear clutch spring compressor
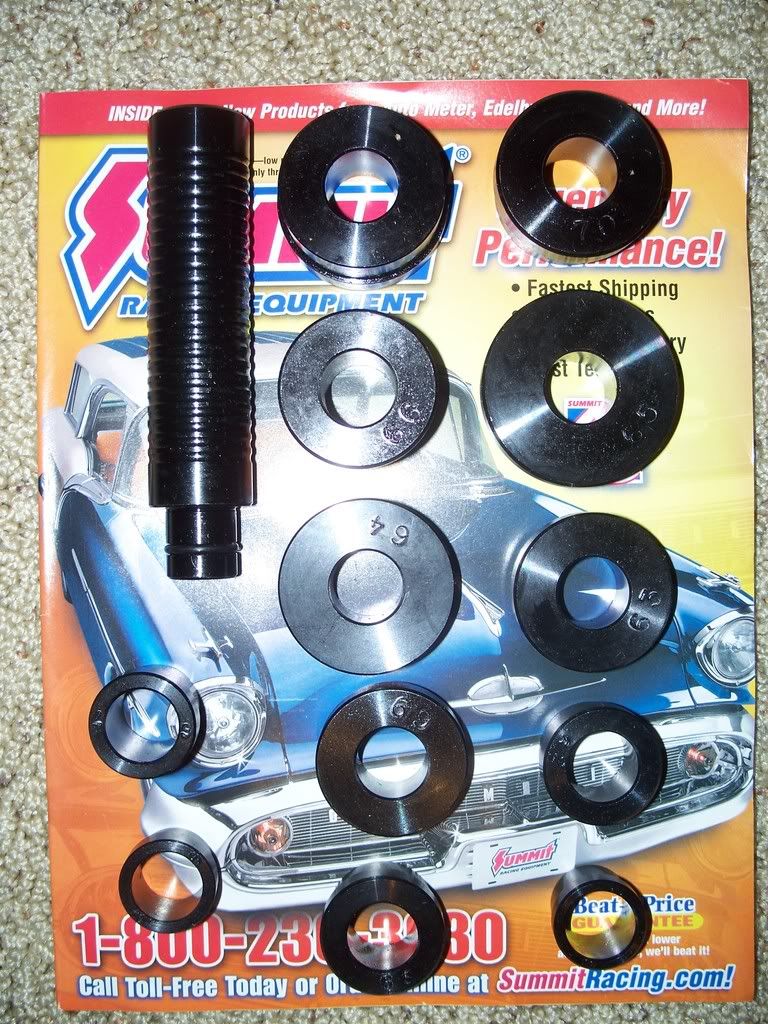
10. Universal trans clutch spring compressor
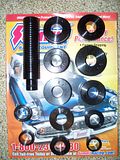
11. 12 piece bushing driver kit
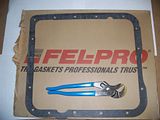
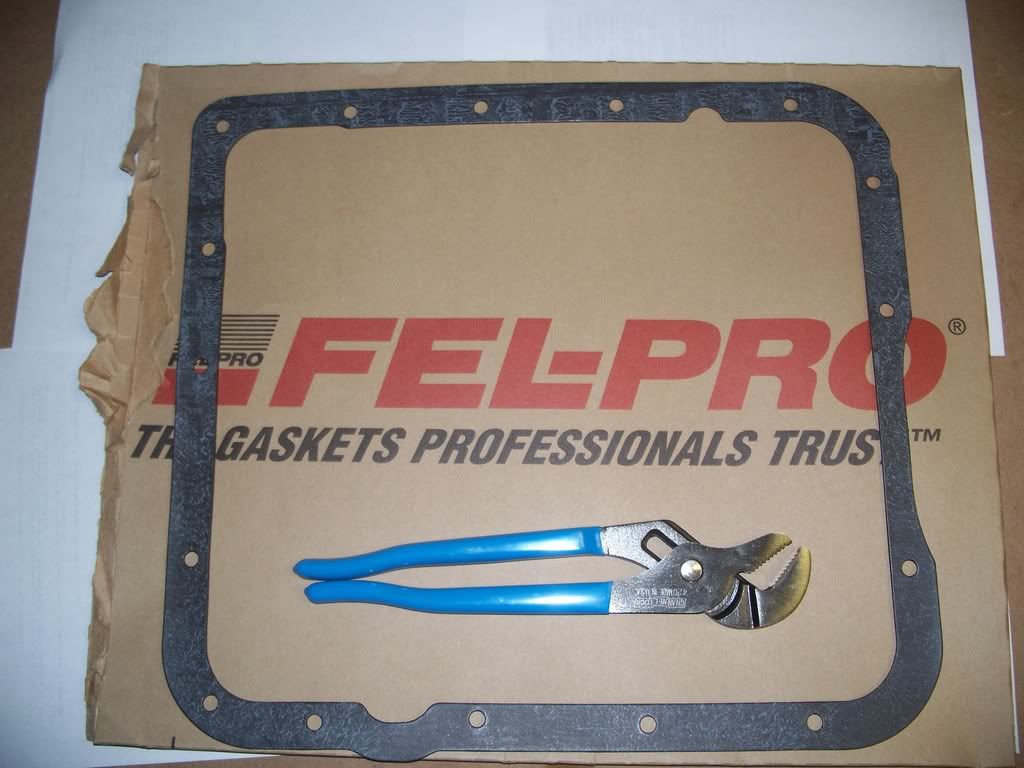
12. Fel-Pro Pan Gasket
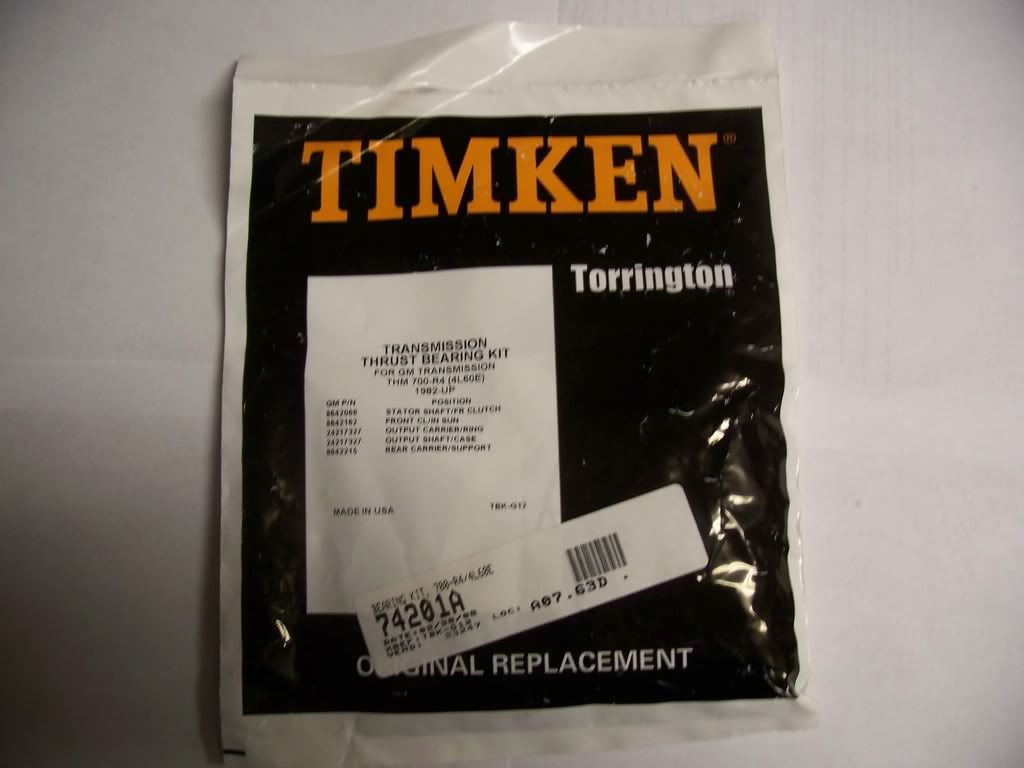
13. Torrington Bearings
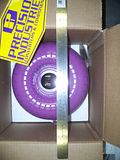
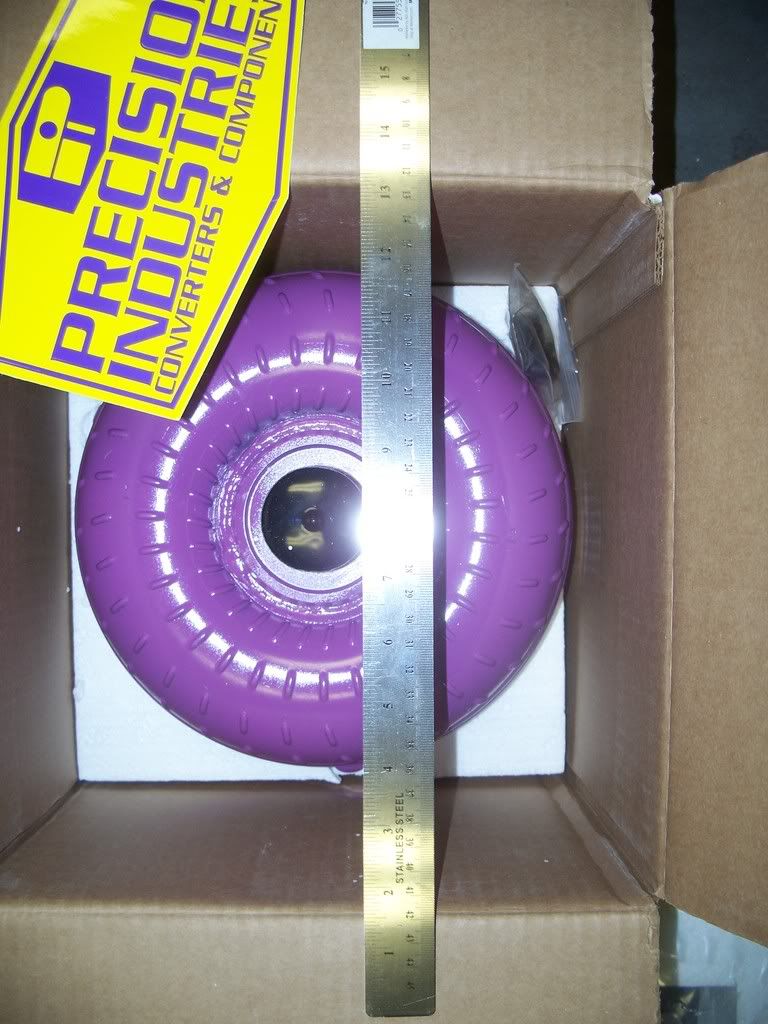
14. Vigilante 9.5 inch converter
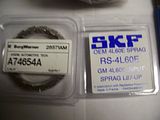
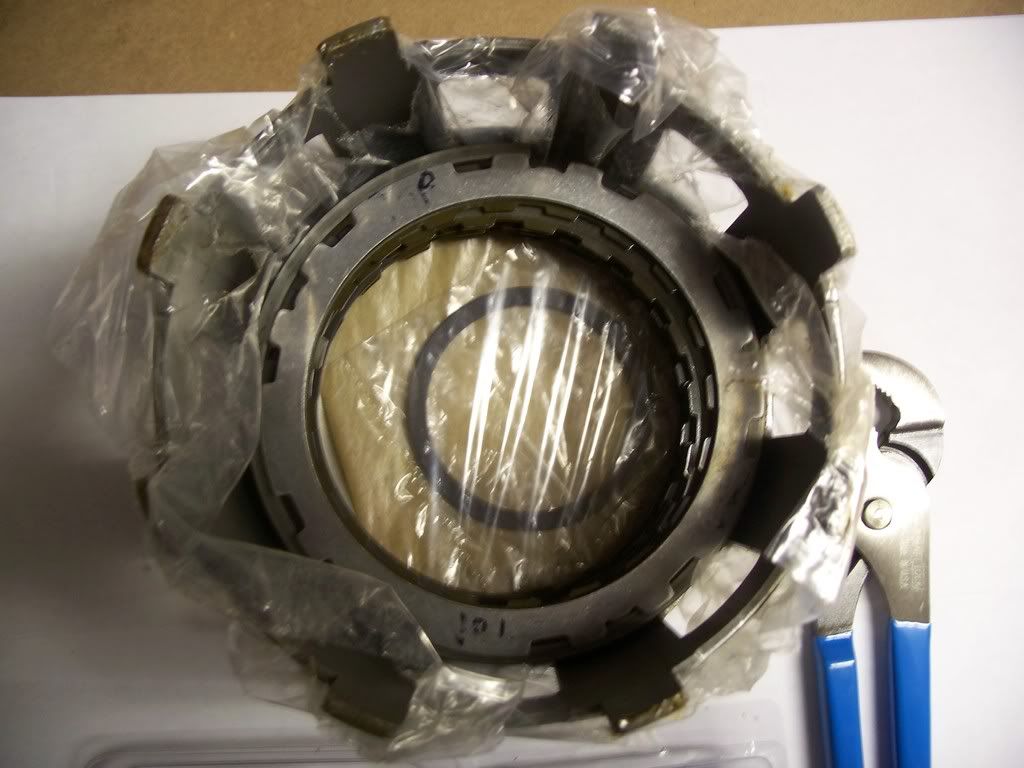
15. SKF Input Sprag, Borg-Warner Low/reverse roller assembly
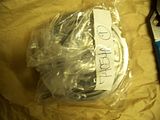
16. Sealed Power Beast sunshell
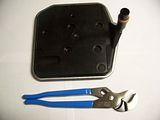
17. Filter
18. Stator support
19. Gasket & Ring Kit
20. Bushings
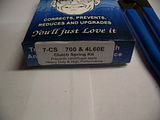
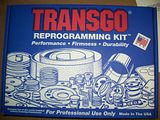
21. Trans-Go (Hi-Rev) replacement forward & 3-4 release springs
22.-25. Clutches, Steels, Pressure Plates
1.
2.
3.
4.
5.
6.
7.
8.
9.
10.
11.
12.
13.
14.
15.
16.
17.
18.
19.
20.
21.
22.
23.
24.
25.
I also want to note that the FSM is not as helpful as expected in removing the trans, it only really tells you how to service it on the car. No big deal though, there were plenty of write-ups on the forum. Also, whats the best way to drain all the fluid out of the trans before I take it off? I plan to stick some tubing down the filler tube and pump out the fluid in the pan, but how should I drain the majority of the fluid the quickest without any compressed air? And if I identified any part incorrectly, please advise me. The wrench is to give you an idea of size.
Thanks in advance,
Jonathan
1. B&M External Trans Cooler, 24,000 GVW, 7.25 in. x 11 in. x 1 1/2 in.
2. Torque Wrench
3. 3/32 Pin Punch, 6 in Bastard Mill File, Scribe with 90* End, Feeler Gauge, Snap Ring Pliers for small snap ring, universal joint
4. Petroleum Jelly with Paint Brush Applicator, Small Files
5. 450 lb transmission jack with � drive breaker bar
6. Shift Lever Seal remover & installer
7. Lip Seal installer tool
8. ATSG Manual and Paul Zank DVD
9. Rear clutch spring compressor
10. Universal trans clutch spring compressor
11. 12 piece bushing driver kit
12. Fel-Pro Pan Gasket
13. Torrington Bearings
14. Vigilante 9.5 inch converter
15. SKF Input Sprag, Borg-Warner Low/reverse roller assembly
16. Sealed Power Beast sunshell
17. Filter
18. Stator support
19. Gasket & Ring Kit
20. Bushings
21. Trans-Go (Hi-Rev) replacement forward & 3-4 release springs
22.-25. Clutches, Steels, Pressure Plates
1.

2.
3.
4.
5.

6.
7.
8.

9.

10.
11.
12.
13.
14.
15.

16.
17.
18.
19.
20.
21.

22.

23.
24.
25.
Last edited by janarvae; 05-09-2008 at 03:50 PM.
 05-09-2008, 03:41 PM
#2
Burning Brakes
Thread Starter
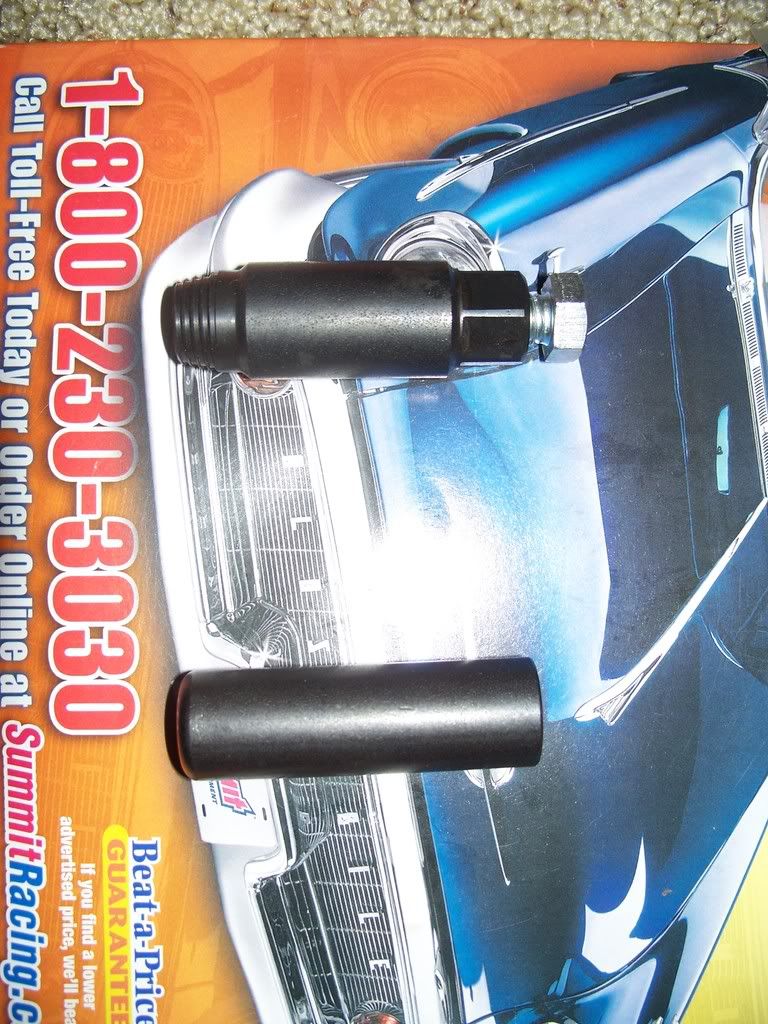
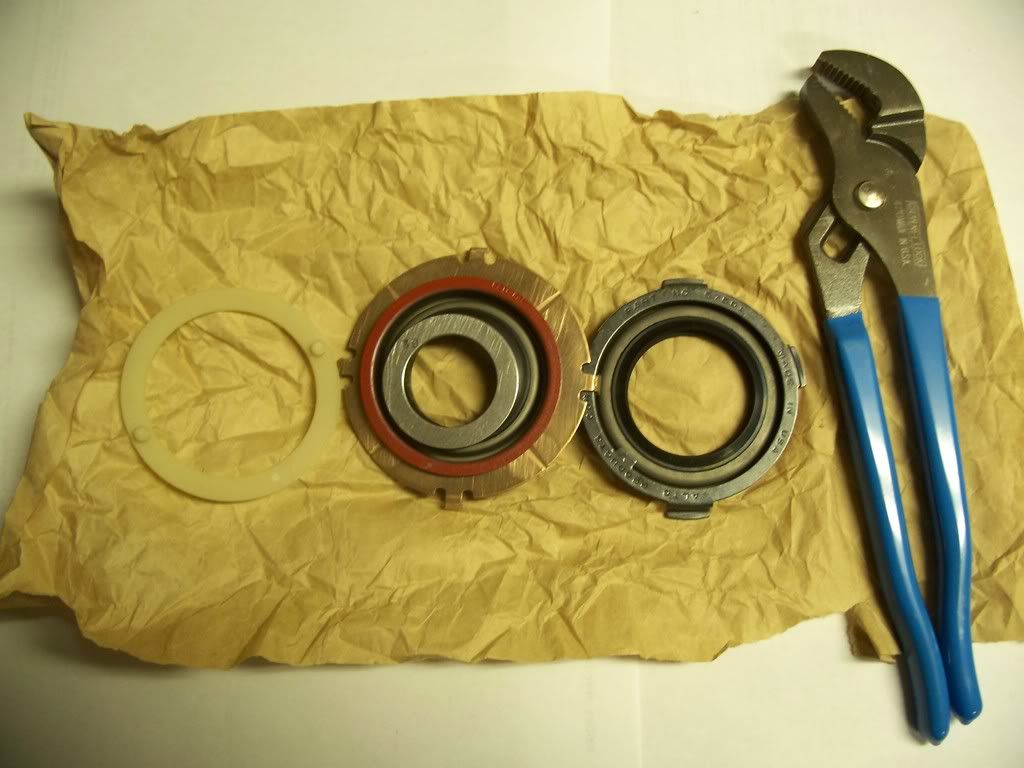
1. Front pump seal + new retainer, rear extension housing seal, washer that lies on pump stator shaft, 69 selective endplay washer for input shaft.
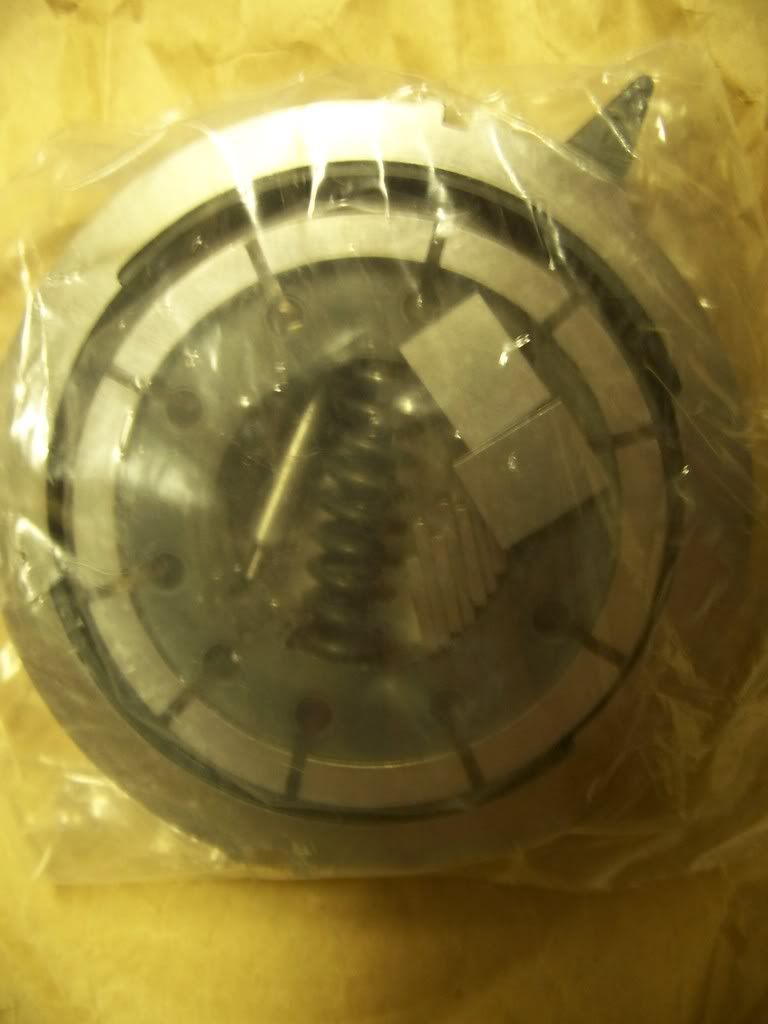
2. New pump 10-vane rotor with vanes, slide, rotor guide & pin assembly.
3. Same as 2.
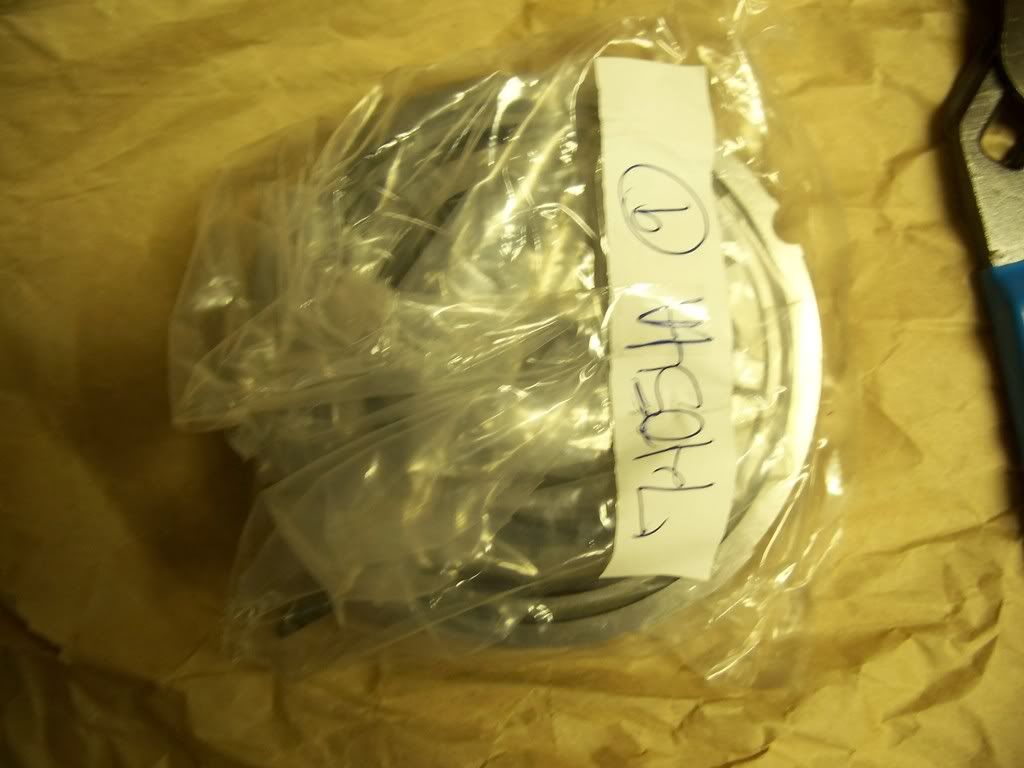
4. 2-4 band. Soak in tranny fluid for at least 30 min, just like clutches.
5. Transgo shift kit with extras from Dana at ProBuilt automatics.
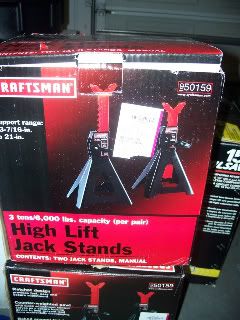
6. Craftsman high lift jack stands - says on the box .
.
2. New pump 10-vane rotor with vanes, slide, rotor guide & pin assembly.
3. Same as 2.
4. 2-4 band. Soak in tranny fluid for at least 30 min, just like clutches.
5. Transgo shift kit with extras from Dana at ProBuilt automatics.

6. Craftsman high lift jack stands - says on the box
.
Last edited by janarvae; 06-20-2008 at 12:52 PM.
05-09-2008, 04:02 PM
#3


Hi, I just did the same thing. I watched the video numerous times. I did not have booklet however. I wish I had because it had some updated information.
Sheeted my Work Bench with Duct steel. Two sheets covered it perfectly. Car lifted at least 18 inches off the ground. More height was needd to reinstall.
 .
.
What!!!! Transmission was rebuilt in 2005. Using stock parts......what a waste. The only thing they added was a beast shell. And they left out a wavy washer on the forward clutches
 .
.
Sub sections taken out. I used a portabel DVD player to reassemble the parts. I would reassemble. Then take it apart to see if I did it right and then reassemble again. I can be **** sometimes...

Anyway, when I took my 3/4 pack out, it looked like this.

 .
.
 .
.
Transmission runs great!!!!
Sheeted my Work Bench with Duct steel. Two sheets covered it perfectly. Car lifted at least 18 inches off the ground. More height was needd to reinstall.
.What!!!! Transmission was rebuilt in 2005. Using stock parts......what a waste. The only thing they added was a beast shell. And they left out a wavy washer on the forward clutches
.Sub sections taken out. I used a portabel DVD player to reassemble the parts. I would reassemble. Then take it apart to see if I did it right and then reassemble again. I can be **** sometimes...
Anyway, when I took my 3/4 pack out, it looked like this.
..Transmission runs great!!!!
05-10-2008, 11:59 PM
#4
Burning Brakes
Thread Starter
Ok, so the battery cables, TV cable, underbody brace (X-brace), starter, distributor cap, complete exhaust system (excluding headers), and bell housing dust cover are off. This is my first time removing most of these components excluding the cat-back exhaust so it has taken me some time. In addition, I have been working alone. Anyways, I am not quite sure how to proceed now.
I have the shifter cable off on the bolt which is not attached to the transmission pan, but not the bracket with two bolts connected to the pan. I already used a hand pump down the filler tube and siphoned out what I believe is the entire panful of fluid before I began working. Everywhere I've read says to keep the pan on the tranny when lowering because you don't want to damage the valve body (obviously). But, I'm afraid of a mass amount of fluid getting all over me and the garage when I disconnect those two bolts. Is this going to happen if I already hand pumped everything in the pan out? I believe not, but would appreciate reassurance.
Then, should I remove the cooler lines next and will I encounter fluid again? Then when I remove the three TC bolts, will fluid come out of the TC? Then I plan on taking out the driveshaft after loosening the C-beam, NOT removing the C-beam. Then once the drive shaft is out, disconnecting the tranny from the engine, but will fluid come out of the rear? I realize that draining the tranny may have been easier with the car running and pressurized, but that ship has sailed. When I remove it, I plan on tilting the tranny rearwards and allowing to drain.
I really want the tranny out tonight so I can begin disassembly into subassemblies, and maybe begin cleaning. I have my workbench now covered with duct metal and a 2 inch hole in it to make reassembly of certain assemblies easier. Then tomorrow I will take my time and finish cleaning, reassemble, mods to the valve body for the Trans-go kit, and put everything back together. Then I would plan on installing the external tranny cooler. Will I encounter the same fluid conflict again when messing with radiator lines?
Thanks for the help I'm about to receive,
Jonathan
05-11-2008, 01:11 AM
#5
If you have already drained some fluid out of the pan, not too much fluid is going to come out of the tail end.
Not Much fluid comes out of the radiator lines end when you disconeect them.
No fliud comes out when you loosen the three converter bolts...at all.
When you remove the converter from the transmission, a few drops will come out....thats it.
When I did my transmission, very little tranny fluid hit the floor when I remove it. I had lint free rags ready to catch everything...including one I stuffed into the tail after removing the driveshaft. I also had my spray bottle of Orange cleaner to constantly wipe the florr. Im **** like that. . .
05-11-2008, 01:33 AM
#6
Burning Brakes
Thread Starter
If you have already drained some fluid out of the pan, not too much fluid is going to come out of the tail end.
Not Much fluid comes out of the radiator lines end when you disconeect them.
No fliud comes out when you loosen the three converter bolts...at all.
When you remove the converter from the transmission, a few drops will come out....thats it.
When I did my transmission, very little tranny fluid hit the floor when I remove it. I had lint free rags ready to catch everything...including one I stuffed into the tail after removing the driveshaft. I also had my spray bottle of Orange cleaner to constantly wipe the florr. Im **** like that. . .
Not Much fluid comes out of the radiator lines end when you disconeect them.
No fliud comes out when you loosen the three converter bolts...at all.
When you remove the converter from the transmission, a few drops will come out....thats it.
When I did my transmission, very little tranny fluid hit the floor when I remove it. I had lint free rags ready to catch everything...including one I stuffed into the tail after removing the driveshaft. I also had my spray bottle of Orange cleaner to constantly wipe the florr. Im **** like that. . .

So where is all of the ATF fluid hiding then? I have read that there is some in the TC and the radiator. Is the rest of the fluid just waiting in the radiator for when I disconnect those hoses for the external cooler install? You said in your PM that you tilted the tail downwards overnight to allow the fluid it come out. Was it just very little, as you have described. I just have a hard time seeing where all 11 quarts or so of ATF have gone. I read that only 1/4 is in the pan, so does that mean it is sealed inside the TC somehow? And are the interior assemblies very moist still? What was your cleaning process following disassembly? I've heard for the pan to use brake cleaner, carb cleaner, water and air dry. For the valve bodies carb cleaner. What about the rest of the parts? And all friction materials will be soaked in ATF for at least 30 min before installation.
Thank you, I do appreciate the response and sorry for the mass amount of questions in this reply. Oh, and don't forget to say happy mother's day to the mothers in your life
Nobody likes a pissed-off woman on mother's day - and your vette may pay the price!! 
Jonathan
05-11-2008, 01:36 AM
#7
Burning Brakes
Thread Starter
Also, while everything is easily accessible underneath the car, is there any specific thing to check for? i.e., sensors, wiring, gaskets? Now would be a great time to replace anything under there.
Thanks,
Jonathan
Thanks,
Jonathan
Last edited by janarvae; 06-20-2008 at 12:55 PM.
05-11-2008, 01:41 AM
#8
After O removed the transmission, I tilted it up and set in a tub and let all the fluid drain out overnight.
There is a lot of fluid in the torque converter, valve body, and internal portions of the transmission. When you remove the valve body, a lot of fluid is going to come out. There is about two quarts in the radiator, many two or three more in the converter, another four or so quarts in the pan. Thats nine quarts right there. . . .the remaining two quarts in the internals.
My cleaning process went like this. I only bagan cleaning once I had complete disassembled the tranny housing. I took it outside and put in on some saw horses (wood planks). I used engine gunk to clean the outside. I used a power sprayer to get rid of the grit. Then I used brake cleaner to clean the internals. I immediately sprayed air to remove the excess. Brake cleaner cleans dirty tranny fluid like a charm. After that, I used compressed air to dry everthing.
I cleaned the subassembles during the reassembly only. I didnt want parts lying all over the place. Used a deep oil drain pan filled with mineral spirits. I cannot use brake cleaner indoors... makes me wheeze. The parts have to sit in the mineral spirits for a while for the dirt to loosen up. I soaked each clutch assembly just before reassembly to avoid confusion. I would identify the clutch pack I was dealing with. Go watch the video of the section that I was reassembling. By the time I was ready, 30 minutes or so had past. I did this for each subassembly. This process took me 10 hours to have the complete transmission back together. . . took my sweet time. I think with expericence and proper tools , it can be reassembled in less than two hours.
Hey, get to work on that tranny and stop typing...
Thanks, I was wondering if anyone was going to reply!
So where is all of the ATF fluid hiding then? I have read that there is some in the TC and the radiator. Is the rest of the fluid just waiting in the radiator for when I disconnect those hoses for the external cooler install? You said in your PM that you tilted the tail downwards overnight to allow the fluid it come out. Was it just very little, as you have described. I just have a hard time seeing where all 11 quarts or so of ATF have gone. I read that only 1/4 is in the pan, so does that mean it is sealed inside the TC somehow? And are the interior assemblies very moist still? What was your cleaning process following disassembly? I've heard for the pan to use brake cleaner, carb cleaner, water and air dry. For the valve bodies carb cleaner. What about the rest of the parts? And all friction materials will be soaked in ATF for at least 30 min before installation.
Thank you, I do appreciate the response and sorry for the mass amount of questions in this reply. Oh, and don't forget to say happy mother's day to the mothers in your life Nobody likes a pissed-off woman on mother's day - and your vette may pay the price!!
Jonathan
So where is all of the ATF fluid hiding then? I have read that there is some in the TC and the radiator. Is the rest of the fluid just waiting in the radiator for when I disconnect those hoses for the external cooler install? You said in your PM that you tilted the tail downwards overnight to allow the fluid it come out. Was it just very little, as you have described. I just have a hard time seeing where all 11 quarts or so of ATF have gone. I read that only 1/4 is in the pan, so does that mean it is sealed inside the TC somehow? And are the interior assemblies very moist still? What was your cleaning process following disassembly? I've heard for the pan to use brake cleaner, carb cleaner, water and air dry. For the valve bodies carb cleaner. What about the rest of the parts? And all friction materials will be soaked in ATF for at least 30 min before installation.
Thank you, I do appreciate the response and sorry for the mass amount of questions in this reply. Oh, and don't forget to say happy mother's day to the mothers in your life
Nobody likes a pissed-off woman on mother's day - and your vette may pay the price!! Jonathan
Last edited by JimiHendrix; 05-11-2008 at 01:51 AM.
05-11-2008, 08:20 PM
#9
Burning Brakes
Thread Starter
So last night I packed up early after removing the driveshaft and stopped after my last post. Mother's day didn't help with the rebuild progress either. So I've decided to finish removing the transmission Friday morning and doing disassembly, cleaning, and reassembly this Friday, Saturday, and Sunday. In the meantime I'm going to buy an air compressor to use for checking seals and such in some subassemblies and get my first air tools while I'm at it. I have my eye on this Craftsman compressor because of the price, brand, and reviews: http://www.sears.com/shc/s/p_10153_1...+%26+Inflators . Any other recommendations in this price range/capacity?
I also broke off a bolt head on the cat exhaust bracket and one on the transmission pan from a month or so ago and will get some replacements at the local Fastenal. I will also watch the DVD and read the book some more - I figure the more I do this, the quicker and more accurate disassembly and reassembly will be. I realize I have been working very slowly, but I decided that doing it right is better than doing it fast. I have learned a TREMENDOUS amount about my car in just the past 2 days working underneath it. I can say that I've literally given sweat and blood in the process too! But its definitely worth the final satisfaction.
Thanks again Jimi (I still don't know if that's your real name) for your help thus far. I will definitely post an update with lots of pictures next Friday. I am so anxious to get back behind the wheel after all this wrenching!
Jonathan
I also broke off a bolt head on the cat exhaust bracket and one on the transmission pan from a month or so ago and will get some replacements at the local Fastenal. I will also watch the DVD and read the book some more - I figure the more I do this, the quicker and more accurate disassembly and reassembly will be. I realize I have been working very slowly, but I decided that doing it right is better than doing it fast. I have learned a TREMENDOUS amount about my car in just the past 2 days working underneath it. I can say that I've literally given sweat and blood in the process too!
But its definitely worth the final satisfaction. Thanks again Jimi (I still don't know if that's your real name) for your help thus far. I will definitely post an update with lots of pictures next Friday. I am so anxious to get back behind the wheel after all this wrenching!
Jonathan
05-11-2008, 09:30 PM
#10
Happy yo hear you are not going to rush it. BTW, I am not expert at this. I was in your position a few weeks ago. Pete K is the man for expert advice. Do a little bit every day so you can reflect upon what you did. You might catch a few mistakes. I know I did.
BTW, I am not expert at this. I was in your position a few weeks ago. Pete K is the man for expert advice. Do a little bit every day so you can reflect upon what you did. You might catch a few mistakes. I know I did.So last night I packed up early after removing the driveshaft and stopped after my last post. Mother's day didn't help with the rebuild progress either. So I've decided to finish removing the transmission Friday morning and doing disassembly, cleaning, and reassembly this Friday, Saturday, and Sunday. In the meantime I'm going to buy an air compressor to use for checking seals and such in some subassemblies and get my first air tools while I'm at it. I have my eye on this Craftsman compressor because of the price, brand, and reviews: http://www.sears.com/shc/s/p_10153_1...+%26+Inflators . Any other recommendations in this price range/capacity?
I also broke off a bolt head on the cat exhaust bracket and one on the transmission pan from a month or so ago and will get some replacements at the local Fastenal. I will also watch the DVD and read the book some more - I figure the more I do this, the quicker and more accurate disassembly and reassembly will be. I realize I have been working very slowly, but I decided that doing it right is better than doing it fast. I have learned a TREMENDOUS amount about my car in just the past 2 days working underneath it. I can say that I've literally given sweat and blood in the process too! But its definitely worth the final satisfaction.
Thanks again Jimi (I still don't know if that's your real name) for your help thus far. I will definitely post an update with lots of pictures next Friday. I am so anxious to get back behind the wheel after all this wrenching!
Jonathan
I also broke off a bolt head on the cat exhaust bracket and one on the transmission pan from a month or so ago and will get some replacements at the local Fastenal. I will also watch the DVD and read the book some more - I figure the more I do this, the quicker and more accurate disassembly and reassembly will be. I realize I have been working very slowly, but I decided that doing it right is better than doing it fast. I have learned a TREMENDOUS amount about my car in just the past 2 days working underneath it. I can say that I've literally given sweat and blood in the process too!
But its definitely worth the final satisfaction. Thanks again Jimi (I still don't know if that's your real name) for your help thus far. I will definitely post an update with lots of pictures next Friday. I am so anxious to get back behind the wheel after all this wrenching!
Jonathan
05-11-2008, 09:38 PM
#11


Sometimes I get too much, undeserved credit. I am in the construction business, but love to do the performance trans builds. I have been fortunate enough to build a few hundred of these, and have seen quite a bit. Take your time, spit shine everything, and follow the book, and everything will work. Keep it simple would be my best advice. I have a few transmissions running low 11's and high 10's with builds others say will break in the mid 12's.
05-11-2008, 09:59 PM
#12
Nah, Pete, you earned the credit by providing sound advice and everyone here knows it. Besides. . . .a few hundred trannies. . . . you are an ultra-expert.
Sometimes I get too much, undeserved credit. I am in the construction business, but love to do the performance trans builds. I have been fortunate enough to build a few hundred of these, and have seen quite a bit. Take your time, spit shine everything, and follow the book, and everything will work. Keep it simple would be my best advice. I have a few transmissions running low 11's and high 10's with builds others say will break in the mid 12's.
05-11-2008, 10:06 PM
#13
Burning Brakes
Thread Starter
Sometimes I get too much, undeserved credit. I am in the construction business, but love to do the performance trans builds. I have been fortunate enough to build a few hundred of these, and have seen quite a bit. Take your time, spit shine everything, and follow the book, and everything will work. Keep it simple would be my best advice. I have a few transmissions running low 11's and high 10's with builds others say will break in the mid 12's.
). Dana at ProBuilt also said that you really knew your stuff when it comes to transmissions. As a side note, is that compressor going to be able to suit my needs? I plan to use it for light-medium duty with an impact gun, ratchet, dryer, and as a tire filler on the car. Its my first air compressor, but I don't want to over or under-do it. And I hope its not TOO powerful for a simple finish nailer or stapler. I doubt it though as I can just down-regulate the PSI and such.
Thanks,
Jonathan
05-11-2008, 10:15 PM
#14
I agree - you are too modest. I, as most on the forum, have read more than one post containing your advice. In practically every auto transmission thread, there is always one or two people wondering when PeteK is going to chime in and give his opinion (which is always regarded as the final say ). Dana at ProBuilt also said that you really knew your stuff when it comes to transmissions.
As a side note, is that compressor going to be able to suit my needs? I plan to use it for light-medium duty with an impact gun, ratchet, dryer, and as a tire filler on the car. Its my first air compressor, but I don't want to over or under-do it. And I hope its not TOO powerful for a simple finish nailer or stapler. I doubt it though as I can just down-regulate the PSI and such.
Thanks,
Jonathan
). Dana at ProBuilt also said that you really knew your stuff when it comes to transmissions. As a side note, is that compressor going to be able to suit my needs? I plan to use it for light-medium duty with an impact gun, ratchet, dryer, and as a tire filler on the car. Its my first air compressor, but I don't want to over or under-do it. And I hope its not TOO powerful for a simple finish nailer or stapler. I doubt it though as I can just down-regulate the PSI and such.
Thanks,
Jonathan
I took a new job 8 months ago, and it eats up most of my time. I cannot chime in as much as I like to sometimes.
Dana is a true pro, and a nice, humble guy. Although I do know quite a bit for a hobbiest, Dana was my role model while doing research in my early days.
As far is the compressor goes, you do not need much when it comes to rebuilding an auto trans. Air check your clutch packs and servo at 30 psi, no more. Too much pressure blows out a seal while checking. Also, do not air check any clutch pack that is not completely assembled up to the snap ring. Trust me on that one.
If you are buying a compressor for the garage, make a list of all the air tools you plan to use. Then check to see how much cfm they use, and buy a compressor based on that. There is no such thing as too much compressor. Buy the best you can afford to buy.
Last edited by Pete K; 05-11-2008 at 10:20 PM. Reason: I still cannot spell
05-11-2008, 10:40 PM
#15
Pro

Member Since: May 2007
Location: Robesonia Pa
Posts: 638
Likes: 0
Received 0 Likes
on
0 Posts
 Also look into a compressor that has an oil lube pump, the one in your link is oil free . Used to be if you looked at the compressors in Lowes they had a chart showing what shop equipment can be run and what could cause problems.
05-11-2008, 10:47 PM
Also look into a compressor that has an oil lube pump, the one in your link is oil free . Used to be if you looked at the compressors in Lowes they had a chart showing what shop equipment can be run and what could cause problems.
05-11-2008, 10:47 PM
#16
Burning Brakes
Thread Starter
I had noted there was an oil and oil-free compressor, but didn't know the benefits/down-sides to each. I imagined that the oil-free would be less hassle, but I've heard the oil pumps have longer lives?
05-11-2008, 11:26 PM
#17
Burning Brakes
Oil compressors require a bit more maintenance (mostly periodic oil changes) but cast iron compressors will last a very long time with proper care. They are also MUCH quieter than the oil-free compressors. I started with a 2 gallon oil-free compressor. Not only was it about useless in terms of CFM, it was so loud that I couldn't run it at night in my garage for fear of waking the neighbors. The current 30 gallon oil compressor is quiet enough that I run it at night with the garage door open with no worries and it puts out enough CFM's for everything I need.
05-12-2008, 11:13 PM
#18
Burning Brakes
Thread Starter
So I had to rent a car until Thurs. this week while mine sits 2 feet up in the air in my garage. I went for the cheapest one they had - a new Ford Focus. Gosh, I appreciate my car sooo much more now.
I don't think I've ever driven a car with less than 6 cylinders and this little FWD is as slow as it looks. The seats are uncomfortable, driving position is awkward, shifter is too low, tires squeal on 5 mph turns, body roll is ridiculous, etc. I don't mind the exhaust though. Its limited to 7000 RPM and I'll admit it was kind of fun on the highway and city just to floor it. It didn't really go anywhere fast, but it sure tried!
Then I was snapped back into reality when I saw a tastefully modded late C4. I wanted to wave, but.....
All I know is it is NO corvette, thats for certain. I miss it already and can't wait to be behind the wheel in just 1 week. One week, I think I'll make it ....
....
I don't think I've ever driven a car with less than 6 cylinders and this little FWD is as slow as it looks. The seats are uncomfortable, driving position is awkward, shifter is too low, tires squeal on 5 mph turns, body roll is ridiculous, etc. I don't mind the exhaust though. Its limited to 7000 RPM and I'll admit it was kind of fun on the highway and city just to floor it. It didn't really go anywhere fast, but it sure tried!
Then I was snapped back into reality when I saw a tastefully modded late C4. I wanted to wave, but.....
All I know is it is NO corvette, thats for certain. I miss it already and can't wait to be behind the wheel in just 1 week. One week, I think I'll make it
....
Last edited by janarvae; 05-12-2008 at 11:38 PM.
05-18-2008, 05:00 PM
#19
Burning Brakes
Thread Starter
As far is the compressor goes, you do not need much when it comes to rebuilding an auto trans. Air check your clutch packs and servo at 30 psi, no more. Too much pressure blows out a seal while checking. Also, do not air check any clutch pack that is not completely assembled up to the snap ring. Trust me on that one.
If you are buying a compressor for the garage, make a list of all the air tools you plan to use. Then check to see how much cfm they use, and buy a compressor based on that. There is no such thing as too much compressor. Buy the best you can afford to buy.
If you are buying a compressor for the garage, make a list of all the air tools you plan to use. Then check to see how much cfm they use, and buy a compressor based on that. There is no such thing as too much compressor. Buy the best you can afford to buy.
You say no more than 30PSI but the Zank video says 40 if I remember correctly. I guess he is wrong.

I also broke off a bolt head on the cat exhaust bracket and one on the transmission pan from a month or so ago and will get some replacements at the local Fastenal. I will also watch the DVD and read the book some more - I figure the more I do this, the quicker and more accurate disassembly and reassembly will be. I realize I have been working very slowly, but I decided that doing it right is better than doing it fast. I have learned a TREMENDOUS amount about my car in just the past 2 days working underneath it. I can say that I've literally given sweat and blood in the process too! But its definitely worth the final satisfaction.
Thanks again Jimi (I still don't know if that's your real name) for your help thus far. I will definitely post an update with lots of pictures next Friday. I am so anxious to get back behind the wheel after all this wrenching!
Jonathan
But its definitely worth the final satisfaction. Thanks again Jimi (I still don't know if that's your real name) for your help thus far. I will definitely post an update with lots of pictures next Friday. I am so anxious to get back behind the wheel after all this wrenching!
Jonathan
Next were the 6 bolts connecting the tranny to engine. I actually found it easier to use a 3/8 hand ratchet, 24 inch extension, universal joint, and 14mm socket (you need both a deep and shallow well). The bolts slipped out with no problem (unlike the 3 converter-flywheel ones). The cooling lines were also no sweat.
Disassembly is to begin soon and when I have time I'll put up a few of the MANY pictures I've taken.
Jonathan
Last edited by janarvae; 05-18-2008 at 05:02 PM.
05-19-2008, 08:07 PM
#20
Burning Brakes
Thread Starter
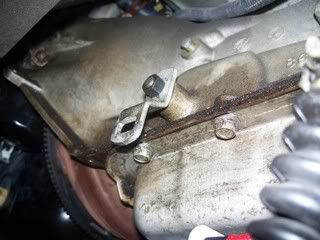
Here are some pictures from the removal. I used my impact wrench on the 3 converter to flywheel bolts and it took them out no problem. I also used it on the bottom two bellhousing to motor bolts. I found the impact too cumbersome and heavy to hold up while trying to get the socket on the upper 4 bellhousing bolts. Instead, a 3/4 ratchet, with unviersal joint, 14 mm (or 9/16) socket, and a 24 inch extension took those out no problem.
I stuck my breaker bar in between the bellhousing and behind the flywheel (not touching the flywheel though) and slid the bellhousing off of the two pins still holding it to the engine. If you support the engine, it won't tilt with the transmission and make it easier to slide it off the pins. Don't be afraid to really jiggle it around to get it off - you should have already checked that your jackstands are stable enough before you even got under the car. My 450 lb tranny jack from Harbor Freight ended up being too tall by like 1 inch to remove the tranny out from the driveshaft tunnel. I had the car on 3 ton Craftsman jacks at 21 inches.
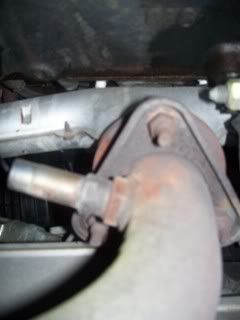
For the cooler lines, a 13mm or 1/2 flare wrench is best. Although it was difficult to get the lower one off because of clearance issues with the flare wrench handle. I had to use a box wrench on that one. But be very gentle as the fittings are easily rounded over!! If anyone needs any specific pictures like Tim Ko did, just PM me, I have plenty of pics of everything.
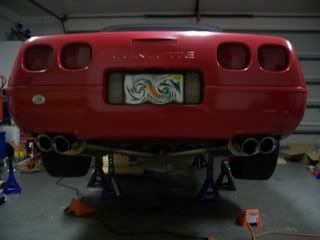
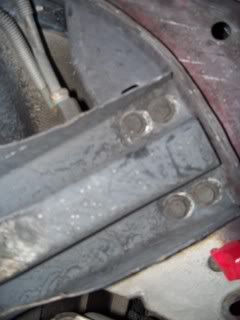
1. Jacked Up On All Fours
2. X-Brace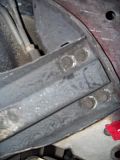
3. TV Cable
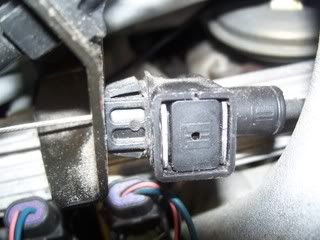
4. TV Cable Closeup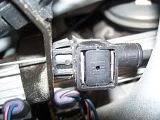
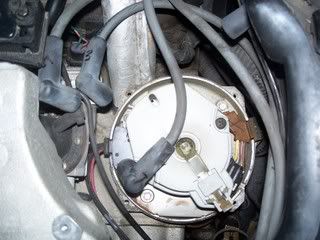
5. Distributor Cap Removed
6. Distributor
7. Cat Exhaust Bracket
8. Shifter Linkage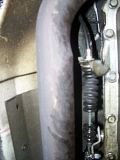
9. Exhaust Flange (Deep 15mm Socket Needed) and 02 sensor
10. Starter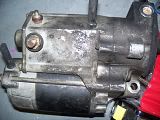
11. Transmission Left View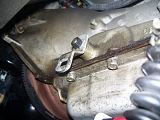
I stuck my breaker bar in between the bellhousing and behind the flywheel (not touching the flywheel though) and slid the bellhousing off of the two pins still holding it to the engine. If you support the engine, it won't tilt with the transmission and make it easier to slide it off the pins. Don't be afraid to really jiggle it around to get it off - you should have already checked that your jackstands are stable enough before you even got under the car. My 450 lb tranny jack from Harbor Freight ended up being too tall by like 1 inch to remove the tranny out from the driveshaft tunnel. I had the car on 3 ton Craftsman jacks at 21 inches.
For the cooler lines, a 13mm or 1/2 flare wrench is best. Although it was difficult to get the lower one off because of clearance issues with the flare wrench handle. I had to use a box wrench on that one. But be very gentle as the fittings are easily rounded over!! If anyone needs any specific pictures like Tim Ko did, just PM me, I have plenty of pics of everything.
1. Jacked Up On All Fours
2. X-Brace
3. TV Cable

4. TV Cable Closeup
5. Distributor Cap Removed
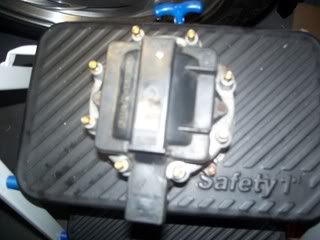
6. Distributor
7. Cat Exhaust Bracket

8. Shifter Linkage

9. Exhaust Flange (Deep 15mm Socket Needed) and 02 sensor
10. Starter

11. Transmission Left View
Last edited by janarvae; 05-19-2008 at 08:14 PM.

