
Targa Top Refinsh How-To
 05-09-2008, 01:08 AM
#1
Melting Slicks

Thread Starter
Member Since: Sep 2006
Location: Stillwater Oklahoma
Posts: 3,094
Likes: 0
Received 5 Likes
on
2 Posts
Well, I have learned a lot over the last year from reading this form, and this is my attempt at writing up a how to.
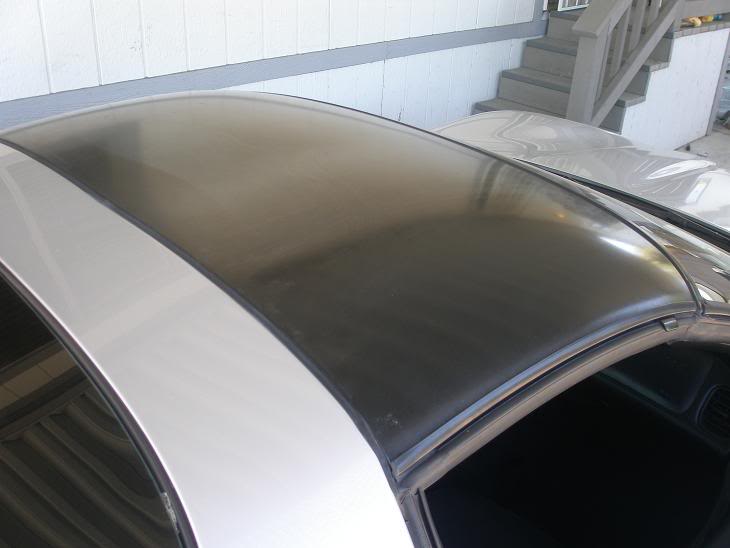
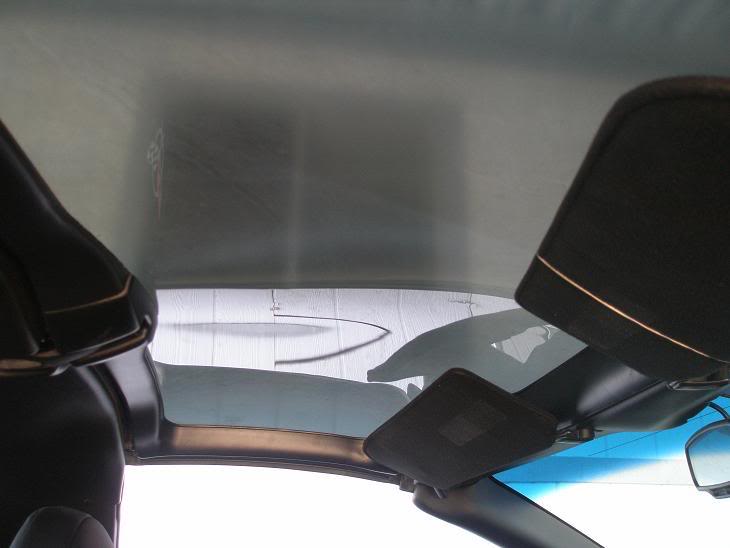
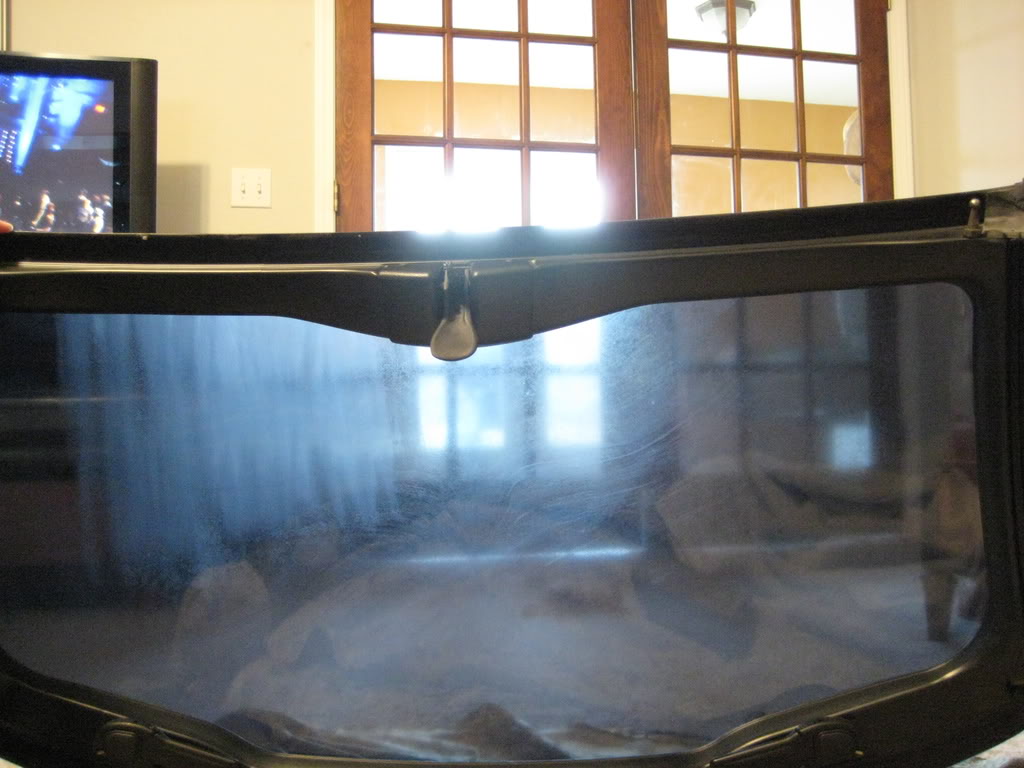
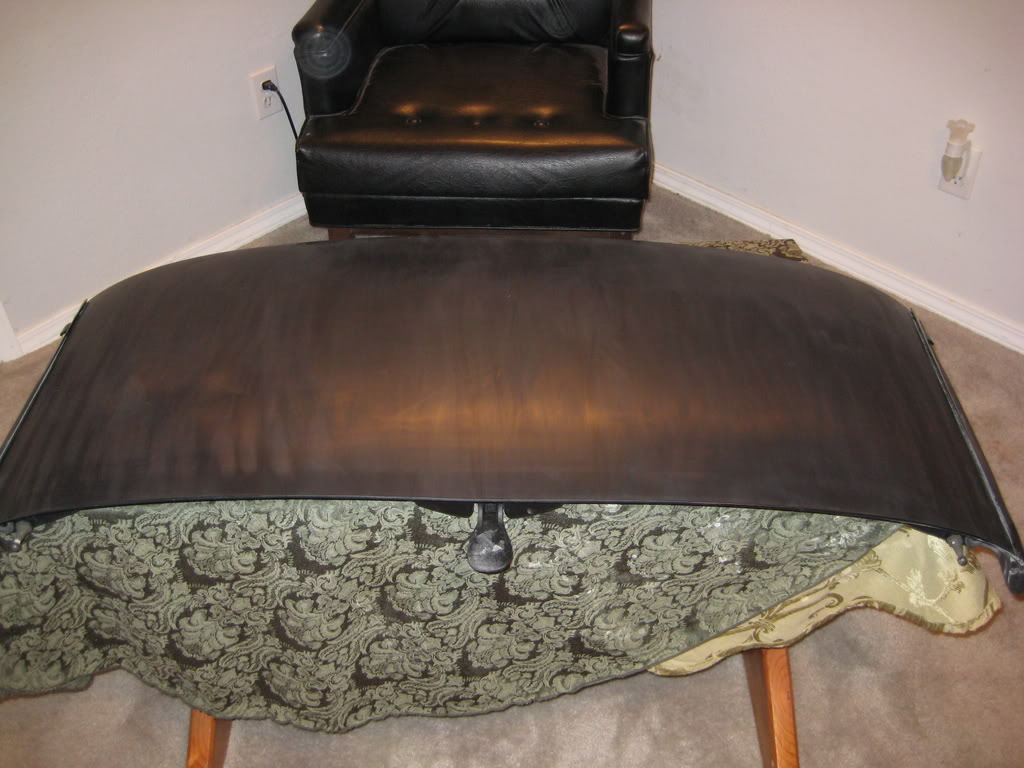
I bought a used clear targa top in the parst section for a good deal. Thanks to David Wilson (doje) for a great transaction. He was very clear about the condition of the top and it was a pleasure dealing with him. That being said the top was hazy and in desperate need of attention.
EDIT: I get emails and calls from people attempting this, and there seem to be mixed results with the sanding. The top I purchased was completely hazy and all of the "Hardcoat" was crazed. (see before pictures below) This, I think, made it easier for me to sand the hardcoat off. I have hear from people haveing a very hard time removing their hardcoat if it is in good shap. Just a FYI.
This is what it looked like when I got it ( actually these pics are from the ad)
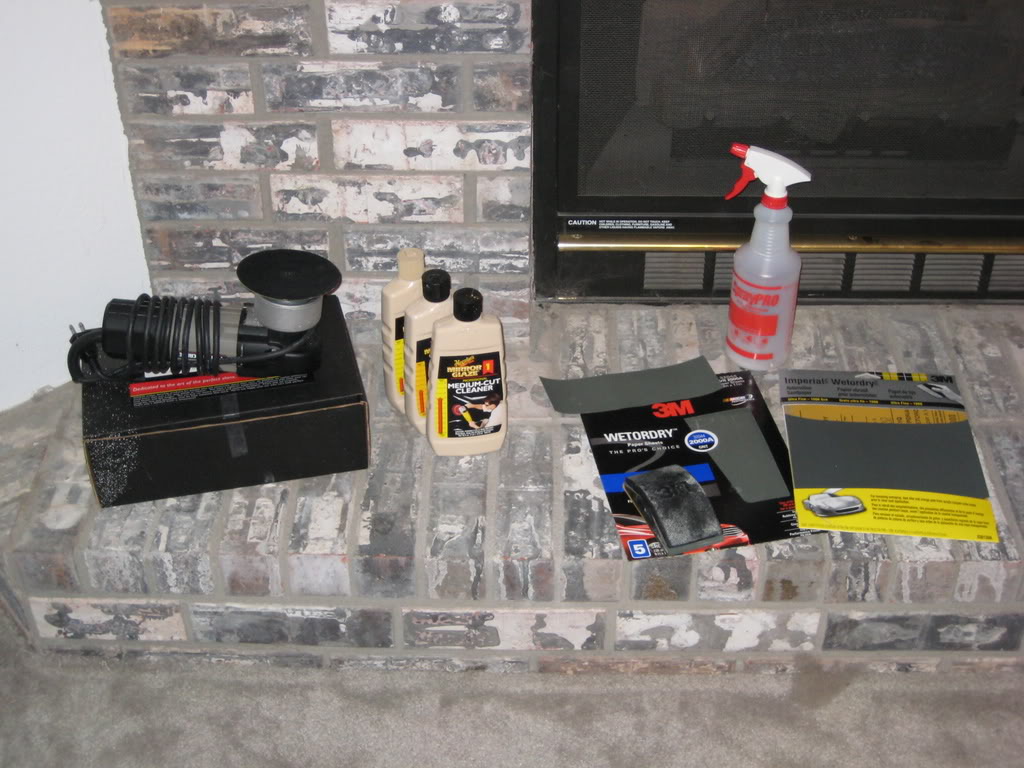
All you need to refurbish the top is:
1000 grit wetsand paper
1500 grit wetsand paper
2000 grit wetsand paper
Rubber sanding block
Squirt bottle
Dish soap
Shammy
Terry towels
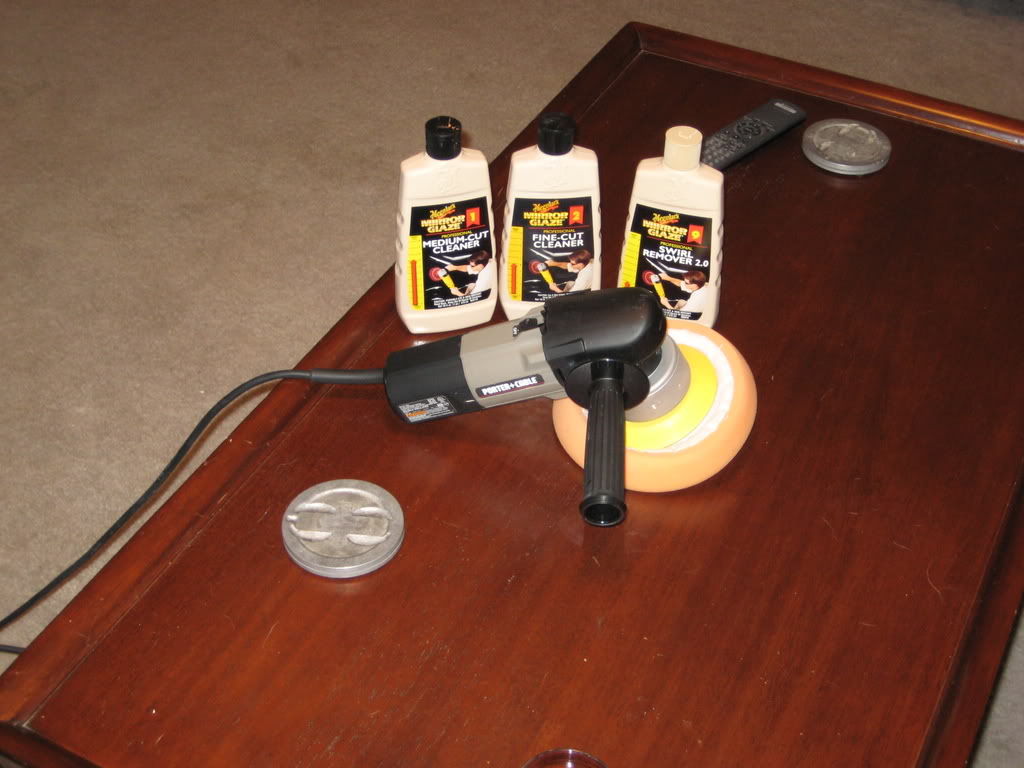
Porter Cable Polisher
Meguieres medium cut, Fine cut, and swirl remover
EDIT: If the Hardcoat on your top is in better shape than mine you will probably want to use a coarser paper and the assistance of a mechanical sander. Do at your own risk. I have verry little expierence with mechanical sanders and can no offer advice in this regard.
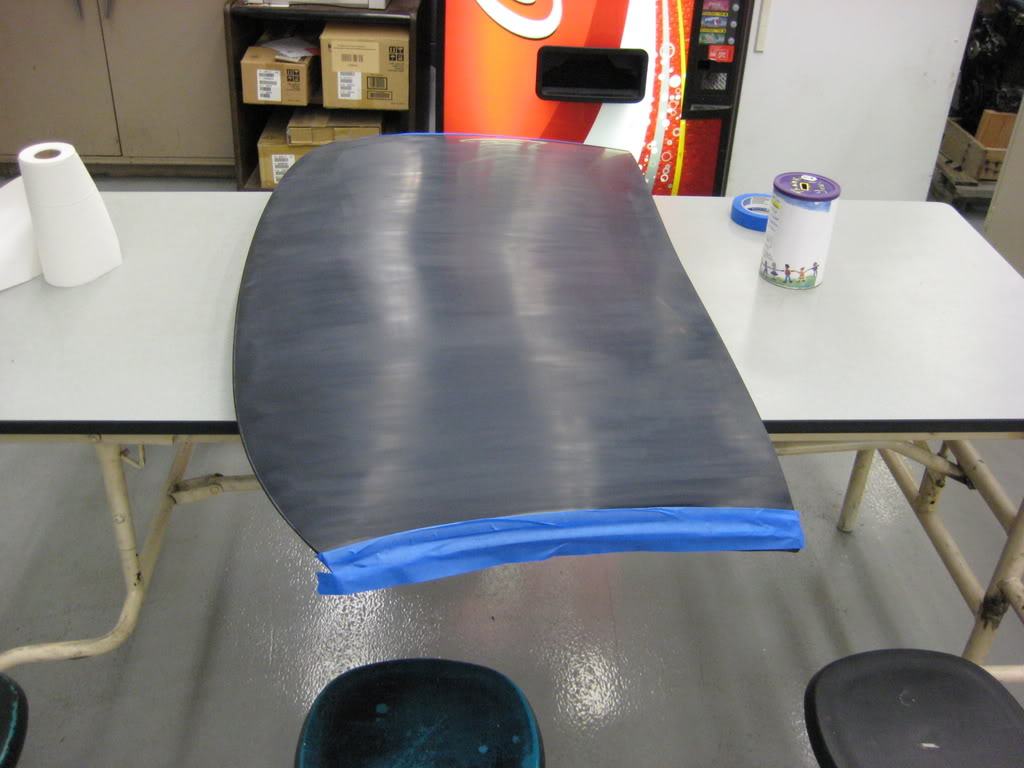
First thing I did was to remove all of the old clear coat and the oxidized plastic from the top. I just used 1000 grit and wetsanded it down. This took about 3 hours to accomplish. It was easy to tell if I was finished because you can look at a light through it and see where it was fully sanded or not. A tip for wetsanding. I used an old shammy to continually clean the surface i was sanding. This makes it easy to remove all of the material from sanding and it the surface will quickly dry so you can tell what areas need more attention.
There are two ways to finish the top from here. At this point it is ready for paint or clear coat. I sprayed a thick layer of PPG clear coat that I had laying around on it. This gives the acrylic UV protection and gives more material to polish out. It is recommended that the surface be sanded down with 600 grit, but I just kept it at 1000 because I was scared of using that course of paper on the top. The coat has stuck fine so far.
(EDIT: I got some requests for the type of PPG Clear that I used. It is Deltron High Velocity Clearcoat. DC3000)
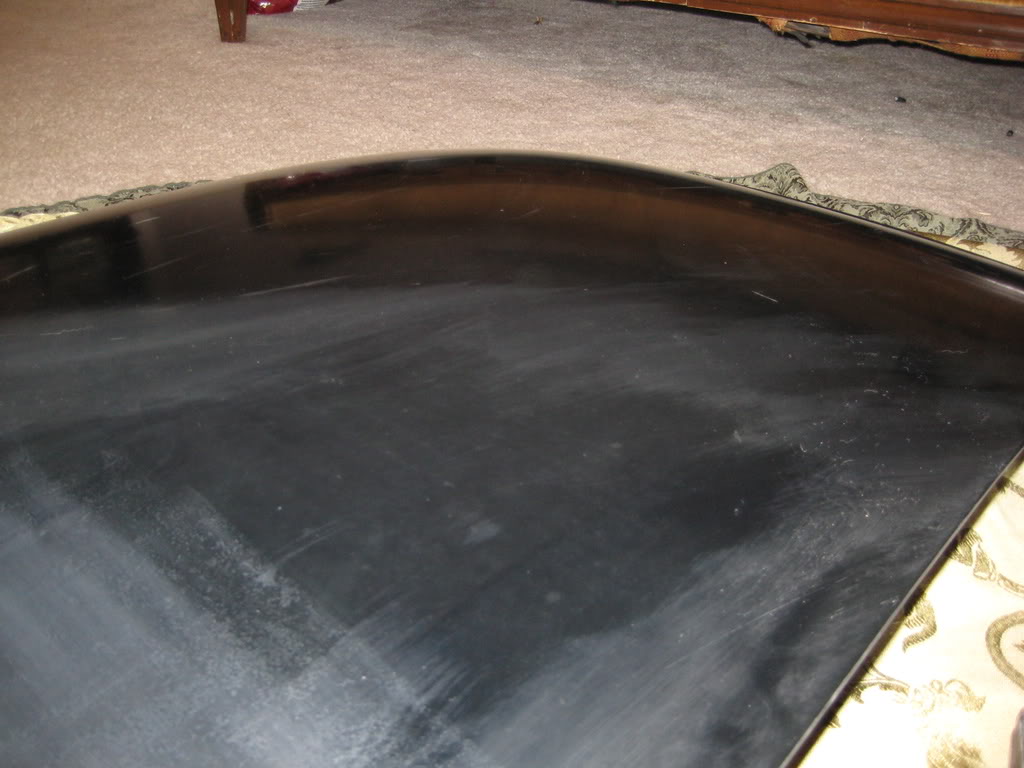
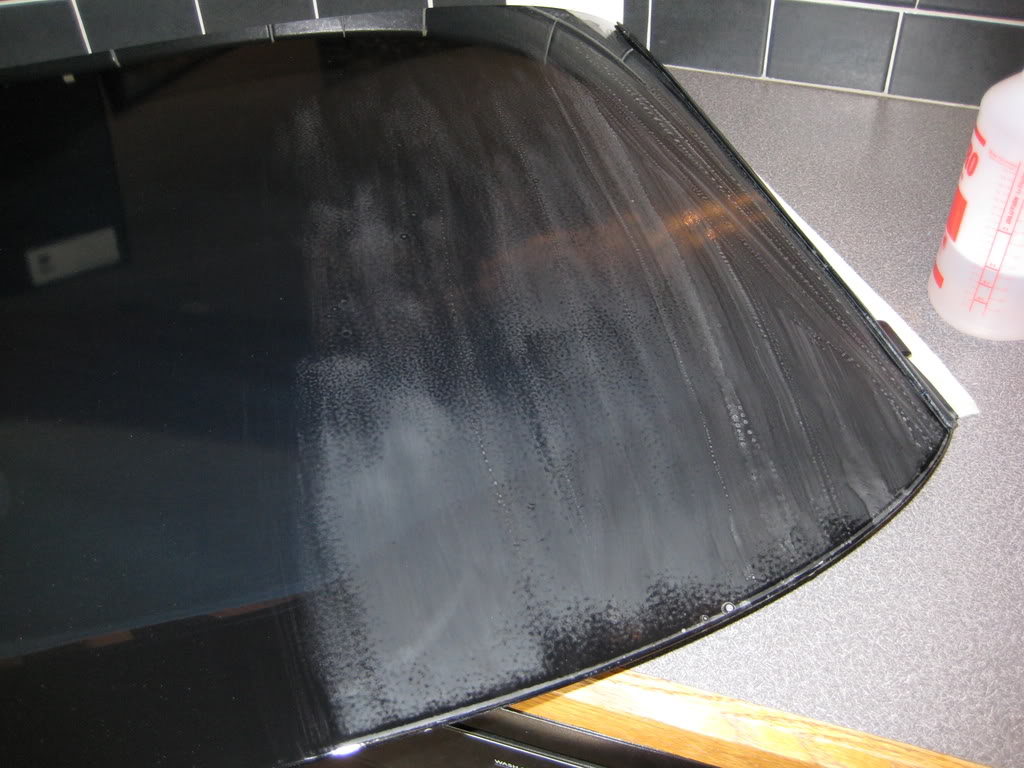
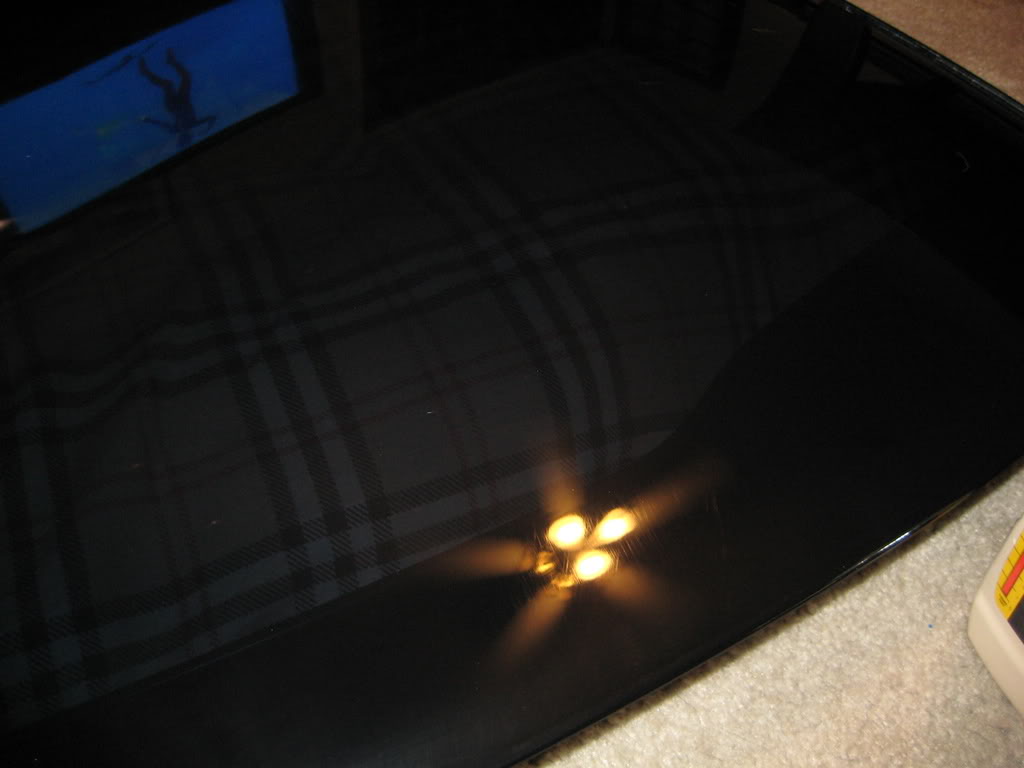
I am not the best with a paint gun so the finish had an orange peal effect to it. I wet sanded the top again, this time with 2000 grit paper in preparation for polishing it. Looking back I should have started with 1500 grit and then worked my way up to 2000, but again, I like to start with a finer paper and just do extra work so I take off as little material as possible. When sanding for polish, always sand in one direction, then when you step up to the next grit, sand 90degrees to the previous grit. Keep sanding till you can’t see the marks from the previous grit. The following picture is where I started sanding the top after paint and you can easily see the orange peal.
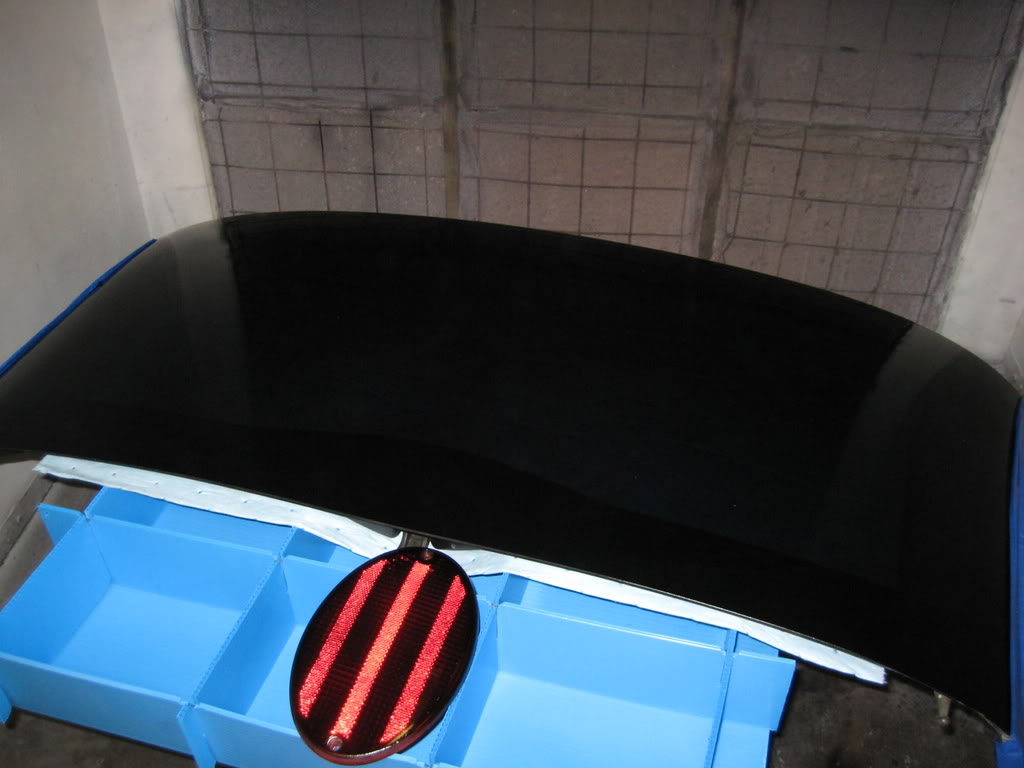
When you get the whole thing sanded out, you are ready for polish. I used a PC 7424 to polish it out, but any polisher will do. I started with the medium cut cleaner and worked it till all of the sanding marks were removed from the finish.
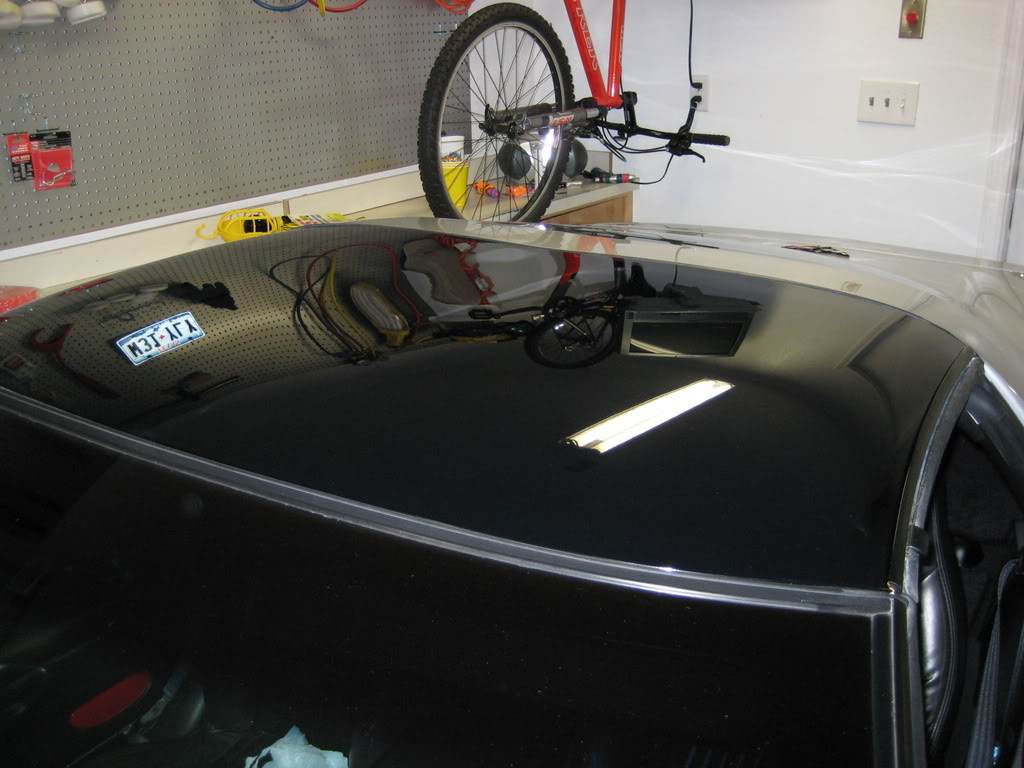
The medium cut cleaner does a good job of removing the sanding marks, but does leave the finish on the top hazy. I steped up to a fine cut cleaner and polished out all of the haze.
Then for good measure I stepped up to the swirl remove and got a great finish on the top.
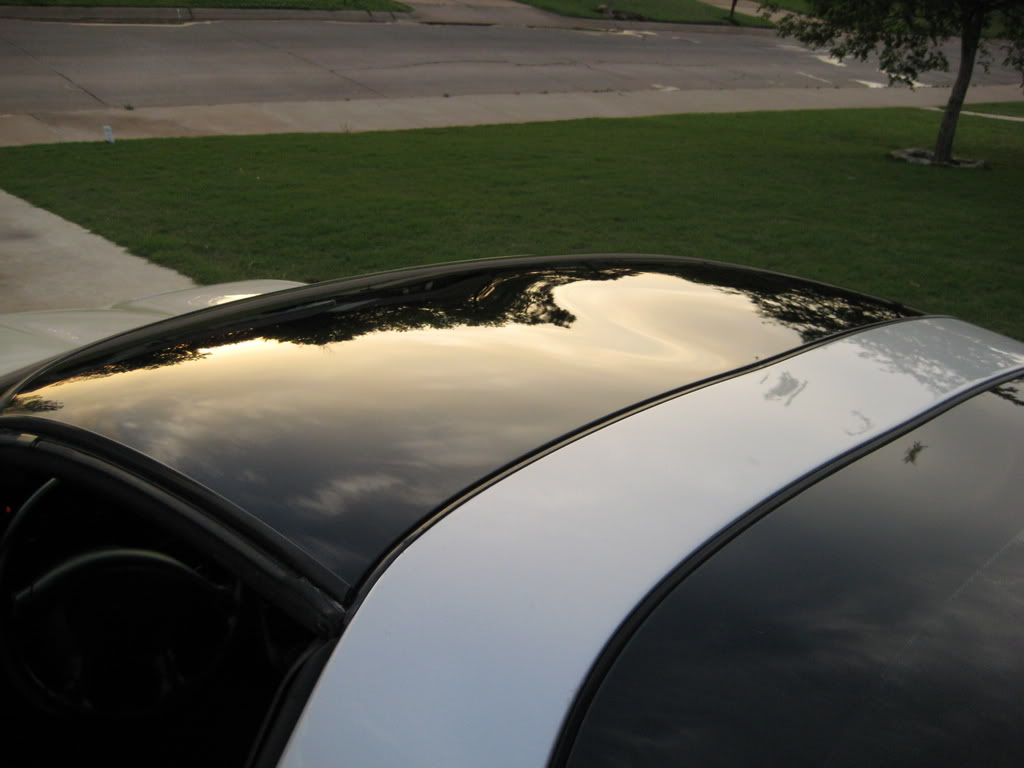
The other way to finish the top is to skip the clear coat step if you don’t have access to paint gun or booth and just polish the acrylic. Step up from the 1000 grit finish to 1500, then 2000, alternating directions each time. Then polish as mentioned above.
You might also be able to find a local shop that can spray the clear for you for a good price. That way you won’t have to mess with buying the clear and getting a booth and a charcoal mask to protect yourself from the fumes.
Hope this helps someone.
Jason
I bought a used clear targa top in the parst section for a good deal. Thanks to David Wilson (doje) for a great transaction. He was very clear about the condition of the top and it was a pleasure dealing with him. That being said the top was hazy and in desperate need of attention.
EDIT: I get emails and calls from people attempting this, and there seem to be mixed results with the sanding. The top I purchased was completely hazy and all of the "Hardcoat" was crazed. (see before pictures below) This, I think, made it easier for me to sand the hardcoat off. I have hear from people haveing a very hard time removing their hardcoat if it is in good shap. Just a FYI.
This is what it looked like when I got it ( actually these pics are from the ad)
All you need to refurbish the top is:
1000 grit wetsand paper
1500 grit wetsand paper
2000 grit wetsand paper
Rubber sanding block
Squirt bottle
Dish soap
Shammy
Terry towels
Porter Cable Polisher
Meguieres medium cut, Fine cut, and swirl remover
EDIT: If the Hardcoat on your top is in better shape than mine you will probably want to use a coarser paper and the assistance of a mechanical sander. Do at your own risk. I have verry little expierence with mechanical sanders and can no offer advice in this regard.
First thing I did was to remove all of the old clear coat and the oxidized plastic from the top. I just used 1000 grit and wetsanded it down. This took about 3 hours to accomplish. It was easy to tell if I was finished because you can look at a light through it and see where it was fully sanded or not. A tip for wetsanding. I used an old shammy to continually clean the surface i was sanding. This makes it easy to remove all of the material from sanding and it the surface will quickly dry so you can tell what areas need more attention.
There are two ways to finish the top from here. At this point it is ready for paint or clear coat. I sprayed a thick layer of PPG clear coat that I had laying around on it. This gives the acrylic UV protection and gives more material to polish out. It is recommended that the surface be sanded down with 600 grit, but I just kept it at 1000 because I was scared of using that course of paper on the top. The coat has stuck fine so far.
(EDIT: I got some requests for the type of PPG Clear that I used. It is Deltron High Velocity Clearcoat. DC3000)
I am not the best with a paint gun so the finish had an orange peal effect to it. I wet sanded the top again, this time with 2000 grit paper in preparation for polishing it. Looking back I should have started with 1500 grit and then worked my way up to 2000, but again, I like to start with a finer paper and just do extra work so I take off as little material as possible. When sanding for polish, always sand in one direction, then when you step up to the next grit, sand 90degrees to the previous grit. Keep sanding till you can’t see the marks from the previous grit. The following picture is where I started sanding the top after paint and you can easily see the orange peal.
When you get the whole thing sanded out, you are ready for polish. I used a PC 7424 to polish it out, but any polisher will do. I started with the medium cut cleaner and worked it till all of the sanding marks were removed from the finish.
The medium cut cleaner does a good job of removing the sanding marks, but does leave the finish on the top hazy. I steped up to a fine cut cleaner and polished out all of the haze.
Then for good measure I stepped up to the swirl remove and got a great finish on the top.
The other way to finish the top is to skip the clear coat step if you don’t have access to paint gun or booth and just polish the acrylic. Step up from the 1000 grit finish to 1500, then 2000, alternating directions each time. Then polish as mentioned above.
You might also be able to find a local shop that can spray the clear for you for a good price. That way you won’t have to mess with buying the clear and getting a booth and a charcoal mask to protect yourself from the fumes.
Hope this helps someone.
Jason
Last edited by Itallian33; 01-25-2010 at 04:01 PM.

The following 4 users liked this post by Itallian33:


 05-09-2008, 05:36 PM
#6
Burning Brakes

Member Since: Jan 2007
Location: Oklahoma City Oklahoma
Posts: 1,126
Likes: 0
Received 0 Likes
on
0 Posts

Learning things the hard way sucks. I am glad people like you are willing to pass on very good info and how to's with no expectations to gain from it. Nice Job!
05-09-2008, 07:00 PM
#8
Race Director

Member Since: Sep 2004
Location: Redsox, Pats, Celts & Bruins !!! Redsox Nation !!!
Posts: 17,786
Likes: 0
Received 3 Likes
on
3 Posts
St. Jude Donor '06-'07-'08-'09-'10-'11-'12

That is one of the first refinishes that I have seen work. Most people paint it. Awesome job. How much time did it take you? 
05-09-2008, 07:08 PM
#9
Team Owner

Member Since: Mar 2004
Location: Oklahoma City OK
Posts: 58,259
Received 1,675 Likes
on
1,298 Posts
C6 of Year Finalist (appearance mods) 2019

 05-09-2008, 07:53 PM
#10
Melting Slicks
Thread Starter
Member Since: Sep 2006
Location: Stillwater Oklahoma
Posts: 3,094
Likes: 0
Received 5 Likes
on
2 Posts
Thanks for the kind words everyone. I am no professional so if i can do it anyone can.


 05-10-2008, 10:01 AM
#14

Is the C5 roof different from the C6 roof? I had a mar that was through the hardcoat on my 08 C6 with only 300 miles on it. I talked to the roof GM engineer, the roof supplier, the hardcoat and polycarbonate panel supplier and several plastic refinishing suppliers and all said the same thing. Once you penetrate beyond the hardcoat there is no fix and that abrasive finishing will not work. They even suggested that a touch up with a sample of liquid clear coat would not look acceptable. I ended up getting a new clear roof.
Were your defects NOT through the hardcoat? Also, I thought the roof panel (at least on the C6) is polycarbonate and not acrylic.
Your thoughts?
Were your defects NOT through the hardcoat? Also, I thought the roof panel (at least on the C6) is polycarbonate and not acrylic.
Your thoughts?
05-10-2008, 05:16 PM
#15
Safety Car


My targa was in pretty rough shape similar to the 1st picture on here.
I used 2000 grit wetsand paper with soap and water and a sanding block $7 total at wal-mart
Some Meguiars Medium Cut, Some turtle wax polising compound, and some 3m finish restorer (swirl remover) in that order.
Then a coat of wax. Looks decent, without as much work. Still a few close up flaws, but 1000 times better without having to re-clear.
I'd say if your final finished product was a 10, mine was a 9. And a grand total of $20 spent.
Oh and one more thing -- thanks for the writeup on how to do this. I now have a nearly new looking targa top instead of a paperweight taking up space in the shed.
Last edited by jedblanks; 05-11-2008 at 09:40 AM.
05-10-2008, 10:04 PM
#16
Melting Slicks
Thread Starter
Member Since: Sep 2006
Location: Stillwater Oklahoma
Posts: 3,094
Likes: 0
Received 5 Likes
on
2 Posts
Is the C5 roof different from the C6 roof? I had a mar that was through the hardcoat on my 08 C6 with only 300 miles on it. I talked to the roof GM engineer, the roof supplier, the hardcoat and polycarbonate panel supplier and several plastic refinishing suppliers and all said the same thing. Once you penetrate beyond the hardcoat there is no fix and that abrasive finishing will not work. They even suggested that a touch up with a sample of liquid clear coat would not look acceptable. I ended up getting a new clear roof.
Were your defects NOT through the hardcoat? Also, I thought the roof panel (at least on the C6) is polycarbonate and not acrylic.
Your thoughts?
Were your defects NOT through the hardcoat? Also, I thought the roof panel (at least on the C6) is polycarbonate and not acrylic.
Your thoughts?
My targa was in pretty rough shape similar to the 1st picture on here.
I used 2000 grit wetsand paper with soap and water and a sanding block $7 total at wal-mart
Some Meguiars Medium Cut, Some turtle wax polising compound, and some 3m finish restorer (swirl remover) in that order.
Then a coat of wax. Looks decent, without as much work. Still a few close up flaws, but 1000 times better without having to re-clear.
I'd say if your final finished product was a 10, mine was a 9. And a grand total of $20 spent.
That is awsome. I thought about just doing that, but i had the clear left over from another project, and thought what the heck. Glad to hear someone else had luck redoing these tops. They are sooo expensive not to try
05-11-2008, 10:19 AM
#19
Burning Brakes

You do nice work. Compared to what you started with, the finished product looks awesome. Thanks for the step by step instructions and pics. I am sure this thread is going to come in handy for many forum users.
