Body off 61 Rod project
 03-25-2007, 10:11 PM
#1
Burning Brakes

Thread Starter

Just for grins I took a few pictures of my body lift today. I'll try to keep this thread posted with my progress. What I started with is an abandoned project by the previous owner. No interior, top , engine, trans etc... The PO modified the original frame to fit C4 suspension front and rear. Not a bad job on the back (but not complete) but the front left a lot to be desired as he sectioned the C4 cradle and welded it to the original frame rails. I bought this car a couple of years ago and have been slowly accumulating parts so I didn't pay too much attention to the frame... I thought I wouldn't have to worry about that part. I had a severe case of Corvette fever when I bought the car and did a real poor job of looking the car over... I was so jazzed that it already had a C4 conversion done that I overlooked A LOT of problems.... Oh well, I now have a Billy Dawson replacement frame on order, and a LS1/T56 waiting to drop in. I approached the body lift a little differently than normal I suppose, but it worked well for me since I always work by myself. Suggestions or comments are certainly welcome as this is the first time I have done a body off project.
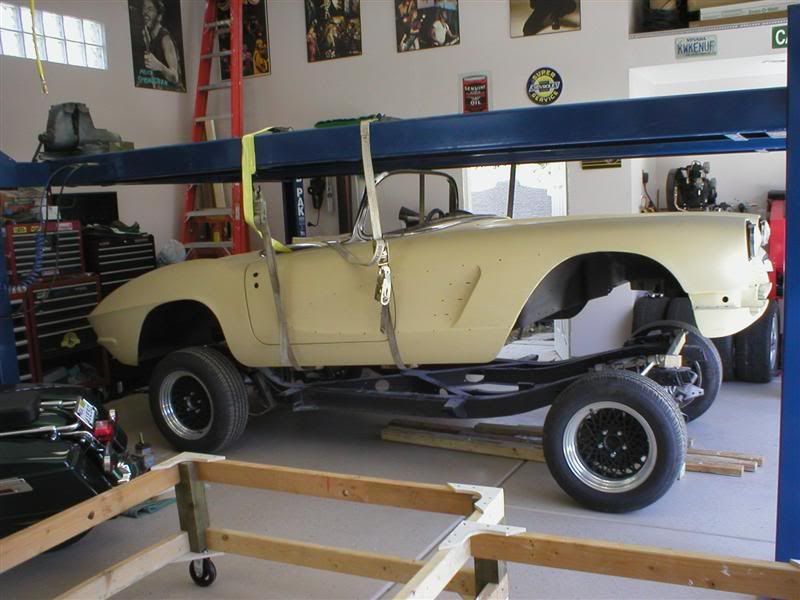
I used my 4 post lift and some tie down straps and it lifted it pretty straight. I had placed some lumber under what I thought would be good lifting points but the straps wouldn't have any of that and placed all the pressure on the rockers....

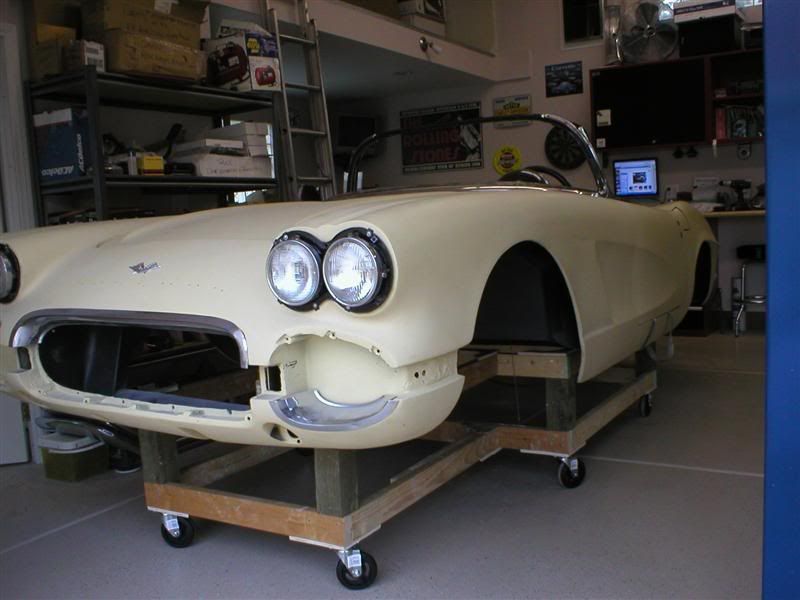
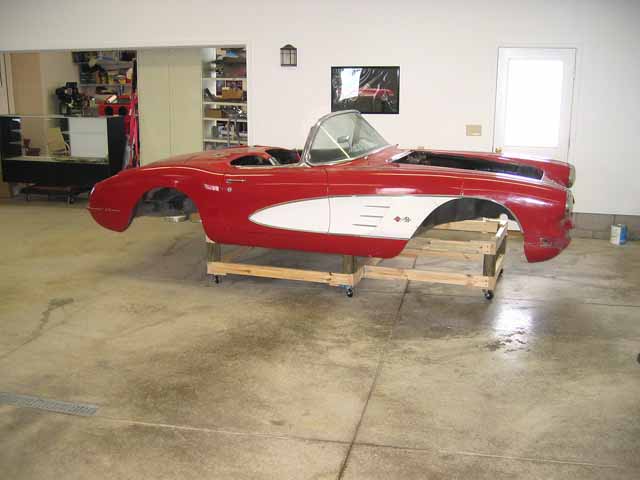
I built my dolly from the drawings in the Noland Adams body lift work book but it doesn't line up well with the body mount locations... To fit correctly, the dolly should be about 6 inches shorter from front to back. side to side matched up OK. I don't have my radiator core support in so the front just floats.....
Here's the retrofitted frame I will not be using.... lot's of welded up rust repair and I don't like the way the suspension was mounted. Billy Dawson at Corvette Corrections makes a real slick replacement frame and I'll be driving to pick it up in about 3 weeks or so.
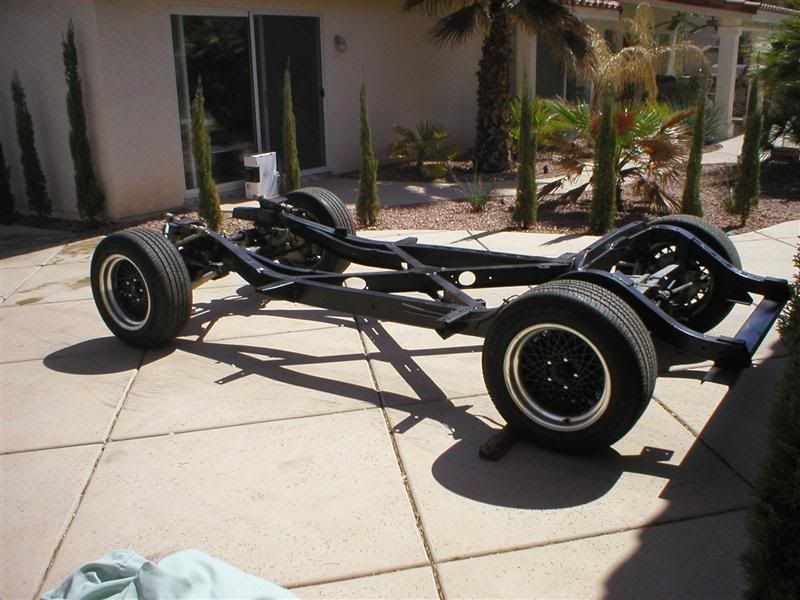
If anyone is interested, the frame will be available after I strip the suspension from it....
I used my 4 post lift and some tie down straps and it lifted it pretty straight. I had placed some lumber under what I thought would be good lifting points but the straps wouldn't have any of that and placed all the pressure on the rockers....
I built my dolly from the drawings in the Noland Adams body lift work book but it doesn't line up well with the body mount locations... To fit correctly, the dolly should be about 6 inches shorter from front to back. side to side matched up OK. I don't have my radiator core support in so the front just floats.....
Here's the retrofitted frame I will not be using.... lot's of welded up rust repair and I don't like the way the suspension was mounted. Billy Dawson at Corvette Corrections makes a real slick replacement frame and I'll be driving to pick it up in about 3 weeks or so.
If anyone is interested, the frame will be available after I strip the suspension from it....
Last edited by kwkenuf; 02-15-2018 at 01:14 PM.
 03-25-2007, 10:26 PM
#2
Le Mans Master


Member Since: Sep 2003
Location: Norwalk ohio
Posts: 8,927
Received 640 Likes
on
358 Posts
2019 Corvette of the Year Winner
St. Jude Donor '15

When I lifted my '60 I grabbed the seat belt anchors with my 4 post lift....


I did 95% of the lift with the seat belt anchors and the last little bit with the radiator surround. DO NOT lift heavy on the radiator surround, just use that point to balance it. My seat belt anchors were in great shape. Using them depends on the shape they are in. You need to evaluate them prior to trying this. Mine were good.
I could lift the body and put it on in 45 minutes...all by myself......this worked really good for me. I probably put it on and off at least 15 times!
good luck!!!
The following users liked this post:
kwkenuf (12-08-2020)
03-26-2007, 09:04 AM
#3
Safety Car


Charles
03-26-2007, 11:32 AM
#4
Burning Brakes
Thread Starter
Are you saying that the body mount locations are off by 6"? I am not familiar with the dimensions in Noland Adams book but if your body mounts are out that far I would check them against the dimensions in the ST12. If you need the correct dimensions, I can email you the page.
Charles
Charles
It is difficult to believe that no one else has made this observation in all the years since the workbook was published.... Maybe it's just me and I'm looking at this thing wrong...wouldn't be the first time... Anyway, doesn't matter, the body is on the dolly and the next time I lift it off I'll add some lumber to the thing and make it fit better.
03-26-2007, 01:26 PM
#5
Le Mans Master
Member Since: Sep 2003
Location: Norwalk ohio
Posts: 8,927
Received 640 Likes
on
358 Posts
2019 Corvette of the Year Winner
St. Jude Donor '15
What I meant to say was that the stand I built from the plans in the Noland Adams body lift work book did not match up with my body mount locations.... I'll check my ST12 for the dimensions and check my body mounts tonight, but I don't think the body (and frame) were altered in that manner... I think it is more of a case that the Noland Adams dolly specs are incorrect... (while I'm not a carpenter, I checked my dolly after I assembled it and it's only 1/8" off)
It is difficult to believe that no one else has made this observation in all the years since the workbook was published.... Maybe it's just me and I'm looking at this thing wrong...wouldn't be the first time... Anyway, doesn't matter, the body is on the dolly and the next time I lift it off I'll add some lumber to the thing and make it fit better.
It is difficult to believe that no one else has made this observation in all the years since the workbook was published.... Maybe it's just me and I'm looking at this thing wrong...wouldn't be the first time... Anyway, doesn't matter, the body is on the dolly and the next time I lift it off I'll add some lumber to the thing and make it fit better.

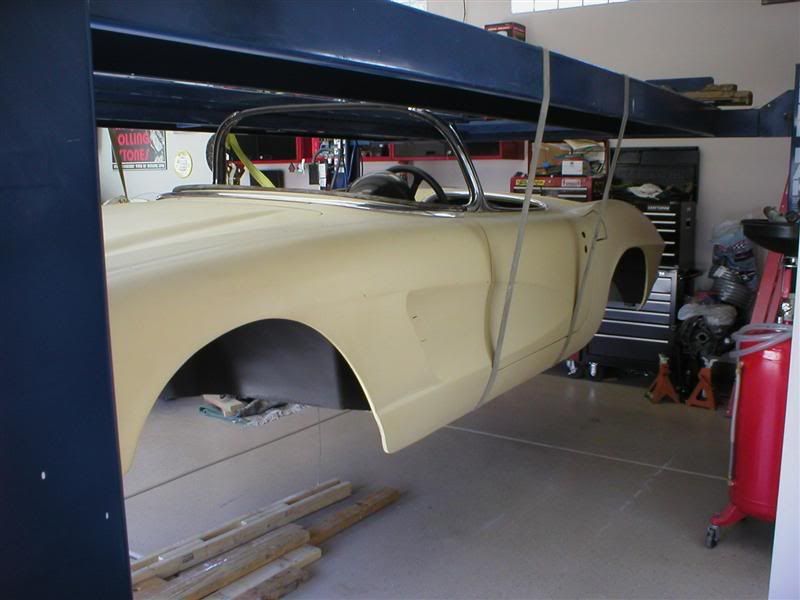
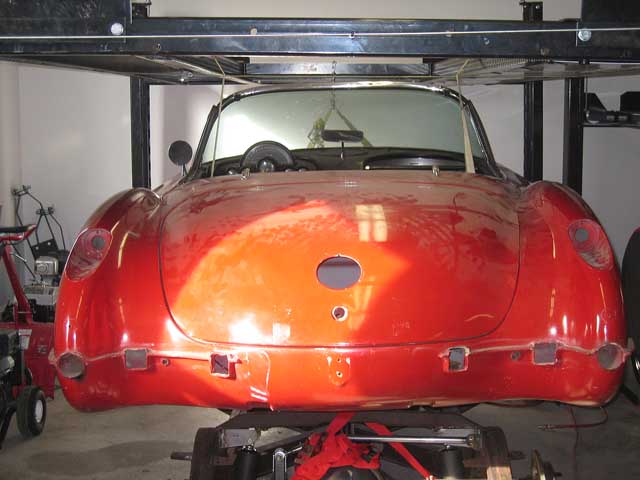
the photo below is NOT SITTING on the dolly correctly. This was when I had the radiator surround out and not in place. The car sits too far back.
Check it out one more time.......
good luck....herb
The following users liked this post:
kwkenuf (12-08-2020)
04-22-2007, 05:55 PM
#6
Burning Brakes
Thread Starter
Just got back from my road trip to Seguin Texas to pick up my Corvette Corrections frame.... Spent half the day with Billy Dawson, drooling over the numerous cars and parts at his shop and I got to drive one of his LS1/T56 conversions..... Holy sh**, that thing rocked! Billy was an awesome host and spent lots of time with me as I took pictures and asked hundreds of questions.....
Anyway here's a couple of pics of what I will be building on....
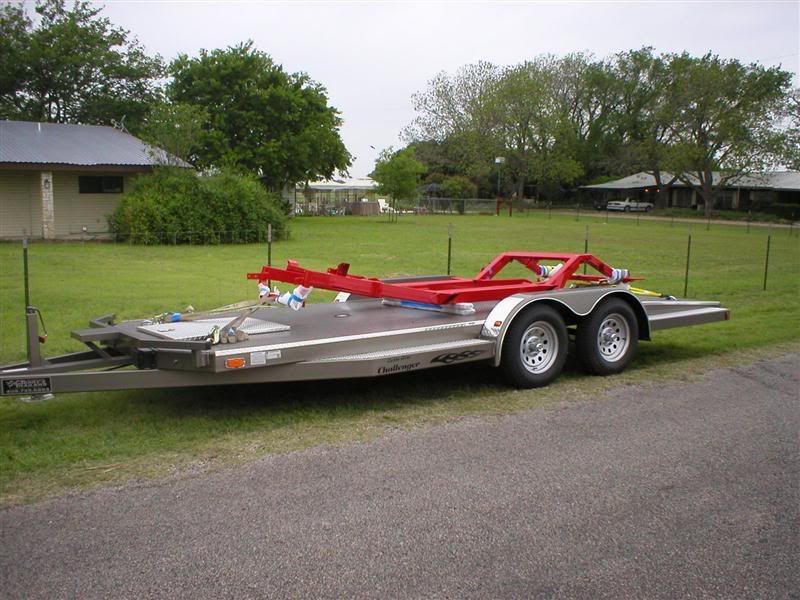
New car hauler and frame.

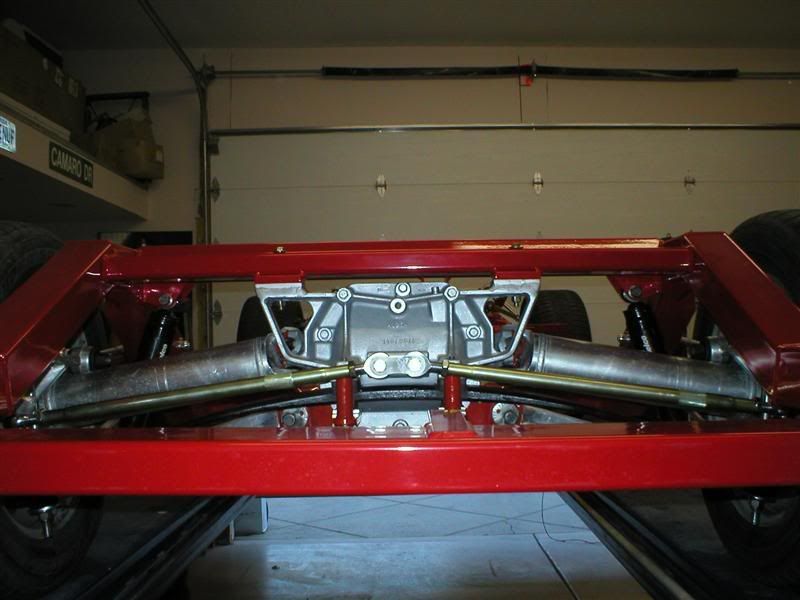
Back at home in the garage. Front side with cradle attached.
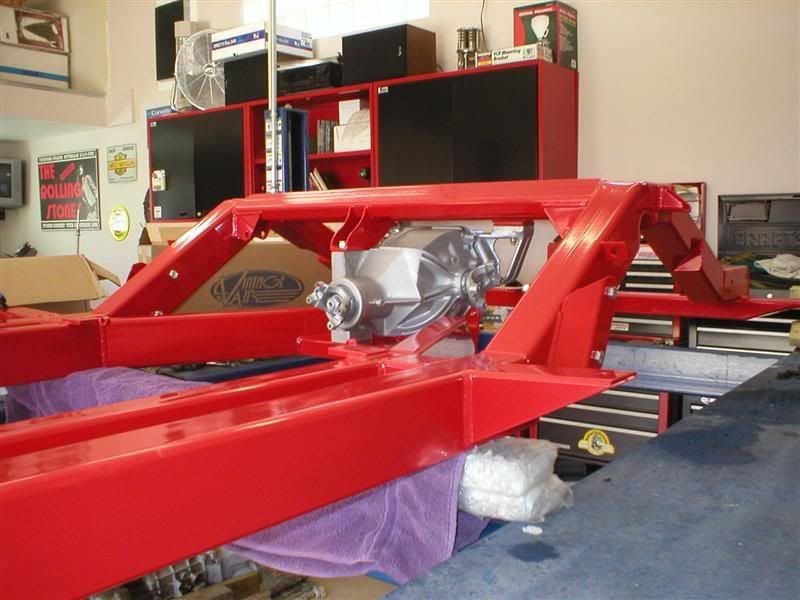
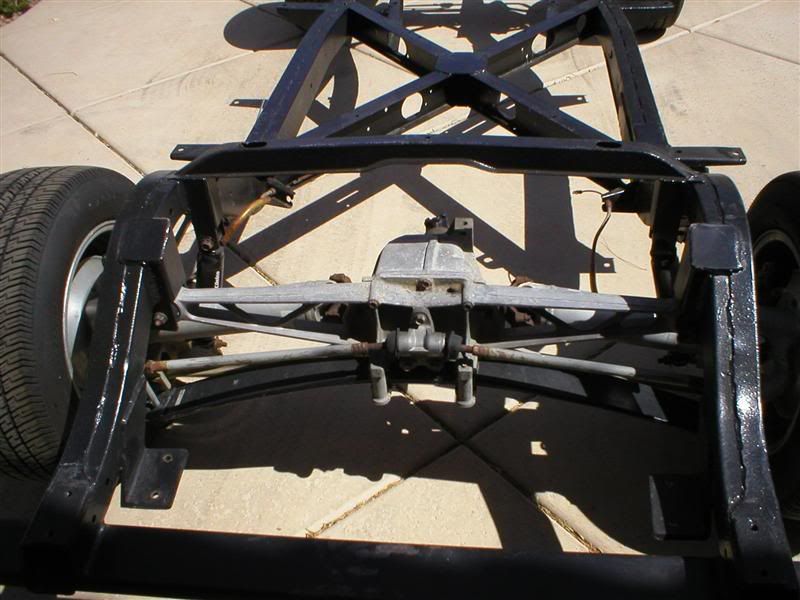
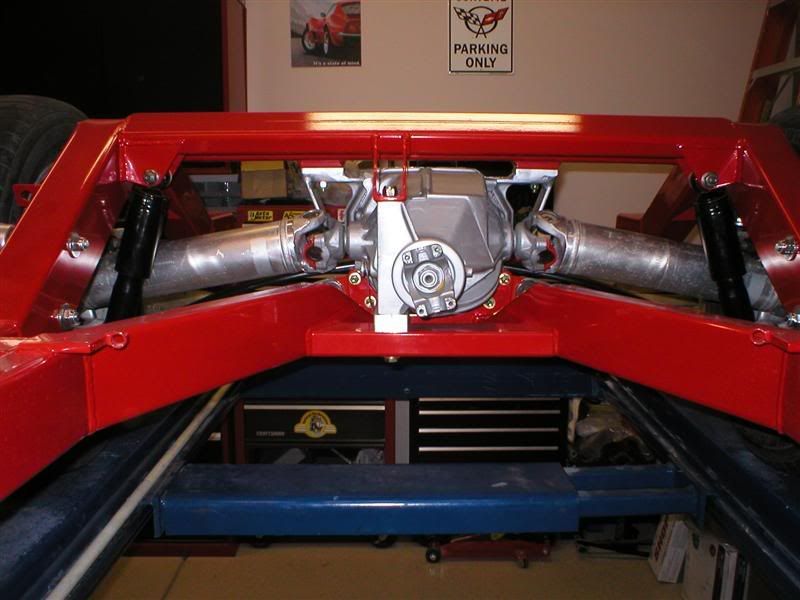
Rear with Dana 36 temp installed.

And my old partial stock conversion frame from which I'll be utilizing the C4 suspension. More pics as I progress. Lots of cleaning to do on my used parts before I install the suspension, engine and trans.
Anyway here's a couple of pics of what I will be building on....
New car hauler and frame.
Back at home in the garage. Front side with cradle attached.
Rear with Dana 36 temp installed.
And my old partial stock conversion frame from which I'll be utilizing the C4 suspension. More pics as I progress. Lots of cleaning to do on my used parts before I install the suspension, engine and trans.
Last edited by kwkenuf; 04-22-2007 at 05:58 PM.

 05-04-2007, 06:54 PM
#9
Burning Brakes
Thread Starter
Got lots of work to do this weekend. Poly bushings and shocks arrived today and I have some more dissasembly and cleaning to do on the suspension pieces. The C4 forged aluminum pieces clean up real good and look great in their natural state.. I am trying to resist the temptation to polish this stuff... I gotta remember it's a driver.... new rack and pinion due in Monday so I should have a roller by this time next week, if time and family obligations allow.. Then I'll start getting the engine and trans ready for install... pics to come this weekend....
05-04-2007, 07:07 PM
#10
Le Mans Master
Member Since: Sep 2003
Location: Norwalk ohio
Posts: 8,927
Received 640 Likes
on
358 Posts
2019 Corvette of the Year Winner
St. Jude Donor '15
Got lots of work to do this weekend. Poly bushings and shocks arrived today and I have some more dissasembly and cleaning to do on the suspension pieces. The C4 forged aluminum pieces clean up real good and look great in their natural state.. I am trying to resist the temptation to polish this stuff... I gotta remember it's a driver.... new rack and pinion due in Monday so I should have a roller by this time next week, if time and family obligations allow.. Then I'll start getting the engine and trans ready for install... pics to come this weekend....
05-04-2007, 07:54 PM
#11
Safety Car

I wish I had know you were coming up, I would have driven over to Billy's to meet you! Billy is one of the good guys, and builds a great chassis as well. You will be very pleased with his chassis! I live just a few miles from him, and am always looking for a good reason to take a few hours off to go visiting him!
Regards, John McGraw
Regards, John McGraw
05-06-2007, 07:49 PM
#12
Burning Brakes
Thread Starter
Just a little closer..... spent some time cleaning the rear suspension parts and doing the modifications required for the rear spindles. Cutting forged aluminum with a cut off tool takes a long time.... wish I had access to a band saw....
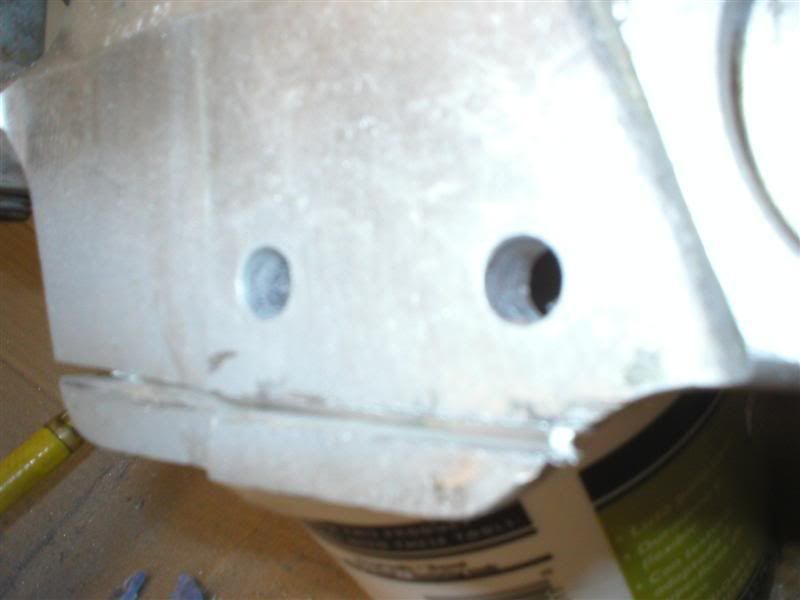
a poor picture of one of the cuts required about 1/2 complete
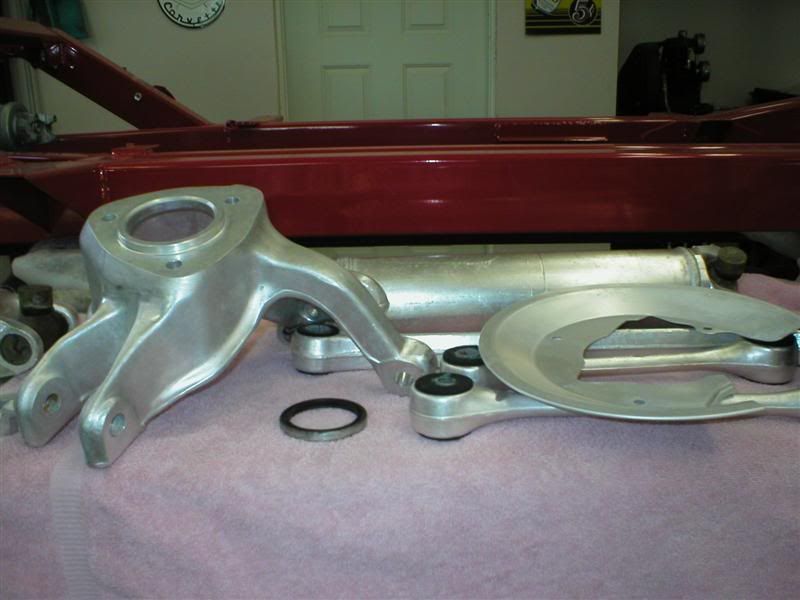
cleaned parts ready for assembly
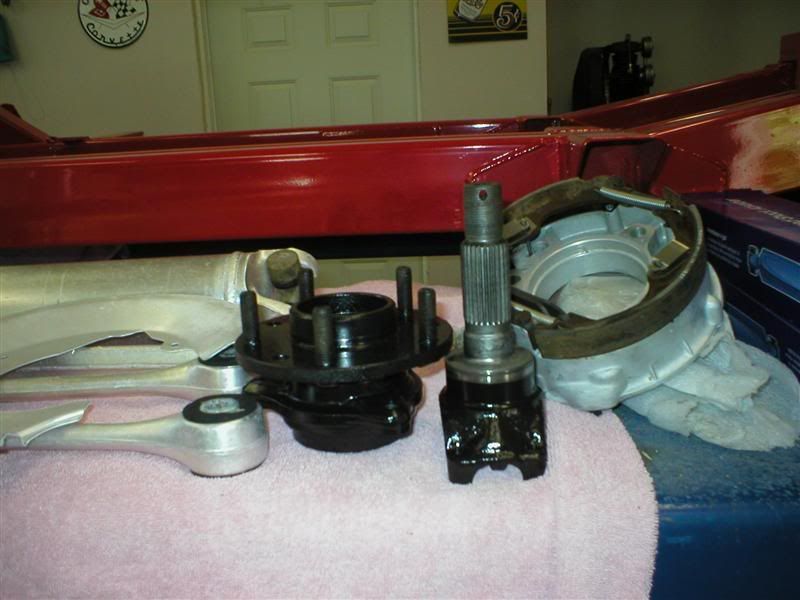
More of the same
After I post this I'm heading to the blast cabinet... I'm gonna clean some parts then try out my new Harbor Freight powder coat set up tonight.
a poor picture of one of the cuts required about 1/2 complete
cleaned parts ready for assembly
More of the same
After I post this I'm heading to the blast cabinet... I'm gonna clean some parts then try out my new Harbor Freight powder coat set up tonight.
05-14-2007, 03:20 PM
#13
Burning Brakes
Thread Starter
Did a little more bead blasting and powder coating last night.... Funny thing.... I was rounding up and cleaning some more parts to be powdered red to go along with the transverse front spring brackets I had ready to go in order to do a bigger batch.... I found a few more brackets to do, sprayed them and then put them in the oven then cleaned up my mess while I was waiting.... After I finished cleaning up I found the parts that I had originally wanted to do in the first place still sitting there undone... DOH!!!
And in the category of "while I've got it apart", I figured I would replace the upper and lower control arm bushings with Poly Graphite pieces.... While disassembling the cross bar from the uppers I had one bolt seize on each side.... totally fubarr'ed threads on both pieces.. (forged aluminum) I'm gonna try to re-thread them but I think I'm headed for replacement.... pics to come after I regain my sanity...
And in the category of "while I've got it apart", I figured I would replace the upper and lower control arm bushings with Poly Graphite pieces.... While disassembling the cross bar from the uppers I had one bolt seize on each side.... totally fubarr'ed threads on both pieces.. (forged aluminum) I'm gonna try to re-thread them but I think I'm headed for replacement.... pics to come after I regain my sanity...
05-28-2007, 11:20 PM
#14
Burning Brakes
Thread Starter
Gotta remember..... 3 times the amount of time planned and twice the cost.....
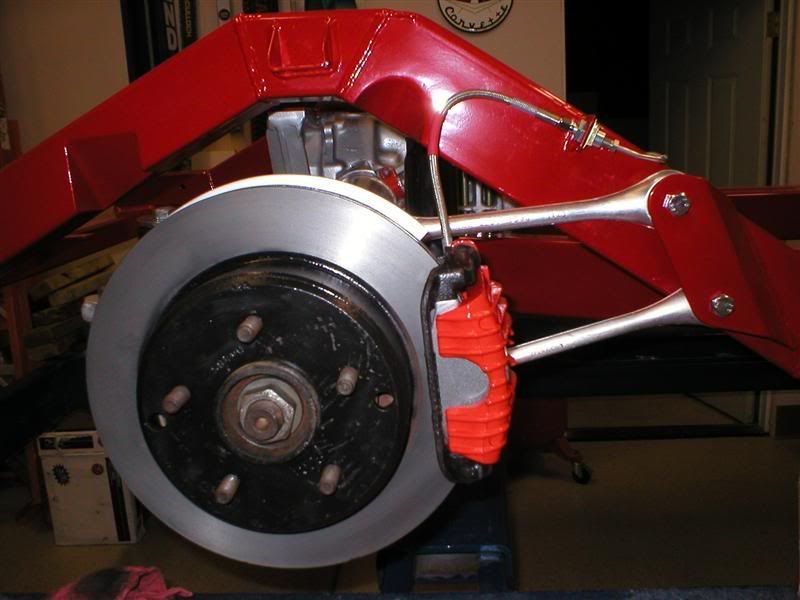
Spent the weekend assembling the suspension and got it rolling..... Still have to replace my junkyard calipers (rusted pistons), they are actually pretty reasonable as rebuilt loaded pairs from AutoZone. I'll powder coat them red and slap 'em on. Then I'll start the brake plumbing. I got a stainless line kit from Billy when I picked up the frame so that part should go pretty smoothly....

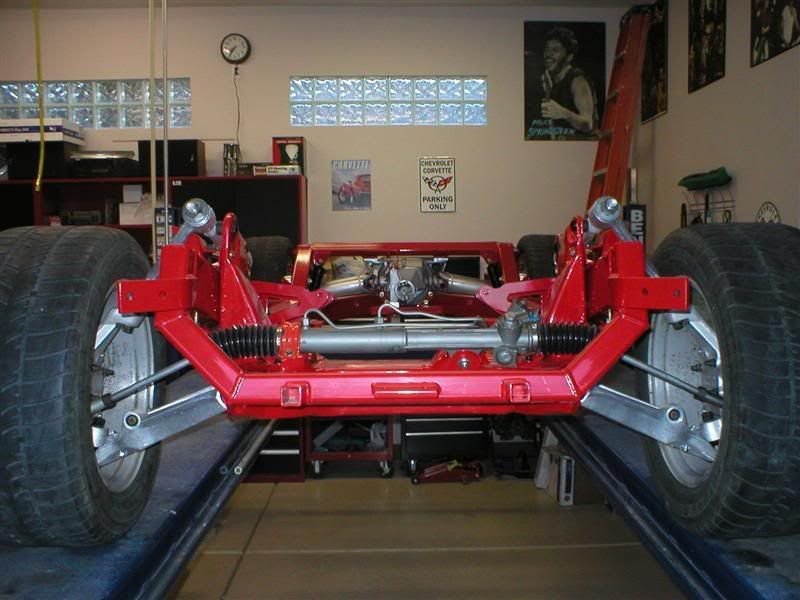
Spent the weekend assembling the suspension and got it rolling..... Still have to replace my junkyard calipers (rusted pistons), they are actually pretty reasonable as rebuilt loaded pairs from AutoZone. I'll powder coat them red and slap 'em on. Then I'll start the brake plumbing. I got a stainless line kit from Billy when I picked up the frame so that part should go pretty smoothly....
Last edited by kwkenuf; 05-29-2007 at 08:06 PM.
05-29-2007, 01:08 PM
#15
Melting Slicks


 08-05-2007, 11:03 PM
#16
Burning Brakes
Thread Starter
Progress... just not as quick as I'd hoped. Life keeps getting in the way... I'd better hustle if I am to finish my car by next May (50th birthday and I wanna' drive it!) Anyway just a couple of pics that show the brakes installed.
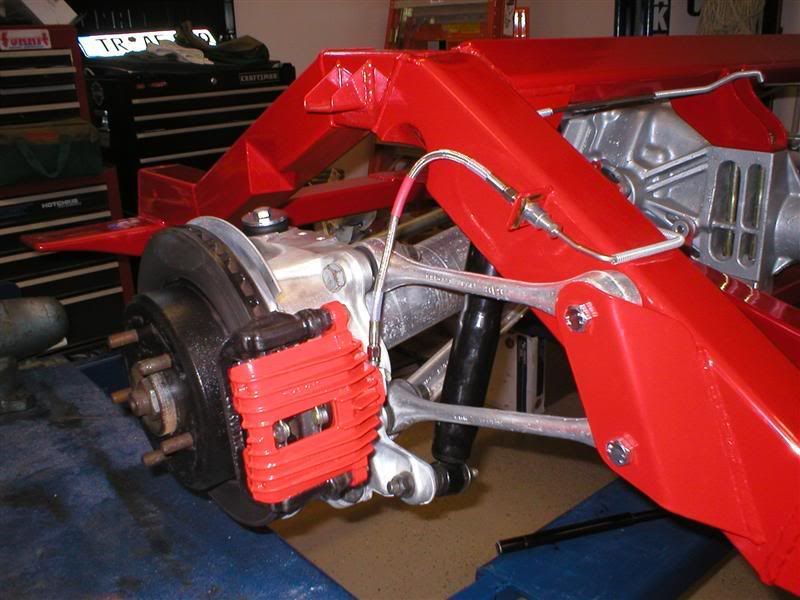
Gotta pull the rotors back off and clean that rust....
Gotta pull the rotors back off and clean that rust....
08-06-2007, 08:59 AM
#17
Safety Car

Loooking GREAT 
Keep the updates comming
George
Keep the updates comming
George
08-06-2007, 09:56 AM
#18
Le Mans Master
It looks great! Keep it up and keep posting some pics with updates.


08-06-2007, 10:44 AM
#19
Burning Brakes
Your frame looks great!!! I'm leaning toward painting my frame the same color as my car.
BTW, I had bought a 61 frame from a guy who had repaired the rear section with a section that looks like yours. Can you buy just the rear section? By rear section I mean from the center crossmember back. All I needed was the front section and not the rear section.
BTW, I had bought a 61 frame from a guy who had repaired the rear section with a section that looks like yours. Can you buy just the rear section? By rear section I mean from the center crossmember back. All I needed was the front section and not the rear section.
08-06-2007, 11:14 AM
#20
Burning Brakes
Thread Starter
I got my complete frame from Billy Dawson, Corvette Corrections.. I don't belive he makes repair sections for stock frames but I could be wrong.